


Category filter
Script to Remove Google Chrome Extensions on macOS
IT administrators often need to remove Chrome extensions from managed macOS devices to reduce security risks, enforce organizational browser standards, and maintain control over the extensions installed across their device fleet. Unapproved or malicious extensions can pose a risk to corporate data, while outdated extensions can conflict with company policies. Administrators remove extensions to remediate malicious extensions across multiple Macs and establish a clean baseline before deploying a company-approved extension list.
Using Hexnode UEM’s Execute Custom Script feature, administrators can remotely deploy scripts to remove a single Chrome extension or all extensions from the active user’s Default profile.
How Google Chrome Stores Extensions
Google Chrome manages extensions by downloading them into a hidden directory within the user’s specific Chrome profile. For example, extensions installed in the Default profile are stored in the Default/Extensions directory. Each extension is assigned a unique 32-character alphanumeric ID (such as kbfnbcaeplbcioakkpcpgfkobkghlhen).
Both scripts, the one targeting a specific Chrome extension and the one targeting all extensions, automatically detect the currently logged-in macOS user, locate the user’s Default Chrome profile, and remove the specified (or all) extensions from the profile.
Technical Execution
Prerequisite: Disable Google Chrome extension sync for the users before running the scripts. If sync remains enabled, Chrome may automatically redownload the removed extensions from the users’ Google accounts.
Remove a Specific Chrome Extension
The Remove a Specific Chrome Extension script removes a single extension from the active user’s Default Chrome profile and deletes its corresponding entries from Chrome’s Preferences and Secure Preferences files.
Administrators target the unique ID of a compromised or malicious extension to remediate it across managed Macs. Before deploying, replace the value assigned to the extension variable in the code with the 32-character ID of your target extension, for example, kbfnbcaeplbcioakkpcpgfkobkghlhen.
|
1 2 3 4 5 6 7 8 9 10 11 12 13 14 15 |
#!/bin/sh currentUser=$(ls -l /dev/console | awk '{print $3}') profile="/Users/$currentUser/Library/Application Support/Google/Chrome/Default" ext_dir="$profile/Extensions" extension="lniofgaicnjjdfinpnkhmlpmnhacnkca" # Gracefully close Google Chrome osascript -e 'tell application "Google Chrome" to quit' >/dev/null 2>&1 sleep 3 # Remove the extension rm -rf "$ext_dir/$extension" >/dev/null 2>&1 # Remove the extension entries from Chrome preference files plutil -remove "extensions.settings.$extension" "$profile/Preferences" >/dev/null 2>&1 plutil -remove "extensions.settings.$extension" "$profile/Secure Preferences" >/dev/null 2>&1 # Relaunch Chrome and restore the previous session open -a "Google Chrome" --args --restore-last-session >/dev/null 2>&1 |
How to Obtain a Chrome Extension ID
Administrators can remotely retrieve the IDs of extensions installed in the Default Chrome profile of a managed Mac by executing a script through the Execute Custom Script action in Hexnode UEM.
To retrieve the extension IDs, refer to Script to fetch Google Chrome extensions installed on Mac.
Remove All Chrome Extensions
The Remove All Chrome Extensions script removes all extensions from the active user’s Default Chrome profile and deletes their corresponding entries from Chrome’s Preferences and Secure Preferences files.
Administrators run it to establish a clean baseline before deploying a company-approved extension list, or to remove extensions from the previous user’s Default Chrome profile before a Mac is reissued.
|
1 2 3 4 5 6 7 8 9 10 11 12 13 14 15 16 17 18 19 20 21 22 |
#!/bin/sh currentUser=$(ls -l /dev/console | awk '{print $3}') profile="/Users/$currentUser/Library/Application Support/Google/Chrome/Default" ext_dir="$profile/Extensions" prefs="$profile/Preferences" secure_prefs="$profile/Secure Preferences" # Gracefully close Google Chrome osascript -e 'tell application "Google Chrome" to quit' >/dev/null 2>&1 # Wait for Chrome to close sleep 3 for extension in "$ext_dir"/*; do [ -d "$extension" ] || continue id=$(basename "$extension") # Skip temporary directory [ "$id" = "Temp" ] && continue rm -rf "$extension" >/dev/null 2>&1 # Remove extension entries from Chrome preference files plutil -remove "extensions.settings.$id" "$prefs" >/dev/null 2>&1 plutil -remove "extensions.settings.$id" "$secure_prefs" >/dev/null 2>&1 done # Relaunch Google Chrome and restore the previous session open -a "Google Chrome" --args --restore-last-session >/dev/null 2>&1 |
Script Variables
Scripts deployed through Hexnode UEM execute with system-level (root) privileges. To ensure the extension removal commands target the active user’s Chrome extension and configuration files rather than the system root directory, the scripts rely on the following variables:
| Script Variable | Description |
|---|---|
$currentUser |
Stores the username of the user currently logged into the Mac and identifies the local user account to target, such as jsmith. |
profile & ext_dir |
Defines the standard macOS folder paths where Google Chrome saves its primary profile data and extension files, such as /Users/jsmith/Library/Application Support/Google/Chrome/Default/Extensions. |
extension |
Specifies the unique 32-character ID that identifies the Chrome extension targeted for removal, for example, kbfnbcaeplbcioakkpcpgfkobkghlhen.Note: This variable is specifically for the Remove a Specific Chrome Extension script. |
prefs & secure_prefs |
Defines the paths to Chrome’s Preferences and Secure Preferences files used to remove the corresponding extension entries. Note: This variable is specifically for the Remove All Chrome Extensions script. |
How the Chrome Extension Removal Script Works
| Script Action | Bash Command | Operational Significance |
|---|---|---|
| Active User Resolution | ls -l /dev/console | awk '{print $3}' |
Identifies the currently logged-in user and extracts their exact username to build the correct path to their Chrome files. |
| Chrome Termination | osascript -e 'tell application "Google Chrome" to quit' |
Quits Google Chrome before the extension removal process begins. |
| Target Removal | rm -rf |
Removes the targeted extension folder from the Chrome Extensions directory. |
| ID Extraction | basename |
Extracts the extension ID from the folder path during the bulk removal process so that the corresponding extension settings can be removed from Chrome’s preference files. |
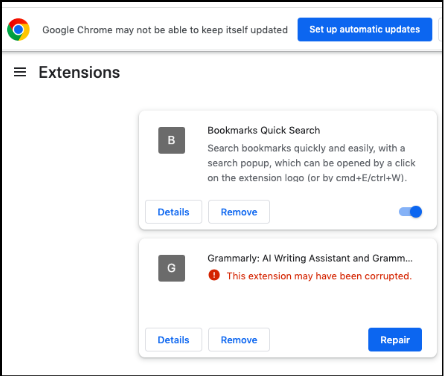
| Configuration Cleanup | plutil -remove |
Cleans up Chrome’s internal preference files to prevent the corrupted extension error, as displayed in the following screenshot:
 |
| Chrome Relaunch | open -a "Google Chrome" --args --restore-last-session |
Launches Google Chrome and restores the previous browsing session after the extension removal process. |
Deploying the Script via Hexnode UEM
Phase 1: Script Integration
- Log in to the Hexnode UEM Portal.
- Navigate to Content > Add Content.
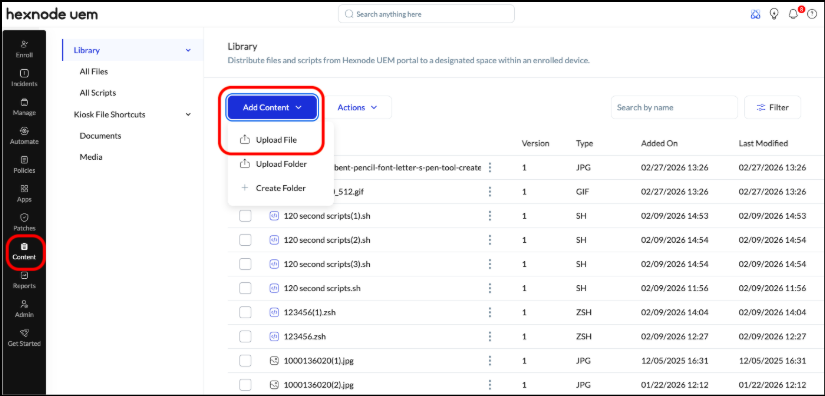
- Select the Upload File option from the drop-down list.
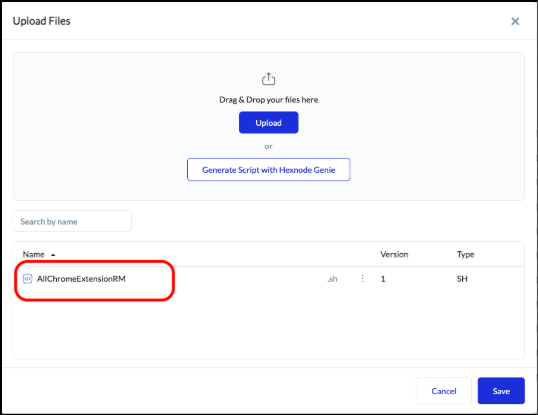
- Click Upload and select your .sh script.
- Click Save to upload the script.
Phase 2: Targeting & Execution
- Navigate to the Manage tab and select the target macOS device.
- Select Actions > Deployments > Execute Custom Script. The Choose File window is displayed.
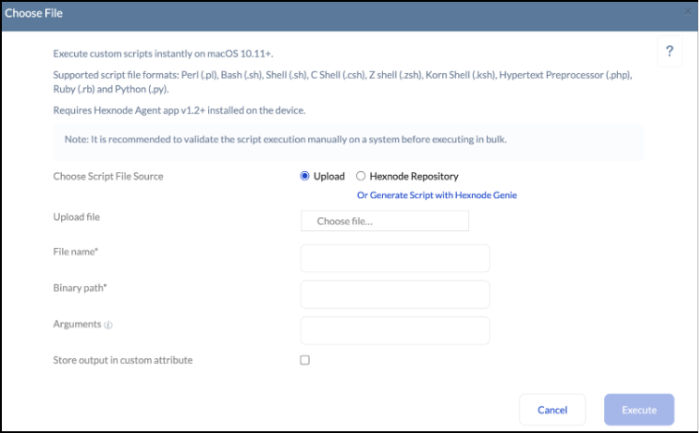
- Select the Hexnode Repository option.
- Search and select the uploaded .sh file.
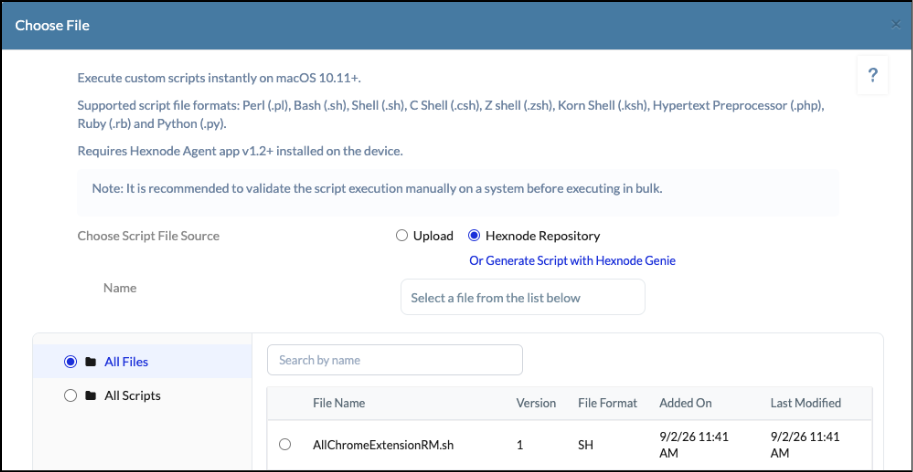
- Verify the binary path and click Execute to run the script.
Phase 3: Verification
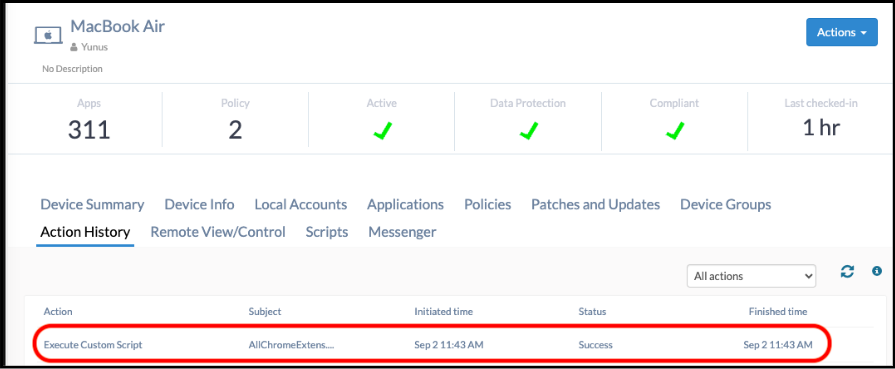
- Navigate to the Action History tab of the target device.
- Locate the Execute Custom Script action.
- Verify that the Status is Success.
End-User Experience
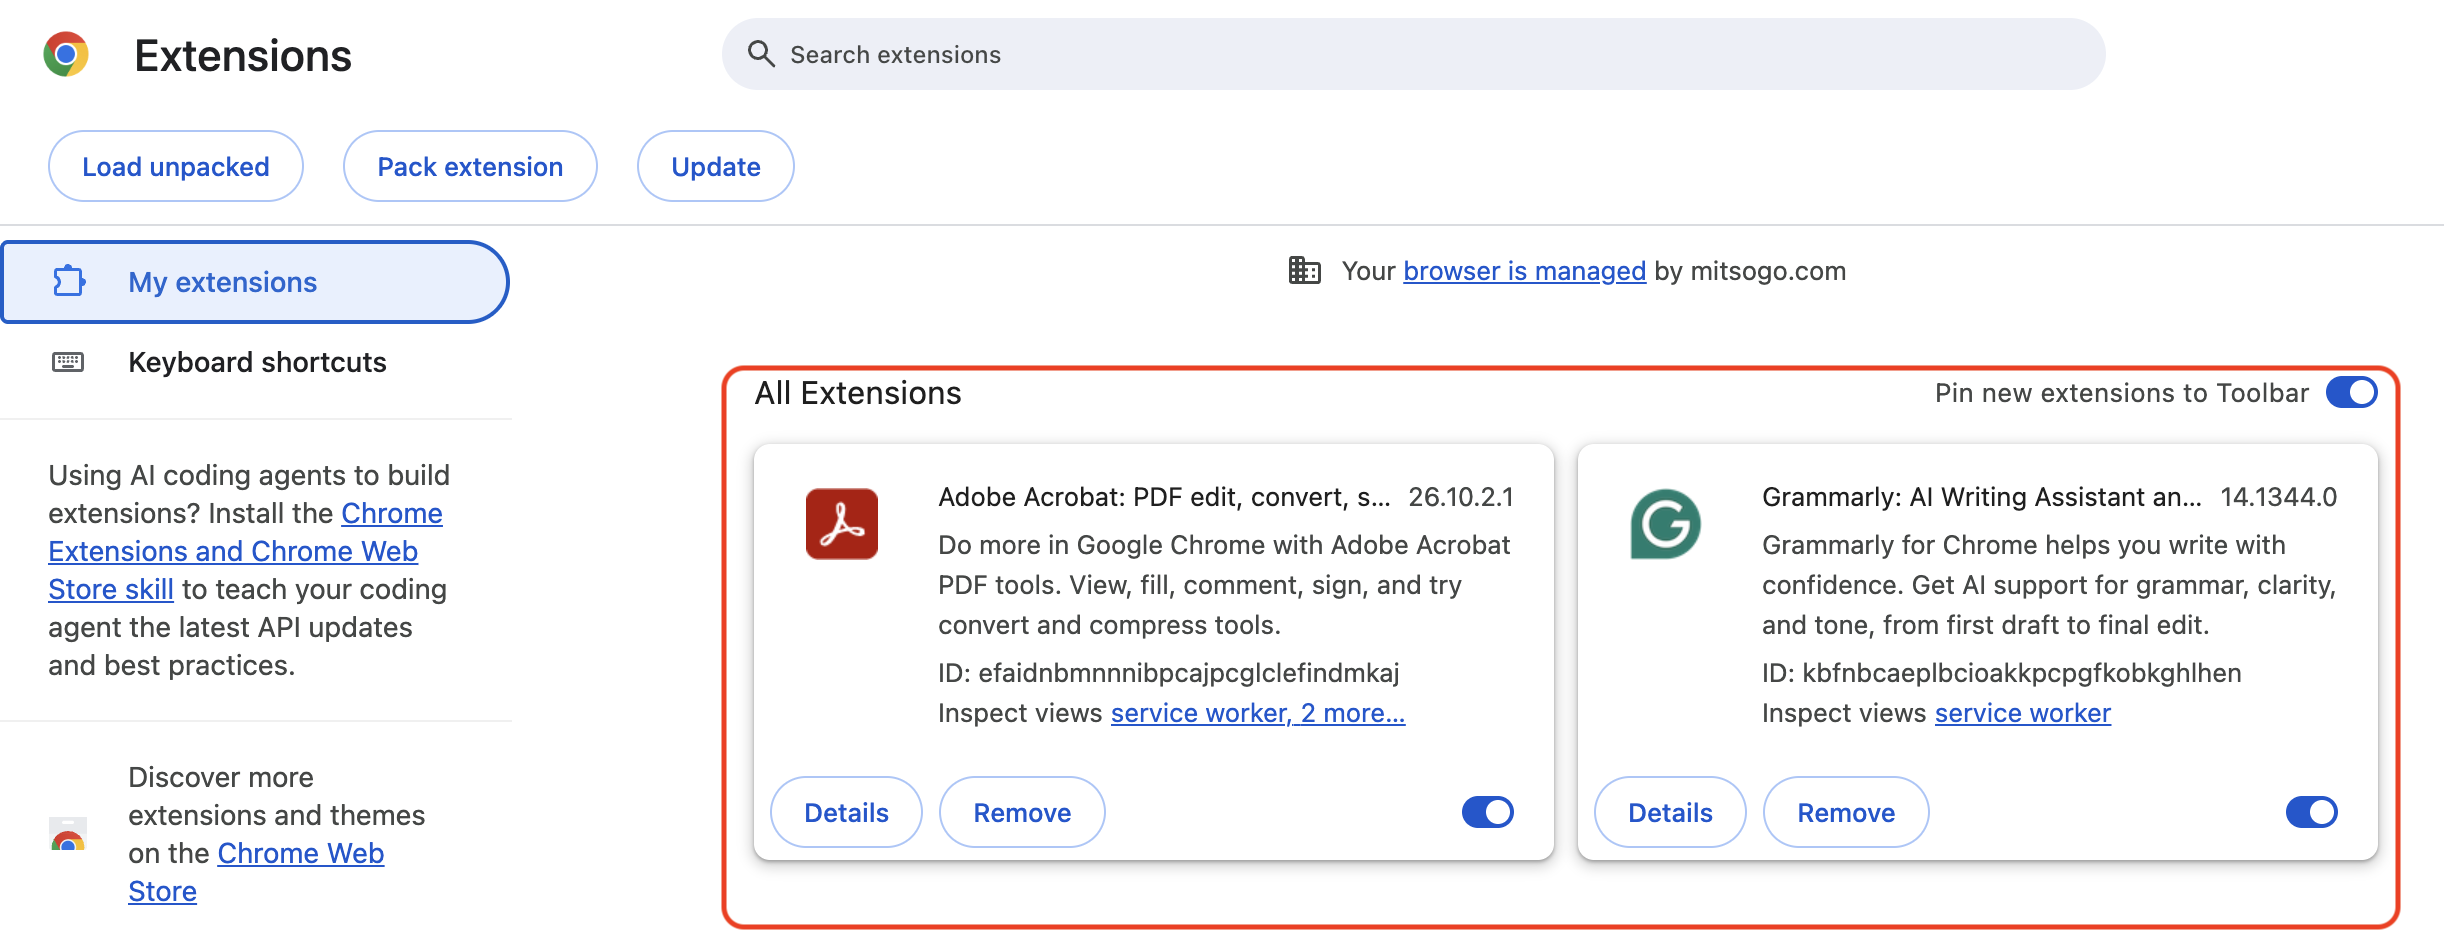
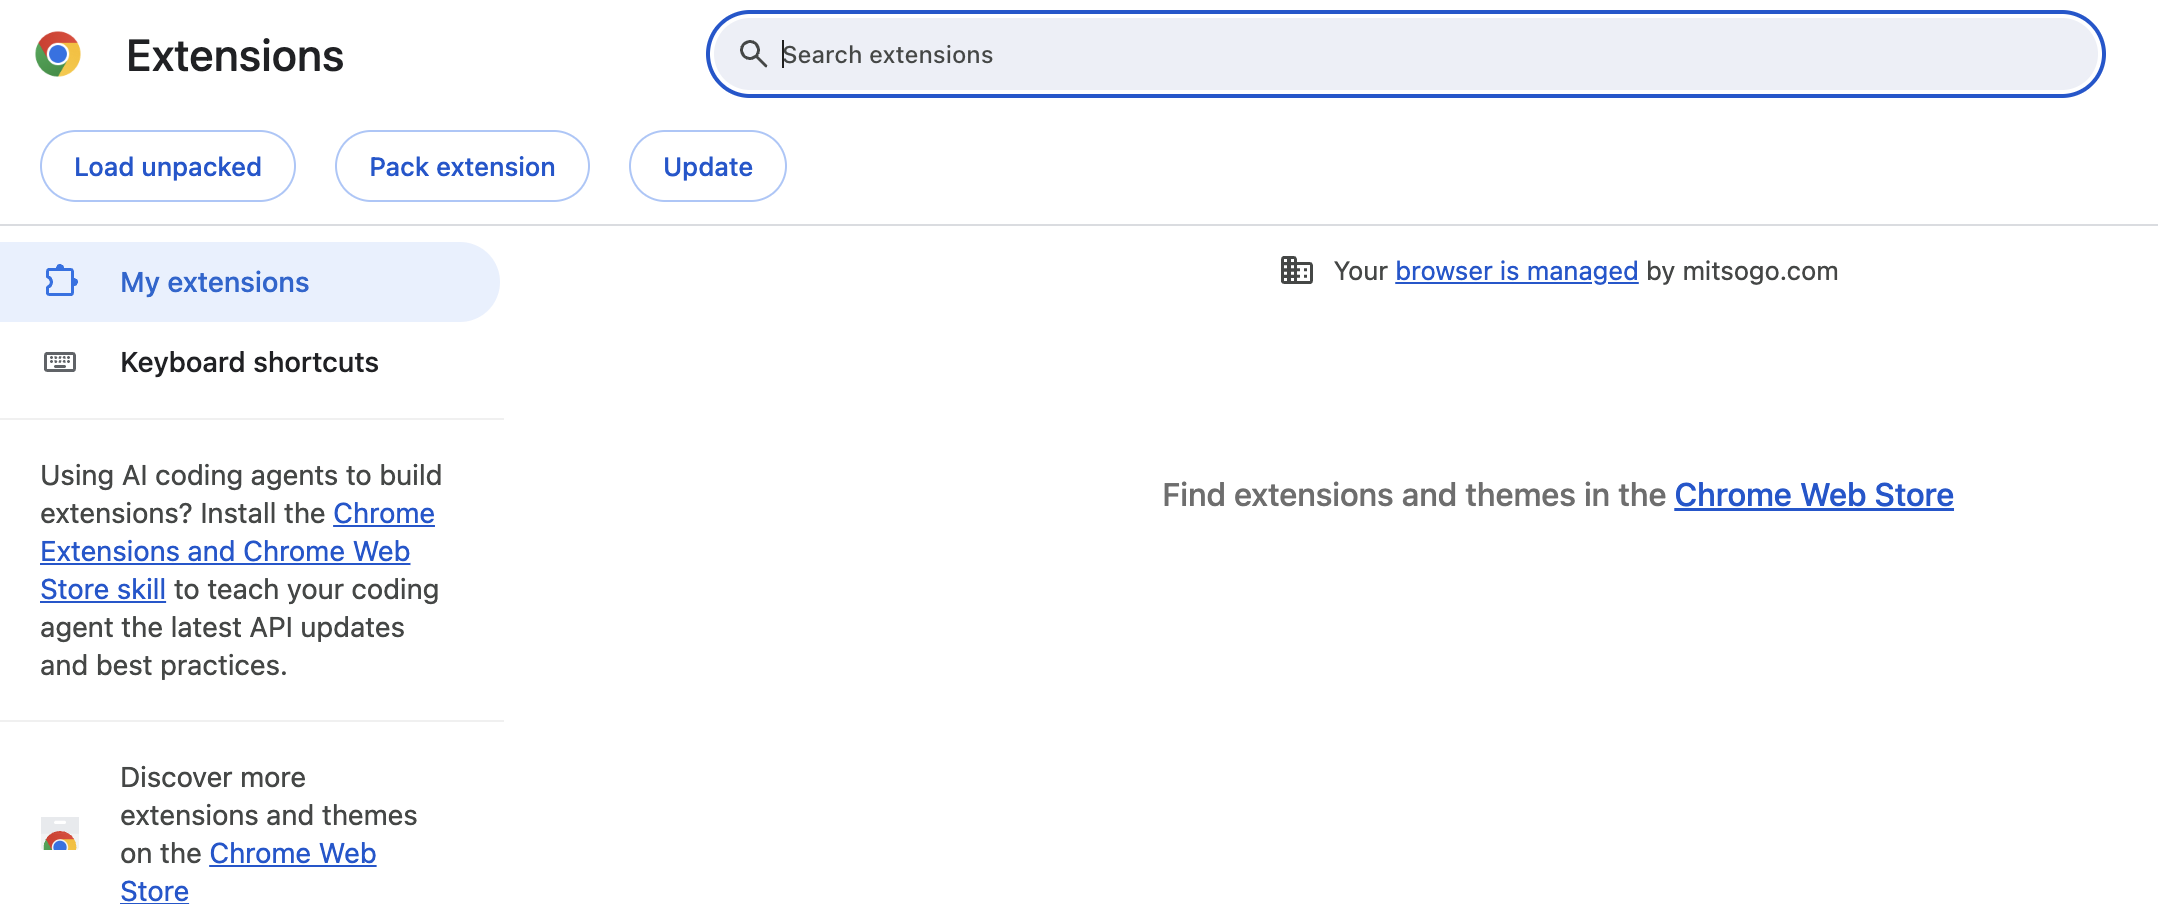
The following images demonstrate the user’s browser extensions page before and after the script’s execution:
Chrome Extension Before Removal
Chrome Extension After Removal
Technical Limitations
- Secondary Chrome Profiles: The scripts target only the primary Default Chrome profile. Extensions installed in secondary Chrome profiles will not be affected.
- Enforced Policies: Extensions mandated by Google Workspace or macOS profiles will automatically reinstall when the browser is launched.
- Chrome Sync: If a user has Google Chrome Sync enabled, removed extensions may automatically redownload from their Google account. Disable extension sync before running the scripts.


