Category filter
How to integrate Drata with Hexnode UEM for Windows devices?
Drata is an advanced security and compliance automation platform whose primary mission entails constantly monitoring devices to ensure that they meet the compliance and security criteria set by organizations.
As we know, Hexnode UEM has a system that ensures that the fleet of devices managed by it is compliant. With Drata in the picture, it amplifies the same by collecting more information on each organization’s security status, extracting data from the devices, the UEM and other sources. Drata’s automated monitoring system constantly watches all the devices and IT admins receive notifications instantly if any device is out of compliance. Admins can also access the audit reports created by Drata to know exactly what went wrong in each device and when.
The Hexnode-Drata integration is supported on Windows and macOS devices. This document explains the steps involved in the integration for Windows devices.
Integrating Drata with Hexnode UEM
Follow the steps given below to execute the integration:
- Connect Hexnode to Drata
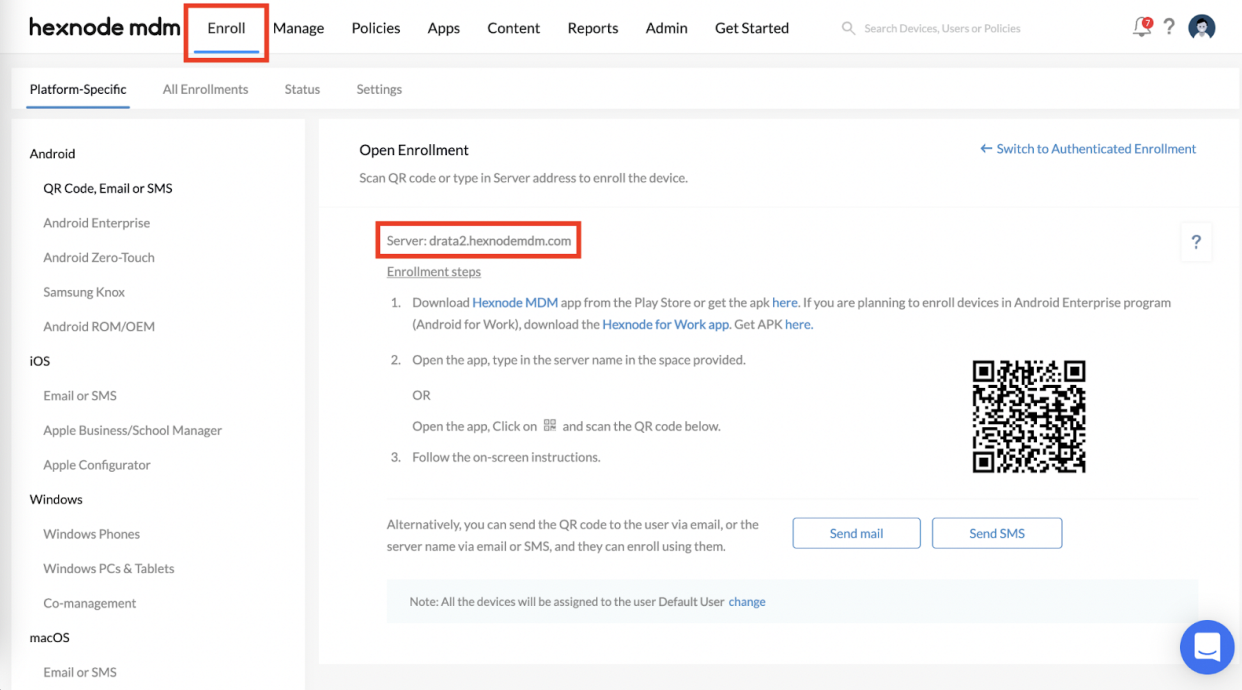
- Navigate to Enroll and make a note of the Server URL.
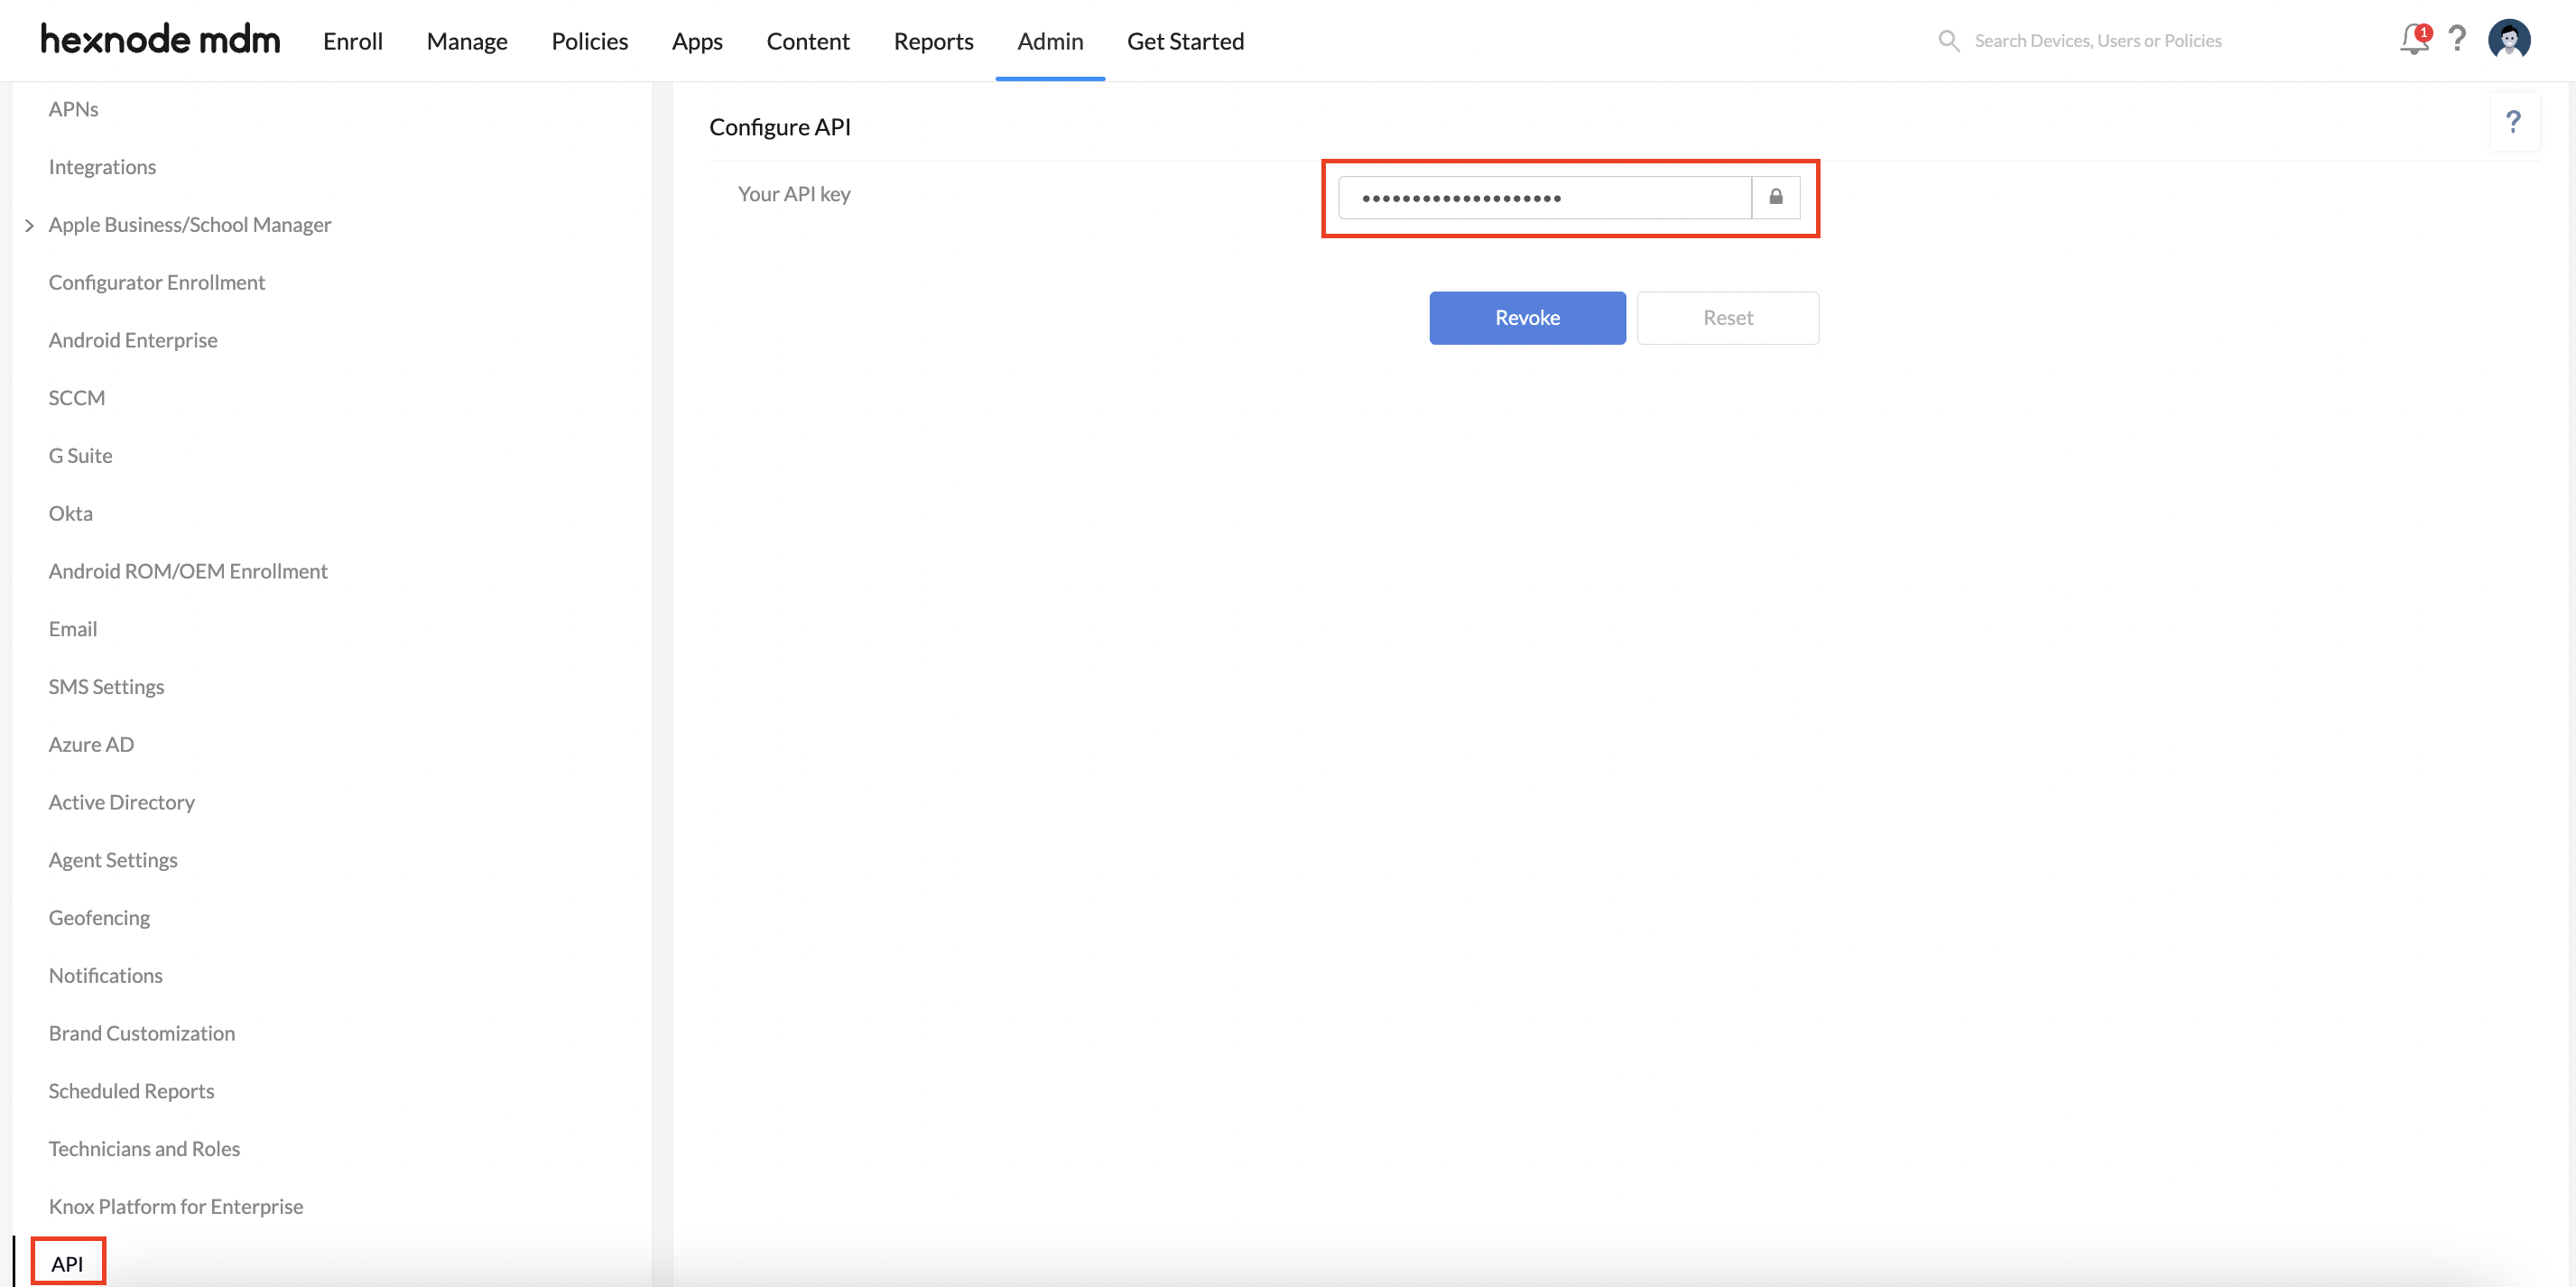
- Navigate to Admin > API.
- Click the lock icon to view the API key and make a note of it too.
- Login to your Drata portal.
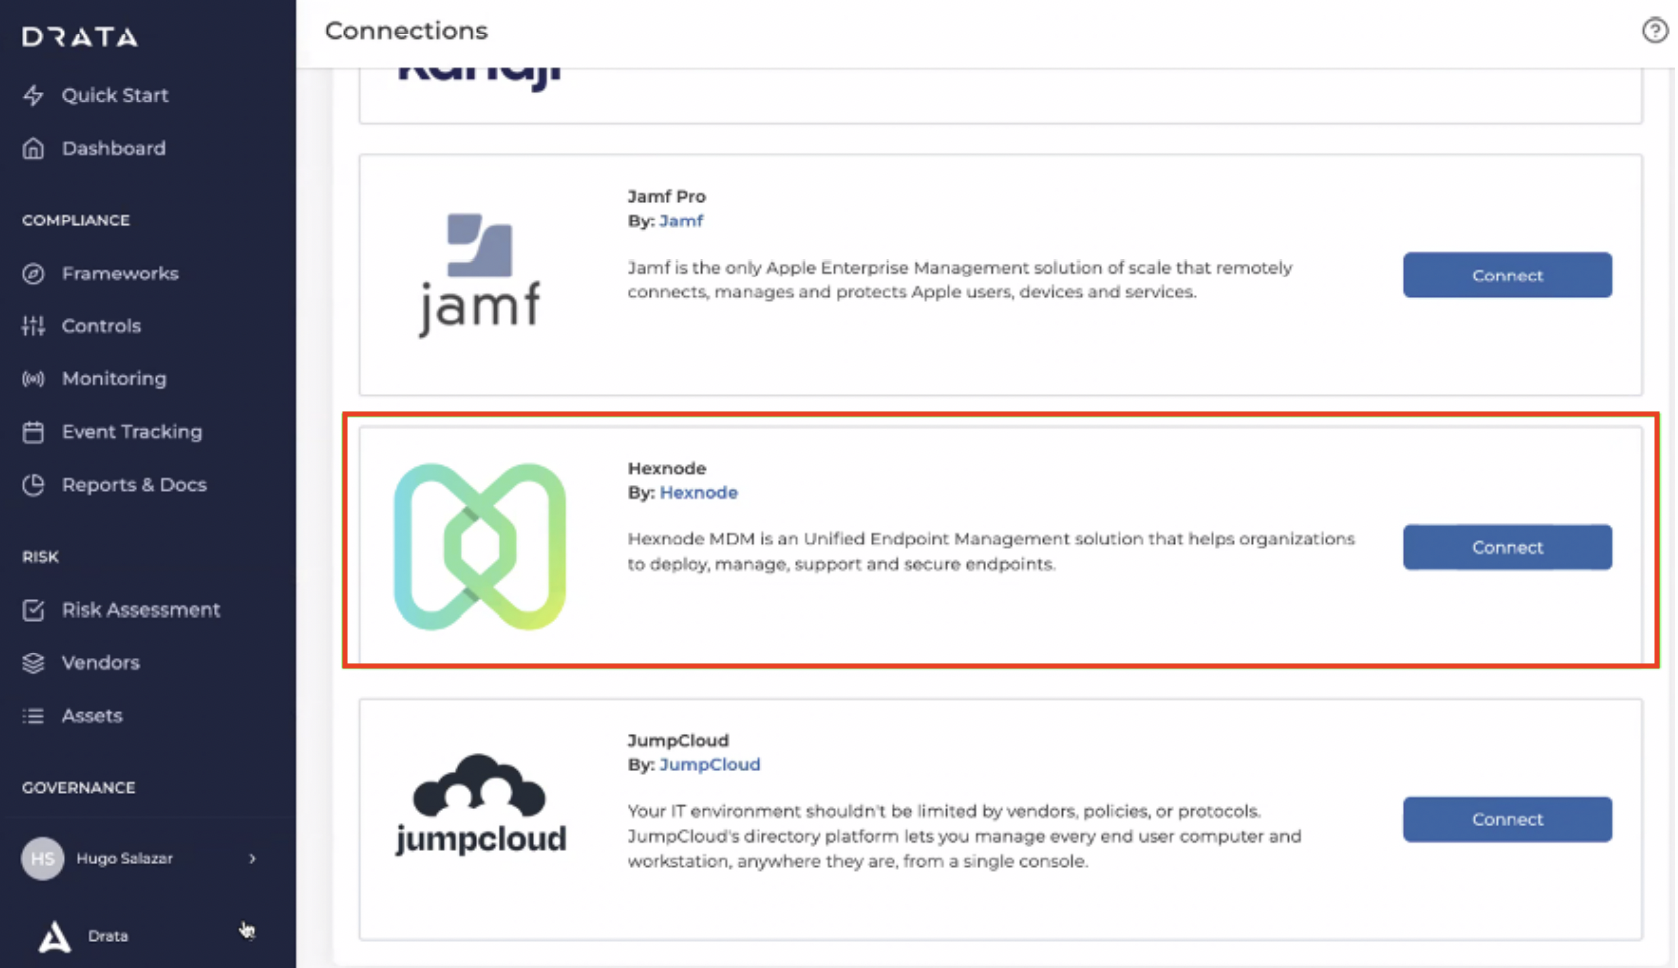
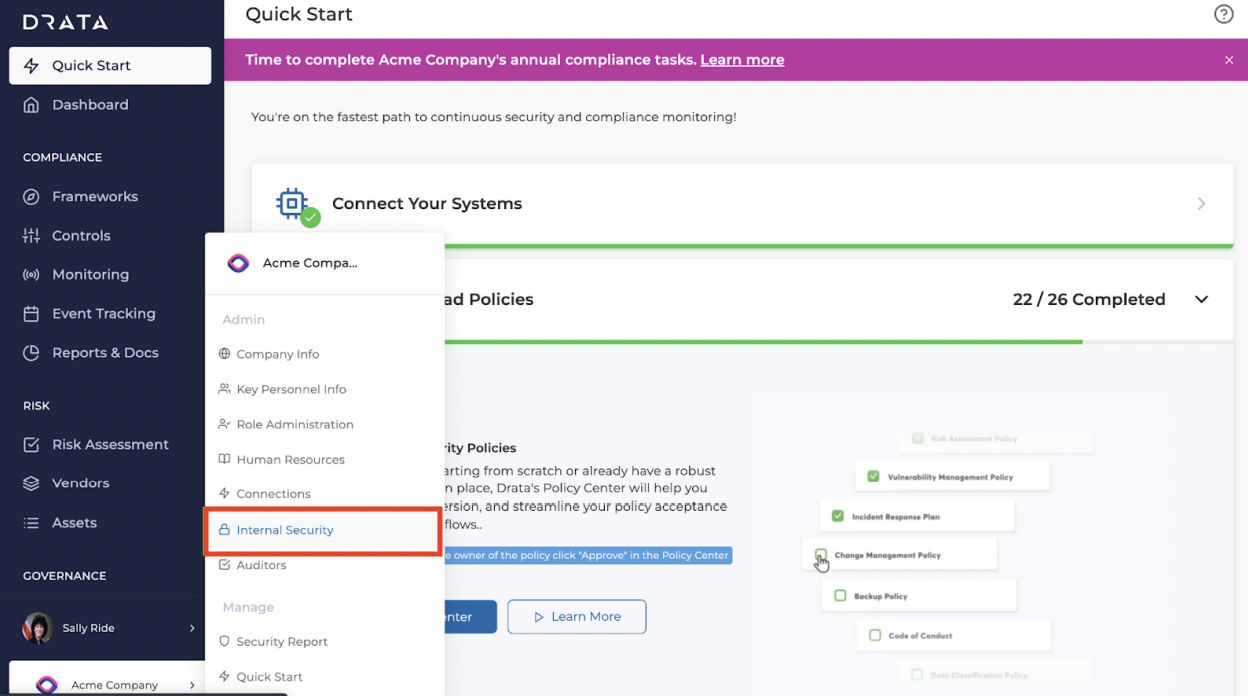
- Click on your company’s name from the sidebar and click Connections.
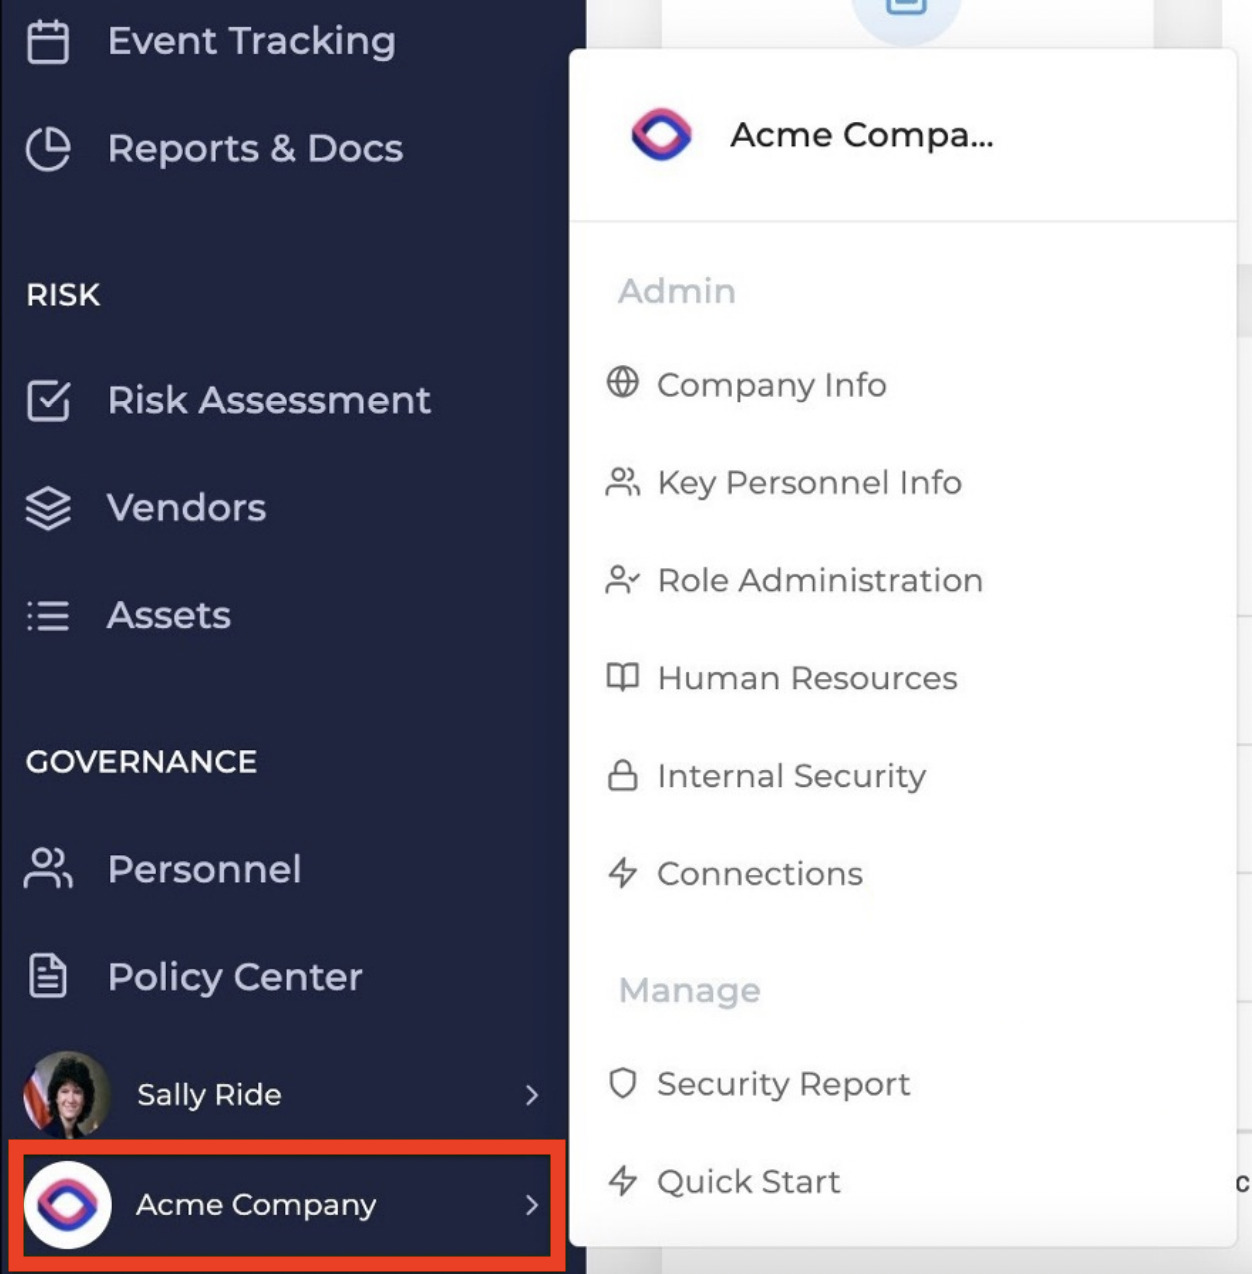
- Find Hexnode from the list and click Connect.
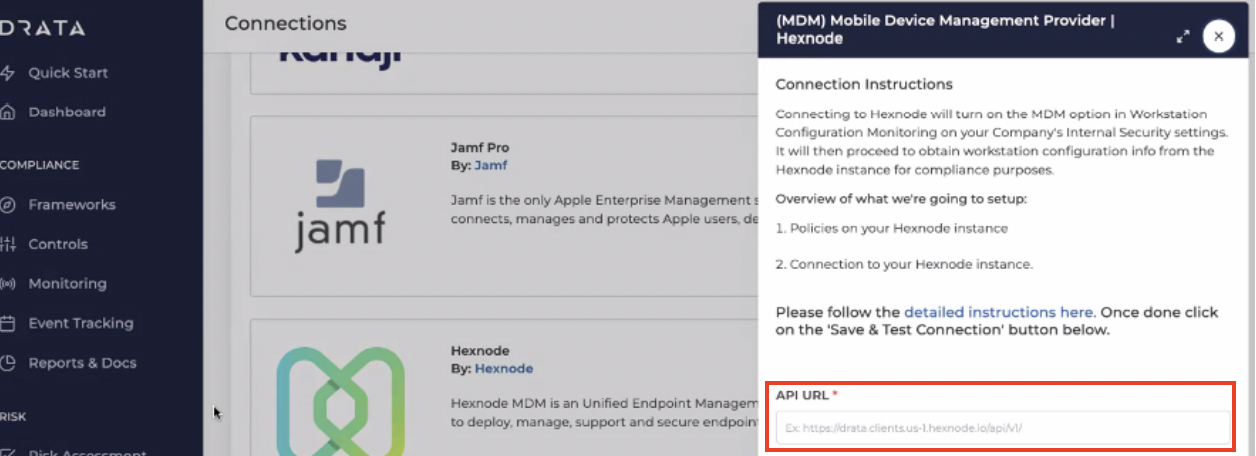
- Enter the previously noted Server URL in the API URL field. Remember to include https:// at the beginning of the URL.
- Enter the previously noted API key in the API Token field.
- Click Save & Test Connection.
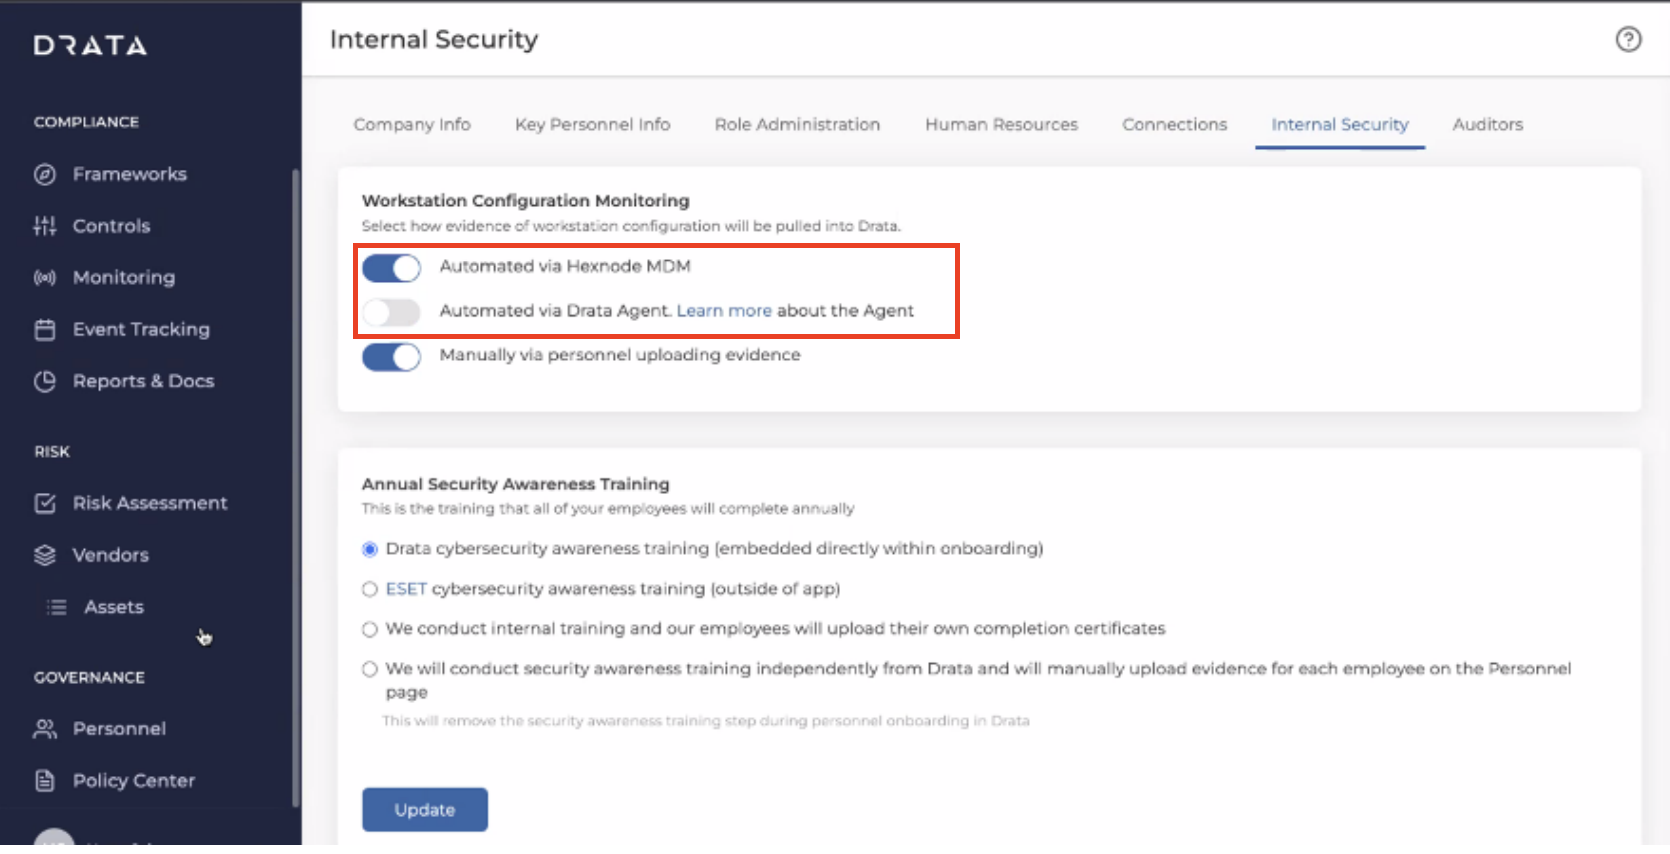
- Click on your company’s name from the sidebar again and click Internal Security.
- Turn the Automated via Hexnode MDM toggle on and the Automated via Drata toggle off. If both options are enabled and the Drata agent is installed on the device, then the compliance data will come from the Drata agent and not Hexnode UEM.
- Login to the Hexnode UEM portal.
- Configure the BitLocker policy:
- Navigate to Policies > New Policy > New Blank Policy.
- Click Select.
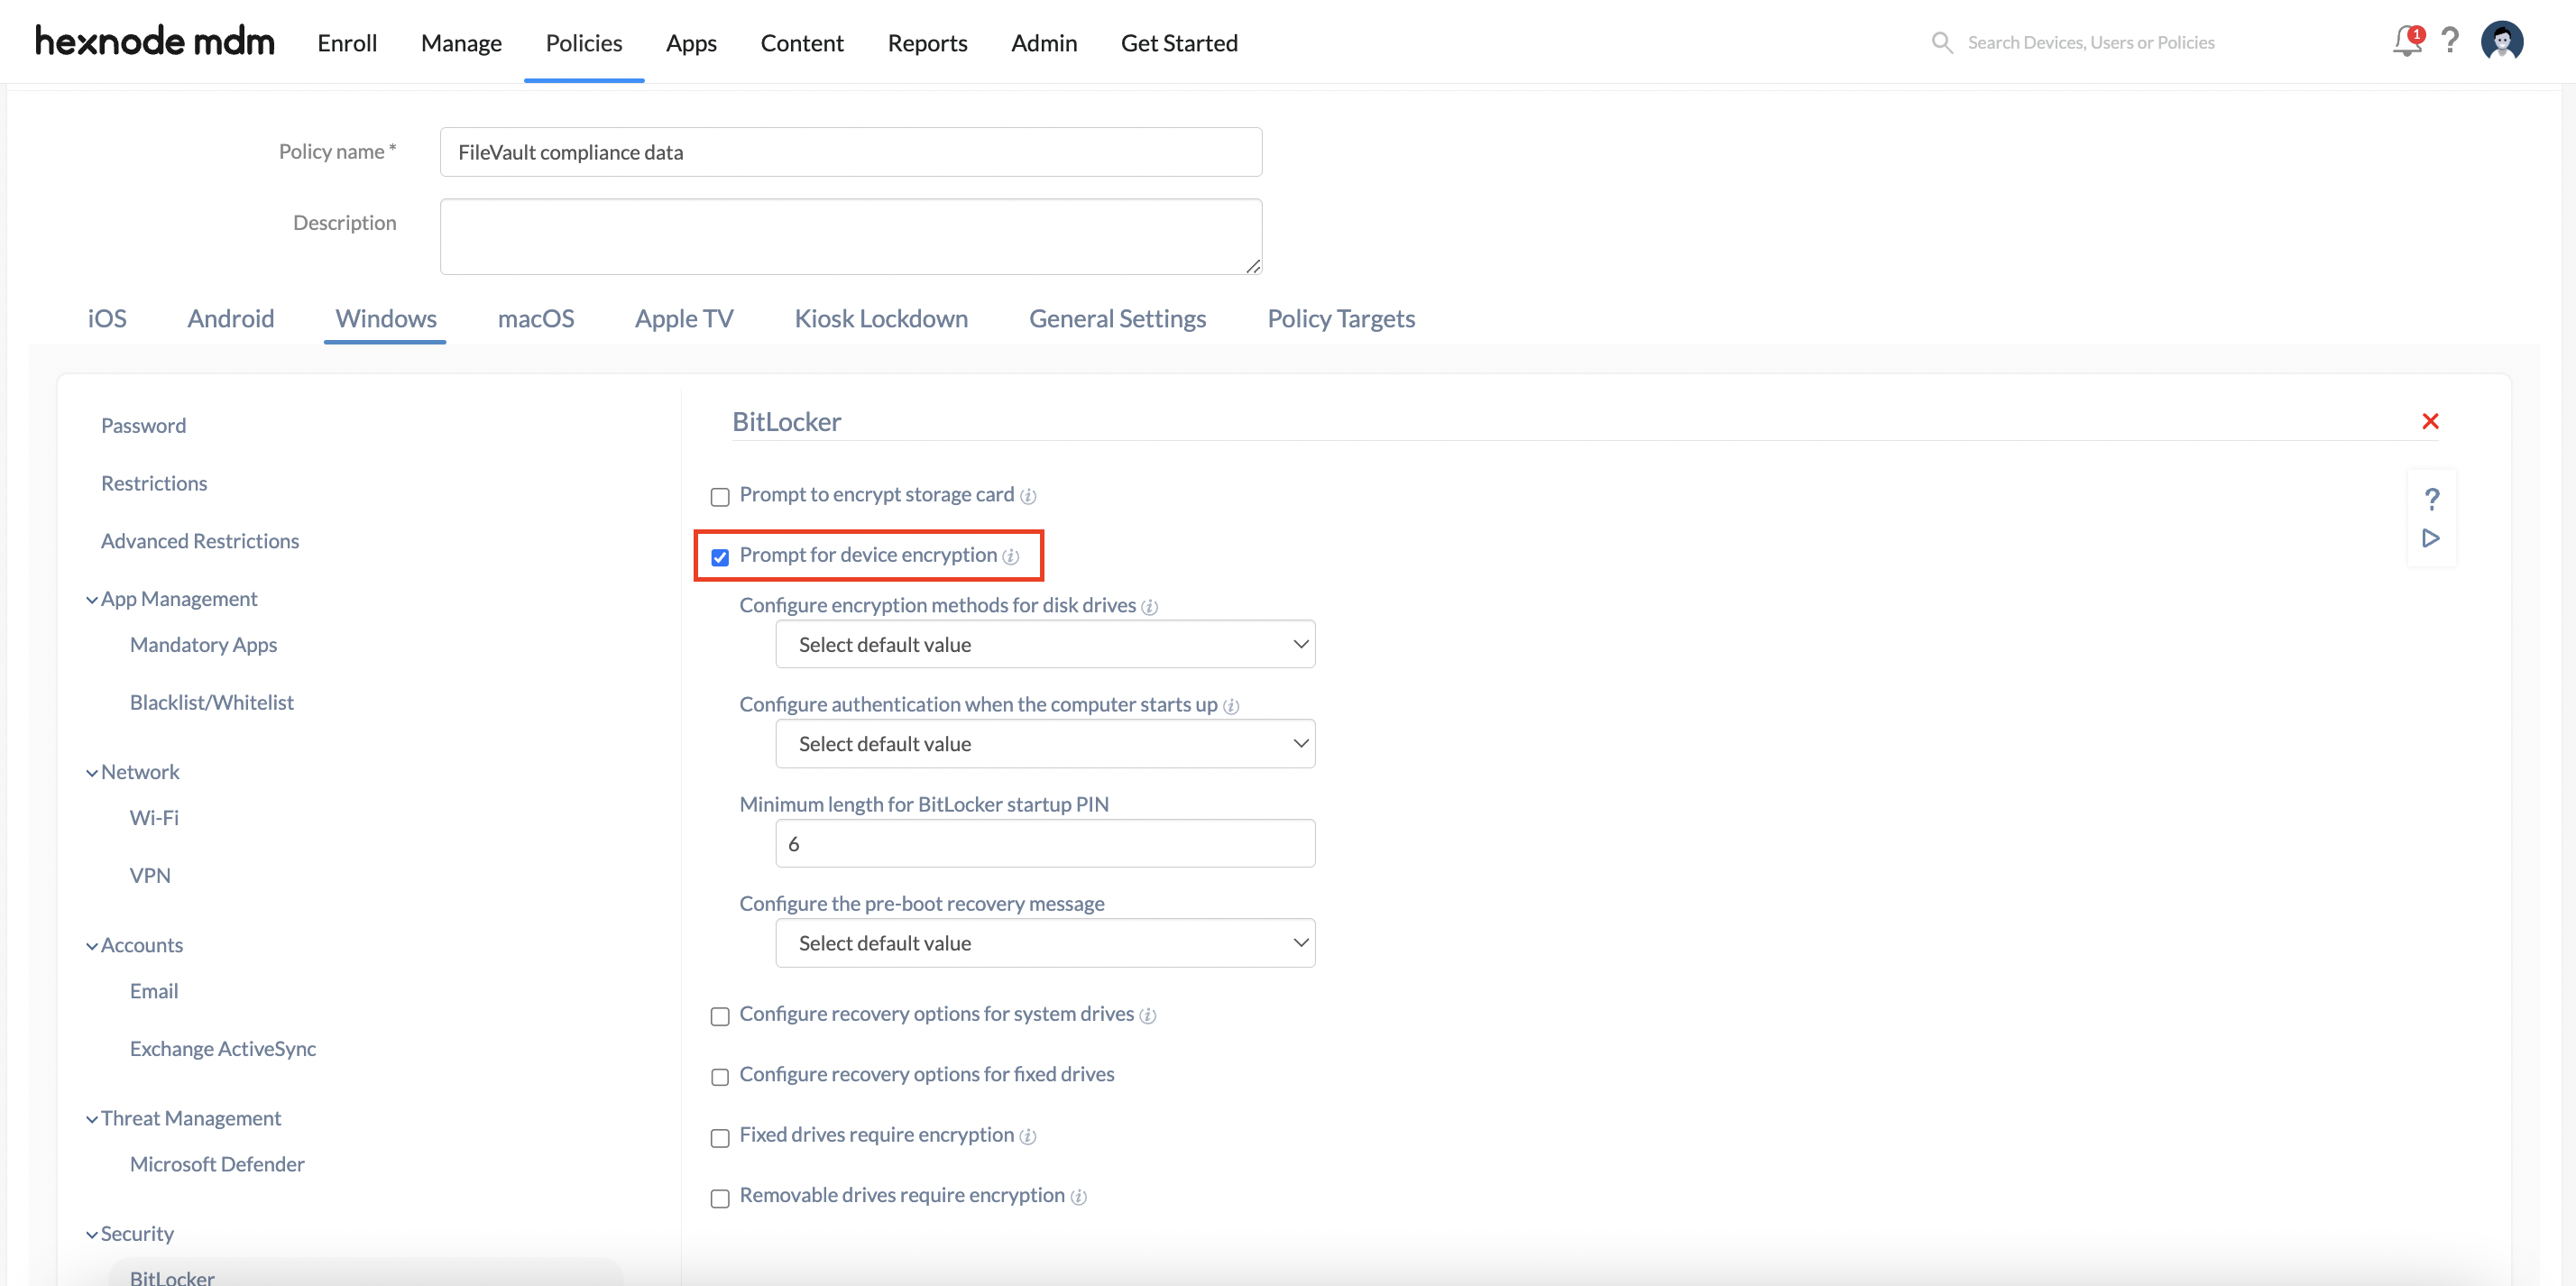
- Provide a suitable policy name which includes the term “FileVault” so that Drata can detect the policy.
- Navigate to Windows > Security > BitLocker and click Configure.
- Ensure that the Prompt for device encryption box is checked and configure the remaining fields as per requirement. You may refer to our document on managing BitLocker for further details and step-wise explanations.
- Navigate to Policy Targets > Add devices and select the devices to be configured.
- Click Save.
- Configure the Password policy:
- Navigate to Policies > New Policy > New Blank Policy.
- Click Select.
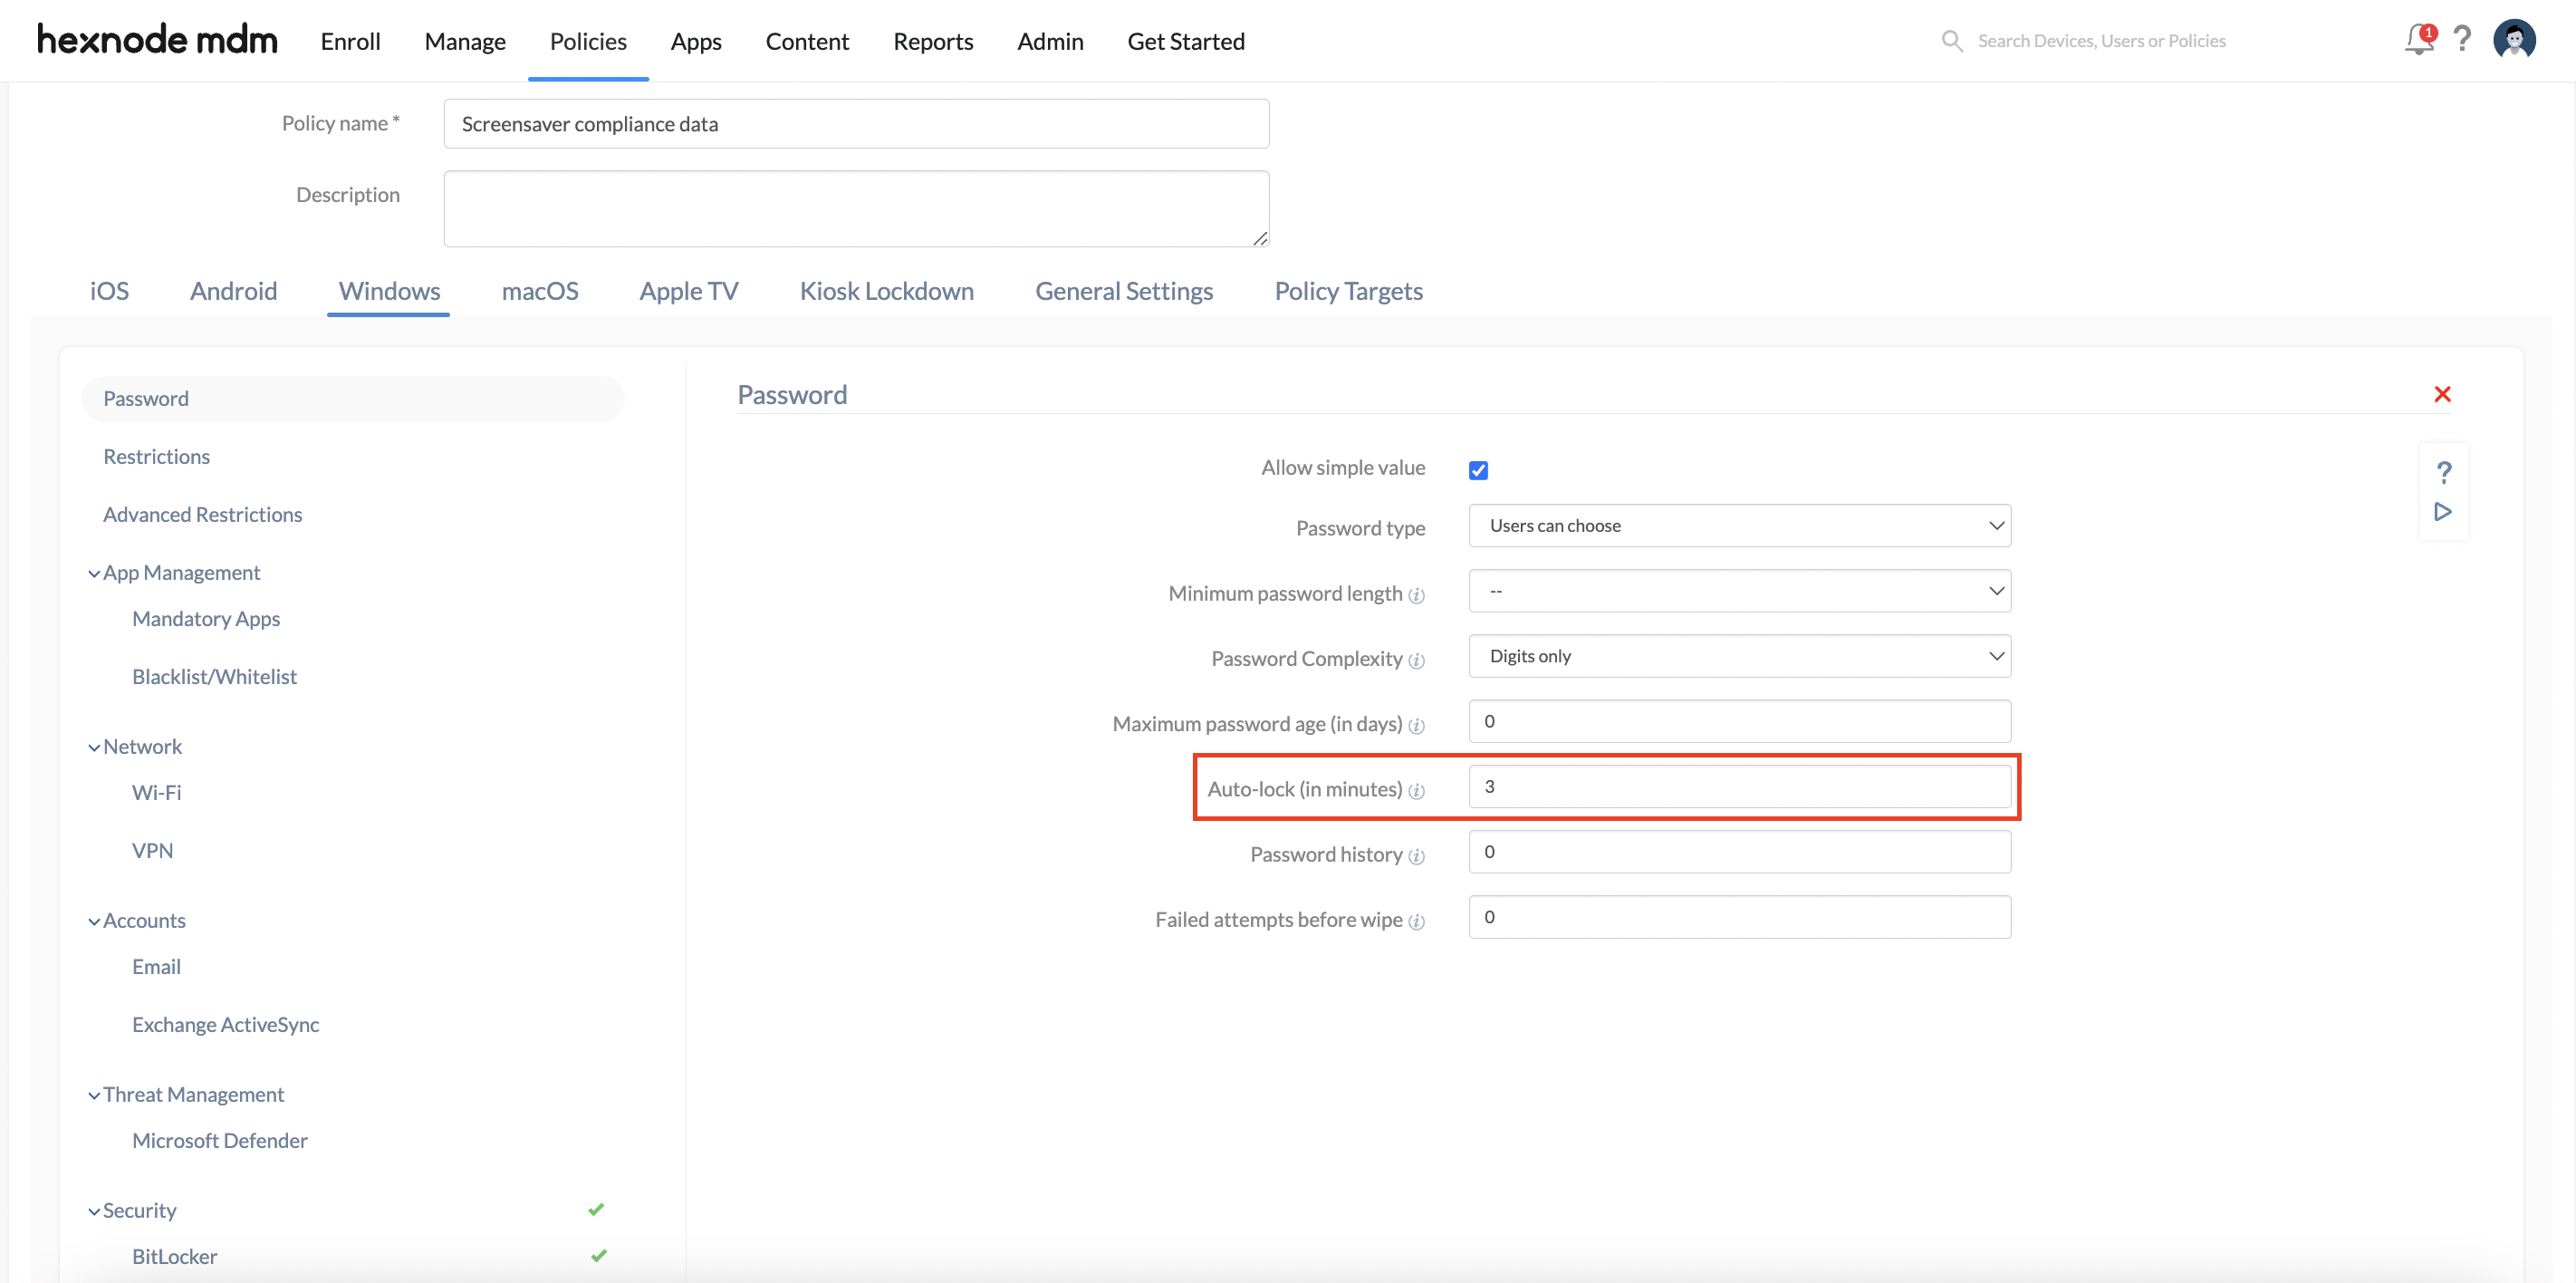
- Provide a suitable policy name which includes the term “Screensaver” so that Drata can detect the policy.
- Navigate to Windows > Password and click Configure.
- Set the Auto-lock (in minutes) option to a value greater than 0 and configure the remaining fields as per requirement. Check out our document on configuring password policy for Windows devices for further guidance.
- Navigate to Policy Targets > Add devices and select the devices to be configured.
- Click Save.
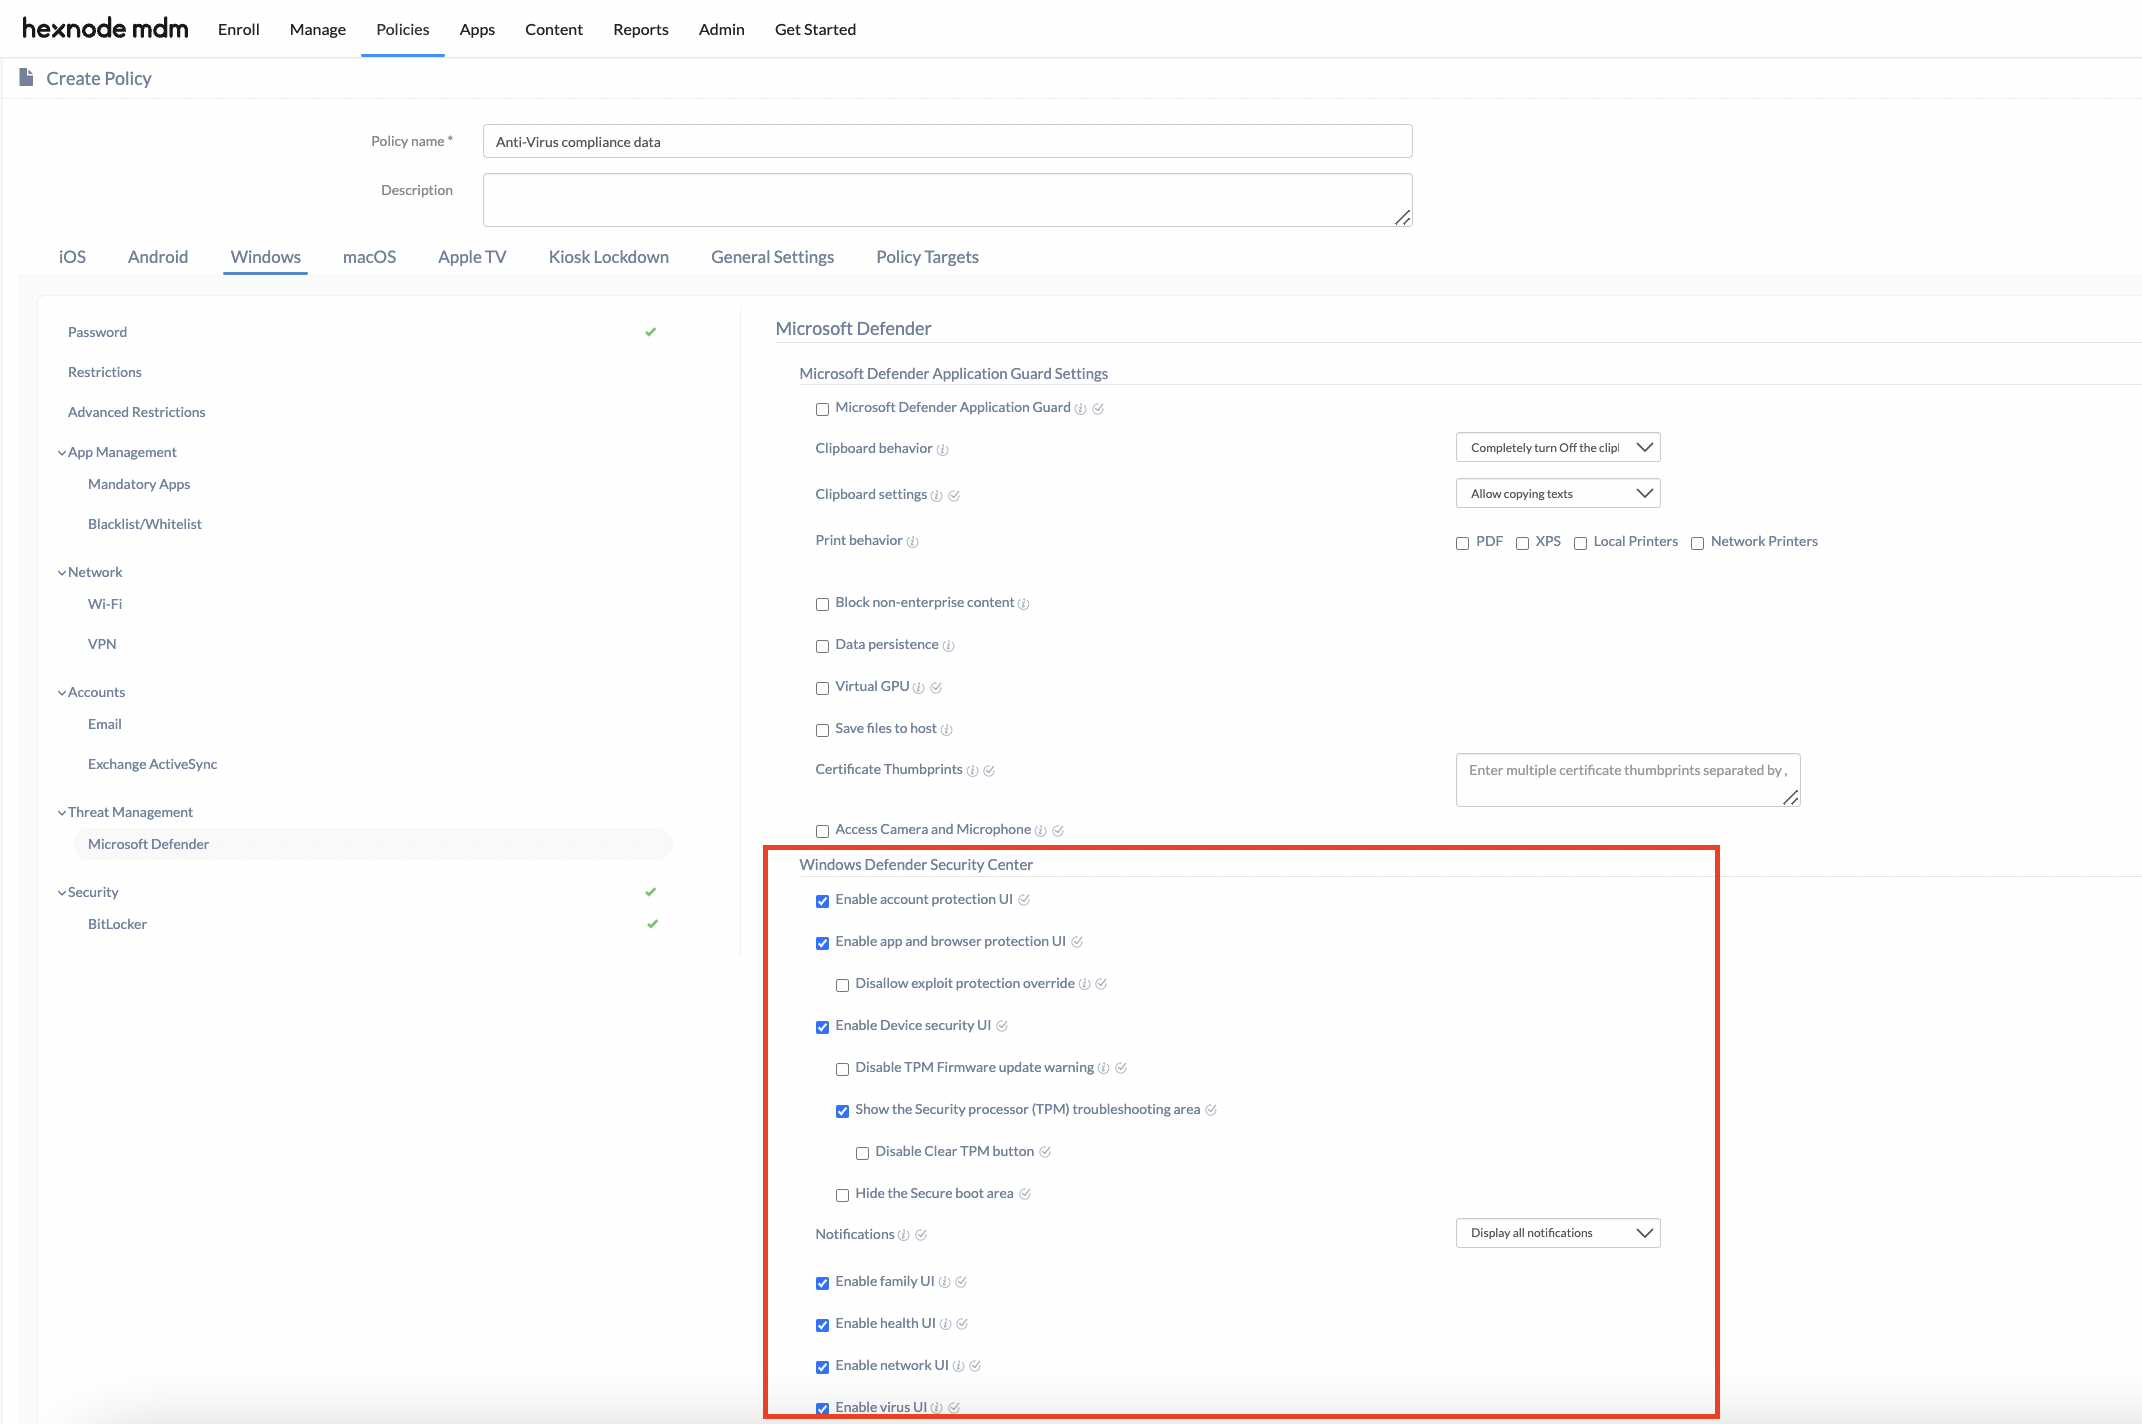
- Configure the Microsoft Defender policy:
- Navigate to Policies > New Policy > New Blank Policy.
- Click Select.
- Provide a suitable policy name which includes the term “Anti-Virus” so that Drata can detect the policy.
- Navigate to Windows > Threat Management > Microsoft Defender and click Configure.
- Check the following options under Windows Defender Security Center:
- Enable account protection UI
- Enable app and browser protection UI
- Enable device security UI > Show the Security processor (TPM) troubleshooting area
- Enable family UI
- Enable health UI
- Enable network UI
- Enable virus UI
- Refer to our document on enabling Microsoft Defender to configure the rest of the settings.
- Navigate to Policy Targets > Add devices and select the devices to be configured.
- Click Save.
The BitLocker, Password and Microsoft Defender policies have to be configured in the Hexnode UEM portal in order to collect compliance data that correspond to windows disk encryption, lock screen and antivirus respectively.
The integration is now complete and Drata will begin collecting essential data regarding Windows devices enrolled in Hexnode UEM.

