Category filter
Manage local user accounts of Windows devices enrolled in Hexnode UEM
Learn how Hexnode UEM helps you manage local users on Windows devices.
Managing local user accounts on corporate assets enhances security by determining user access to devices. Organizations can easily create and maintain user accounts while having centralized control over them with Hexnode’s Local Accounts management for Windows devices. It provides a set of actions for managing user accounts like creating local accounts, syncing user accounts with the portal, unlocking a user account, changing user roles, resetting passwords, disabling/enabling/deleting user accounts, and more. Let’s understand in deeper about how to manage local user accounts on Windows devices with Hexnode UEM.
How to remotely manage local users on Windows?
Hexnode UEM provides a range of remote management options for local users on Windows devices.
Sync Local Accounts
The first step to managing local users on your Windows devices is to execute the Sync Local Accounts action to sync all the accounts on the devices with Hexnode UEM.
- Log in to the Hexnode UEM console.
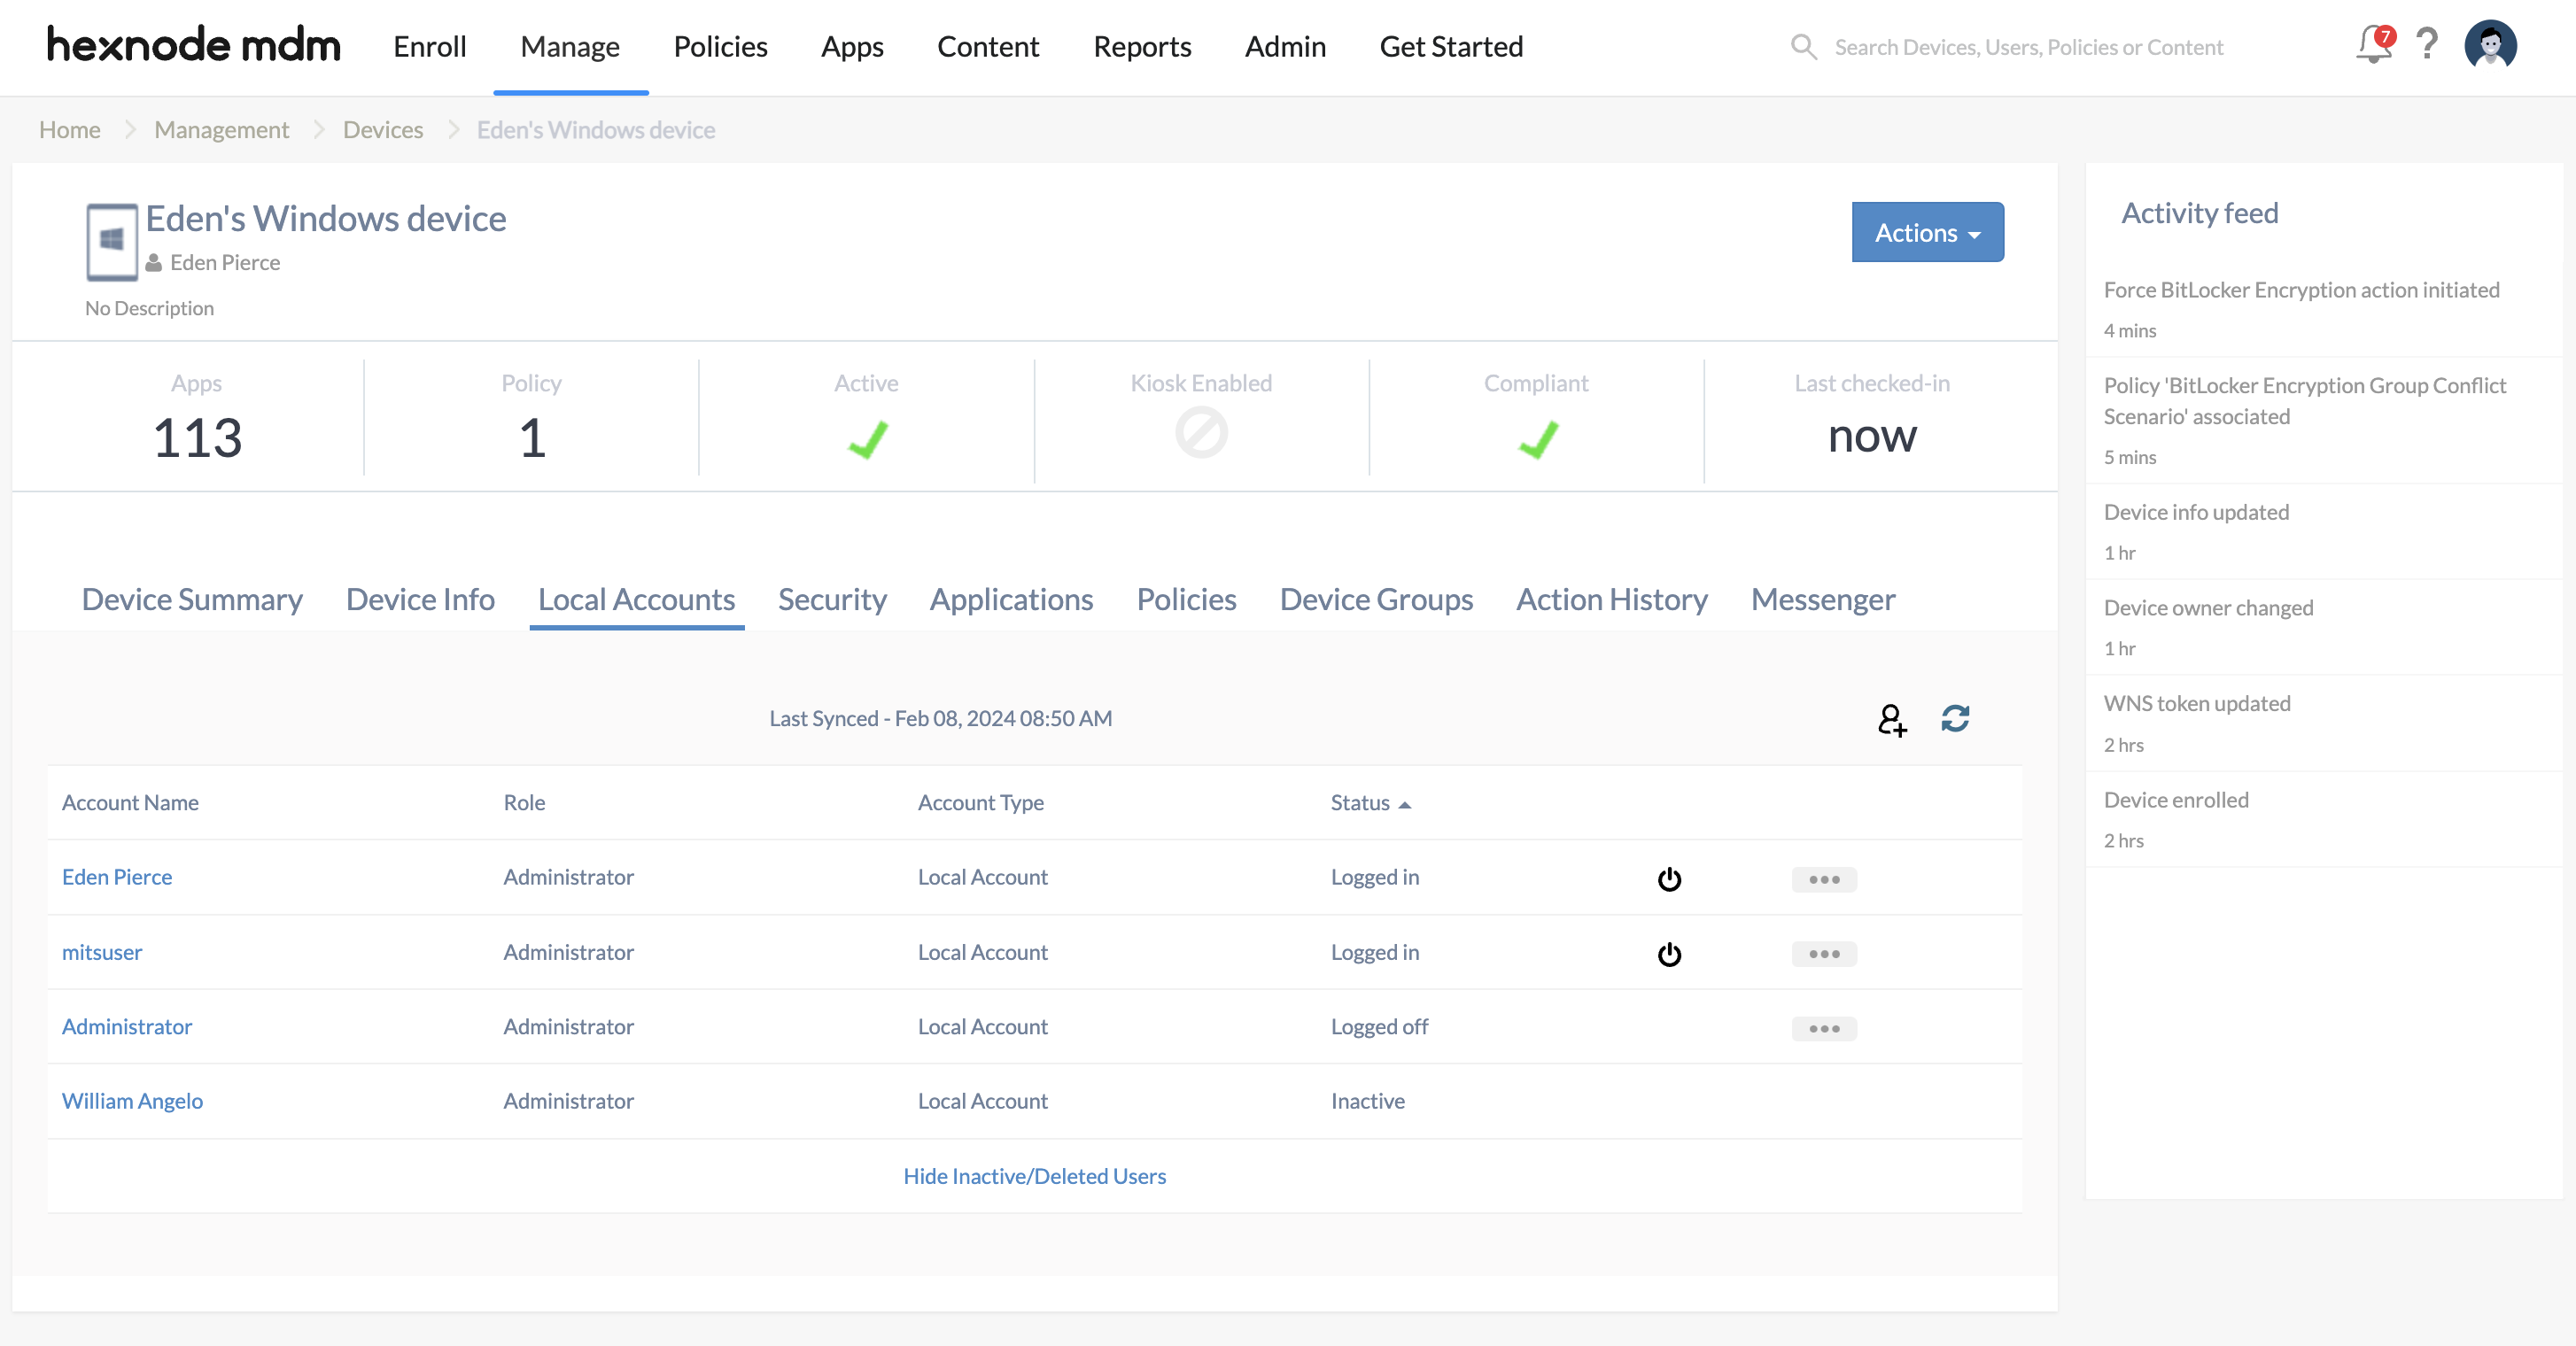
- Navigate to the Manage tab and click on the name of the Windows device whose local accounts you want to display.
- Click on Actions and choose Sync Local Accounts.
- Now click on the Local Accounts tab.
Here, you’ll find a list of all the active users on the Windows device, along with additional details such as:
- Account name: Shows the username of the users.
- Role: Indicates whether the user is an Administrator or a Standard user.
- Account Type: Specifies whether the user is a local user or network user.
- Status: Indicates whether the user is currently logged in or logged off.
To access inactive or deleted users, simply click on the ‘Show Inactive/Deleted Users’ button located at the bottom of the user accounts list.
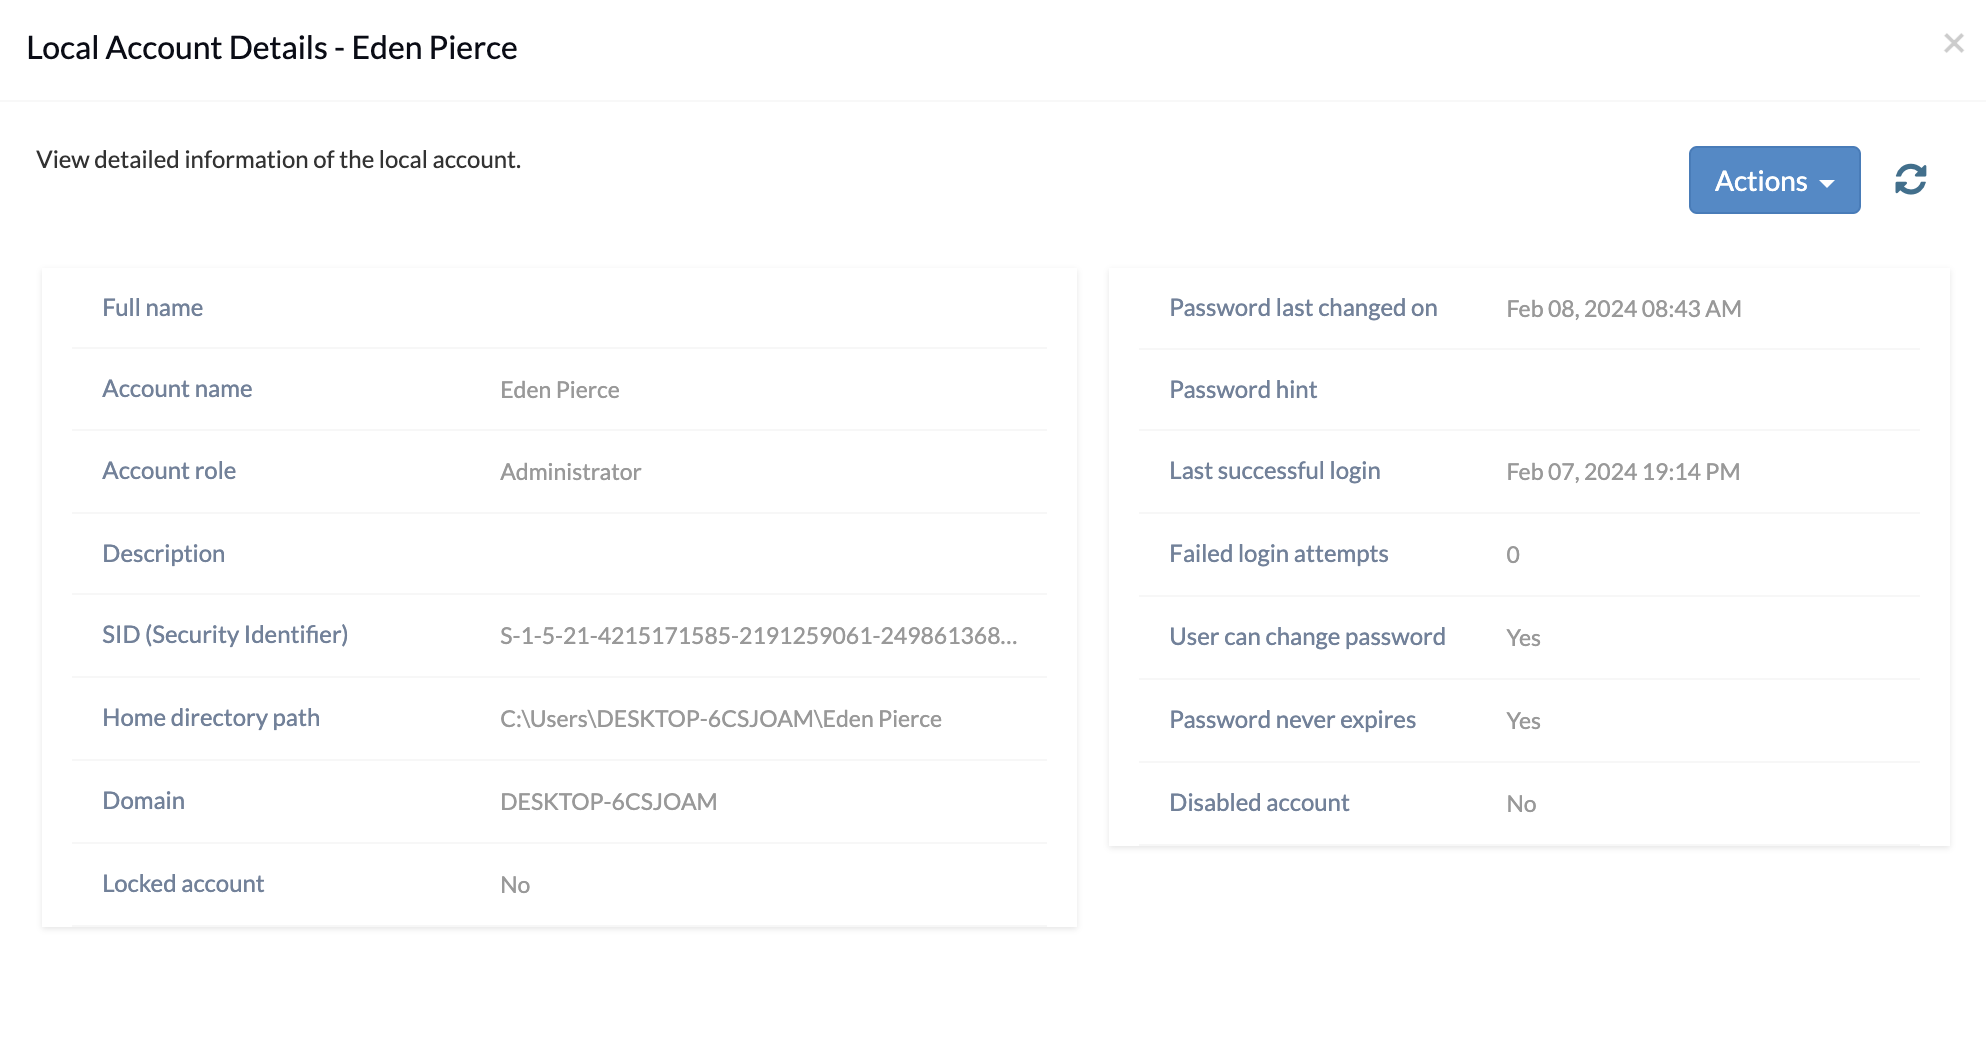
Clicking on the name of a user will provide you further details, such as:
- Full name: Displays the complete name of the user.
- Account name: Displays the username of the user.
- Account role: Specifies whether the user is an Admin user or a Standard user.
- Description: Provides details about the created user account.
- SID (Security Identifier): Represents a unique alphanumeric string assigned to the user account by the Windows operating system.
- Home directory path: Indicates the location of the user’s home folder.
- Locked account: Indicates whether the user account is currently locked due to multiple failed login attempts.
- Password last changed on: Shows the date and time when the account password was last modified.
- Password hint: Provides the hint for the user’s password.
- Last successful login: Displays the date and time of the user’s last successful login.
- Failed login attempts: Indicates the number of failed login attempts since the last successful login.
- User can change password: Specifies whether the user has permission to change their account password.
- Password never expires: Indicates whether the user’s password is set to expire or not.
- Disable account: Indicates whether the user account is currently disabled or not.
Create User Account
To effectively manage local users on Windows, you can also add more accounts to devices in addition to what already exists. Execute the Create User Account action from the Hexnode console to create new users.
- Log in to your Hexnode portal.
- Navigate to Manage > Devices.
- Select the Windows device to which you want to add a new user.
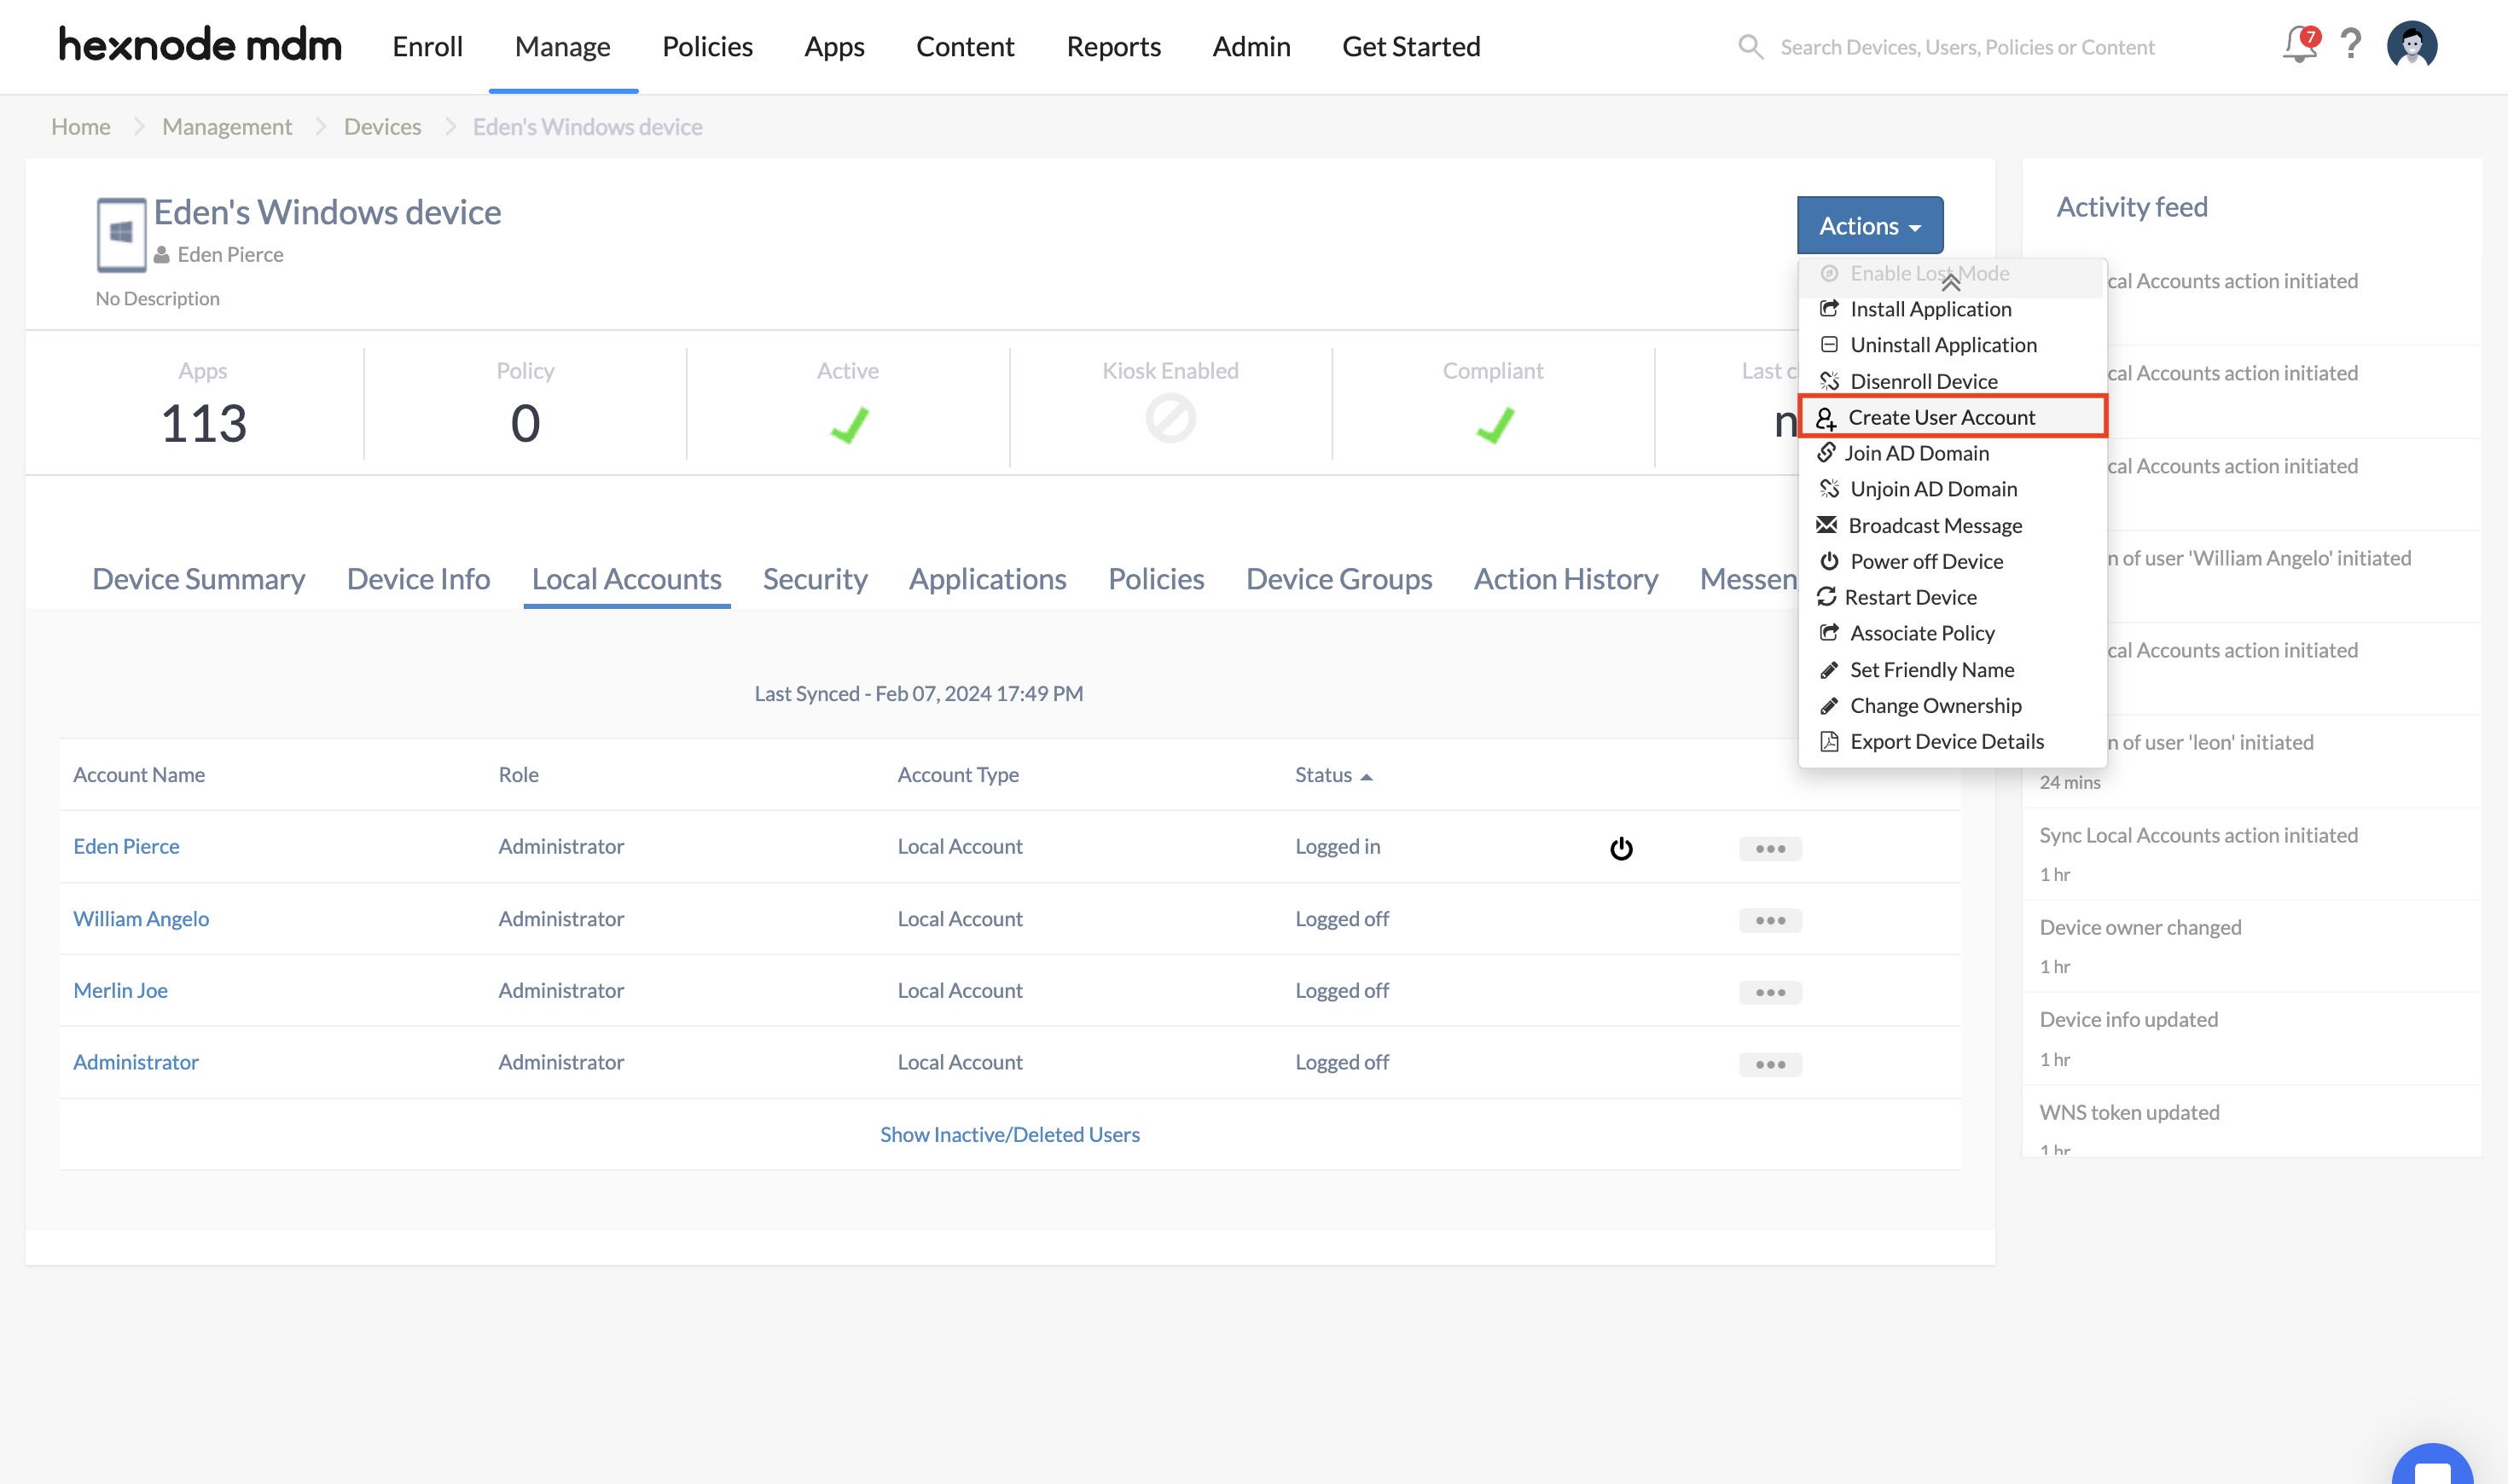
- Click the Local Accounts tab and click the Create User Account icon.
- A dialog box opens up. Choose either of the following 2 options and configure various settings that follow.
1. Choose a user from Hexnode” :
- Domain
- User
- Account Name
- Full Name
- Description
- Account Role
- Password
- Verify Password
- User must change password at next login
- Password never expires
- User cannot change password
- Password Hint
- Disable Account
2. Create a new user:
- Account name
- Full Name
- Description
- Account Role
- Password
- Verify Password
- User must change password at next login
- Password never expires
- User cannot change password
- Password Hint
- Disable Account
- Click on Create to create a new user account.
Check out our detailed guide on creating user accounts
on Windows devices.
- Navigate to Manage > Devices.
- Select the Windows device to which you want to add a new user.
- Click Actions > Create User Account.
- Configure various settings as mentioned above and click on Create to create a new user account.
Force Log Out User
This action will force log out the user from their current active session.
- Navigate to Manage > Devices.
- Select the Windows device whose user account(s) you want to force log out.
- Click the Local Accounts tab.
- Click the Power button icon corresponding to the user that you want to force log out which is situated to the left of the horizontal three-button menu.
- Click Proceed in the confirmation dialog box.
- Click Confirm to force log out the user.
OR
- Navigate to Manage > Devices.
- Select the Windows device whose user account(s) you want to force log out.
- Click the Local Accounts tab.
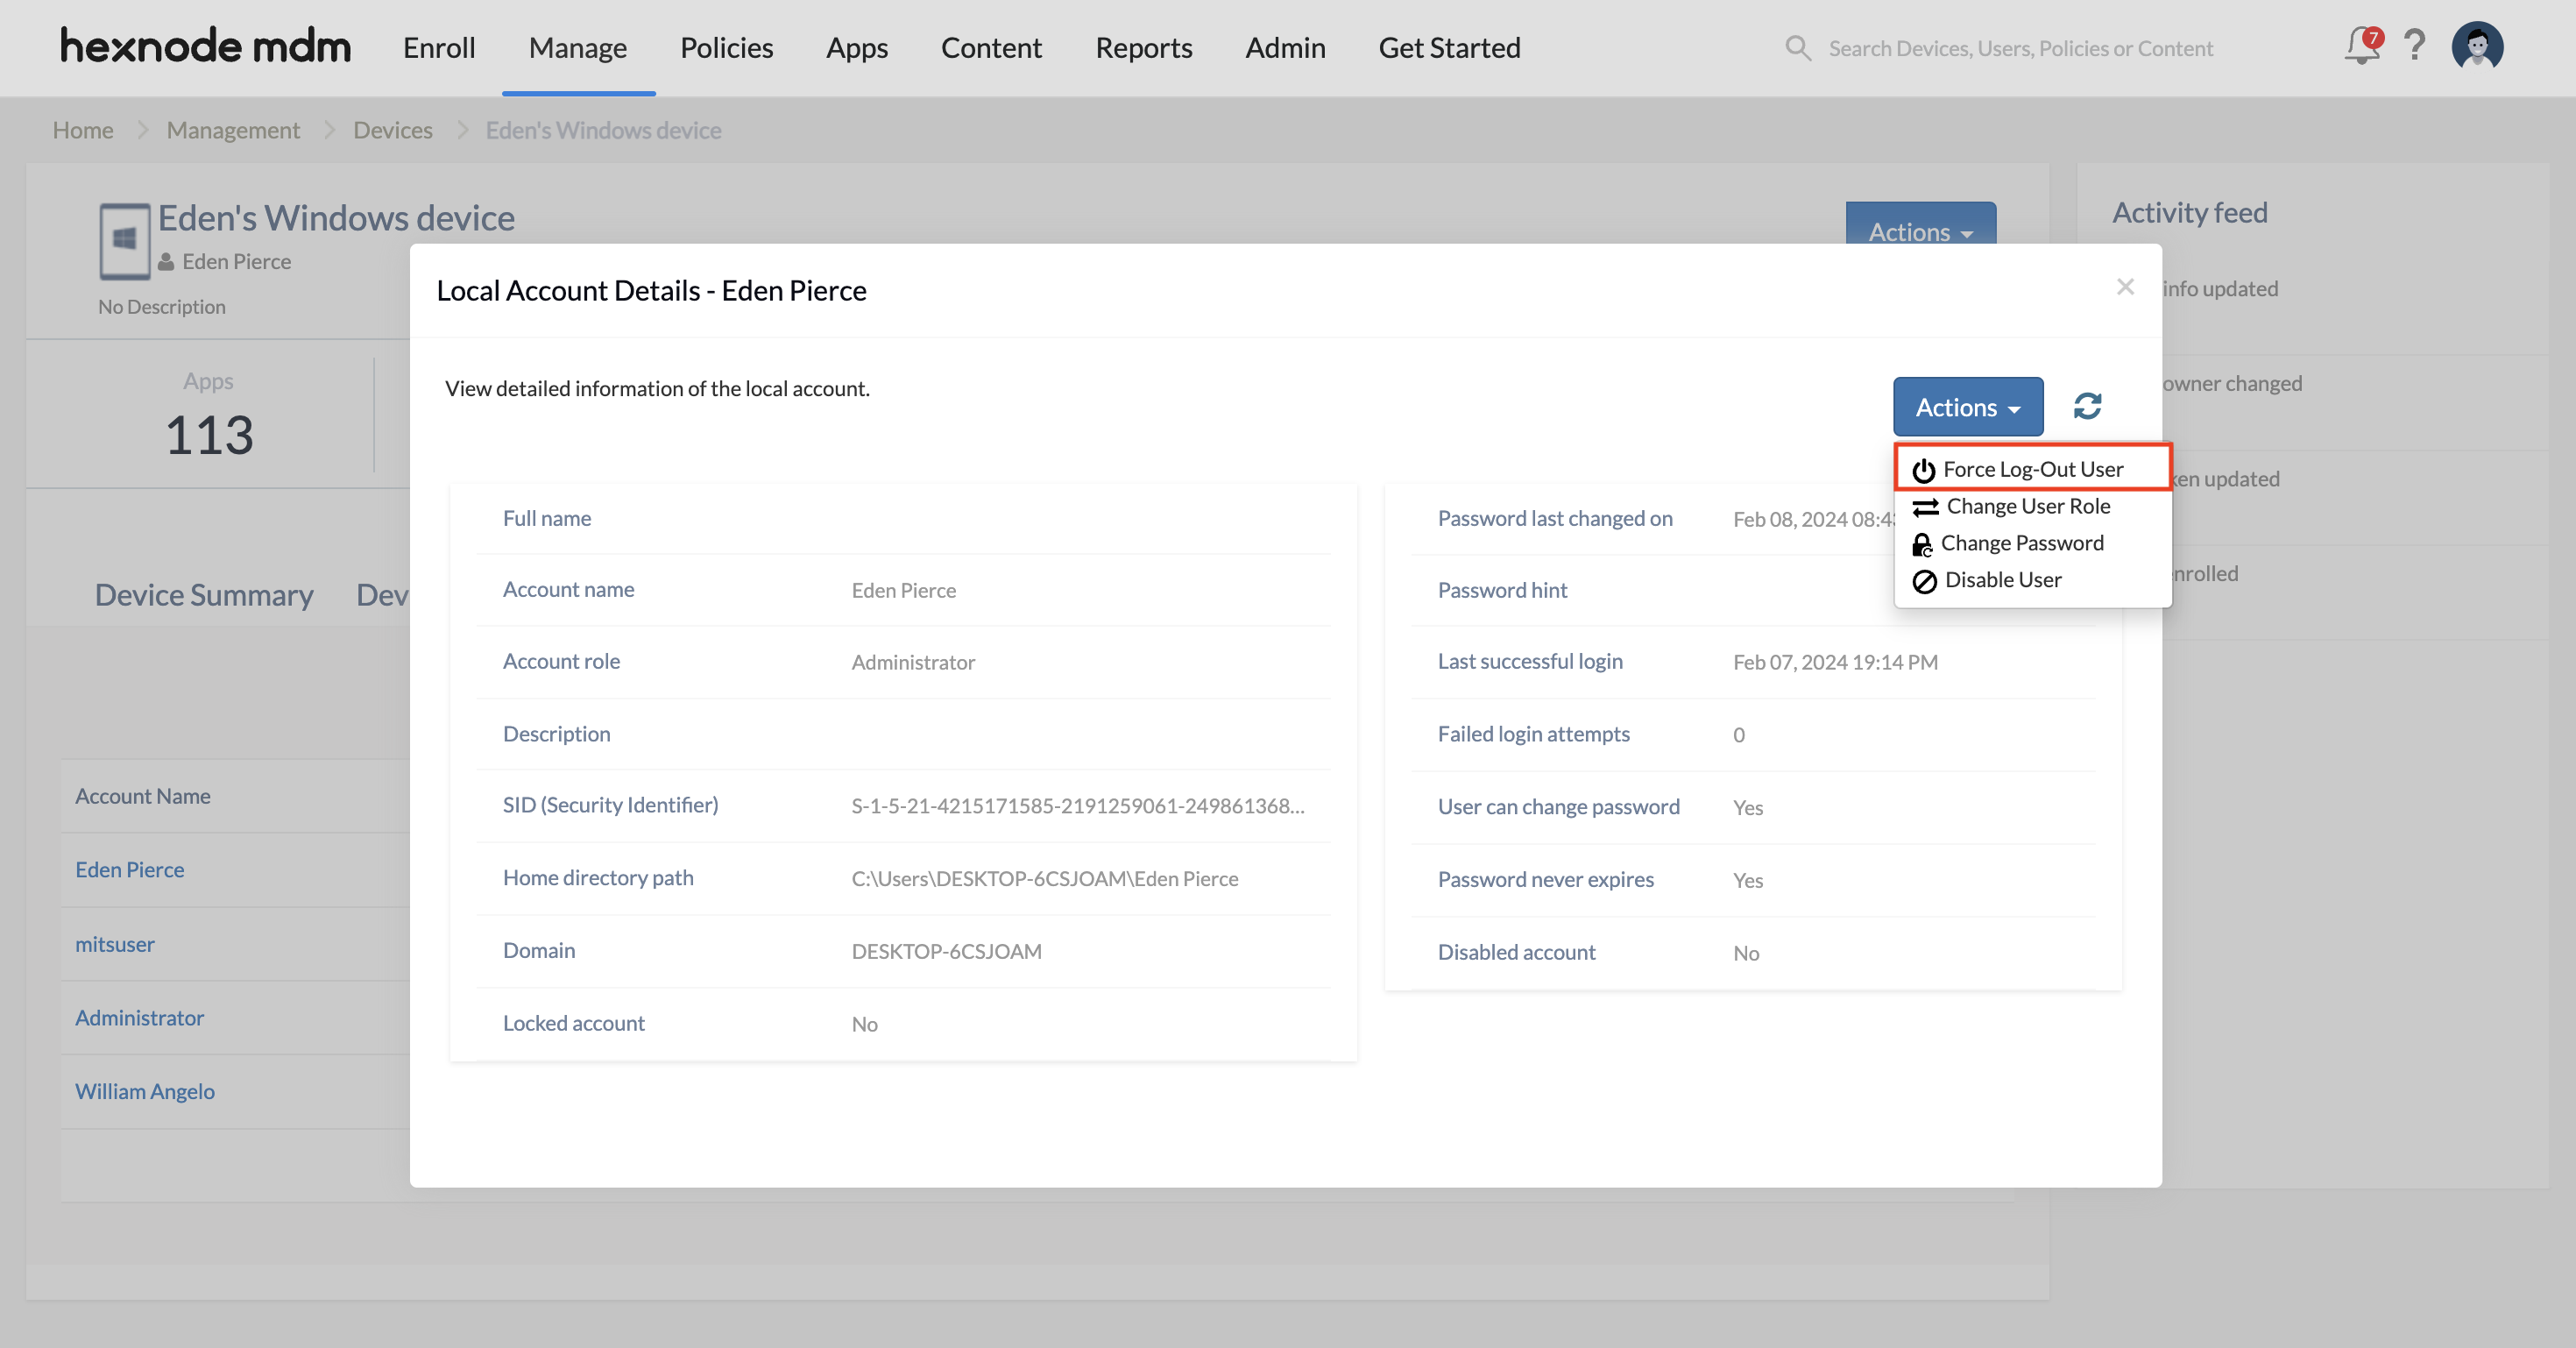
- Click the name of the user that you want to force log out under the Local Accounts tab.
- Click the Actions button and choose the Force Log-Out User option.
- Click Proceed in the confirmation dialog box.
- Click Confirm to force log out the user.
Unlock Account
This action aids you in unlocking user accounts that have been locked due to repeated failed password attempts.
- Navigate to Manage > Devices.
- Select the Windows device whose user account(s) you want to unlock.
- Click the Local Accounts tab.
- Click the name of the user that you want to unlock.
- Click Actions and choose the Unlock User Account option.
- Click Proceed in the confirmation dialog box.
- Click Confirm to unlock the user.
OR
- Navigate to Manage > Devices.
- Select the Windows device whose user account(s) you want to unlock.
- Click the Local Accounts tab.
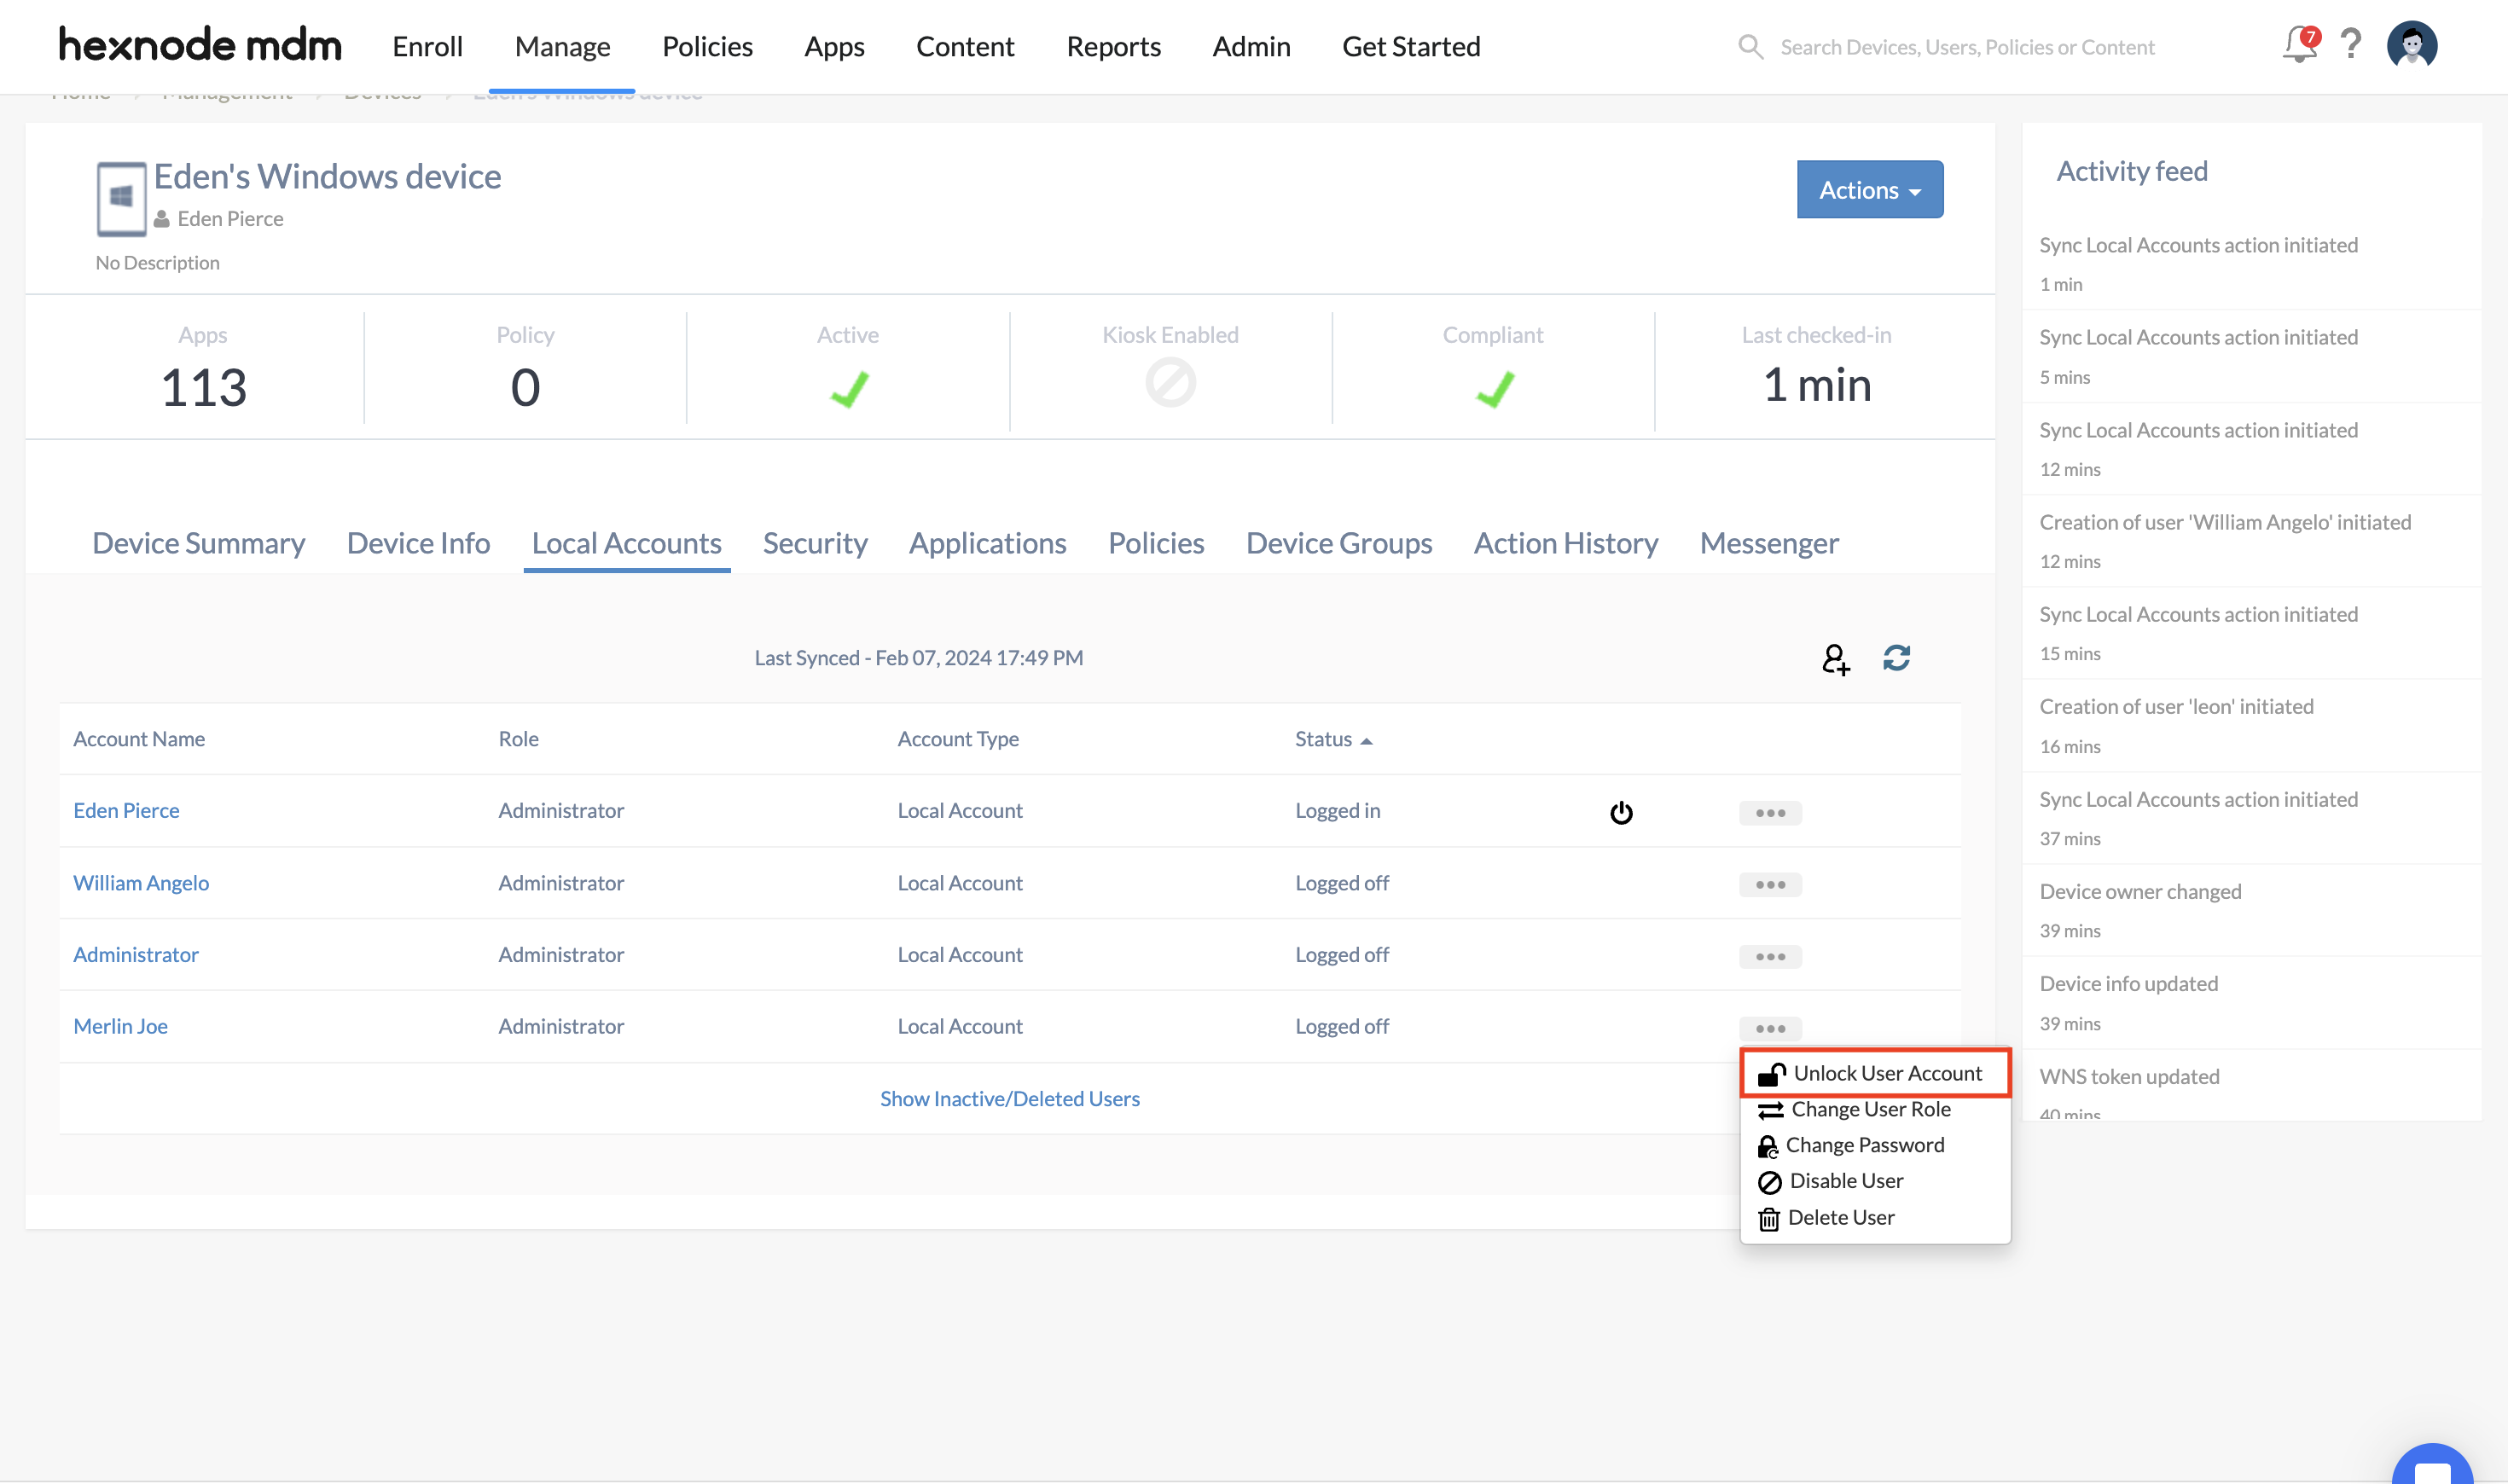
- Click the horizontal three-dot menu corresponding to the respective user.
- Click the Unlock User Account option from the drop-down menu.
- Click Proceed in the confirmation dialog box.
- Click Confirm to unlock the user.
Change User Role
This action allows you to change the role of a user to either Administrator or Standard user.
- Navigate to Manage > Devices.
- Select the Windows device whose user account(s) role you want to change.
- Click the Local Accounts tab.
- Click on the name of the user for whom you want to change the role.
- Click Actions and choose the Change User Role option.
- In the Change User Account Role page, the new role to be assigned for the user will be mentioned. Additionally, you can configure whether the change in user role is temporary by enabling the Change role temporarily checkbox. Specify the duration for the temporary role change next to the Change role for option. Choose 30 minutes, 1 hour, 2 hours, 4 hours, or 12 hours. Click on Proceed.
- Click Confirm to change the user role.
OR
- Navigate to Manage > Devices.
- Select the Windows device whose user account(s) role you want to change.
- Click the Local Accounts tab.
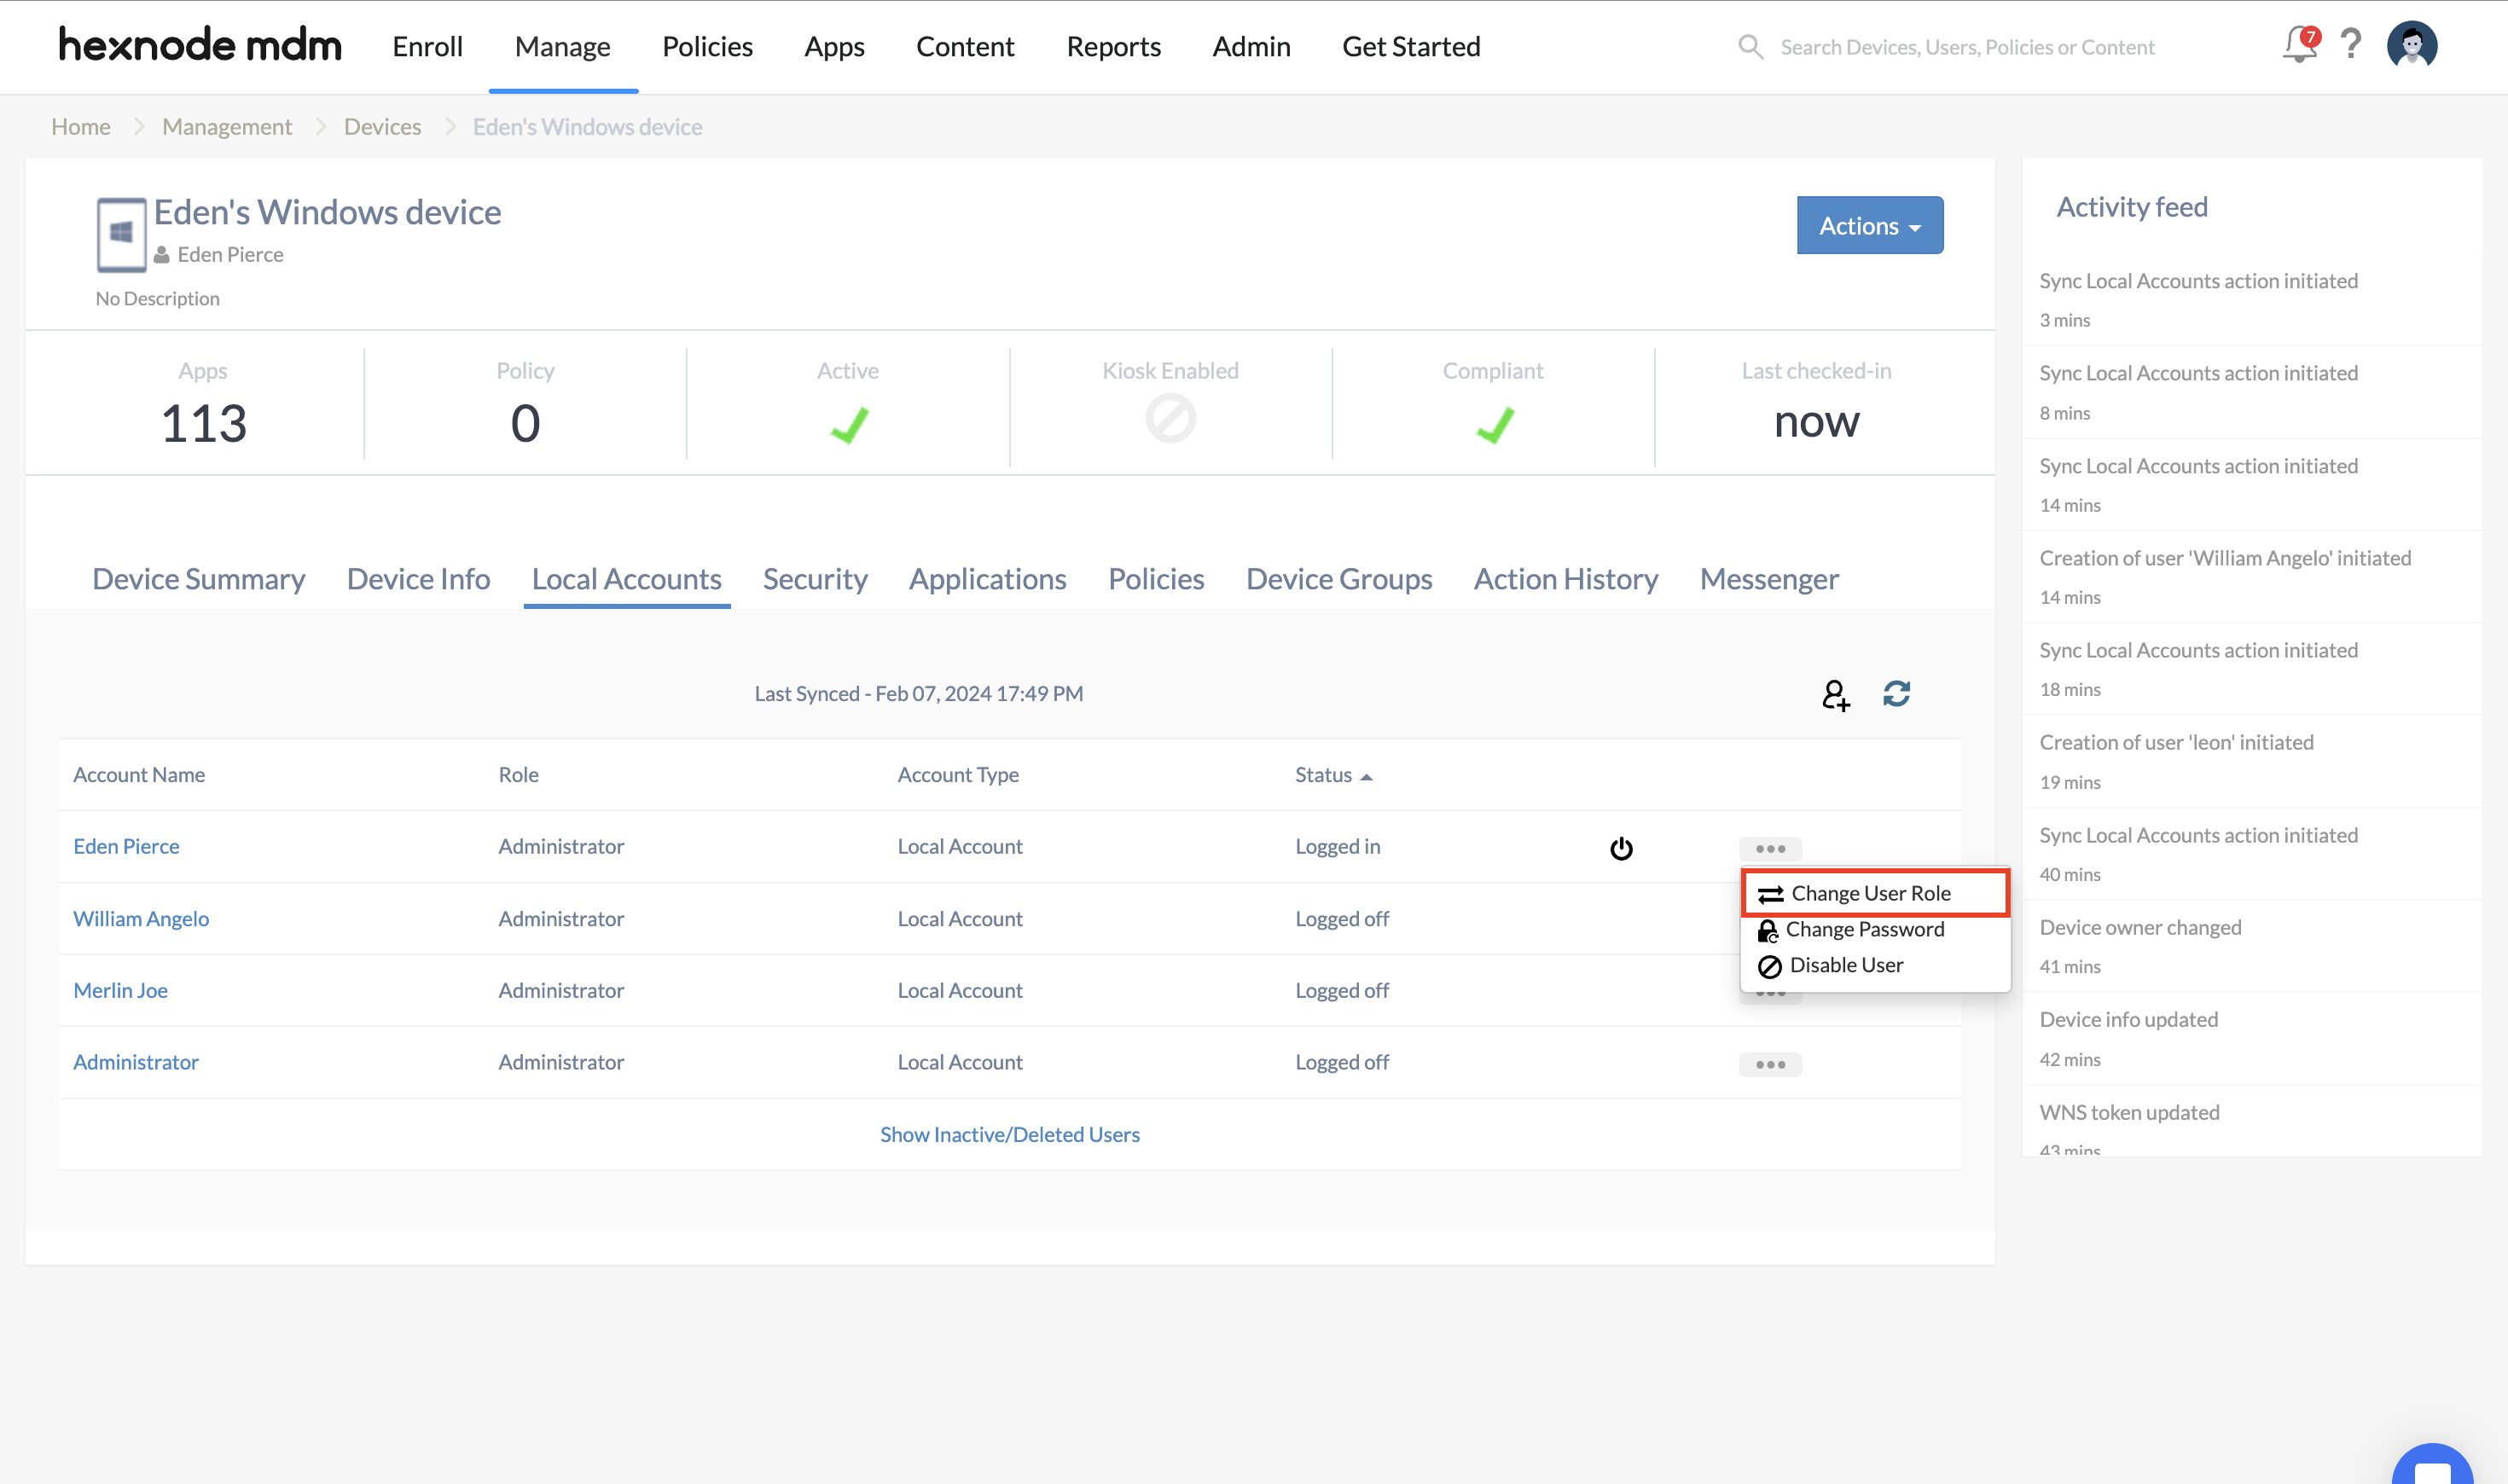
- Click the horizontal three-dot menu corresponding to the respective user.
- Click the Change User Role option.
- In the Change User Account Role page, the new role to be assigned for the user will be mentioned. Additionally, you can configure whether the change in user role is temporary by enabling the Change role temporarily checkbox. Specify the duration for the temporary role change next to the Change role for option. Choose 30 minutes, 1 hour, 2 hours, 4 hours, or 12 hours. Click on Proceed.
- Click Confirm to change the user role.
Change Password
This action allows you to change the user’s password.
- Navigate to Manage > Devices.
- Select the Windows device whose user account(s) password you want to change.
- Click the Local Accounts tab.
- Click the name of the user to which you want to change the password.
- Click Actions and choose the Change Password option.
- Type in your new password, then re-enter the password for verification, and provide a password hint. There are three checkboxes under Verify Password:
- User must change password at next logon.
- Password never expires.
- User cannot change the password.
Check the appropriate boxes accordingly, and then click Proceed.
- Click Confirm to change the password of the user.
OR
- Navigate to Manage > Devices.
- Select the Windows device whose user account(s) password you want to change.
- Click the Local Accounts tab.
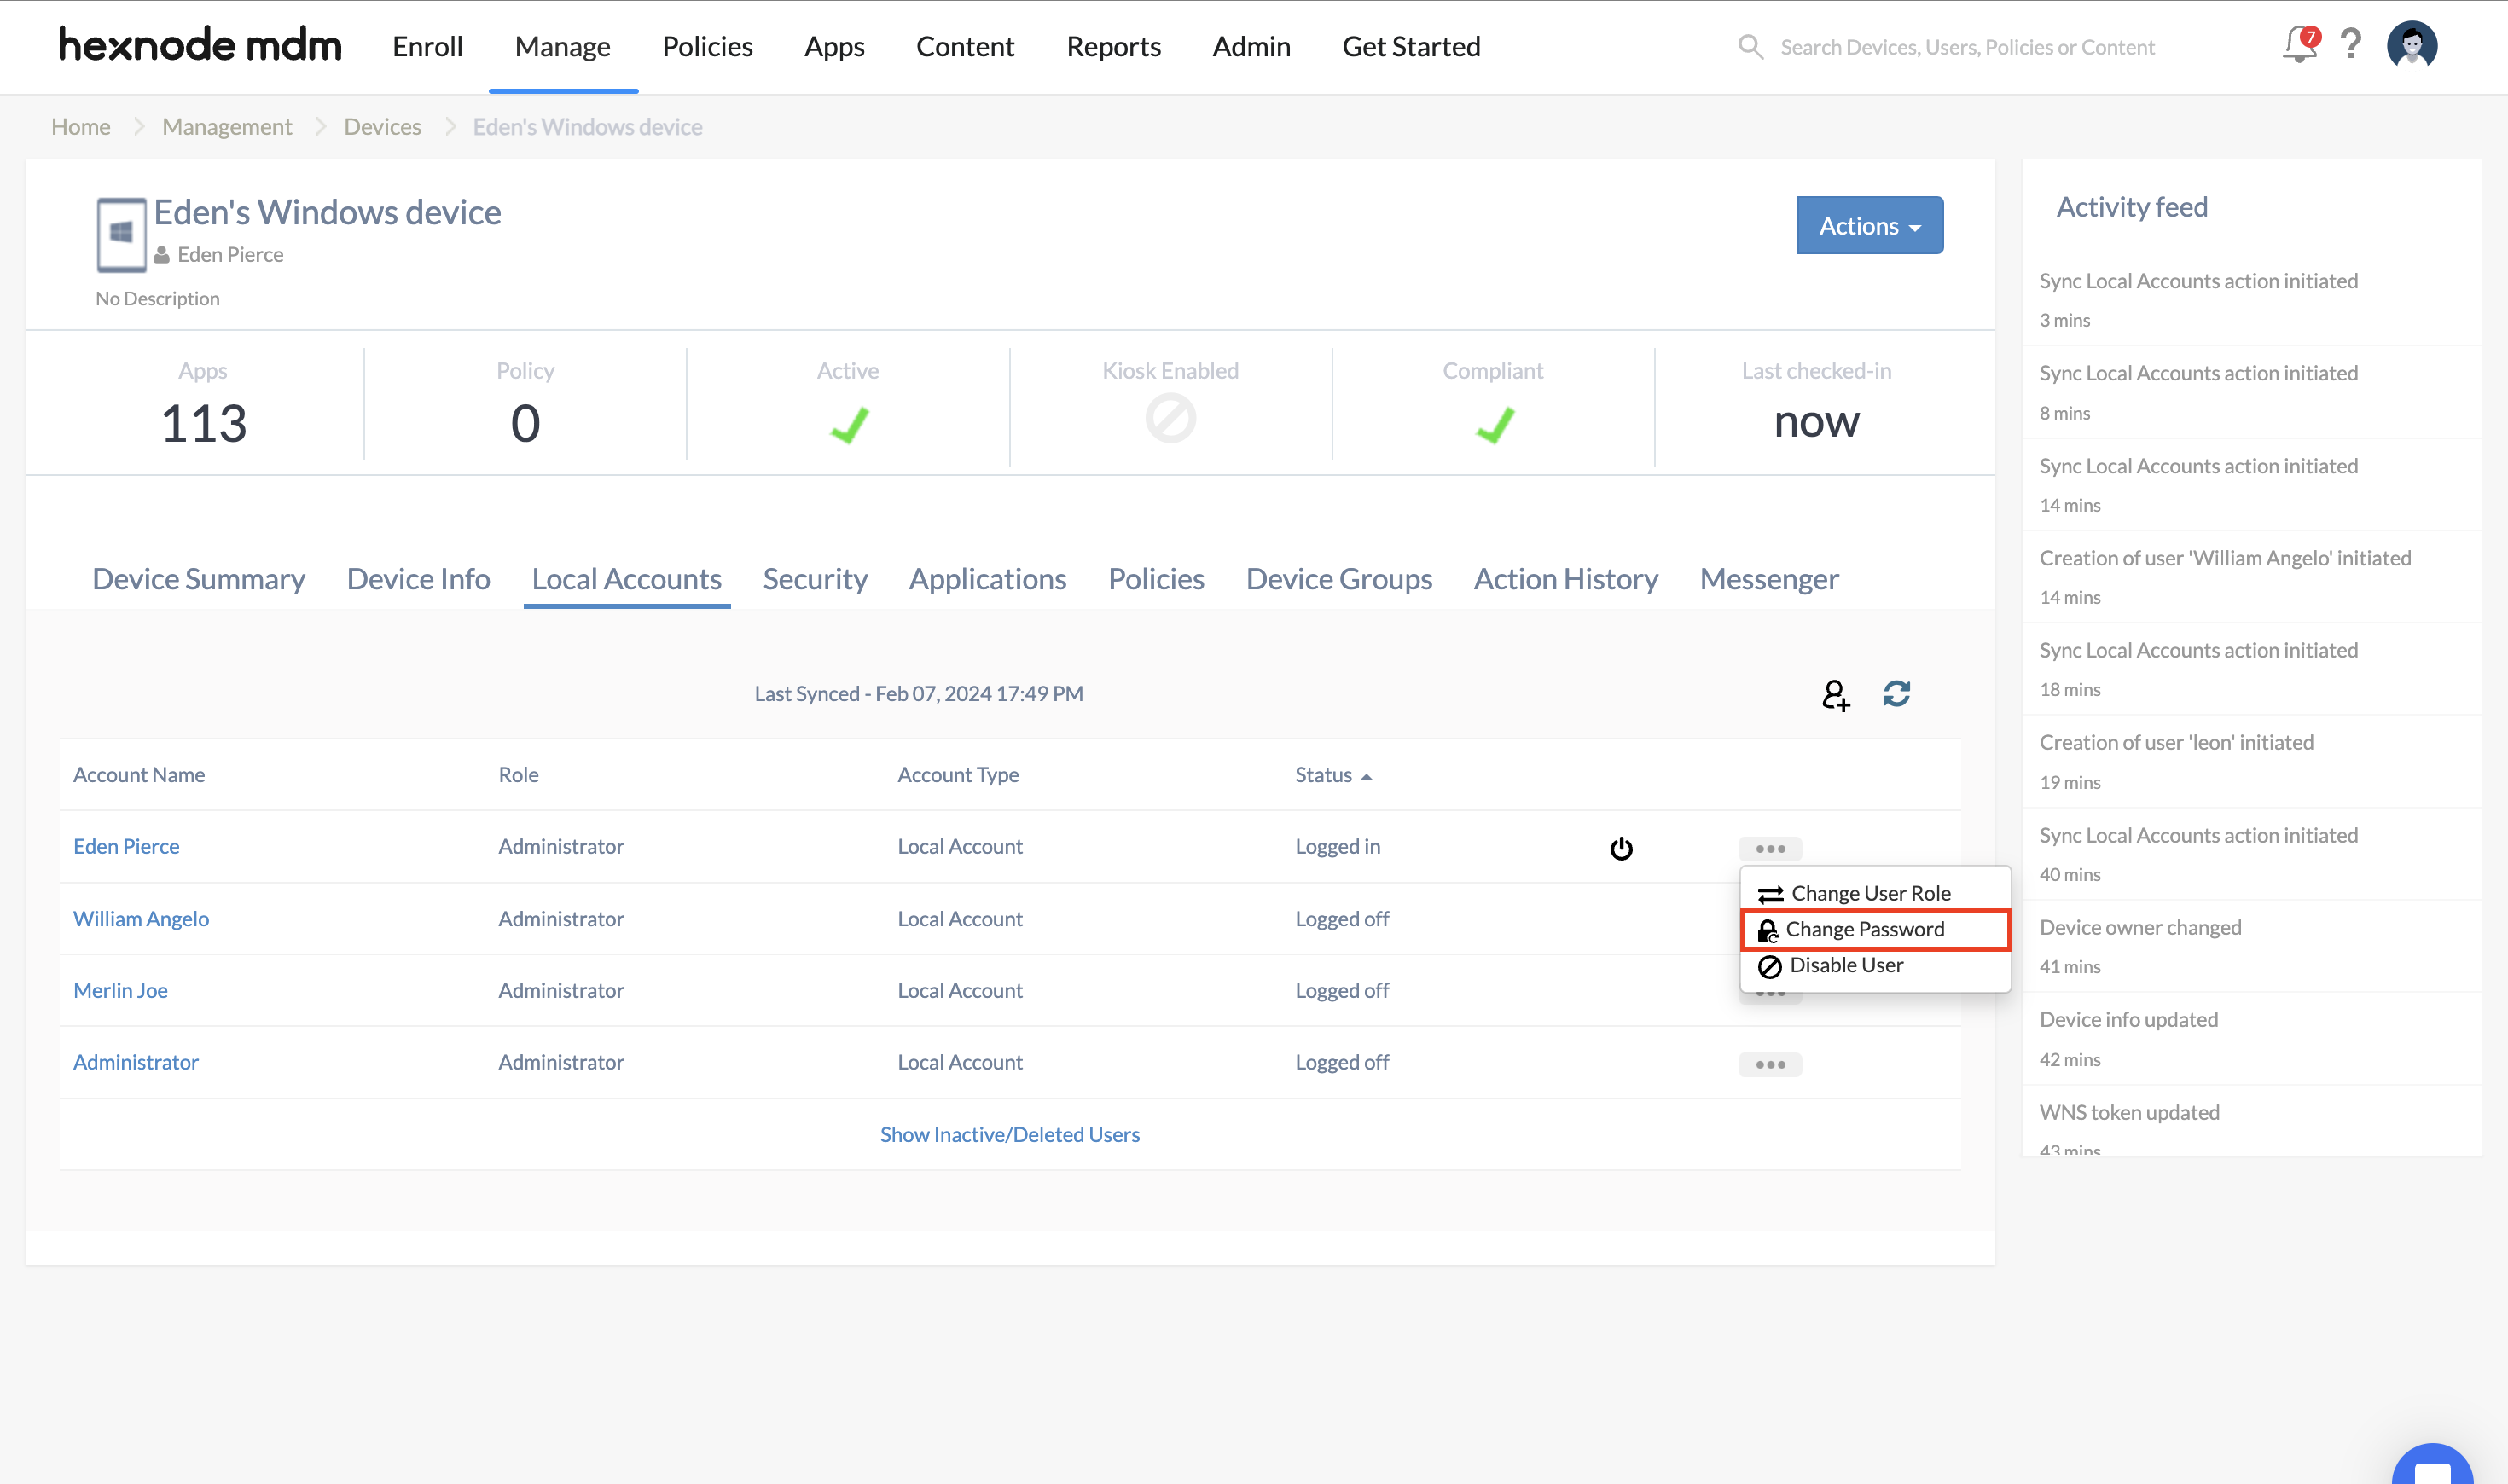
- Click the horizontal three-dot menu corresponding to the respective user.
- Choose the Change Password option from the drop-down menu.
- Type in your new password, then re-enter the password for verification, and provide a password hint. There are three checkboxes under Verify Password:
- User must change password at next logon.
- Password never expires.
- User cannot change the password.
Check the appropriate boxes accordingly, and then click Proceed.
- Click Confirm to change the password of the user.
Disable Account
This action allows you to temporarily restrict a user’s access to the device.
- Navigate to Manage > Devices.
- Select the Windows device whose user account(s) you want to disable.
- Click the Local Accounts tab.
- Click on the name of the user that you want to disable.
- Click Actions and choose the Disable User option.
- Click Proceed in the confirmation dialog box.
- Click Confirm to disable the user.
OR
- Navigate to Manage > Devices.
- Select the Windows device whose user account(s) you want to disable.
- Click the Local Accounts tab.
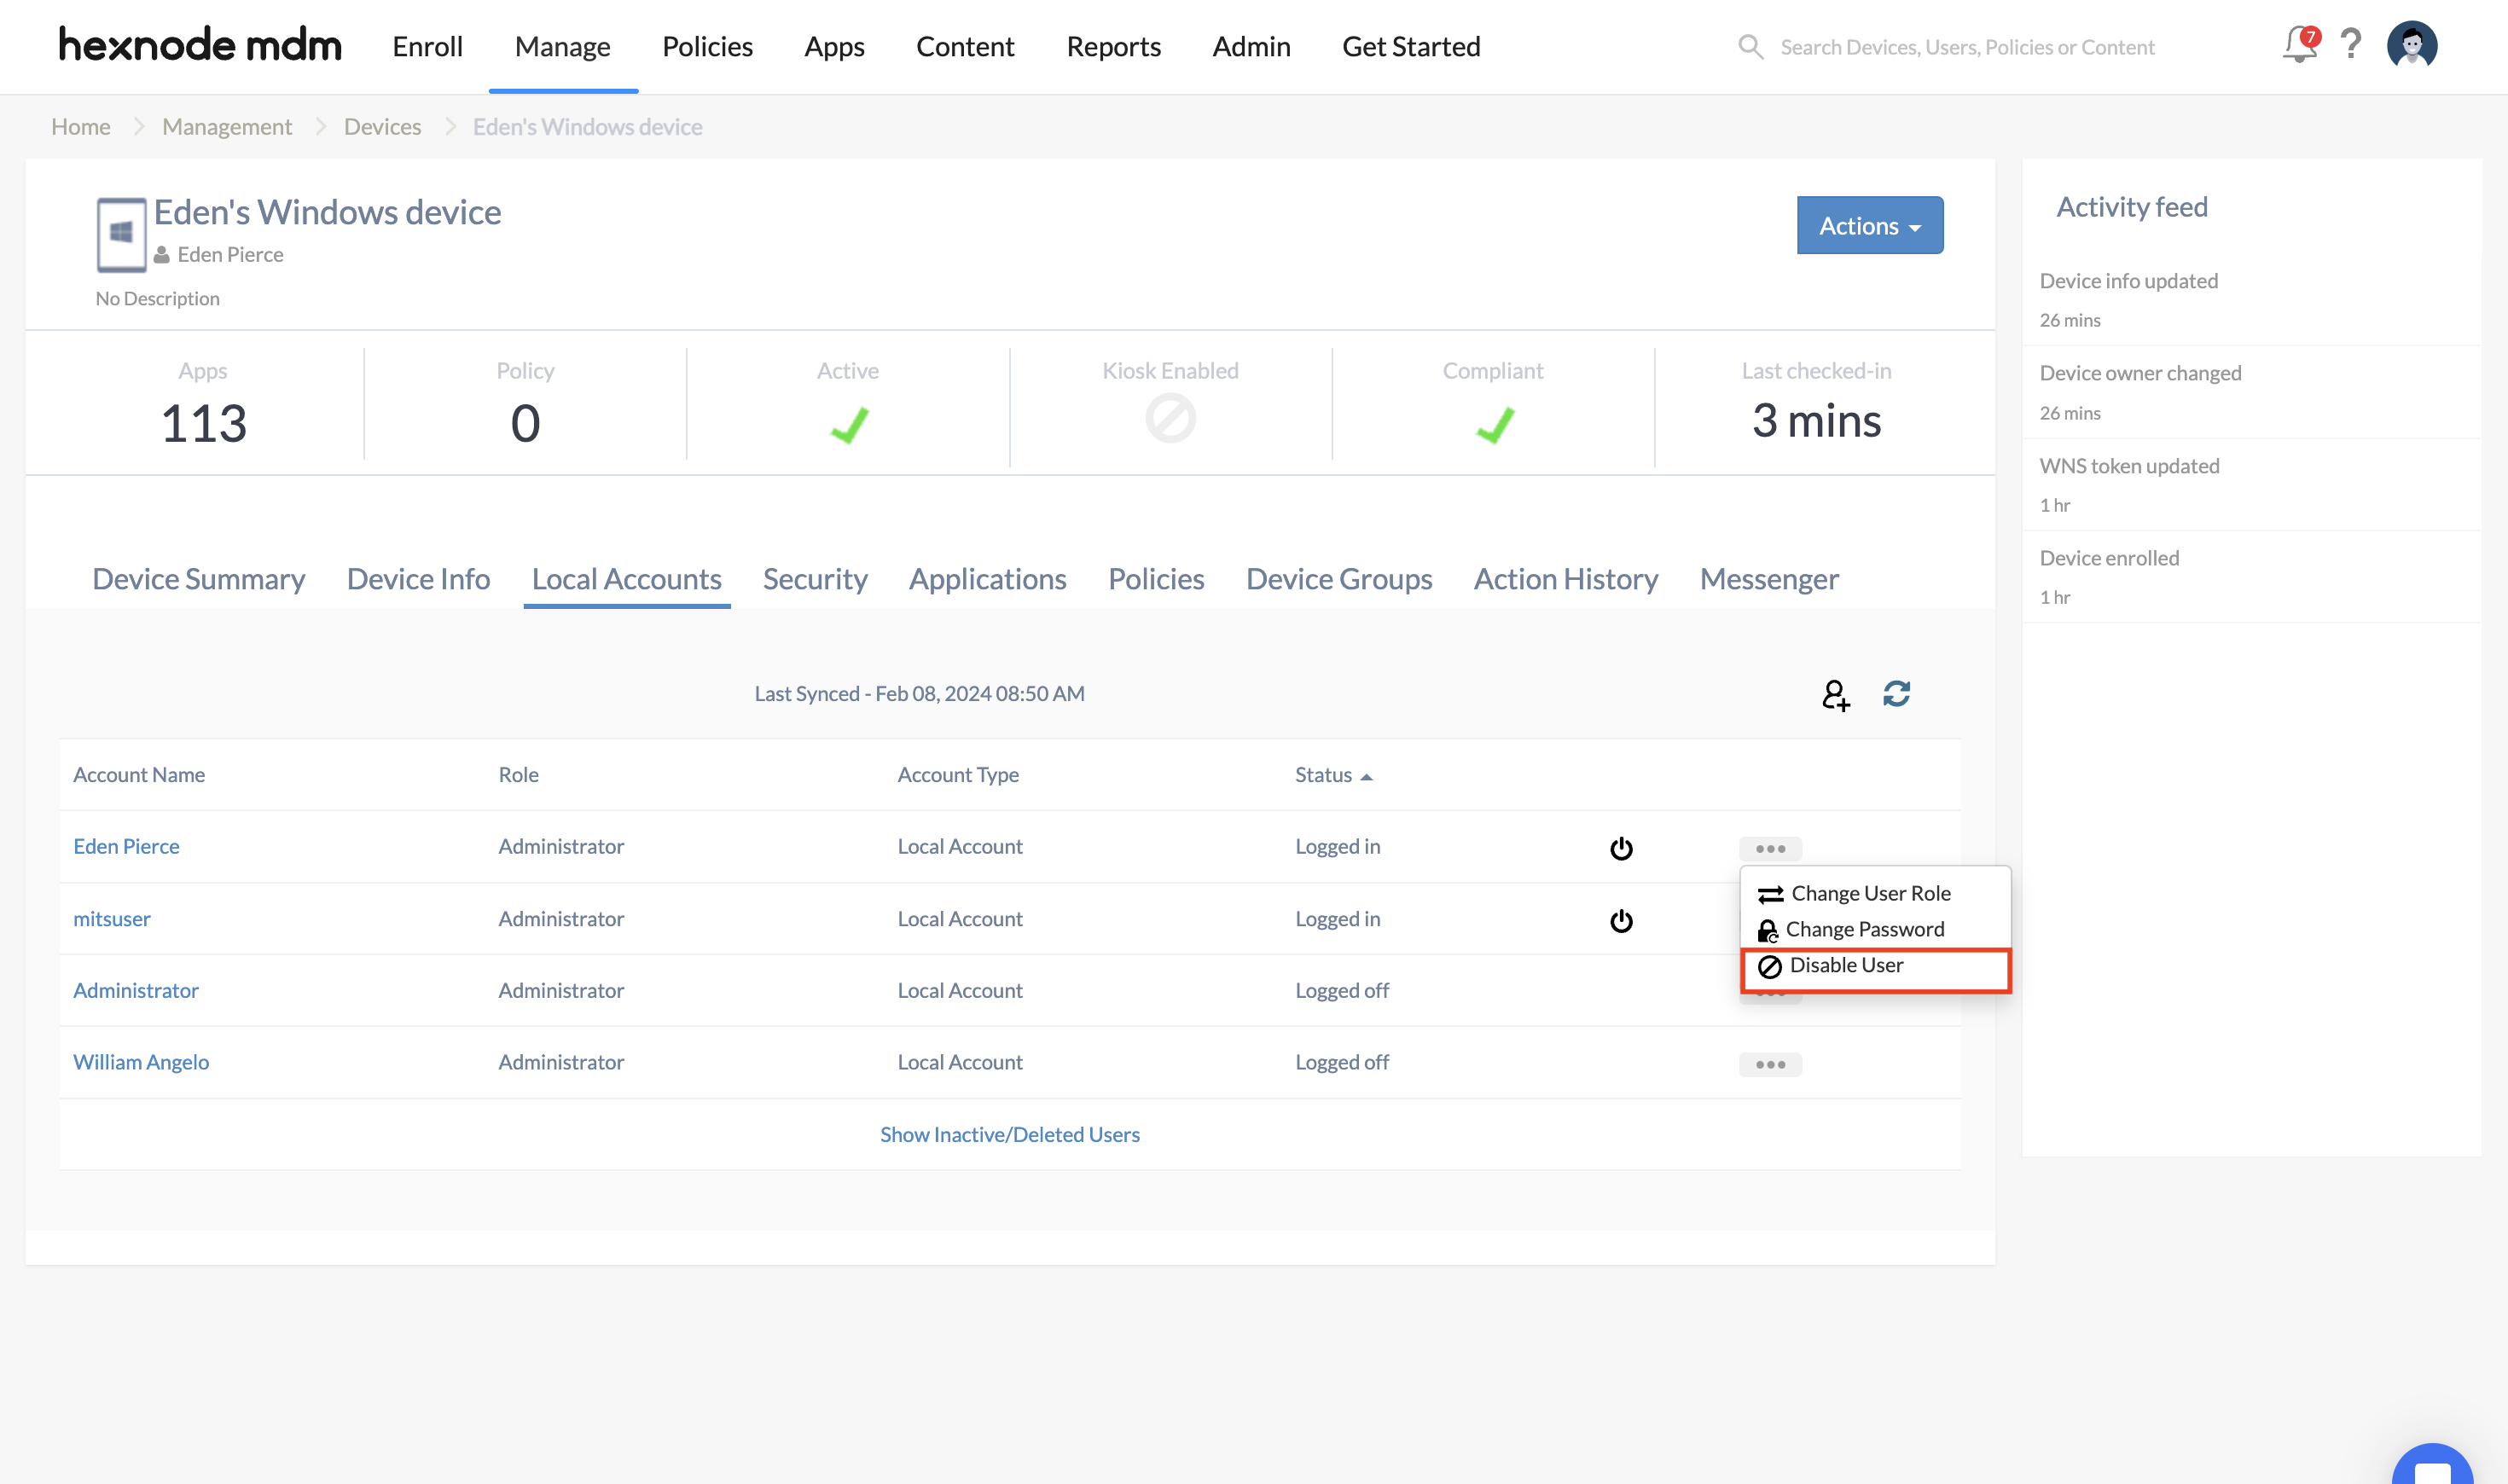
- Click the horizontal three-dot menu corresponding to the respective user.
- Click the Disable User option from the drop-down menu.
- Click Proceed in the confirmation dialog box.
- Click Confirm to disable the user.
An IT Admin must enable a disabled user from the portal for them to access their device.
Enable Account
This action allows you to enable a user account that was previously disabled using the Disable User action.
- Navigate to Manage > Devices.
- Select the Windows device whose user account(s) you want to enable.
- Click the Local Accounts tab.
- Click on the name of the user that you want to enable.
- Click Actions and choose the Enable User option.
- Click Proceed in the confirmation dialog box.
- Click Confirm to enable the user.
OR
- Navigate to Manage > Devices.
- Select the Windows device whose user account(s) you want to enable.
- Click the Local Accounts tab.
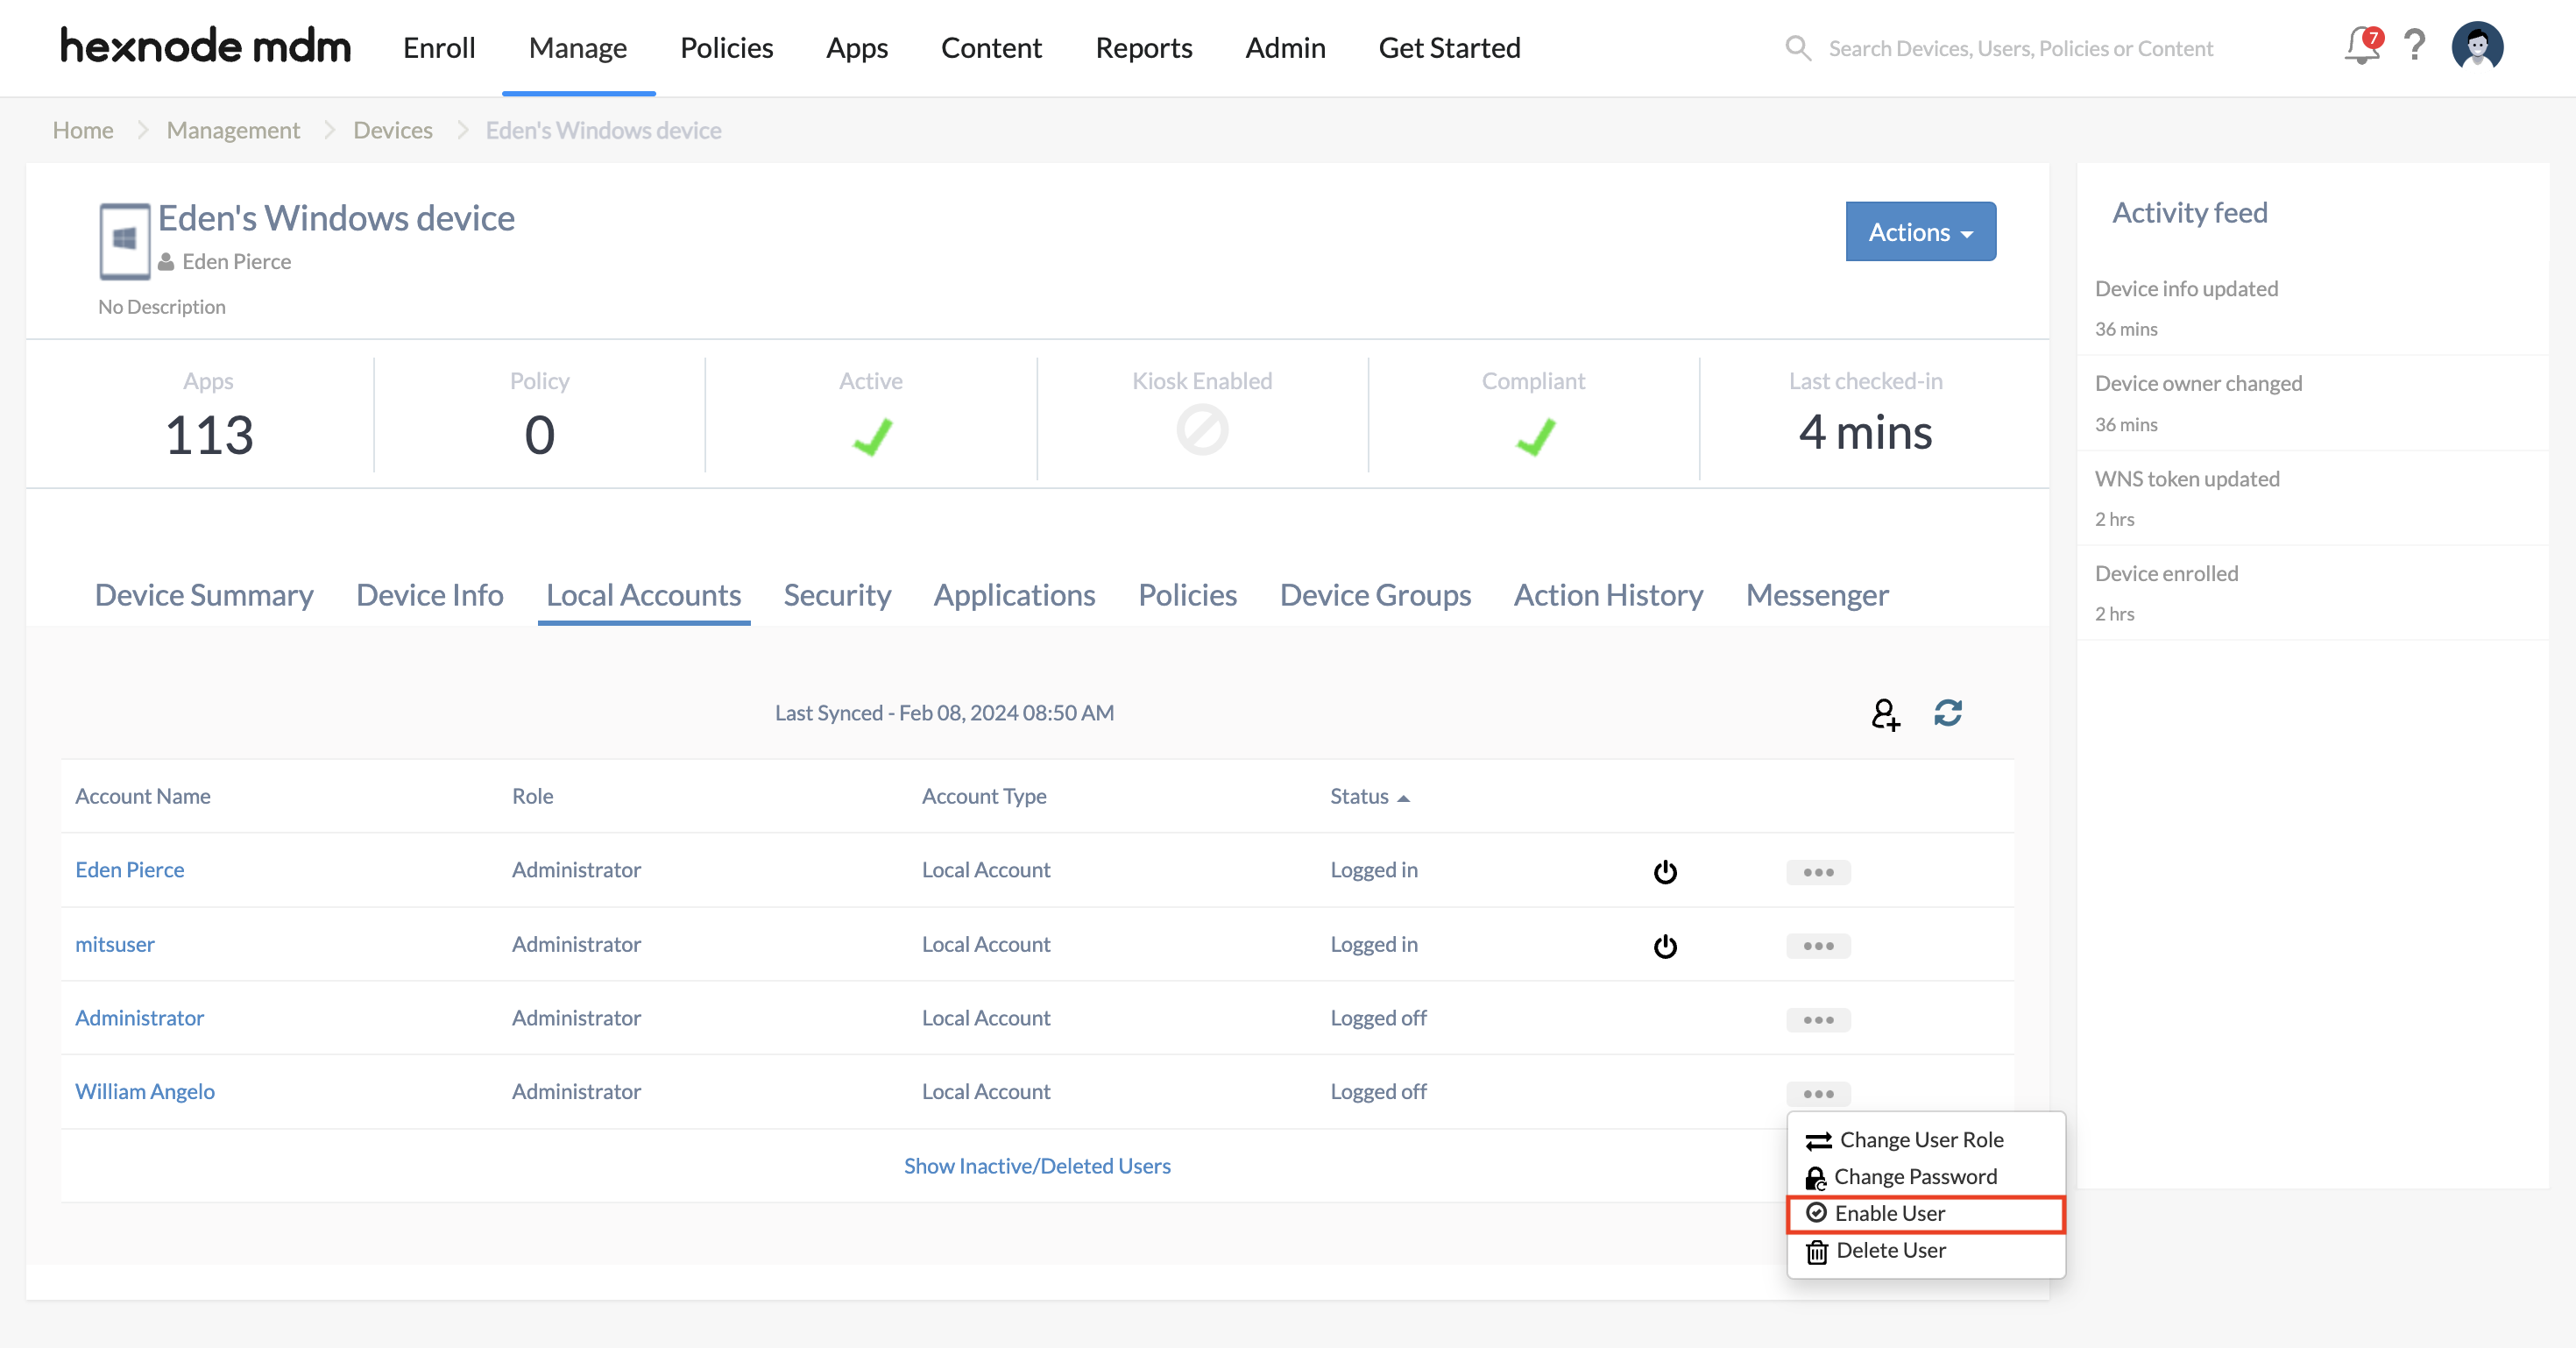
- Click the horizontal three-dot menu corresponding to the respective user.
- Click the Enable User option from the drop-down menu.
- Click Proceed in the confirmation dialog box.
- Click Confirm to enable the user.
Delete Account
This action allows you to delete a user from the device.
- Navigate to Manage > Devices.
- Select the Windows device whose user account(s) you want to delete.
- Click the Local Accounts tab.
- Click on the name of the user that you want to delete.
- Click Actions and choose the Delete User option.
- Click Proceed in the confirmation dialog box.
- Click Confirm to delete the user.
OR
- Navigate to Manage > Devices.
- Select the Windows device whose user account(s) you want to delete.
- Click the Local Accounts tab.
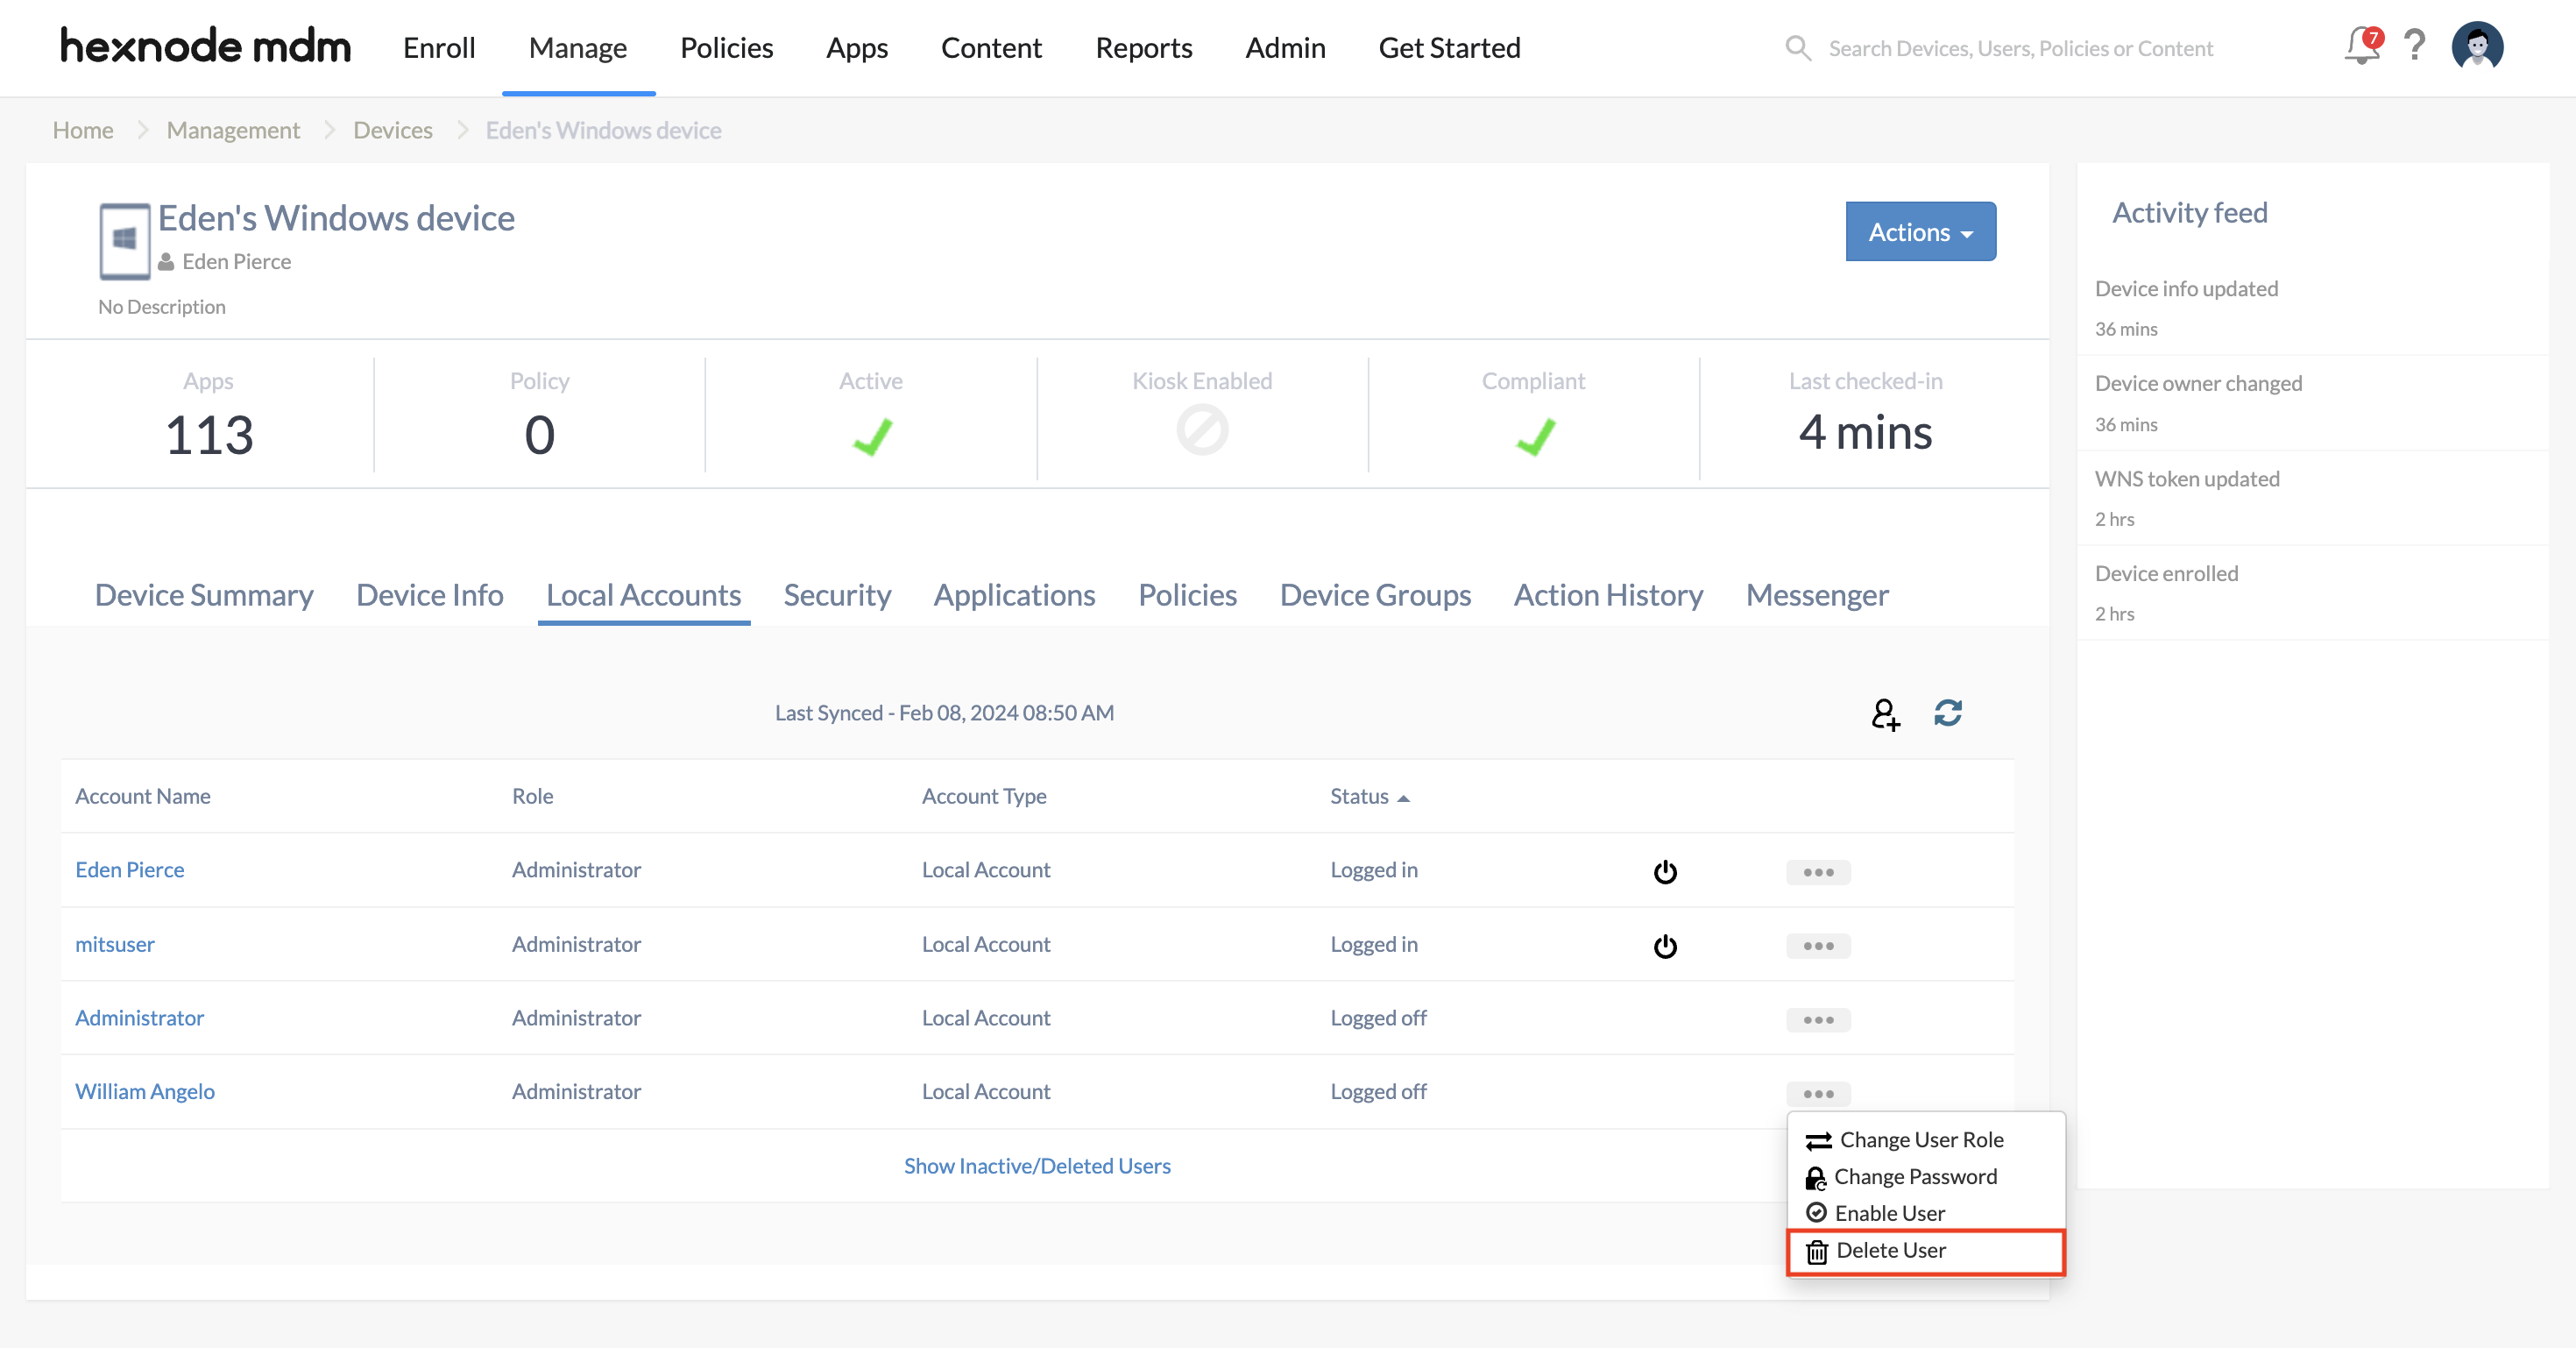
- Click the horizontal three-dot menu corresponding to the respective user.
- Click the Delete User option from the drop-down menu.
- Click Proceed in the confirmation dialog box.
- Click Confirm to delete the user.
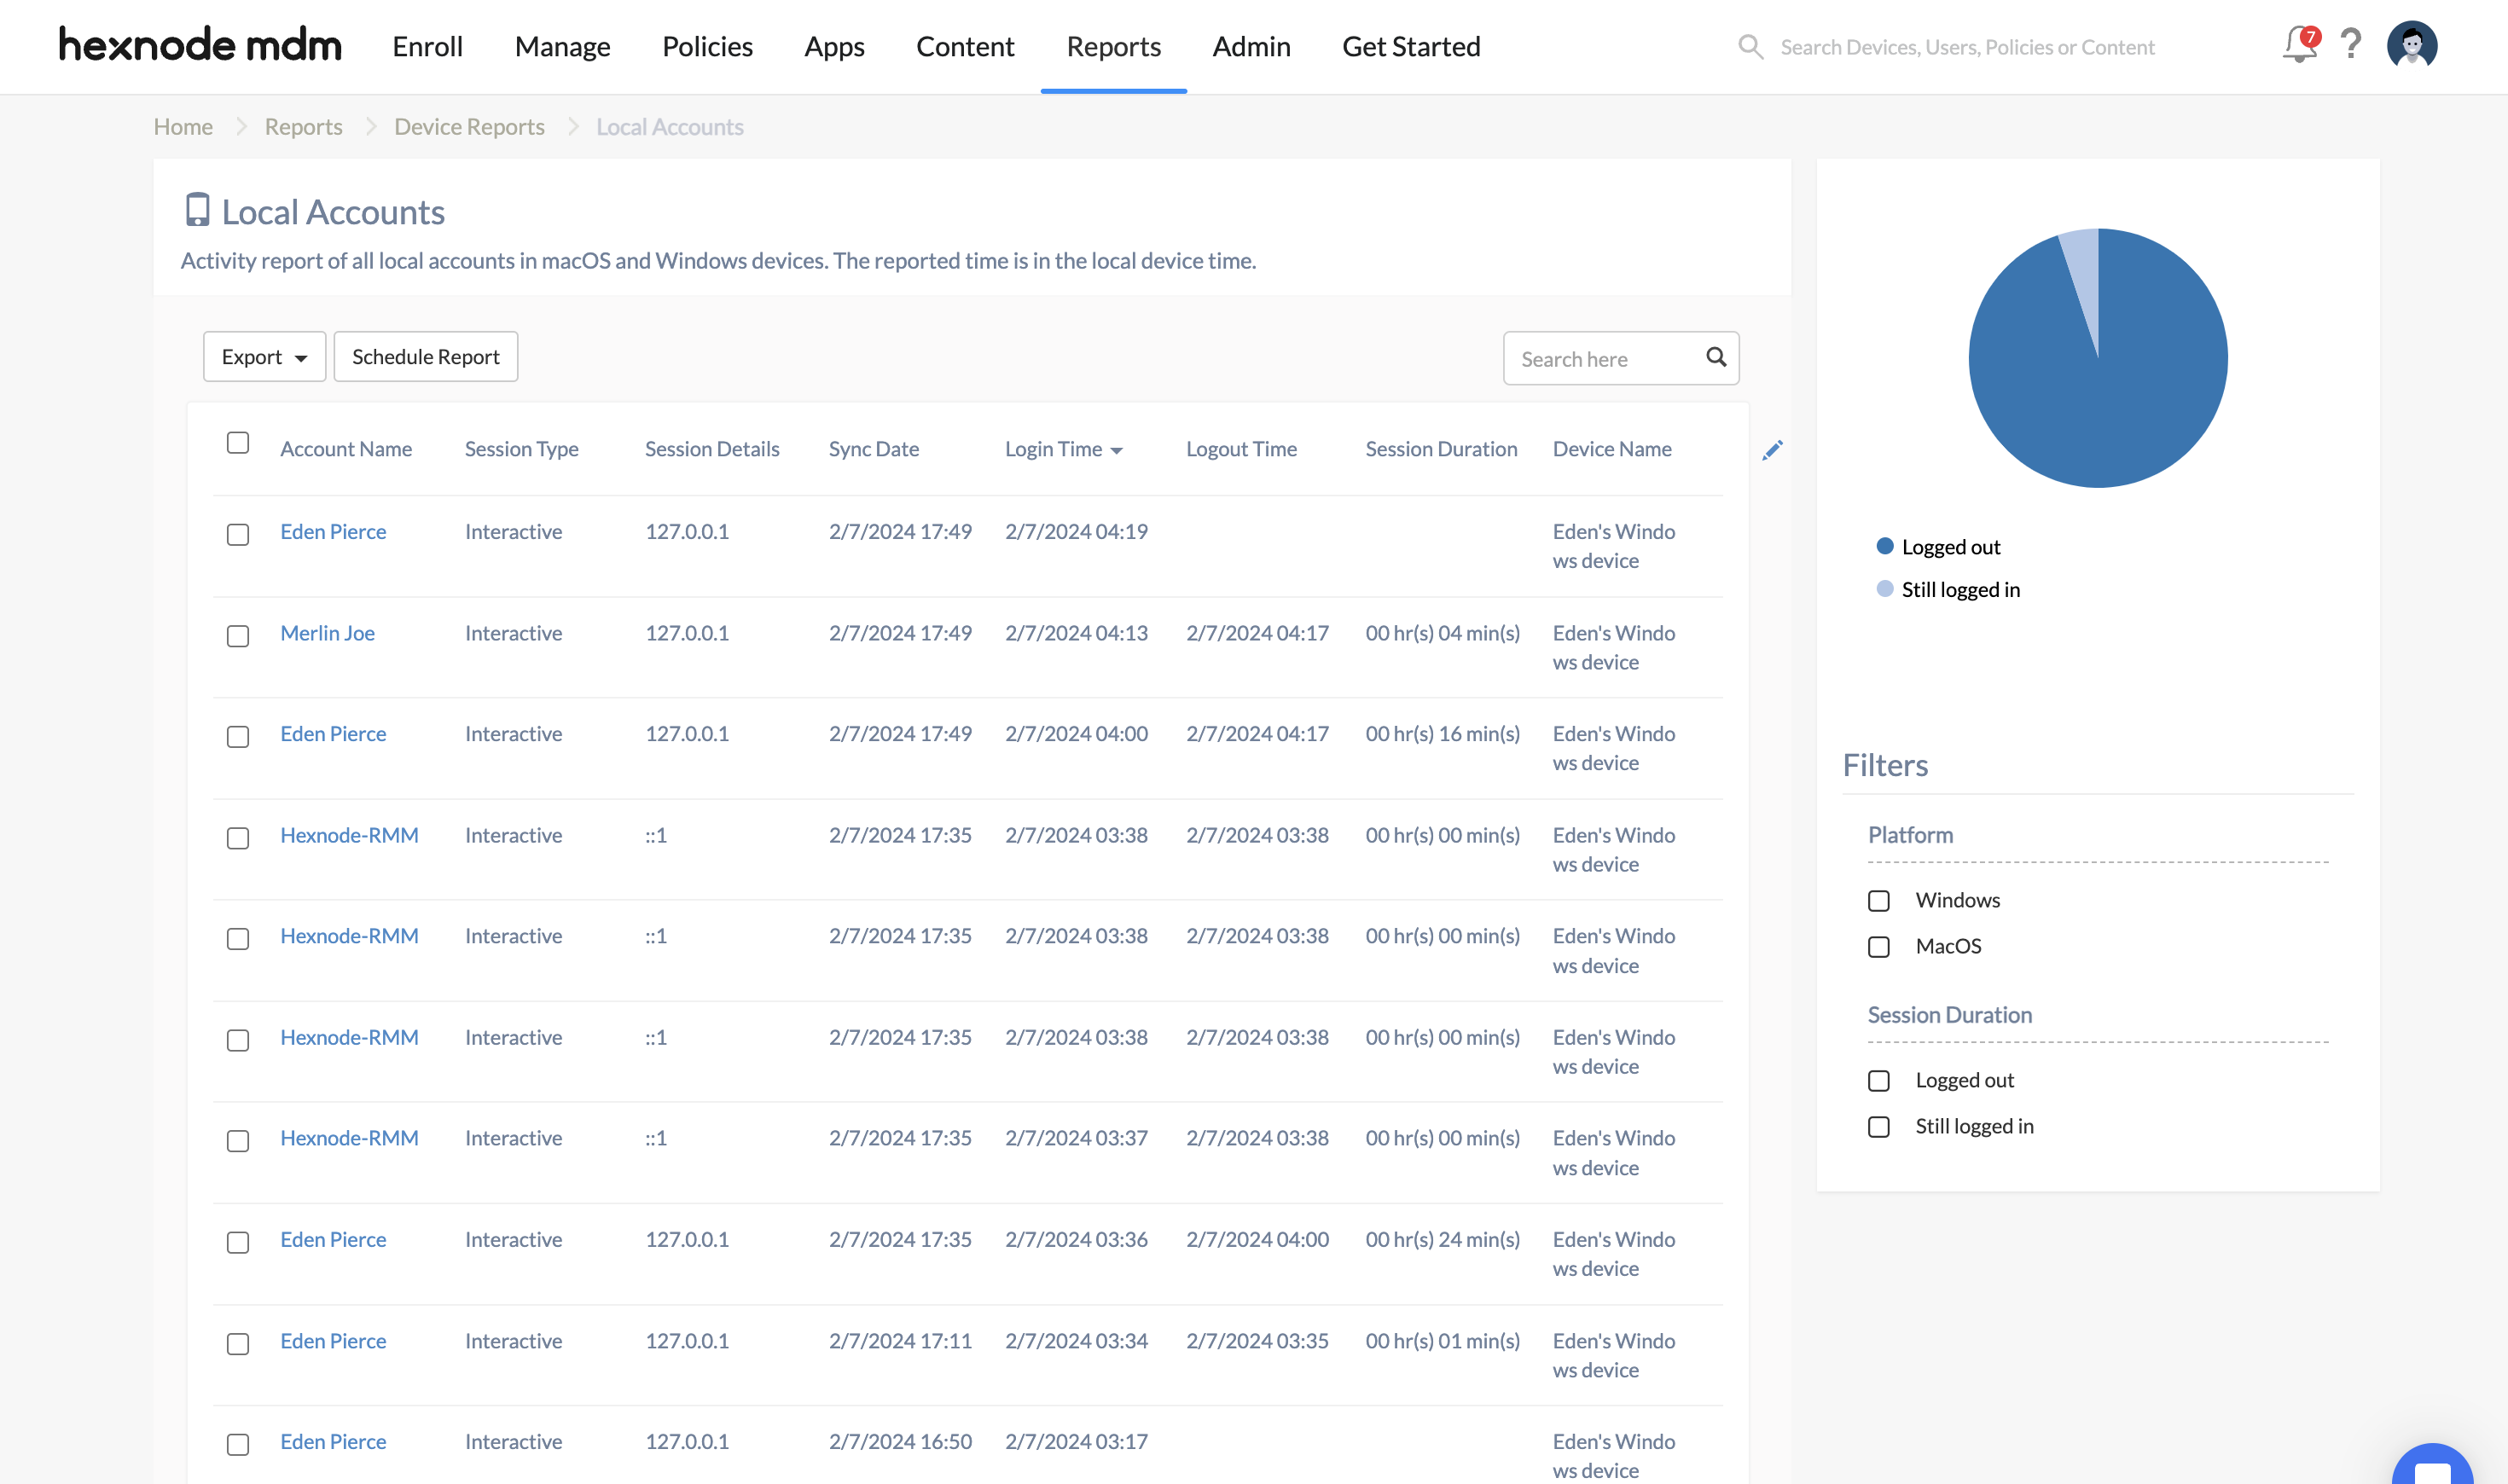
Report of Local Accounts on Windows devices
Hexnode allows you to retrieve a detailed report outlining all user accounts across various Windows and macOS devices enrolled in Hexnode UEM. The report provides insights into session types, session details, sync dates, login and logout times, session durations, and more for each local user account on your Windows device. To access this report, simply navigate to Reports > Device Reports > Local Accounts.

