Category filter
Exporting a report from Hexnode UEM
Hexnode UEM: Device Report Export Documentation
This guide provides the structured workflow generating and downloading various reports and data related to managed devices, applications, users, and policies from the Hexnode UEM portal.
The Exports Tab: Centralized Management
The Exports tab in Hexnode UEM acts as a dedicated repository for all generated Report Files originating from both Built-in and Custom Reports. The Download option in the Exports tab allows administrators to save Generated Report Files directly to their local machine for offline analysis and record-keeping.
- Location: Navigate to Reports > Exports
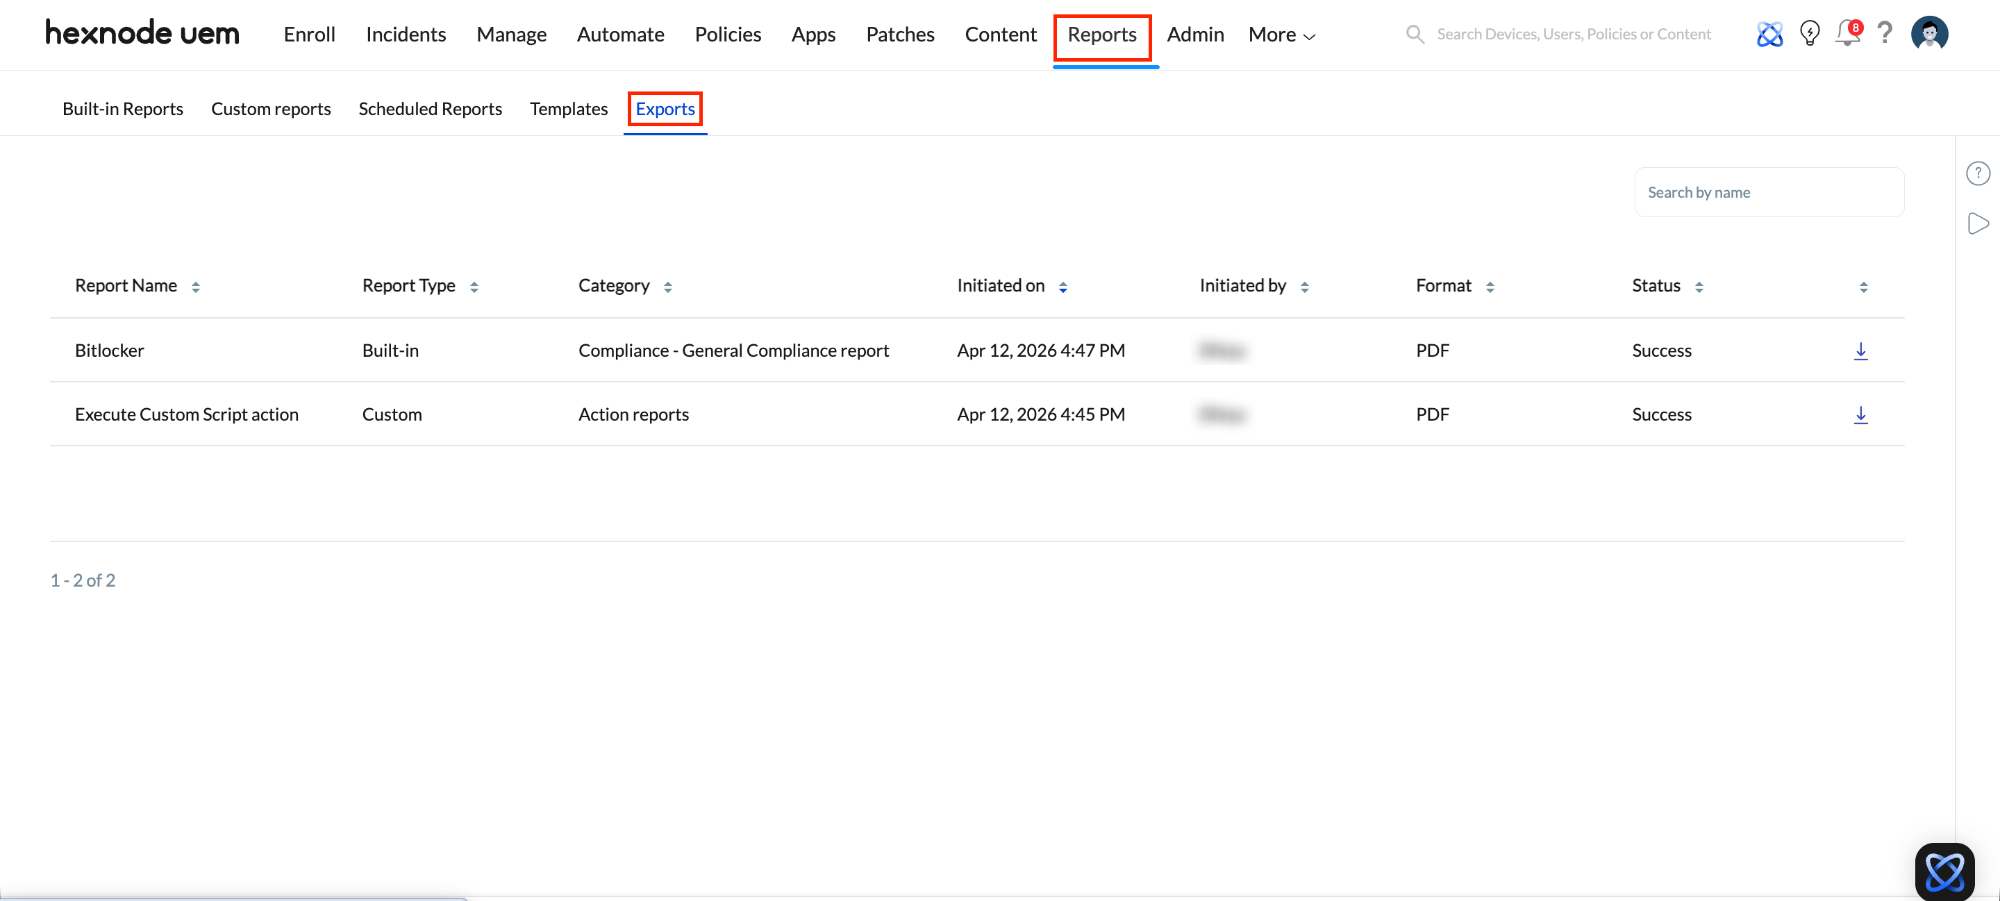
- Functionality: The Exports tab in Hexnode UEM enables administrators to generate and download various reports and data extracts, such as device, application, user, policy, and audit reports.
- Historical Access: Admins can revisit this tab to re-download previously existing, generated reports, ensuring that data snapshots from specific timeframes are readily available without re-running needing to generate the same report again.
Reporting & Data Export Framework
Operational frameworks for leveraging Hexnode’s reporting engine to drive compliance, business intelligence, and endpoint lifecycle management
- Compliance and Auditing
Organizations often need to prove that their device fleet meets specific security standards (like SOC 2, HIPAA, or GDPR).
- Use Case: You can export compliance reports for external auditors to corroborate that all company-owned devices have encryption enabled, passcodes enforced, and OS versions up to date.
- Benefit: Provides instant, offline, and verifiable proof of your organization’s security posture.
- Integration with Third-Party Tools
While Hexnode has native integrations, you may use specialized tools that don’t directly connect to the platform. These reports act as a source of information to be integrated with such third-party tools.
- Use Case: You can export device inventory data as a CSV file and import it into an IT Service Management (ITSM) tool like ServiceNow, Jira Service Management, or an asset management database. You could also import this data into Business Intelligence (BI) tools like Tableau or Power BI for custom dashboarding.
- Benefit: Bridges the gap between Hexnode and other enterprise software, allowing for unified asset tracking and advanced analytics.
Step-by-Step Workflow: Exporting Device Reports
To initiate an export, follow the standard Hexnode UEM procedure:
- Access the Reports Module: Log in to your Hexnode UEM console and click on the Reports tab.
- Select Category: Choose the report category relevant to your needs:
- Built-in Reports: Pre-configured data summaries designed to provide immediate, actionable insights into your managed devices, applications, users, and compliance status without requiring custom setup.
- Custom Reports: Reports tailored with specific criteria and saved by the admin.
- Choose Report Type: Click on the specific report type you wish to view. This will open the Report Details page.
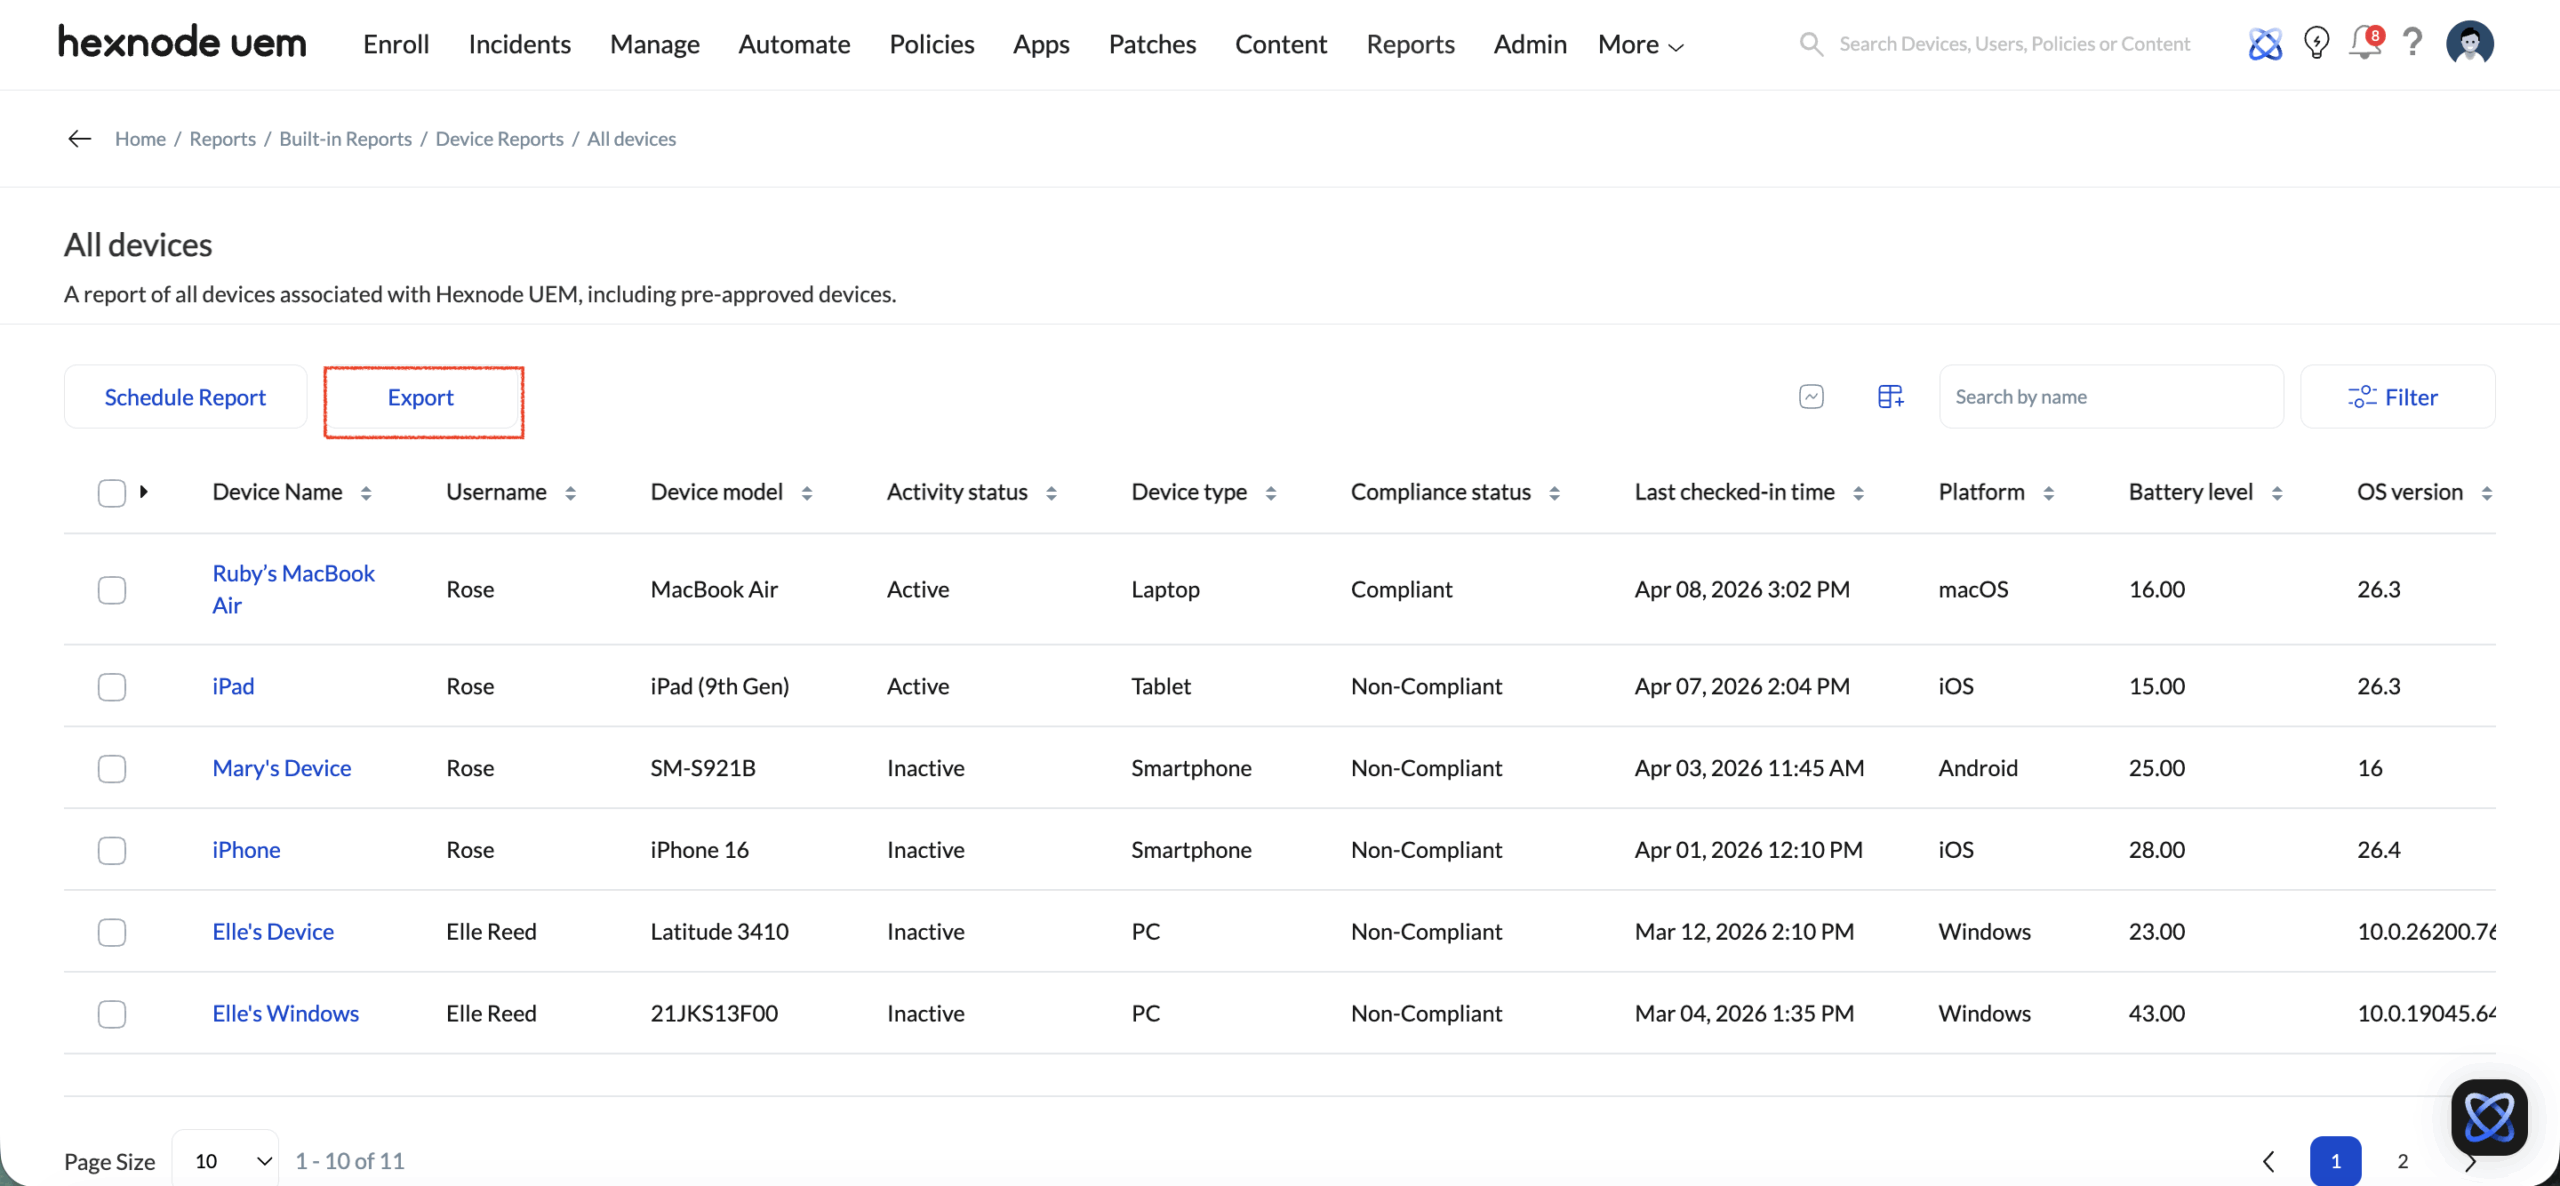
- Initiate Export: Click the Export button located at the top of the report table.
Customizing the Export Configuration
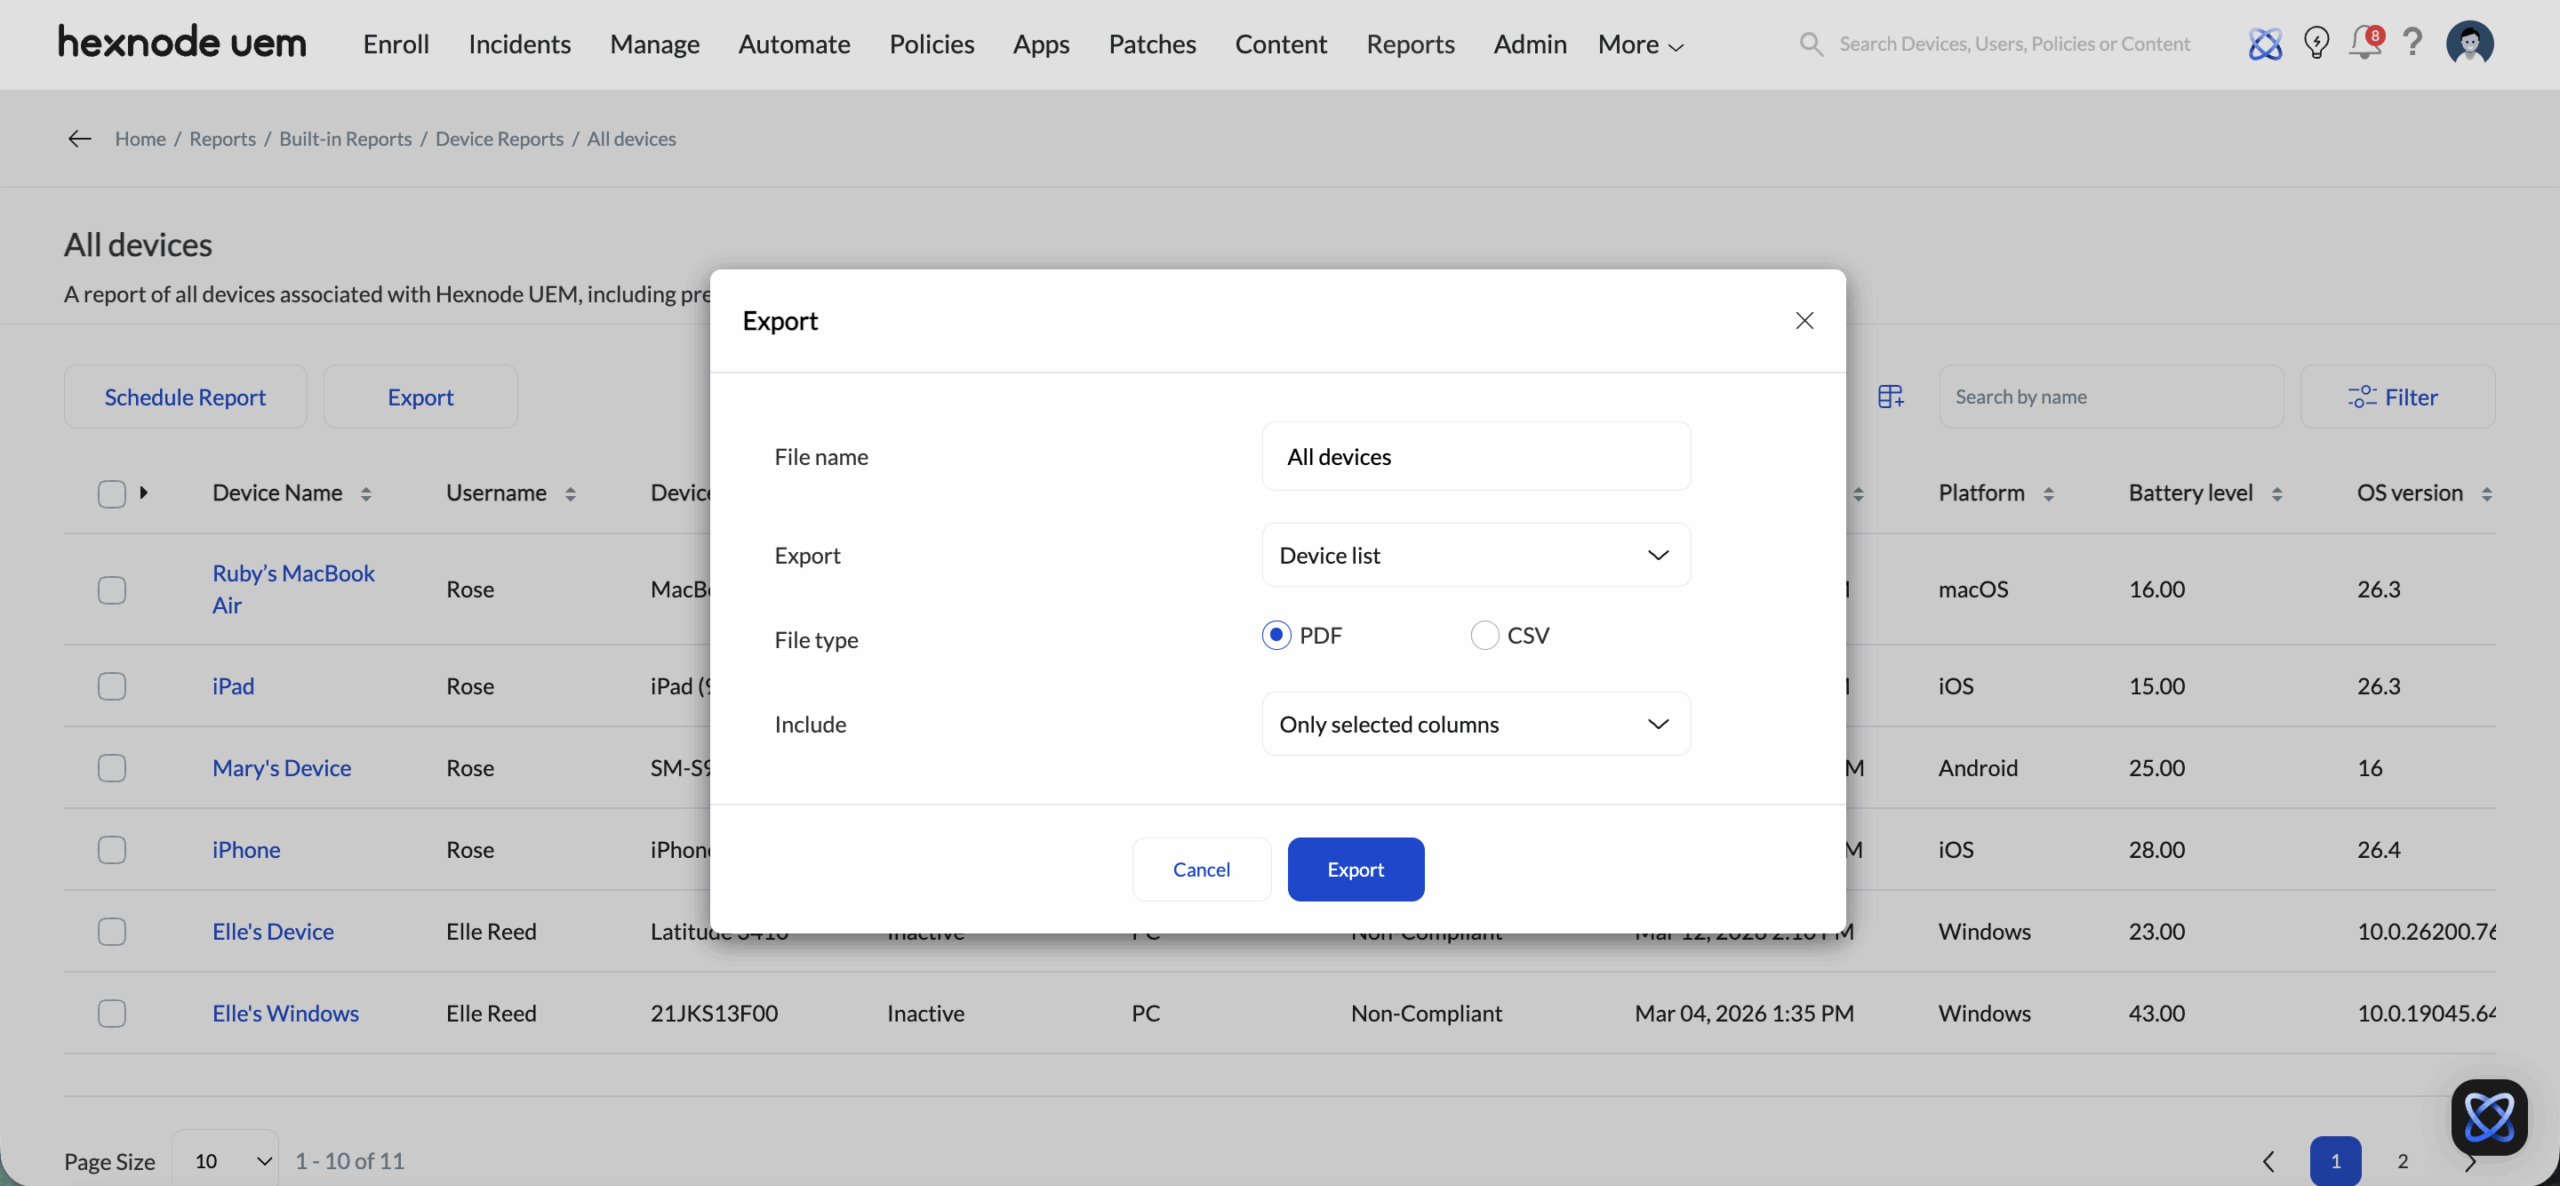
Upon clicking Export, a configuration window appears. Hexnode allows for the following customizations:
- File Name: Define a custom name for the report for easy identification in the Exports list.
- File Type:
- CSV: Ideal for processing large datasets in external analytical tools.
- PDF: Ideal for non-editable, professional documentation and compliance sharing.
- Include Columns: Select All Columns for a comprehensive data dump or choose Specific Columns to limit the data to relevant parameters (e.g., Device Name, Serial Number, Last Sync).
Finalizing and Downloading
Once you click Export in the customization window:
- Processing: A confirmation pop-up will indicate that the report export was successful.
- Accessing the File: Access your generated files by clicking the View Exports shortcut in the pop-up notification or by navigating to Reports > Exports at any time.
- Download: Locate your file in the list and click the Download icon. The file will be saved to your local machine in the format specified (CSV or PDF).
FAQs
- How long will exported reports remain available in the Exports subtab?
Any report whether it is a built-in report or a custom report, will only be available in the Exports subtab for 24 hours. Once that 24-hour window closes, the report is automatically removed from the list.
- What is the procedure for managing a report export that fails to generate?
- Is there a limit to the number of columns that can be included when exporting a report?
The column limit depends entirely on the file format chosen for the export:
- PDF Export: A maximum of 38 columns can be exported. The system does not support more than 38 columns for this format.
- CSV Export: There is no limit; all available columns can be exported successfully.
If a report export fails, there is no need to start over. Go to the Exports subtab and look for the failed report. Click the re-initiate icon to try the export again immediately.
