


Category filter
How to Create, Modify, Delete, Clone or Archive Policies?
A policy is a set of configurations, restrictions and apps that are defined first and then applied across a range of devices, users and groups within Hexnode UEM. You can either create a new policy, modify an existing policy, clone a policy, archive a policy, or delete a policy if not required.
Policy Template
Policy templates can be created in advance with the required configurations. While creating a policy, you can choose from the existing templates and then associate the policies to relevant devices.
- Log in to your Hexnode portal.
- Navigate to Policies > Templates > New Template.
- Provide a template name and description.
- Select the required configurations and save the template.
- Navigate to Policies > My Policies > New Policy.
- Choose any of the templates.
- Go to Policy Targets and associate the policy with devices.
- Save the policy.
- Go to Policies > My Policies.
- Select the existing policies that need to be saved as templates.
- Click Manage > Save as template(s).
Create New Policy
- Log in to your Hexnode UEM Portal.
- Go to Policies.
- Click New Policy.
- A pop-up appears from where you can select from the existing templates or click New Blank Policy.
- It will take you to the policy creation page.
- Policy Name: Provide a suitable name to identify the policy.
- Description: Provide a brief description about the policy.
- Depending upon the type of device the users have, select the appropriate settings.
- iOS.
- Android.
- Windows.
- macOS.
- Apple TV.
- Linux.
- visionOS.
- ChromeOS.
- Kiosk lockdown – Android kiosk lockdown, iOS/iPadOS kiosk lockdown, Windows kiosk lockdown, Apple TV kiosk lockdown, ChromeOS kiosk lockdown.
- General Settings.
- Policy Targets
- Configure the required settings for the devices.
- Click on Save to save the policy.
Modify an existing Policy
- Log in to your Hexnode UEM Portal.
- Go to Policies.
- Select an existing policy to modify it. The policy summary will be displayed, including details such as the policy version, type, creation and modification details, number of target devices, and the configured settings.
- Click Manage in the top right corner, then select Modify from the dropdown.
- If required, change the policy name and description.
- Make the necessary changes under the policy and click on Save.
Clone a Policy
- Log in to your Hexnode UEM Portal.
- Go to Policies.
- Click on the clone icon at the right side of the policy to be cloned.
- It creates a copy of the selected policy with its same configurations.
- Make the necessary changes and associate the policy with devices.
You can also clone a policy by clicking on an existing policy from the Policies tab. On the policy summary page, click Manage in the top right corner and choose Clone from the dropdown.
Archive a Policy
- Log in to your Hexnode Portal.
- Go to Policies.
- Select the policy.
- Click on Manage > Move to Archive.
You can archive a policy by clicking on the desired policy. On the policy summary page, click Manage in the top right corner and select Move to Archive from the dropdown.
You can also view the archived policies from the Archived Policies subtab.
- Archived policies will be listed here.
- You can either restore/delete the archived policy by clicking on the restore/delete button.
Delete a Policy
Hexnode allows you to delete a policy permanently after archiving it.
- Log in to your Hexnode UEM Portal.
- Go to Policies > Archived Policies.
- Select the policies you want to delete.
- Click on Manage > Delete.
Remove a Policy
Certain situations may require removing the policy from the devices. In such cases, you can remove the policy from the associated devices or remove the device from the policy.
To remove a policy from the device,
- Log in to your Hexnode portal.
- Go to Manage > Devices.
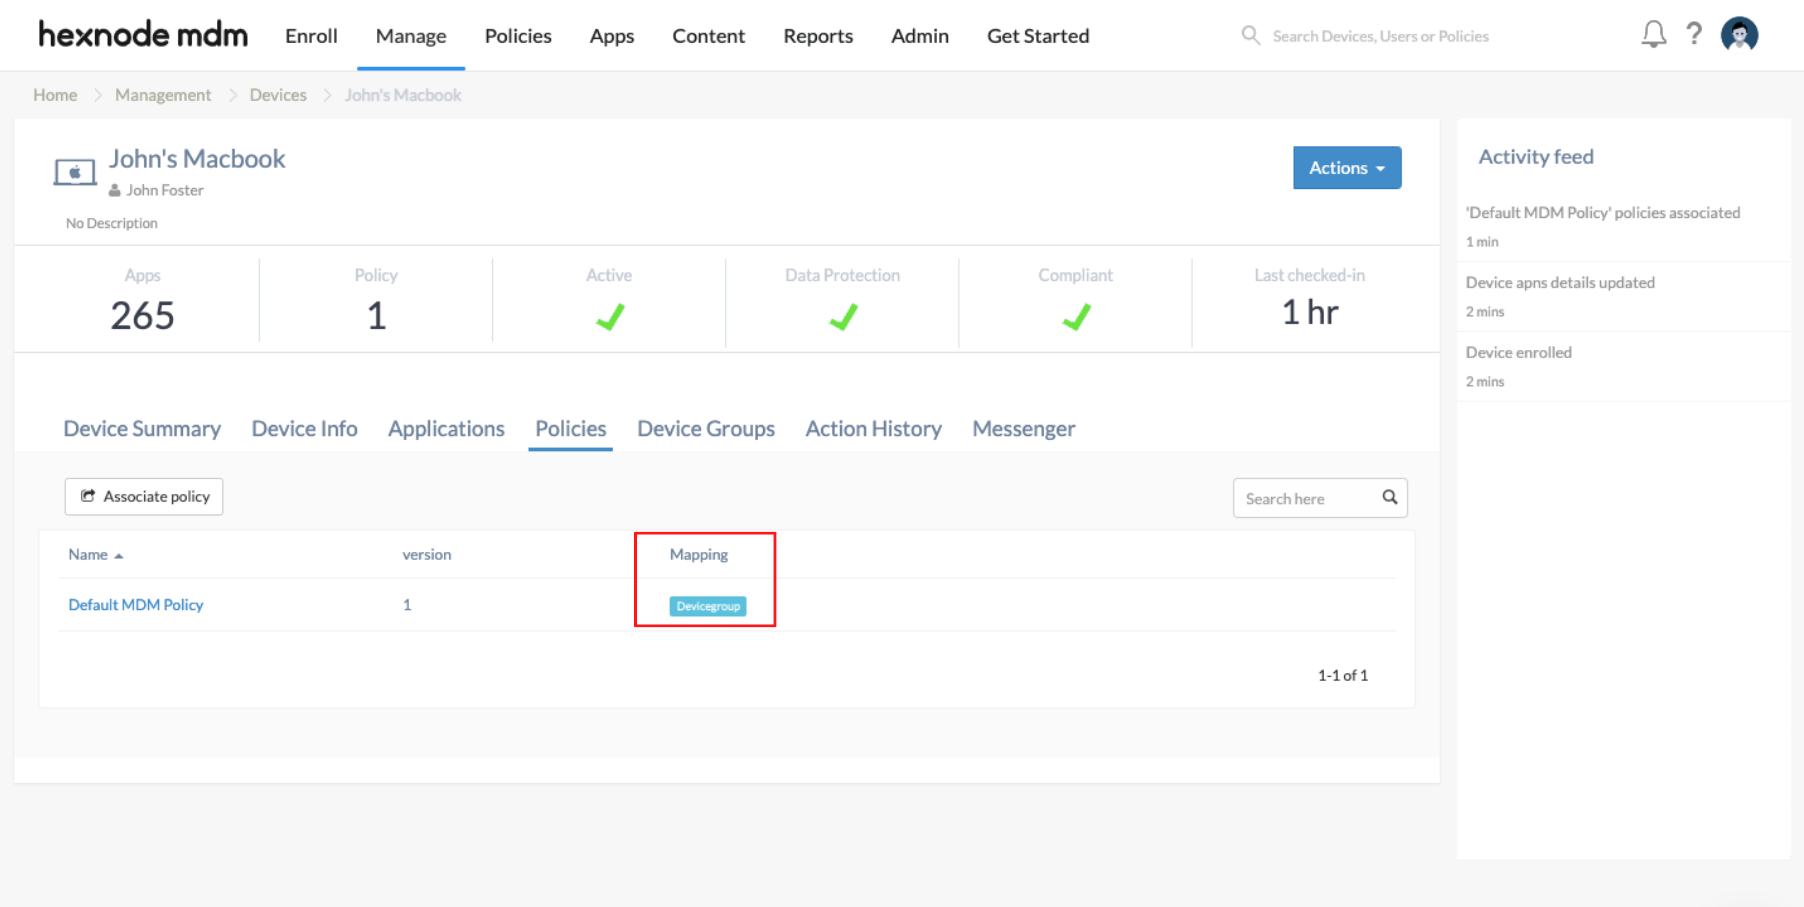
- Click on the device from which the policy is to be removed.
- From the Device Summary page, click on the Policies subtab and remove the policy by clicking on the trash icon.
To remove a device from the policy,
- Log in to your Hexnode portal.
- Go to Policies and select the policy.
- From Policy Targets, click on Remove to remove the corresponding policy.
- Save the policy.
How to associate policies with the devices?
Once the policy is created, you need to associate it with the devices.
There are two ways by which you can associate a policy with the devices.
If the policy has not yet been saved:
- Navigate to Policy Targets.
- Click on +Add Devices.
- Select the devices and click OK.
- Click on Save to apply the policies to devices.
Apart from devices, you can also associate the policies to Device groups, Users, User groups, or Domains from Policy Targets.
If the policy has been saved, you can associate it with a different method:
- From Policies, check the policies to be associated.
- Click on Manage → Associate Targets and select the device.
- Click on Associate to apply policy to the devices.
How to exclude targets from a policy?
While configuring policy targets, you can exclude specific devices, users, or organizational units (OUs) to prevent them from receiving the policy. There are two ways to configure these exclusions.
Method 1: While Configuring Policy Targets
Navigation : Policies → Create Policy → Policy Targets
To exclude devices from Device Groups:
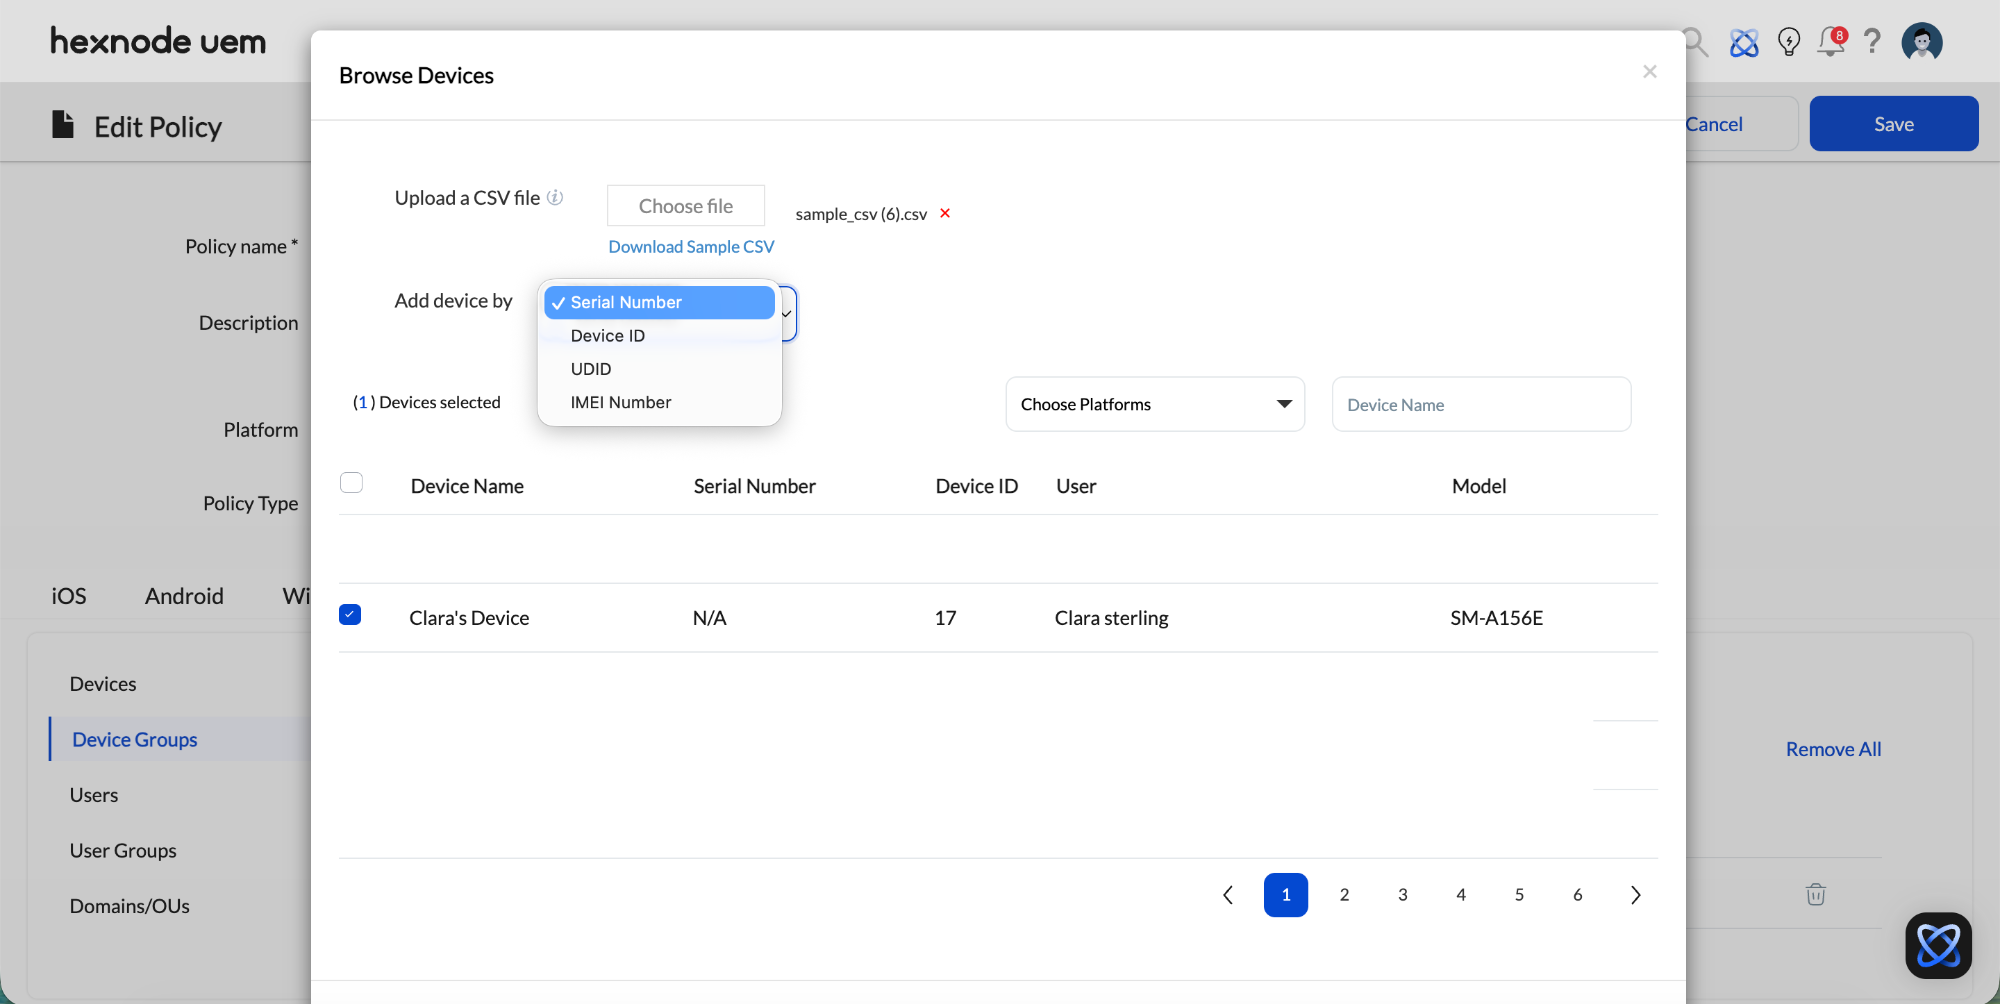
Go to Excluded Devices and choose to either select enrolled devices from the list or upload a CSV file.
- If uploading a CSV file, ensure it contains device identifiers such as Serial Number, Device ID, UDID, or IMEI Number. You can download a sample CSV file directly from the Hexnode UEM portal.
- Select the required identifier in the Add device by dropdown. When the user uploads the CSV file, the system reads it row by row. It looks at the column header that matches the identifier selected in the dropdown (e.g., if “Serial Number” is selected, it looks for the “Serial Number” column in the file).
The system then takes each value from that column and searches for the device inventory to find the matching device record.
To exclude users from User Groups:
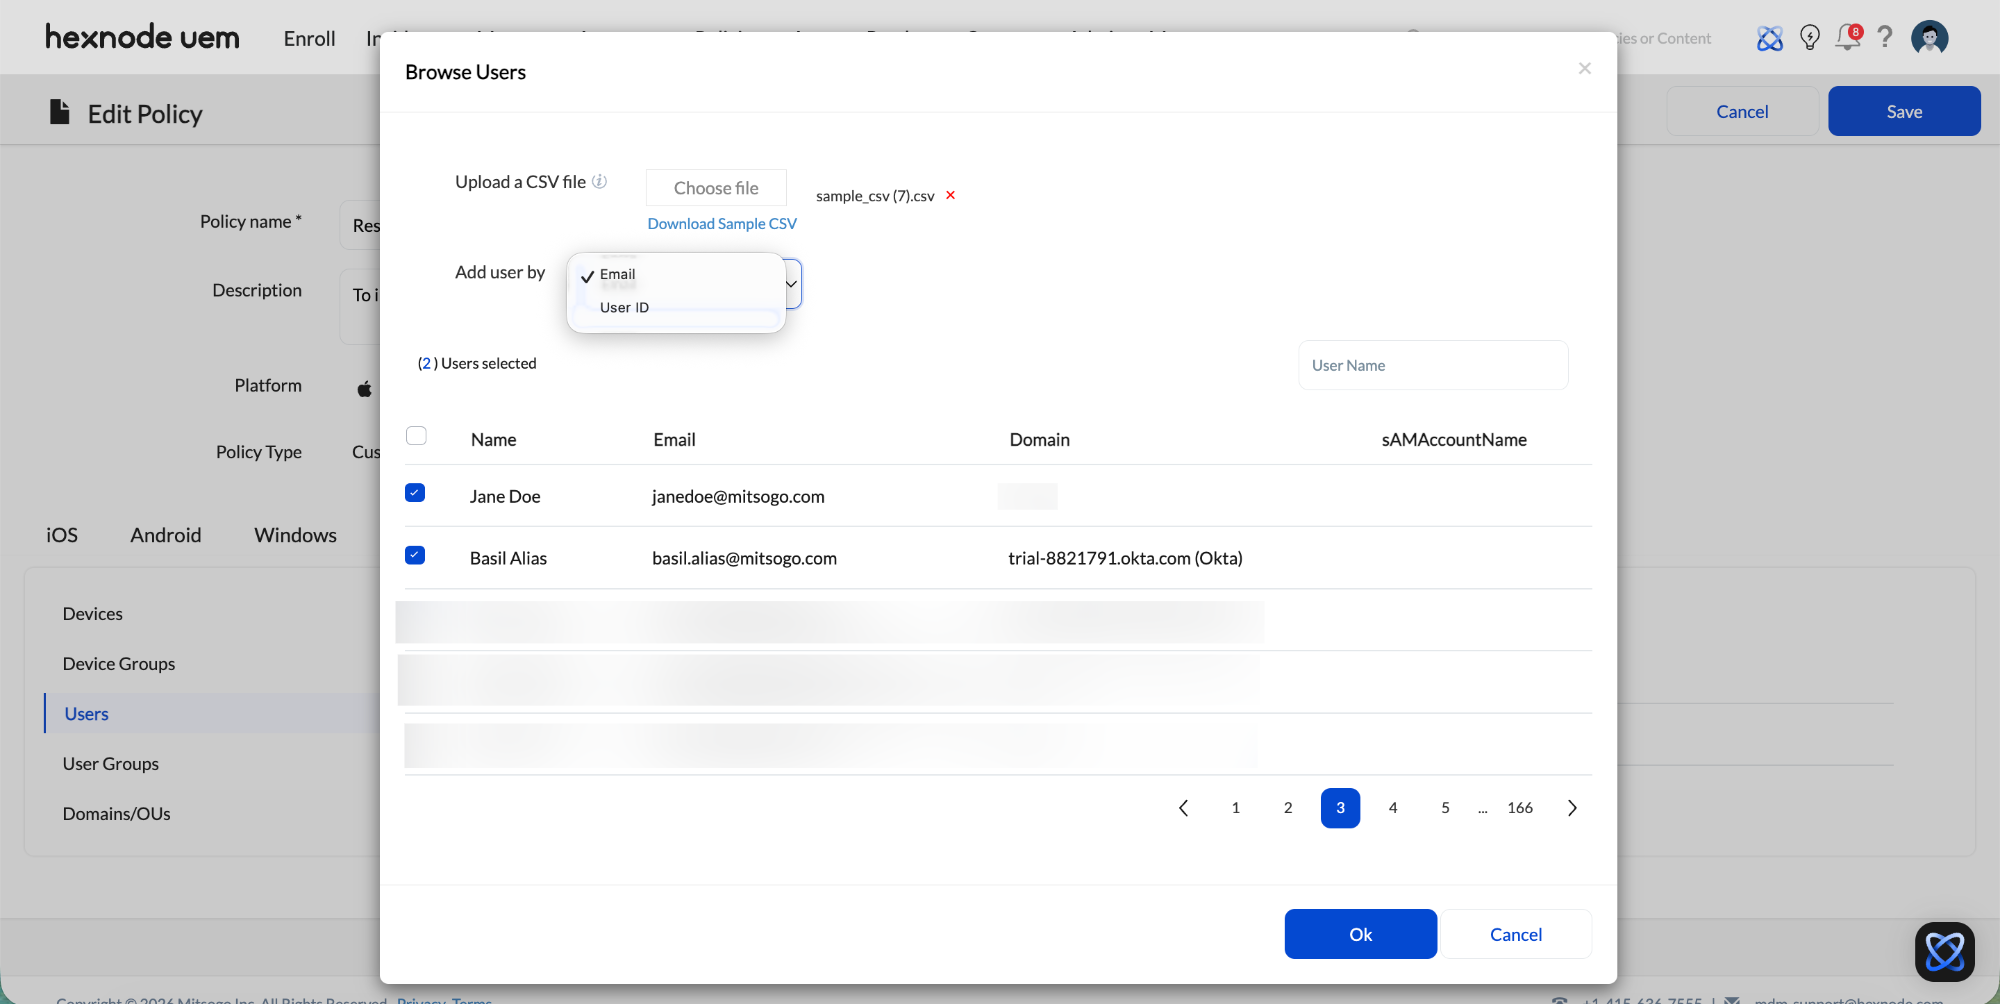
- Go to Excluded Users and choose to either select created users from the list or upload a CSV file.
- If uploading a CSV file, ensure it contains user identifiers such as Email or User ID. You can download a sample CSV file directly from the Hexnode UEM portal.
- Use the Add user by dropdown to select the identifier (like Email or User ID) that matches your CSV column header. This ensures the system maps your data accurately and excludes the correct users.
To exclude OUs from Domains/OUs
Go to Excluded OUs and select the child OUs you want to exempt.
Method 2: From the Device Details or User Details Page
Navigation : Manage → Devices/Users/Directory Services → Click your specific Device/User Directory Services → Policies tab
If a policy was assigned to a device, user or directory service via a group mapping, you can easily exempt them from that specific policy:
- Locate the policy under the Policies tab.
- Click the Delete icon next to the policy.
- Click Continue on the confirmation prompt to automatically add the device, user, or directory service to the policy’s exclusion list.
Policy Summary
The Policy Summary provides a comprehensive overview of a policy, including its Policy Type (Custom/Enterprise), Version, Created Time, Created By, Modified Time, Last Modified By, Target Count, and configured settings. To view the Policy Summary:
- Navigate to Policies.
- Click on the policy summary icon on the right side of the policy.
- You can view the policy summary here.
Alternatively, you can simply click on the policy name to open the Policy Summary page directly.


