Category filter
Distribute iOS Enterprise Apps via Hexnode UEM
Enterprise (in-house) apps are proprietary applications developed for internal use and are mostly not available on the Apple App Store. With Hexnode UEM, administrators can securely upload, manage, and deploy these apps across the organization’s device fleet.
Phase 1: Adding the Enterprise App to Hexnode UEM App Inventory
Before deployment to device fleet, the application must be added to the Hexnode UEM App Inventory.
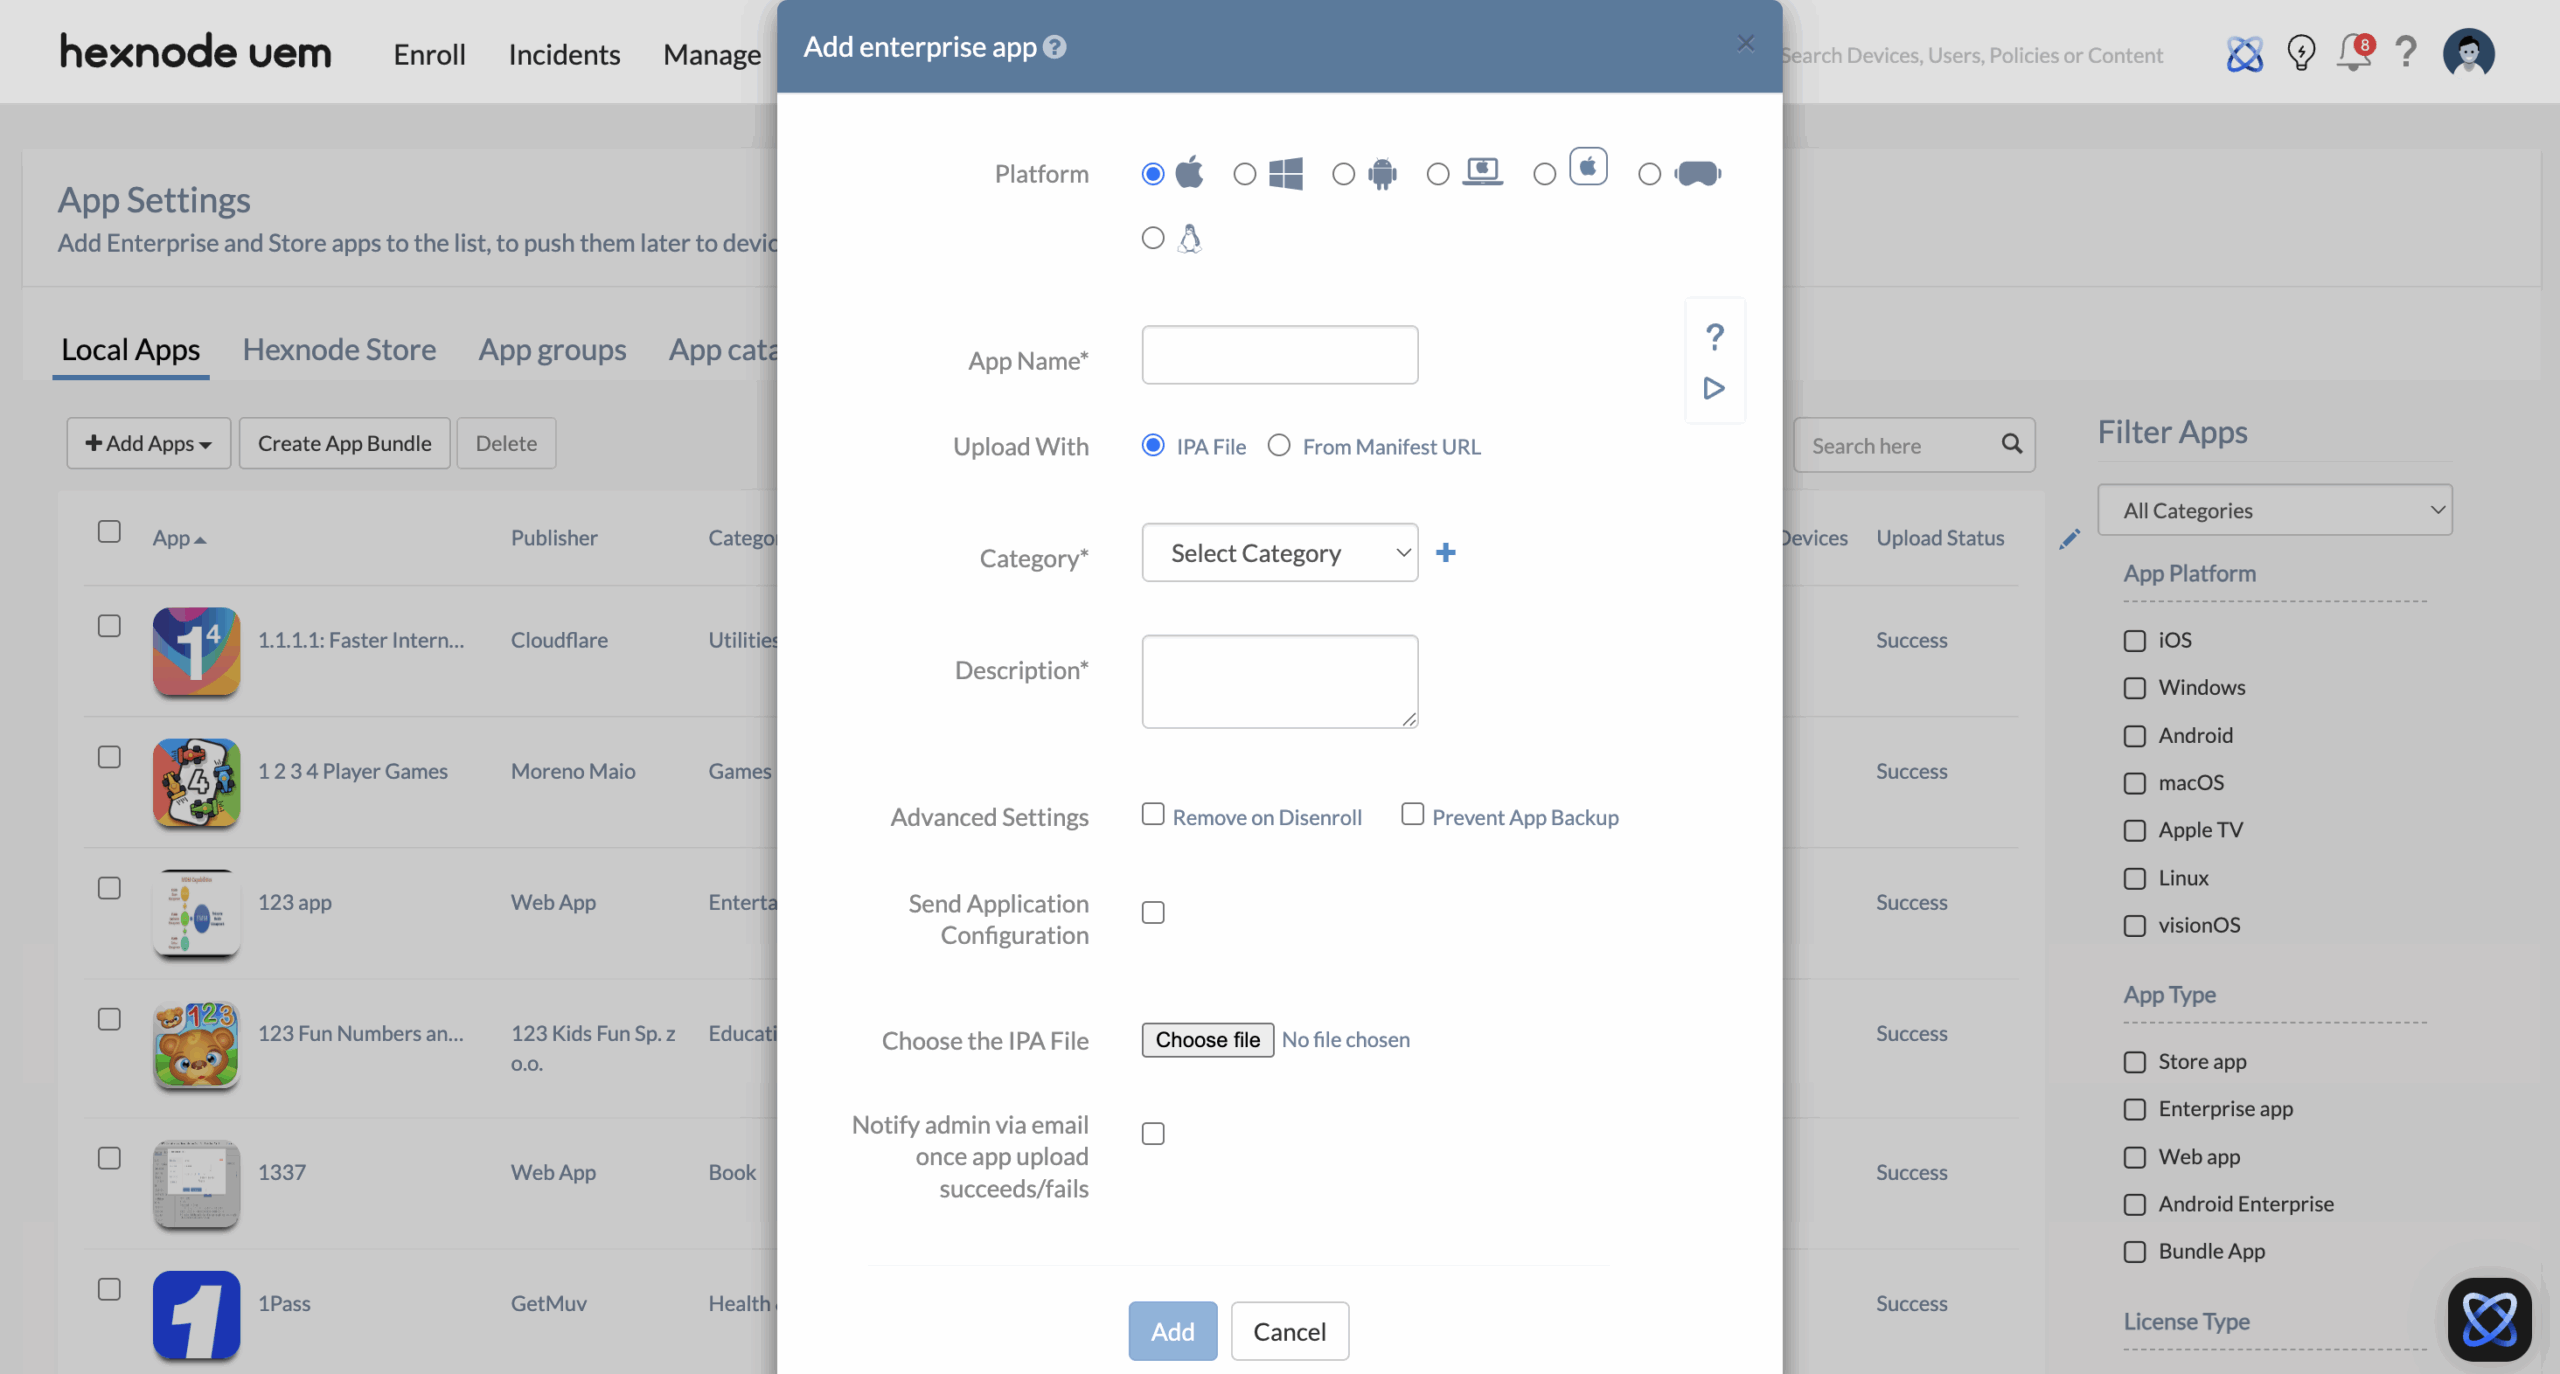
- Path: Apps > +Add Apps > Enterprise App.
- Platform Selection: Select the Apple icon radio button.
- App Name: Provide a name for your enterprise app.
- Upload With:
- IPA File: Select IPA file and click on Choose file to upload the .ipa file from the local system.
- Manifest URL: Select From manifest URL to provide the external app hosting link.
- Categorization: Select a Category from the list. Click (+) to create a new category.
- Metadata: Enter the app details in the Description text box.
- Advanced Settings:
- Remove on Disenroll: Tick this to uninstall the app automatically if the device is disenrolled from Hexnode UEM.
- Prevent App Backup: Tick this to block app data from being backed up to iCloud/iTunes.
- Send Application Configuration: Ticking this checkbox returns an option to upload an XML file with pre-defined in-app settings (logins, server URLs, etc.) during deployment. To know more, see Pushing an iOS app configuration using XML.
- Status Notification: Tick the checkbox “Notify admin via email once app upload succeeds/fails” to receive an automated status update once the server finishes processing the file.
- Click Add to finish setup and add the enterprise app.
Phase 2: Distribution Workflows
Choose between manual installation via Remote Actions or automated deployment using Hexnode UEM’s Required Apps policy.
Method 1: Manual Installation (Remote Actions)
This method is best for one-off testing or specific device updates.
- Path: Manage > Devices > Select target device(s).
- Action: Actions > Applications > Install application.
- Selection: Search for your enterprise app, select it, and click Done.
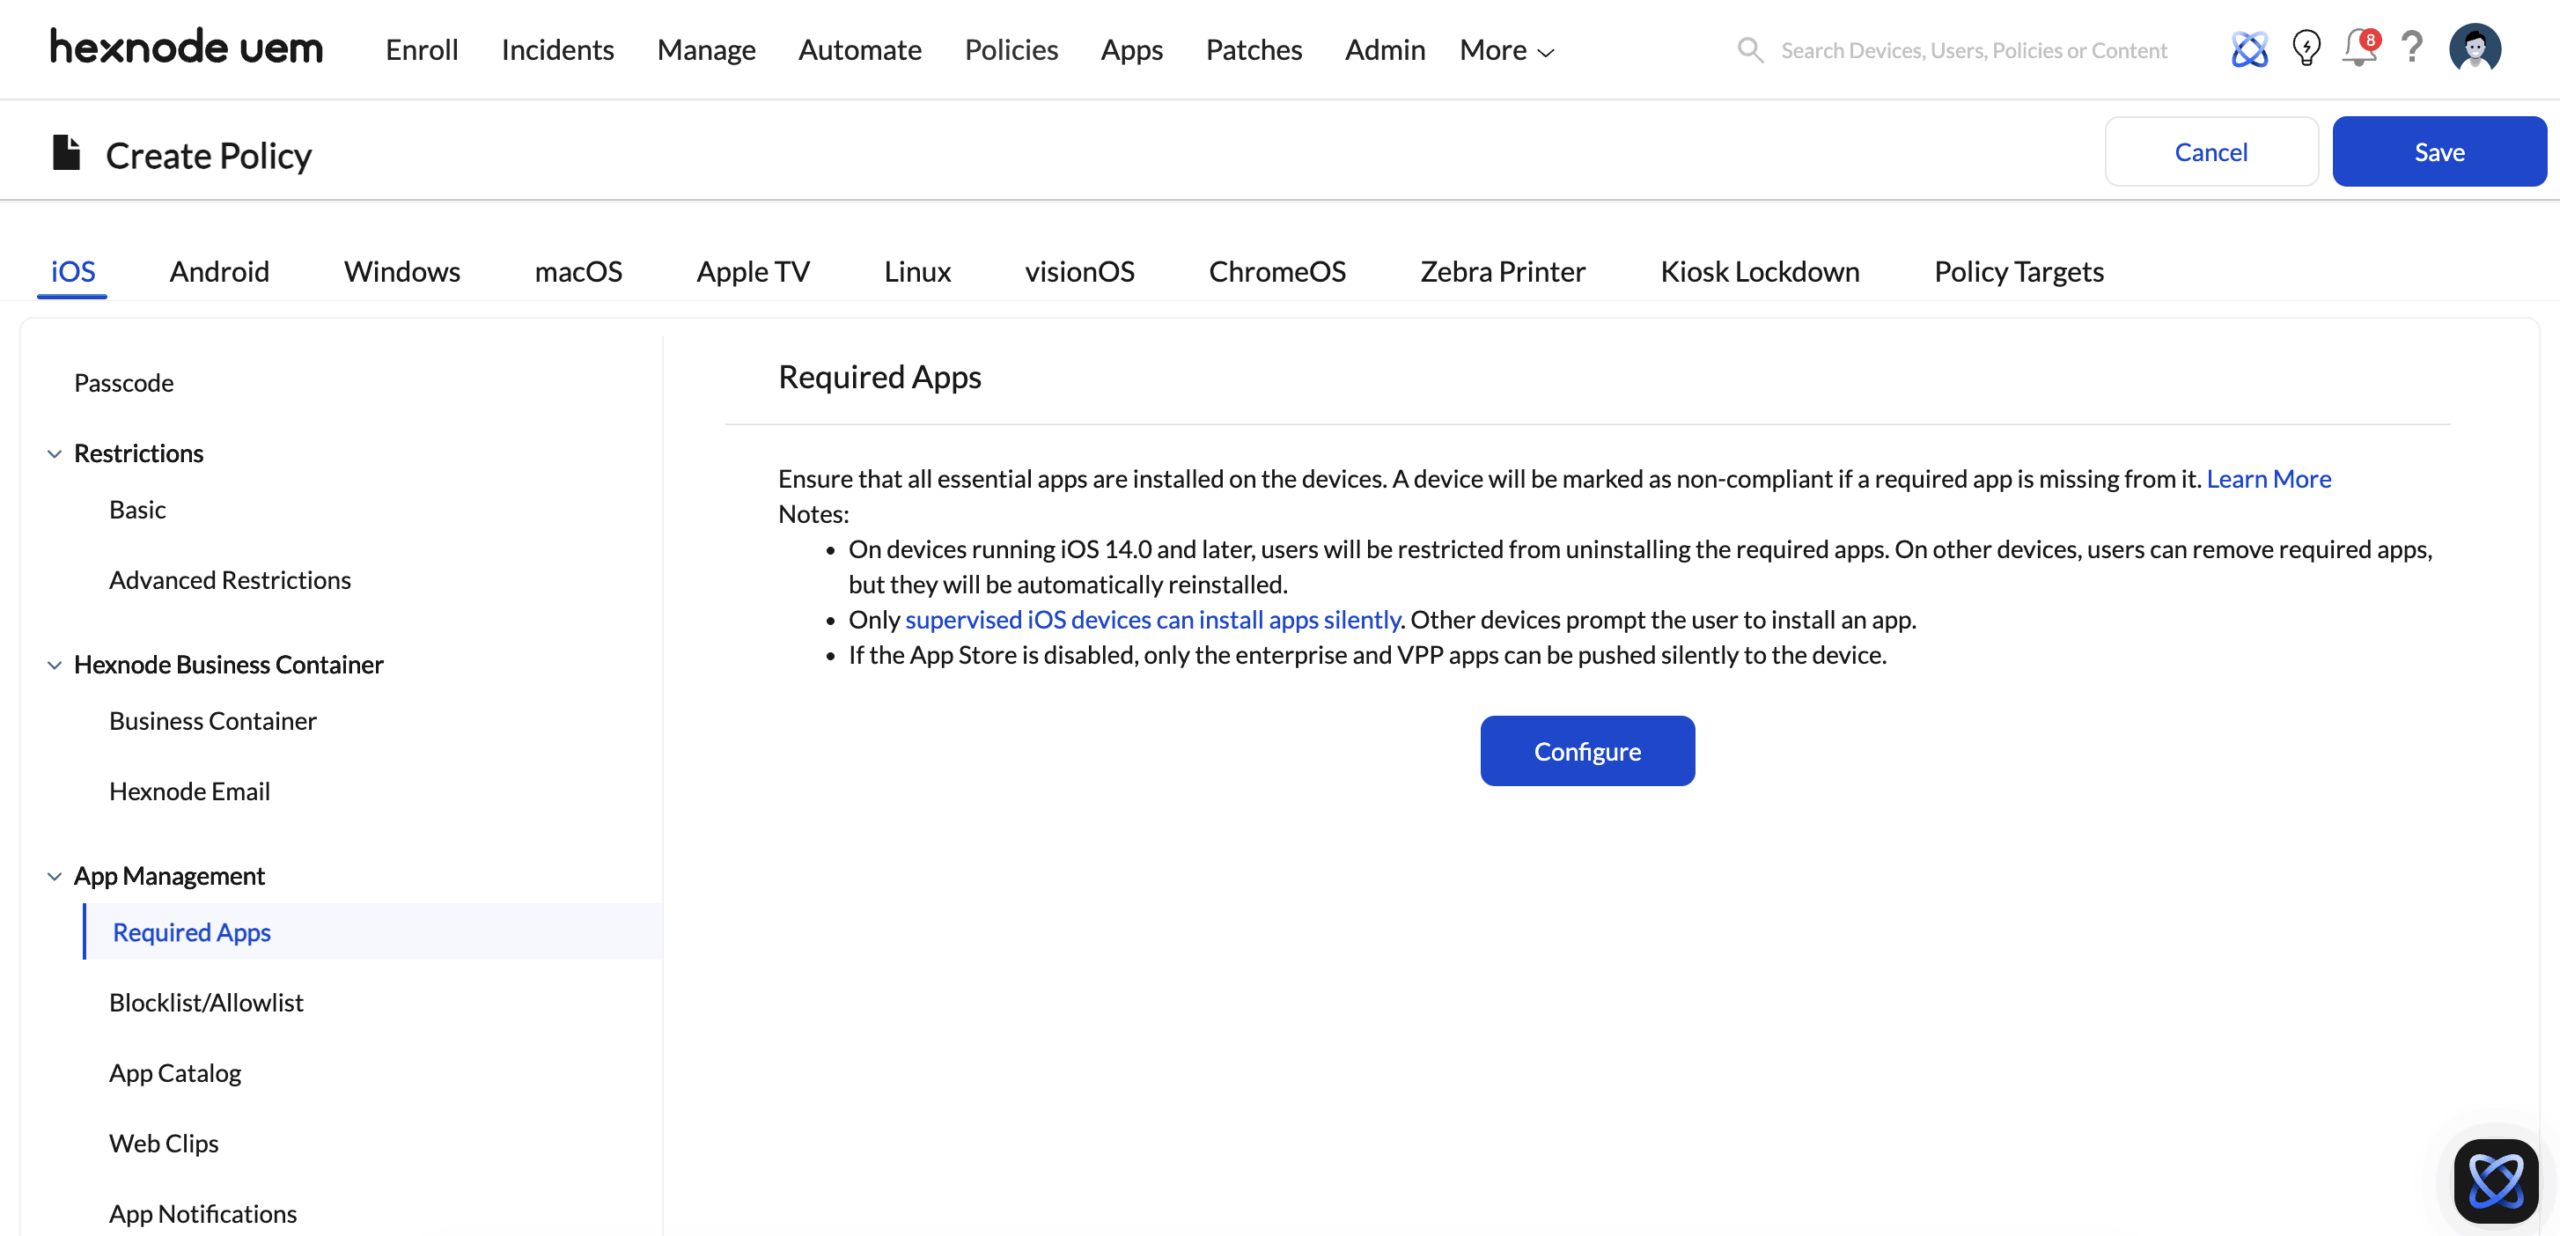
Method 2: Automated Deployment (via Policies)
Hexnode UEM enables the admin to configure polices containing enterprise apps as Required Apps. When the policy is associated with a device or group, the apps are deployed in the background without further human interference.
- Path: Policies > New Policy > Create a fully custom policy.
- Name: Provide a name for your policy.
- Configure Apps: iOS > App Management > Required Apps > click Configure.
- Selection: Click +Add > Add App. Select apps from your inventory and click Done.
- Targeting: Navigate to the Policy Targets tab > +Add Devices > Select your devices > Click OK. (You can also associate the policy with Users, User Groups, Device Groups, or Domains)
- Finalise: Click Save.
Device-End Installation Experience
The installation behaviour depends on the management state of the iOS device:
- Supervised Devices: Hexnode UEM installs the enterprise app automatically on the device without any user intervention.
- Unsupervised and User Enrolled Devices: The device receives a notification to install the app. The user must manually accept the prompt to begin the installation process.
Advanced Troubleshooting Resources
Explore these guides for specific error codes and deployment hurdles.
- Common Issues with iOS App Installation: A deep dive into Apple Account conflicts and supervision errors.
- Error During iOS App Installation: A comprehensive list of Hexnode UEM error codes and their specific fixes.
