Category filter
How to Add AirPrint Printers to Mac devices
AirPrint is an Apple technology designed for iOS and Mac devices, enabling full-quality printing of photos and documents via Wi-Fi without the need to download or install any printer-specific drivers. Hexnode UEM pre-configures AirPrint settings for the user devices with its ‘AirPrint’ policy, thereby letting Mac devices to print from known AirPrint printers in the same network.
Get Printer Information
Adding printer information to the AirPrint payload lets the Mac devices connect to AirPrint printers, which may or may not be on the same subnet as the device.
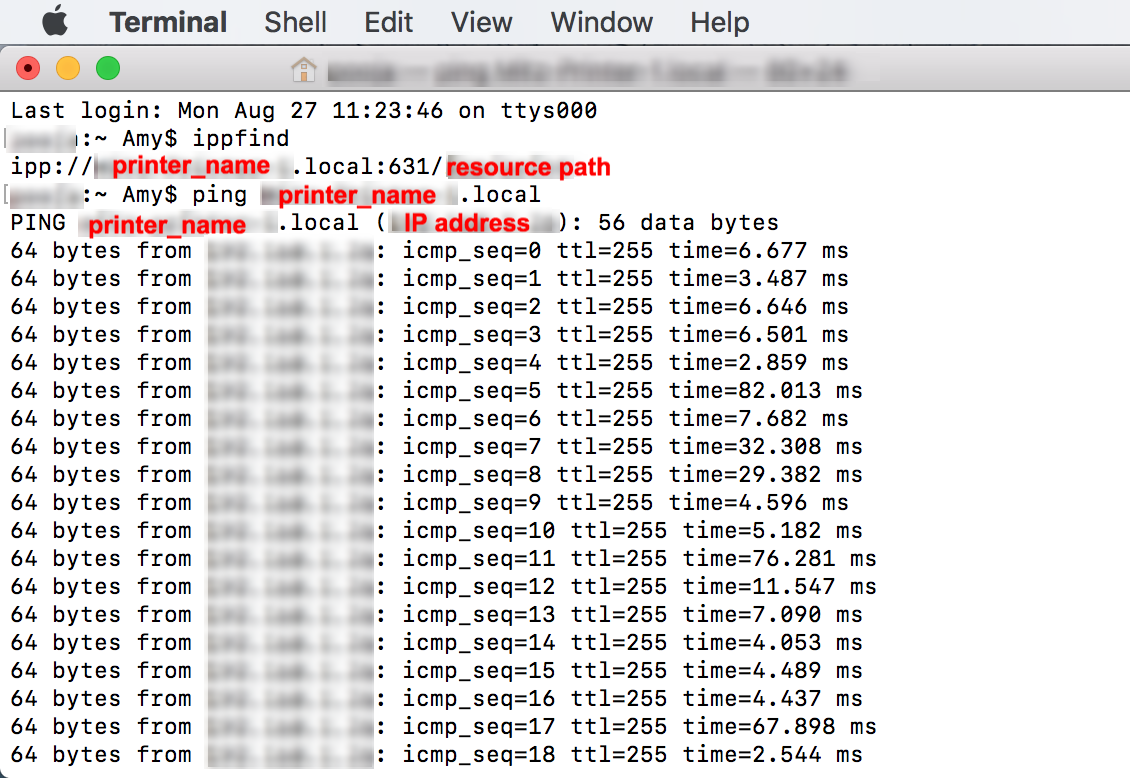
- Open Terminal from Finder > Applications > Utilities.
- Type ippfind in the Terminal, then press Enter.
- Make note of the printer information returned by the command in the format: ipp://printer_name.local:631/ipp/print. The former half gives the name of the printer and the latter gives the resource path (/ipp/print).
- Type ping printer_name.local in the Terminal, then press Enter.
- Make note of the IP address returned by the command.
Now, you can add the IP address and resource path of the printer. An example IP address may be 10.104.25.14 and an example resource path may be /ipp/print.
Create AirPrint Policy
The AirPrint policy allows the configuration of one or more AirPrint-enabled printers.
- In your Hexnode MDM portal, navigate to Policies -> New Policy. Assign a suitable name and description (optional) for the policy, or you can choose to continue with an existing policy.
- Under macOS > Configurations, choose AirPrint and click Configure.
- Click on +Add AirPrint device.
- Enter the AirPrint printer information – IP address and Resource Path.
IP Address: Input the IPv4 or IPv6 address of the printer. To find the IP address of the printer identified using hostnames, ping the printer in the Terminal app as mentioned earlier.
Resource Path: Input the resource path for the printer on your network.
- Click Add.
- To associate the policy with the devices, go to Policy Targets and choose the target entity – Devices, Device Groups, Users, User Groups or Domains.
- For the respective entity, click on +Add and choose the targets. Click OK to confirm.
- Click Save.
Now, the AirPrint policy has been associated successfully.
Associate Policies with Target Devices
If you are editing an existing policy and wish to associate the policy to more targets,
- Navigate to the Policies tab, select the policy and click on Manage > Associate Targets.
- Add the target entities and click Associate.
You can also associate the policy from the Manage tab, in two ways.
- Select the devices, click on Actions drop-down and choose Associate Policy.
- Click on the target device. On the device summary page, choose Actions > Associate Policy.
Or
After applying the AirPrint profile with target devices, the printer should be manually added to the Printers list.
Adding Printers manually on the device
In order to add the AirPrint printers to the Printers list,
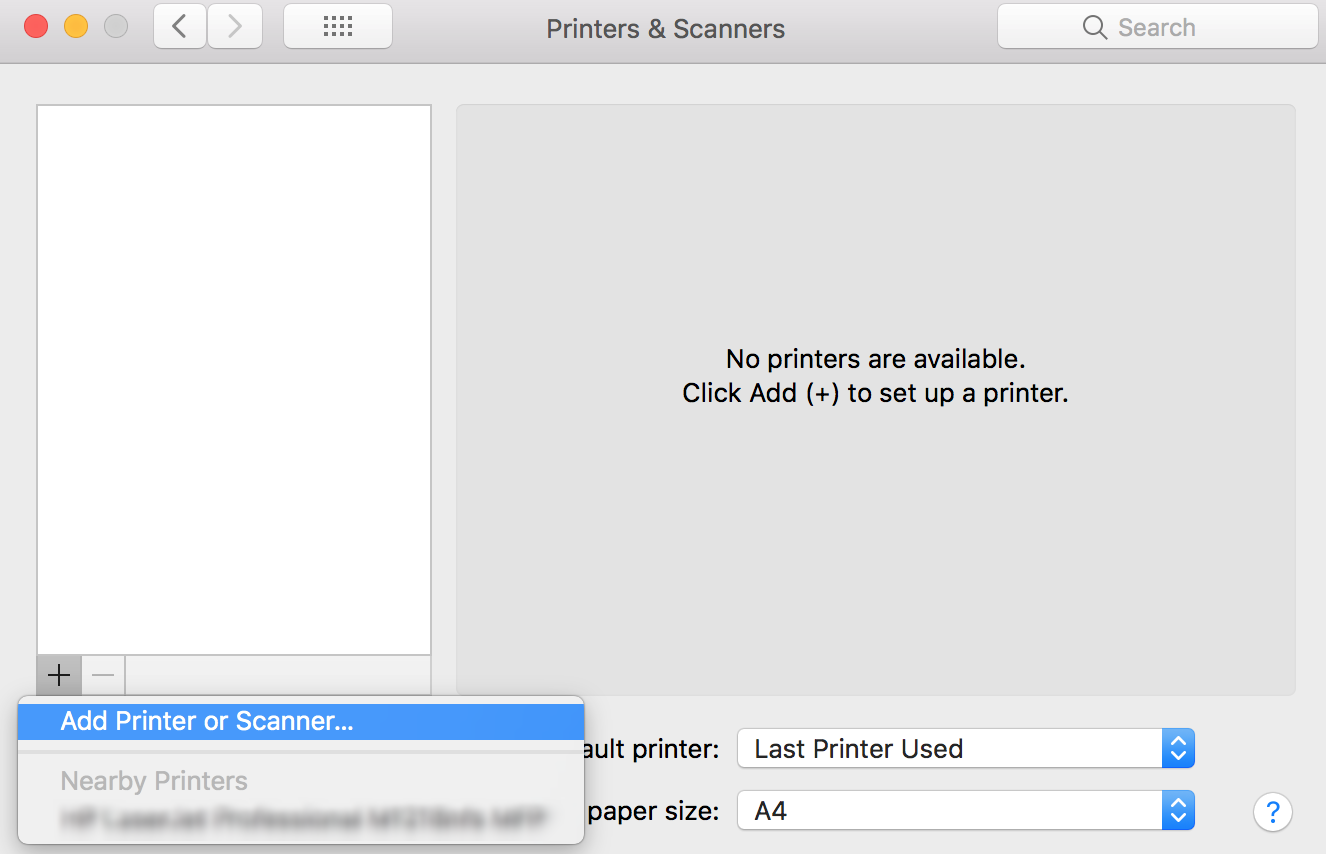
- Go to System Preferences > Printers & Scanners.
- Click the Add button “+” at the bottom of the Printers list and select Add Printer or Scanner.
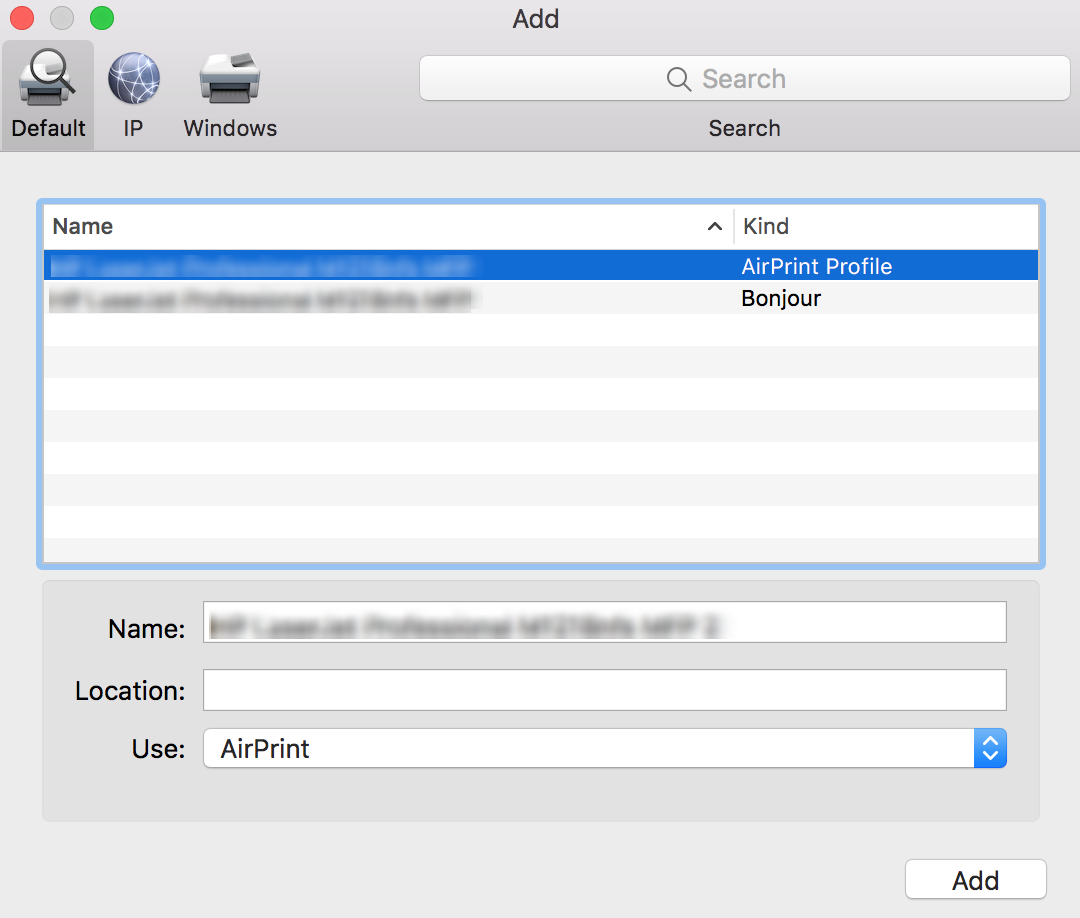
- A dialog box appears enlisting all the printers, including the ones in your local Bonjour network. The printers you added are listed under the kind, “AirPrint Profile”.
- Search for the desired printer by name or kind and click Add. The printer gets added to the printers list.
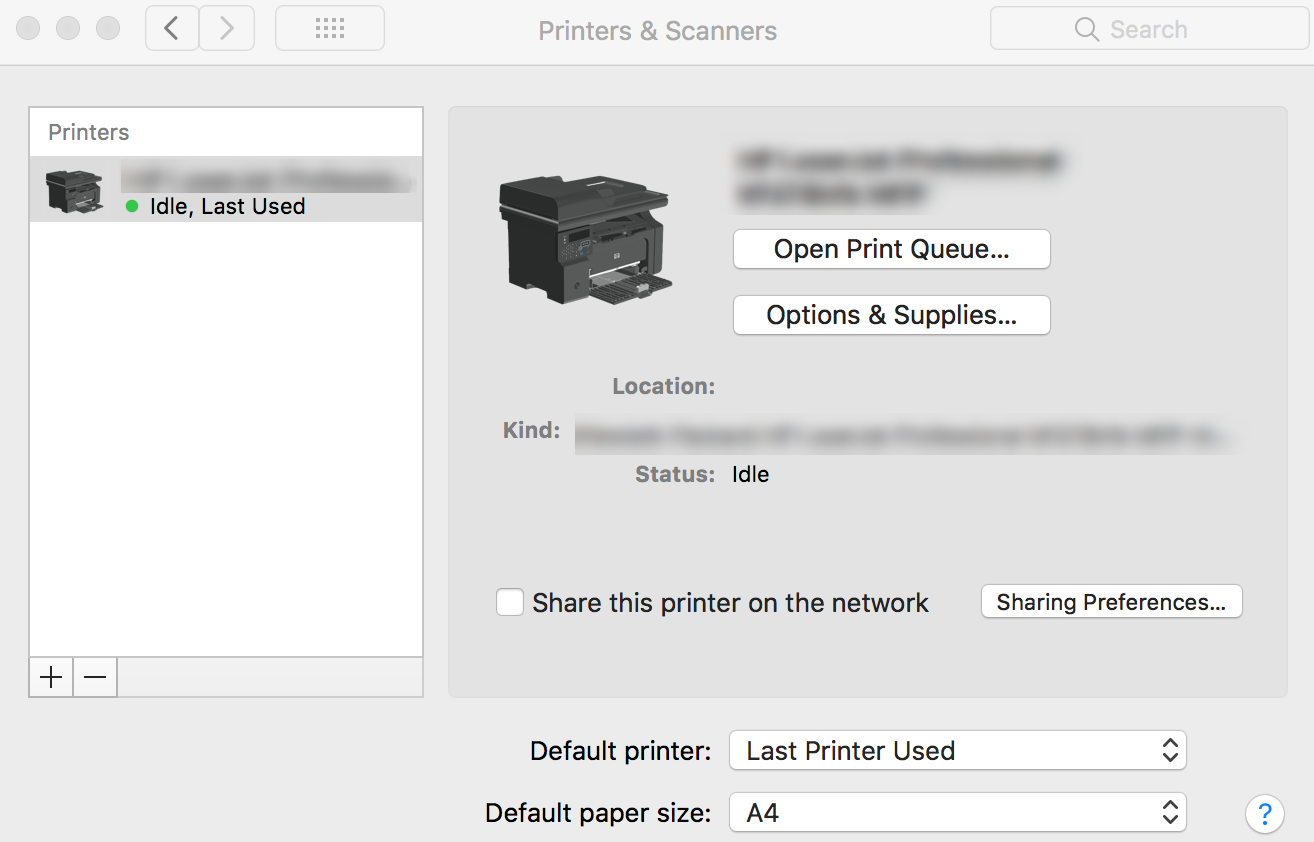
What happens at the device end?
The configured printers will get added on your managed devices under System Preferences > Printers & Scanners. The printer will be categorized as ‘AirPrint Profile’.
