Category filter
Add certificates to Hexnode for visionOS devices
This document helps you how to add certificates to visionOS devices.
To safeguard an organization’s confidential data, it is crucial to implement robust security measures when deploying new devices. One secure method is to add or install a digital certificate on the user’s device, enabling users to securely exchange information between trusted parties. A digital certificate helps streamline authentication and verifies data integrity. For instance, digital certificates allow users to securely authenticate with organizational networks and services.
Hexnode made it simpler for IT administrators to add certificates to visionOS devices.
Add Certificates to visionOS devices
To add certificates for your visionOS devices,
- Login to your Hexnode UEM portal.
- Navigate to Policies > New Policy. Assign a suitable name and description (optional) for the policy. You can also choose to continue with an existing policy.
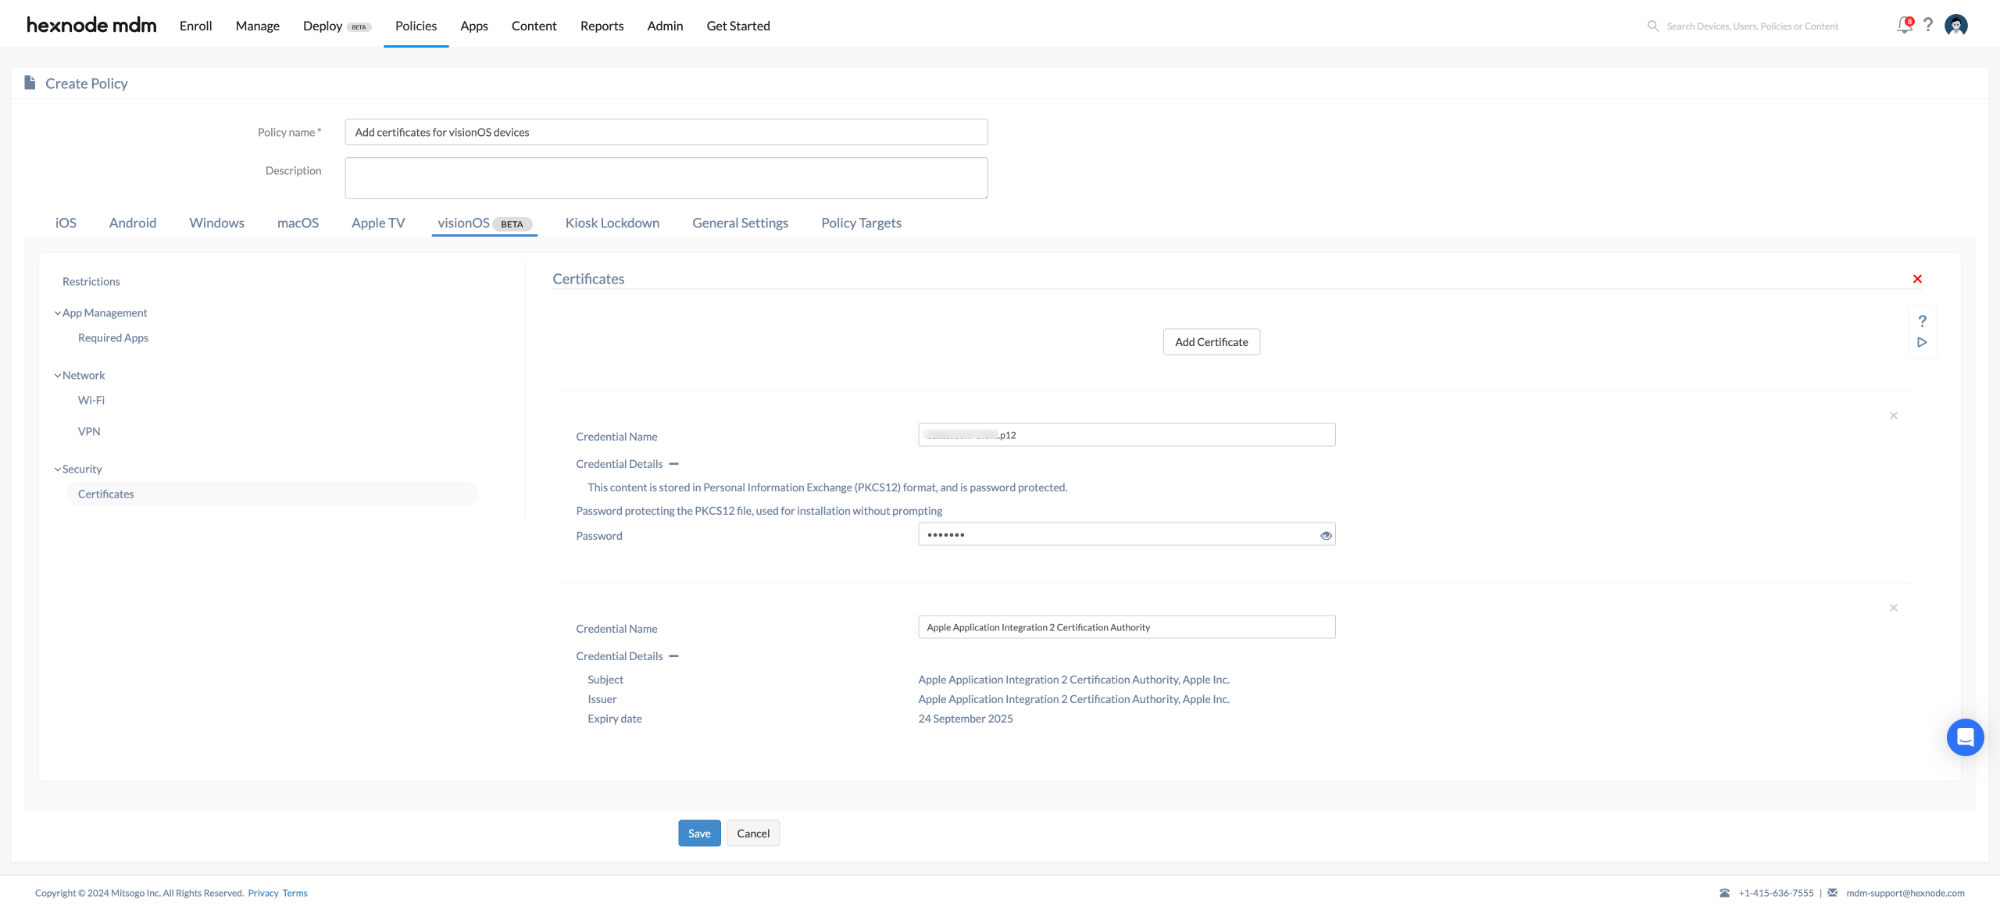
- Go to visionOS > Security > Certificates. Click Configure.
- Click on the Add Certificates option to import a new credential certificate profile from your device. After adding the certificate, you can see the following options:
- Certificate Name: Credential name refers to the display name of the certificate. This field becomes visible after you upload a certificate by clicking on “Add Certificate”. While this
field will be automatically populated, you can modify it if needed. - Credential Details: Click on the ‘+’ button to view the credential details, including the subject, issuer name, and expiry date. Click on the ‘-’ button to hide the details section.
- Certificate Name: Credential name refers to the display name of the certificate. This field becomes visible after you upload a certificate by clicking on “Add Certificate”. While this
Associate policy with the devices/groups
If the policy has not been saved,
- Navigate to Policy Targets > +Add Devices.
- Choose the target devices and click Ok. Click Save.
- You can also associate the policy with device groups, users, user groups, or domains from the left pane of the Policy Targets tab.
If the policy has been saved,
- Go to the Policies tab and choose the desired policy.
- Click on Manage drop-down and select Associate Targets.
- Choose the target entities and associate the policy.


