Category filter
Create user account on Windows devices enrolled in Hexnode UEM
As an IT admin, creating user accounts during employee onboarding can be complex, especially in larger organizations with numerous employees. In such scenarios, remote user account creation offers a convenient solution. With Hexnode’s Create User Account action, adding user accounts remotely on Windows devices becomes effortless.
Create User Account
To create a user account on a Windows device:
- Login to your Hexnode portal.
- Navigate to Manage > Devices
- Select a device.
- Navigate to Actions > Create User Account.
- Select either Choose user from Hexnode or Create new user to configure the following account setup options.
Choose user from Hexnode
If you select this option, then the users in the Hexnode portal will be synced for you to choose.
- Domain: Select your domain from the drop-down menu. All domains within your organization will be listed here. It includes domains of both ‘local’ users created in the Hexnode console and other users integrated from various directory services.
- User: Select an existing user from the drop-down menu. All the users in the selected domain will be listed here.
- Account Name: The account name will be automatically generated based on the user provided in the User field. The field supports the use of all wildcards.
- Full name: Based on the User field’s value, Full name gets generated automatically. The field supports the use of all wildcards.
- Description: Provide a description for the user account. You can view this information by clicking on the respective user account in our portal after it has been created under the Local Accounts tab.
- Account Role: You can choose either Standard or Administrator.
- Password: Configure a password for the account. The field supports the use of all wildcards.
- Verify Password: Re-enter the password to verify it.
- User must change password at next login: Enforces users to
change their password during their next login. - Password never expires: Allows users to keep the same
password permanently. - User cannot change password: Restricts users from modifying
their passwords. - Password Hint: Password hints help the user remember the account password. The value specified here will be displayed as the password hint in the login window when the user enters an incorrect password. The field supports the use of all wildcards.
- Disable Account:Choose this option if you want to prevent the account from appearing in the login window or the Start menu.
After verifying the password, admins can also configure any of the following password-related settings:
Create new user
If you select this option, you will need to manually provide all the details to create a user.
- Account Name: Specify the account name of the user. The field supports the use of all wildcards.
- Full Name:Specify the full name of the user. The field supports the use of all wildcards.
- Description: Provide a description for the user account. This contains the details of the user account that has been created. You can view this information by clicking on the respective user account in our portal after it has been created under the Local Accounts
- Full name: Based on the User field’s value, Full name gets generated automatically. The field supports the use of all wildcards.
- Description: Provide a description for the user account. You can view this information by clicking on the respective user account in our portal after it has been created under the Local Accounts tab.
- Account Role: You can choose either Standard or Administrator.
- Password: Configure a password for the account. The field supports the use of all wildcards.
- Verify Password: Re-enter the password to verify it.
- User must change password at next login: Enforces users to
change their password during their next login. - Password never expires: Allows users to keep the same
password permanently. - User cannot change password: Restricts users from modifying
their passwords. - Password Hint: Password hints help the user remember the account password. The value specified here will be displayed as the password hint in the login window when the user enters an incorrect password. The field supports the use of all wildcards.
- Disable Account: Choose this option if you want to prevent the account from appearing in the login window or the Start menu.
After verifying the password, admins can also configure any of the following password-related settings:
- Click Create.
What happens on the device end?
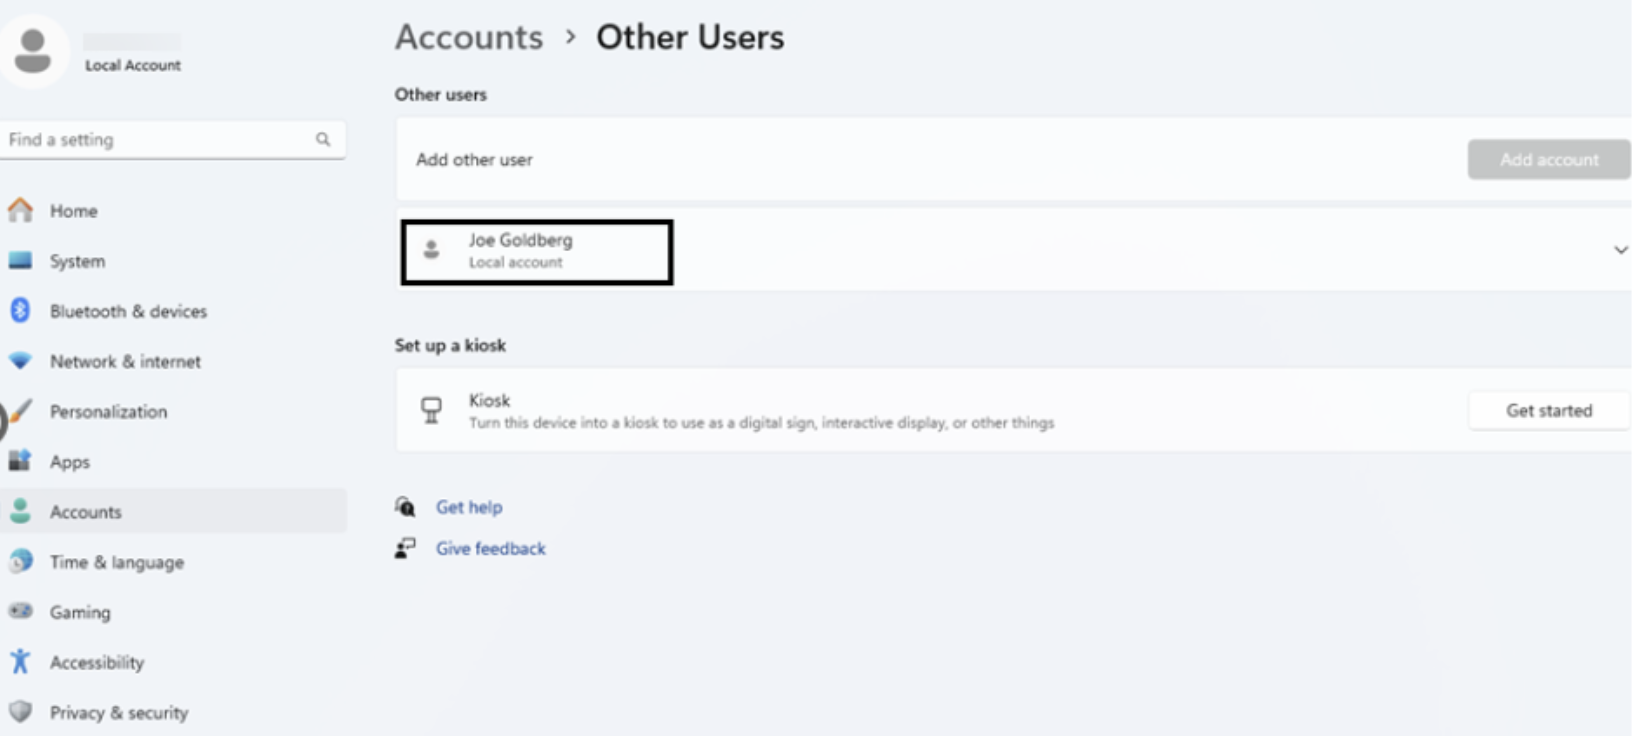
IT admins can confirm the creation of the user from the Settings > Accounts section on their Windows devices.

After the user is created, the username will be visible on the login screen of their devices.


