Category filter
Managing and Navigating the User Details Page in the Hexnode UEM console
Hexnode UEM simplifies user lifecycle management, allowing IT administrators to add, group, and monitor users through a centralized console.
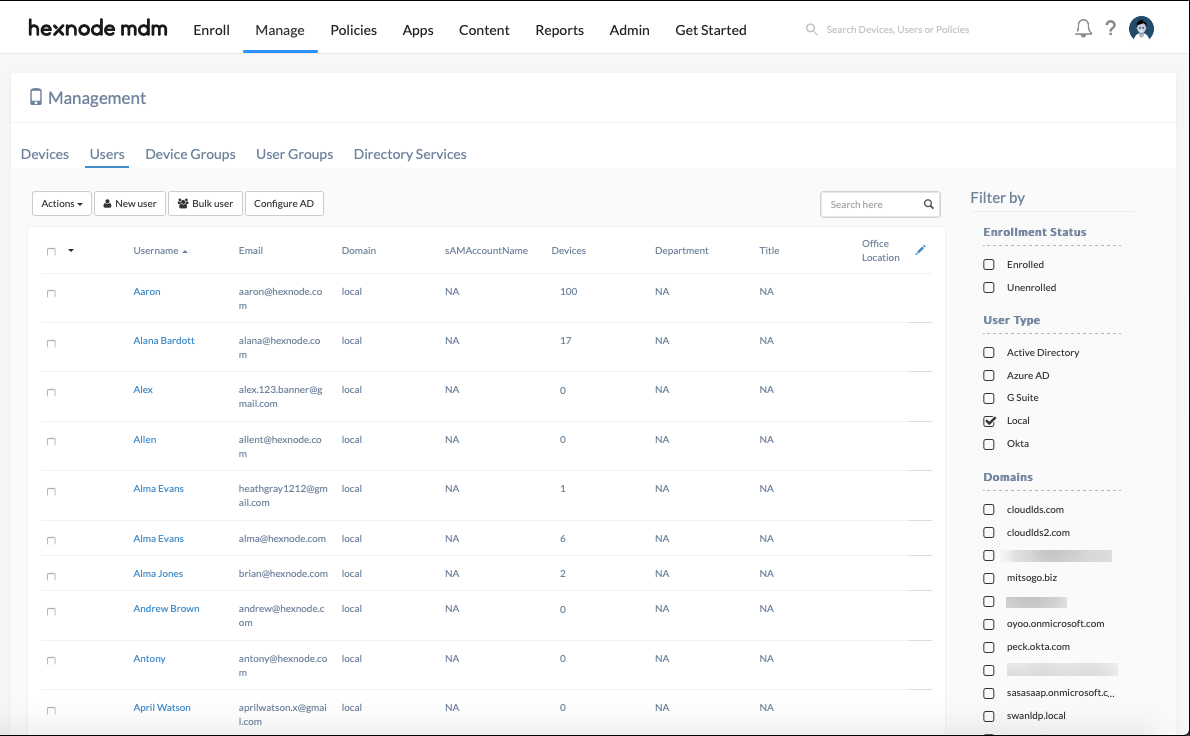
Adding Users
Before assigning policies or apps, users must be added to the Hexnode console. Administrators can populate their user list through three primary methods:
- Directory Integration: Import users from AD, Microsoft Entra ID, Google Workspace, or Okta.
- Local Creation: Manually create individual users directly within the Hexnode console.
- Bulk Import: Add multiple users simultaneously using a CSV file.
Pro Tip: Users can be organized into User Groups to apply bulk actions, policies, and configurations efficiently.
Viewing and Managing User Details
To access user-specific data, navigate to Manage > Users and click on a specific User Name.
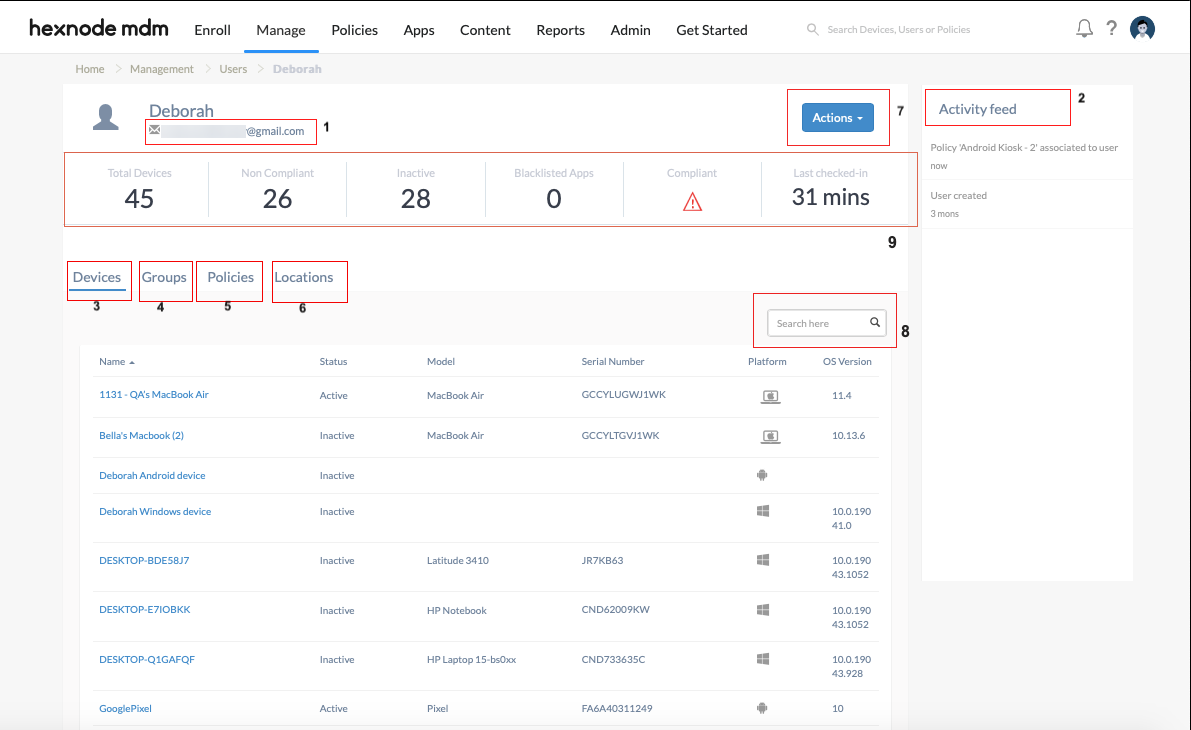
The User Summary Ribbon
Located at the top of the user page, this ribbon provides an immediate snapshot of the user’s device health:
- Total Devices: Total count of devices associated with the user.
- Non-compliant Devices: Number of devices failing organization rules.
- Inactive Devices: Devices currently not reporting to Hexnode.
- Blocklisted Apps: Count of prohibited applications found on the user’s devices.
- Compliance Status: A Green Tick indicates full compliance; a Red Exclamation indicates non-compliance.
- Last Reported: Timestamp of the user’s most recent communication with Hexnode.
Detailed Information Tabs
The following sub-tabs provide granular visibility into user activity and associations:
- User Info: This default tab serves as the primary identity profile for the user. It is organized into two key segments:
- User Info: Displays core directory and enrollment data, including Username, Email, Phone Number, Domain, User type, sAMAccountName, Department (AD), Title (AD), Office Location (AD), Hexnode Username, and Enrollment status.
- Custom Attributes: Displays organization-specific metadata assigned to the device along with their assigned values. These attributes are defined globally in the Admin tab and associated specifically with the User entity.
- Activity Feed: A chronological log of actions involving the user (e.g., policy associations or removals). Click entries to view specific timestamps.

- Devices: Lists all enrolled devices with details: Status, Model, Serial Number, Platform, and OS Version.

- Groups: Displays the names, descriptions, and creation dates of any groups the user belongs to.
- Policies: Shows all policies mapped to the user.
- Mapping: Displays as User (direct association) or Usergroup (inherited via group).
- Version: Tracks how many times a policy has been modified.
- Management: Use the Trash icon to remove direct policies or the Associate Policy button to add new ones.

- Location: Displays the last known location of all associated devices in both list and map views.
Note: Integration with Google Maps API is required to switch from the default Hexnode map.
- Actions drop-down: Allows admins to trigger critical remote actions on the user’s devices without physical access.
- Search Bar: Context-aware search to quickly find specific devices, policies, or groups within the current sub-tab.
Frequently Asked Questions (FAQs)
- How does the ‘Mapping’ field in the Policies tab work?
The Mapping field identifies the source of a policy. If it says User, the policy was applied specifically to that individual and can be deleted from their page. If it says Usergroup, the policy is inherited from a group and must be managed at the group level.
- How do I see exactly when a specific activity occurred?
Navigate to the Activity Feed and click on any specific activity listed to reveal the exact date and time the action took place.
- Where do I define the attributes that appear in the ‘Custom Attributes’ section of a user’s page?
Custom attributes are globally defined under Admin > Custom Attributes. To ensure an attribute is associated with a user (on the User Details page), the Attribute Type must be set to User during creation.
