Category filter
Configure CalDAV Settings for iOS
Calendaring Extensions to WebDAV, or CalDAV, policy in Hexnode allows the organizations to remotely set up the configurations for connecting iOS devices to the CalDAV-complaint calendar server. This lets you sync the corporate calendar events, tasks, schedules and notifications from various email accounts to your managed devices. Additionally, the synchronization enables the end-users to create and receive invitations, receive event updates and to sync tasks with the Remainders app on their iPhone/iPad.
Configure CalDAV settings via policy
To configure CalDAV account on an iOS device via policy,
- Login to your Hexnode UEM portal.
- Navigate to Policies > New Policy. Assign a suitable name and description (optional) for the policy. You can also choose to continue with an existing policy.
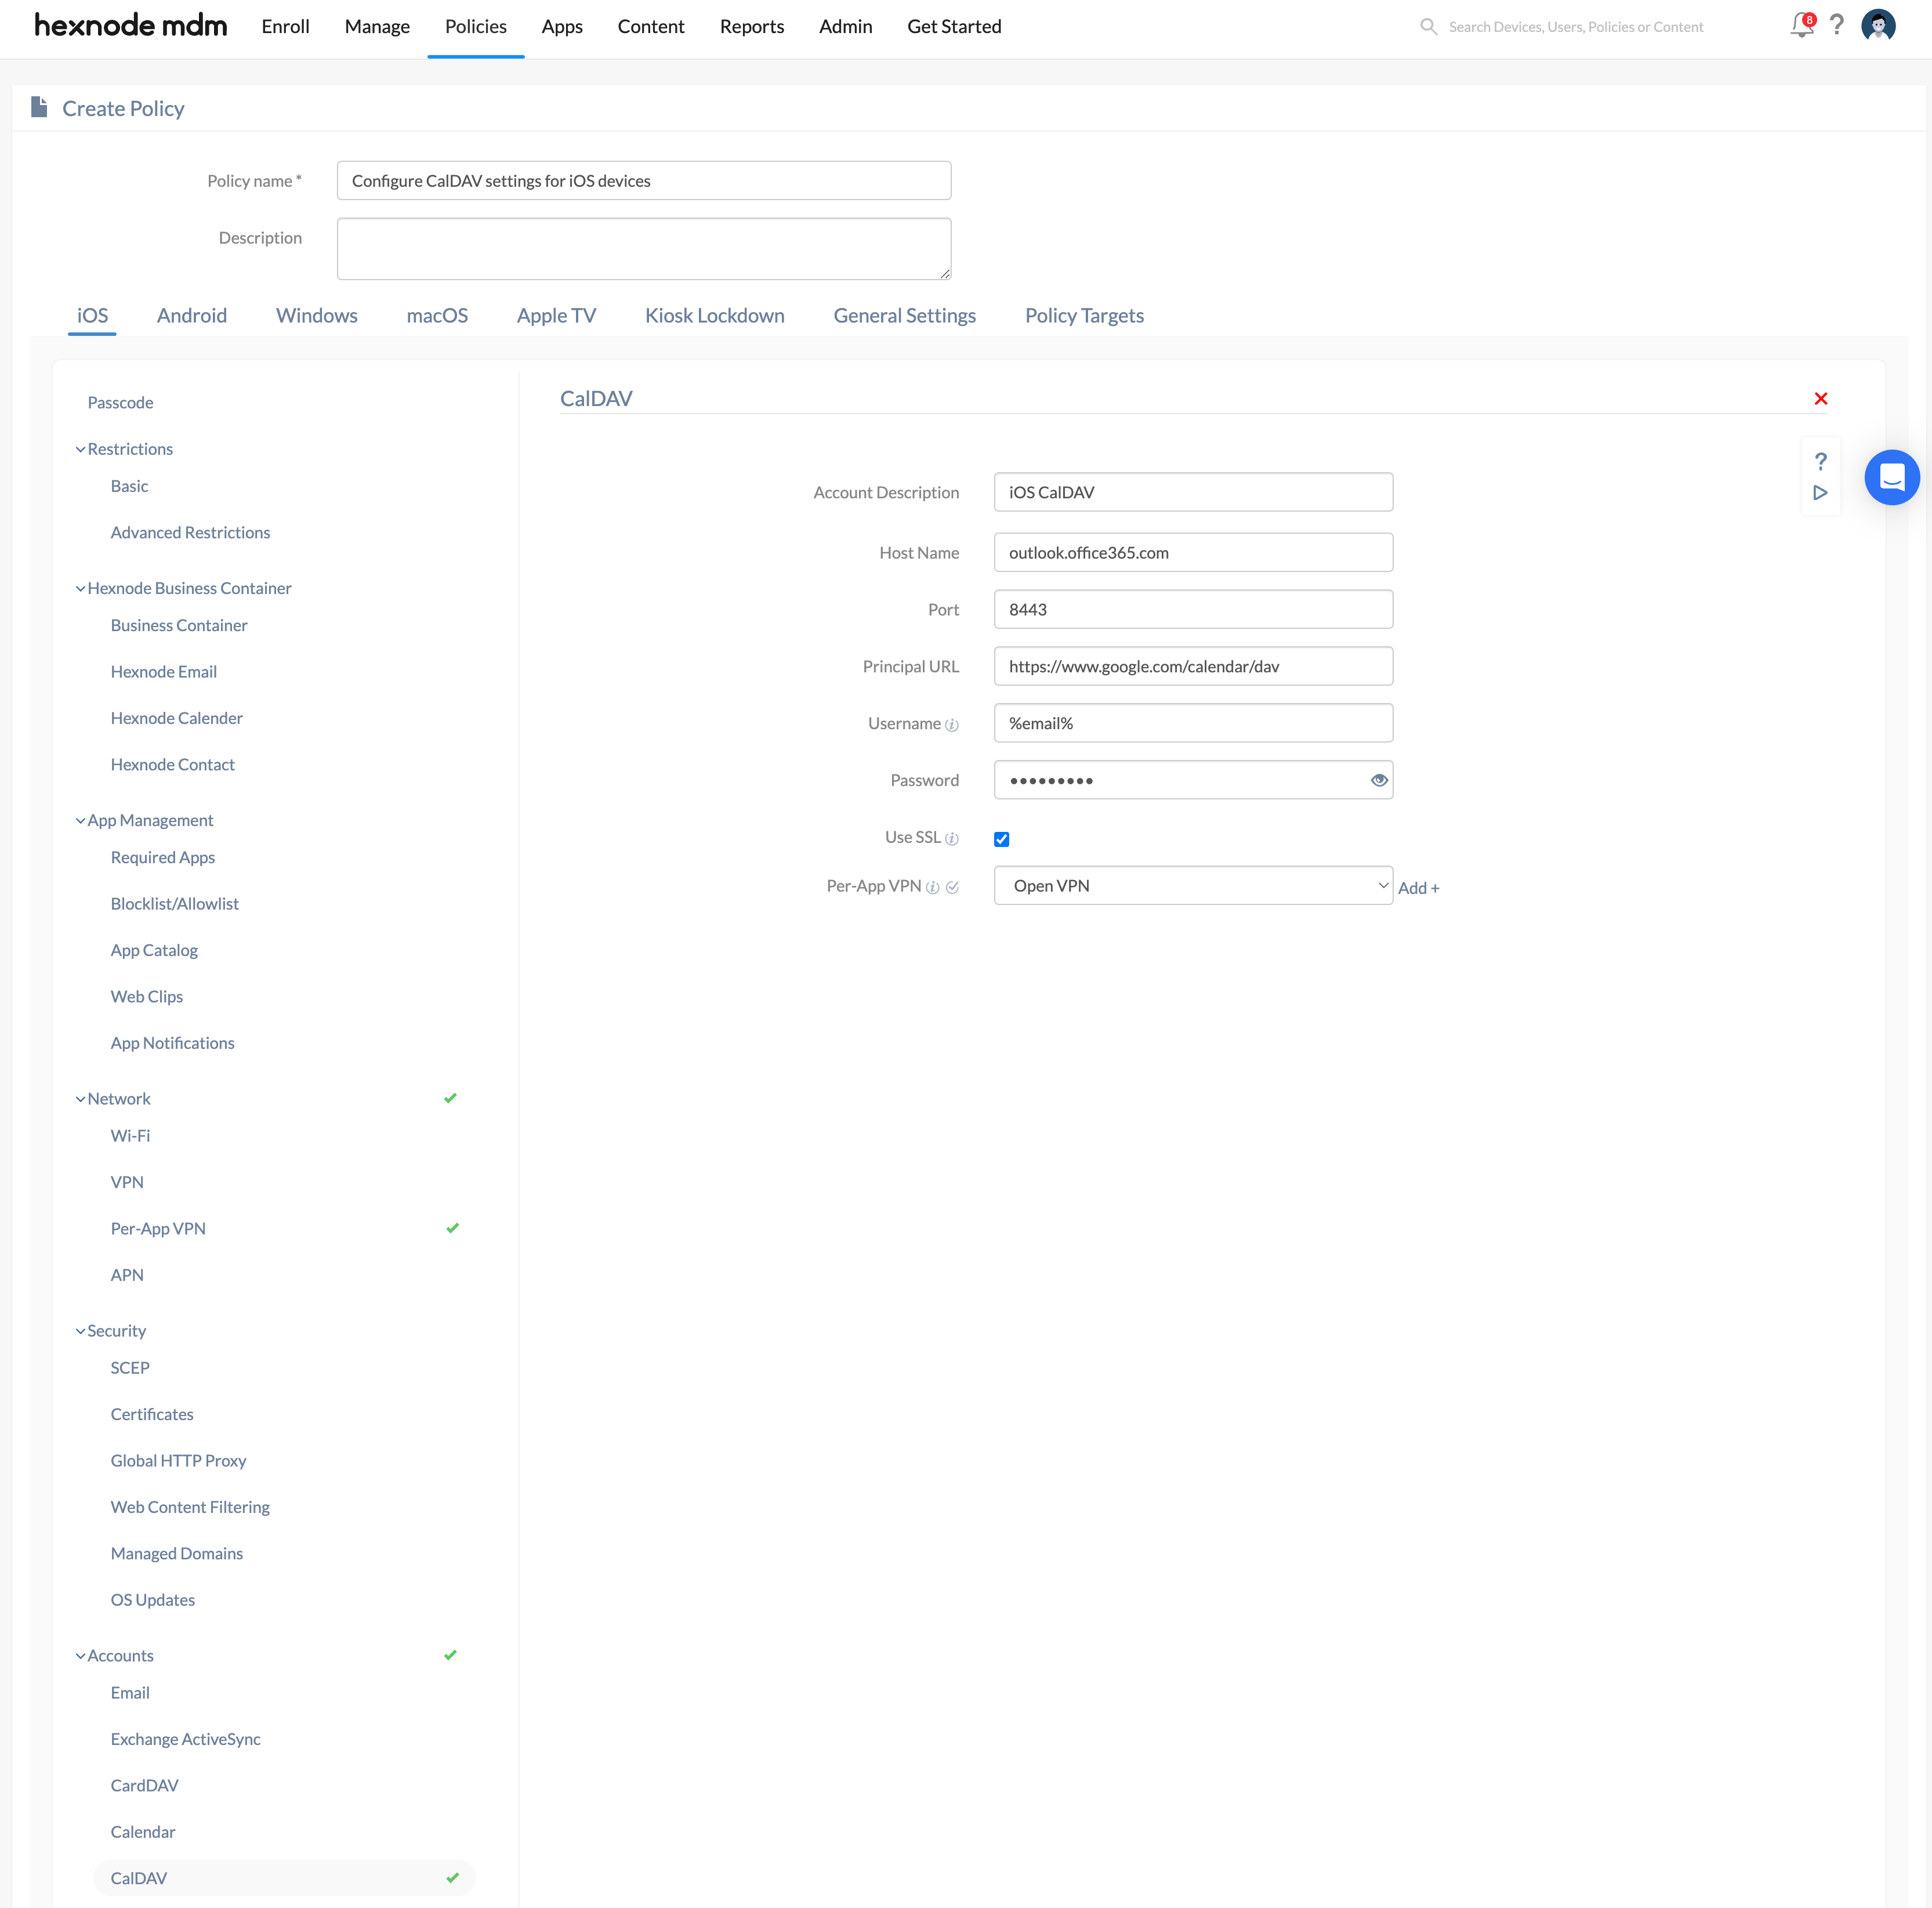
- Go to iOS > Accounts > CalDAV. Tap on Configure.

| Settings | Description |
| Account Description | Description to identify between various CalDAV accounts on the device. |
| Host Name | Domain name or IP address of the server. |
| Port | Port number of the server. |
| Principal URL | URL to access the user’s calendar. All iCloud calendar for the same users will have the same principal URL. |
| User Name | User’s account name. Supports the use of wildcards %email% and %alternateemail%. |
| Password | Password associated with the above-mentioned username. |
| Use SSL | Use SSL for establishing an encrypted connection between the device and the CalDAV server. |
| Per-App VPN
(Supported on iOS 14.0 and above) |
Per-app VPN for CalDAV ensures that calendar synchronization data is securely transmitted through a private network. To use a VPN with CalDAV, select the VPN from the drop-down menu. If the VPN hasn’t been configured yet, click on the ‘+Add’ option to set up a Per-app VPN. Once the Per-app VPN is configured, it can be selected for use with CalDAV. |
Associate policy with iOS devices/groups
If the policy has not been saved,
- Navigate to Policy Targets > +Add Devices.
- Choose the target devices and click OK. Click Save.
- You can also associate the policy with device groups, users, user groups or domains from the left pane of the Policy Targets tab.
If the policy has been saved,
- Go to Policies tab. Choose the desired policy.
- Click on Manage drop-down and select Associate Targets.
- Choose the target entities and click Associate.
What happens at the device end?
Once the policy is successfully deployed to the device, the CalDAV account will be added on the Calendar app. To check whether the CalDAV account has been successfully configured to your iOS device, head to Settings > Calendar > Accounts. It can also be viewed under Settings > General > Device Management > Hexnode MDM > Accounts.


