Category filter
Enrollment of Apple devices through ADE
Automated Device Enrollment (ADE), formerly known as the Device Enrollment Program (DEP), is Apple’s standard method for enrolling organization-owned devices into Mobile Device Management (MDM). ADE utilizes a “zero-touch” approach, allowing devices to automatically enroll in Hexnode UEM and apply configurations immediately upon their first power-on.
This capability is managed through Apple Business or Apple School Manager (ASM), which integrate directly with Hexnode to streamline deployment.
Key Concepts
- Apple Business: A web-based portal combining ADE and VPP (Volume Purchase Program) to manage devices and apps in enterprise environments.
- Supervision: Devices enrolled via Apple Business can be “Supervised” over-the-air, granting administrators higher privileges and control.
- Zero-Touch Deployment: No manual configuration is required by IT; the user unboxes the device, connects to Wi-Fi, and the device configures itself.
Prerequisites
To use ADE, ensure the following requirements are met:
- Apple Business/ASM Account: Your organization must be enrolled in Apple Business or Apple School Manager.
- APNs Certificate: A valid Apple Push Notification service certificate must be configured in the Hexnode UEM portal.
-
Supported Operating Systems:
- iOS: iOS 7 or later.
- iPadOS: iPadOS 13.1 or later.
- macOS: macOS 10.9 or later.
- tvOS: tvOS 10.2 or later.
- visionOS: visionOS 2.0 or later.
Step 1: Configure ADE in Hexnode
Establishing a connection between Hexnode and Apple’s portal is the first step.
- Log in to your Hexnode UEM portal.
- Either navigate to Enroll > Platform-Specific > [iOS/macOS/tvOS/visionOS] > Apple Business/School Manager > Add ADE Account or Admin > Apple Business/School Manager > Automated Device Enrollment > Add ADE Account.
- Enter a name for the ADE account and click to download the certificate file.
Step 2: Configure Apple Business
- Sign in to the Apple Business portal.
- Navigate to Devices > Management Services.
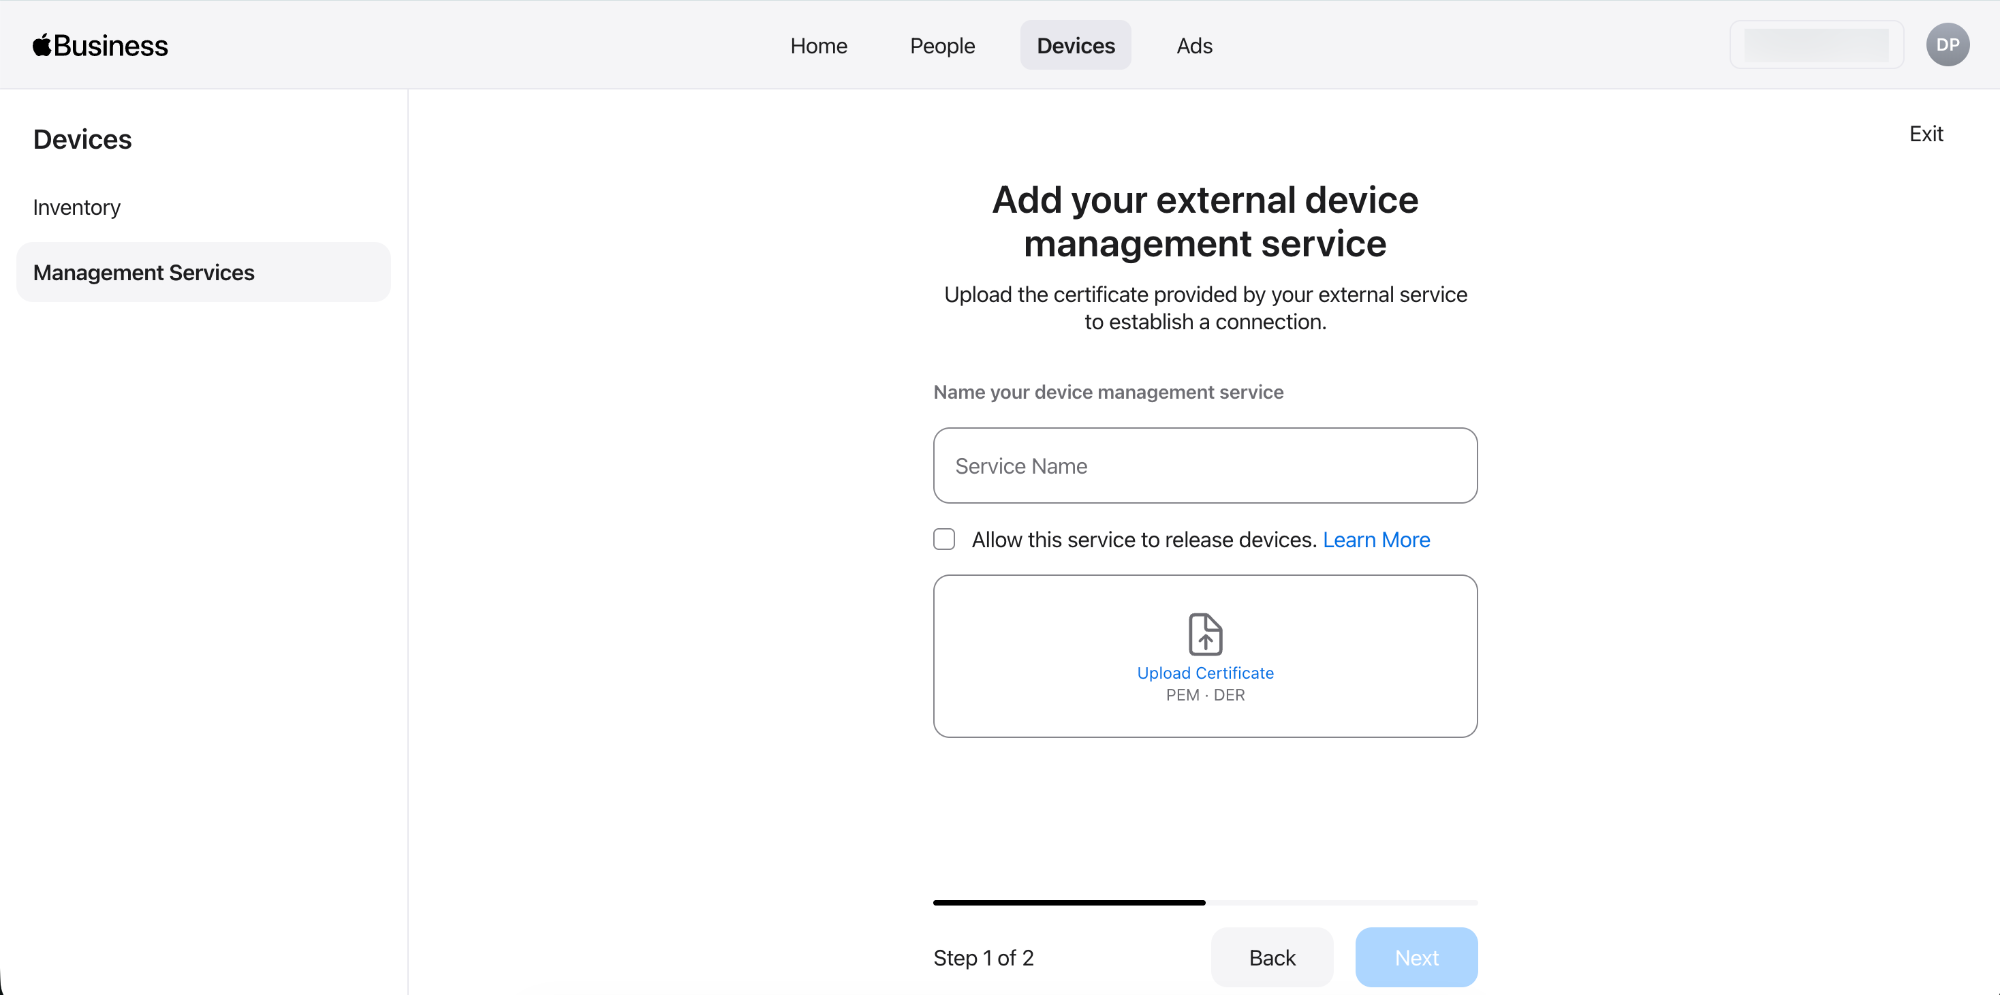
- Scroll down to the Services subtab and click Add next to Add device management service.
- Enter the device management service name (e.g., Hexnode). This is a required field.
- Optionally, check the box next to Allow this service to release devices.
- Upload the Certificate file downloaded from Hexnode in the previous step. (Supported formats: PEM, DER).
- Click Download Service Token to download the server token to your device.
- Click Done.
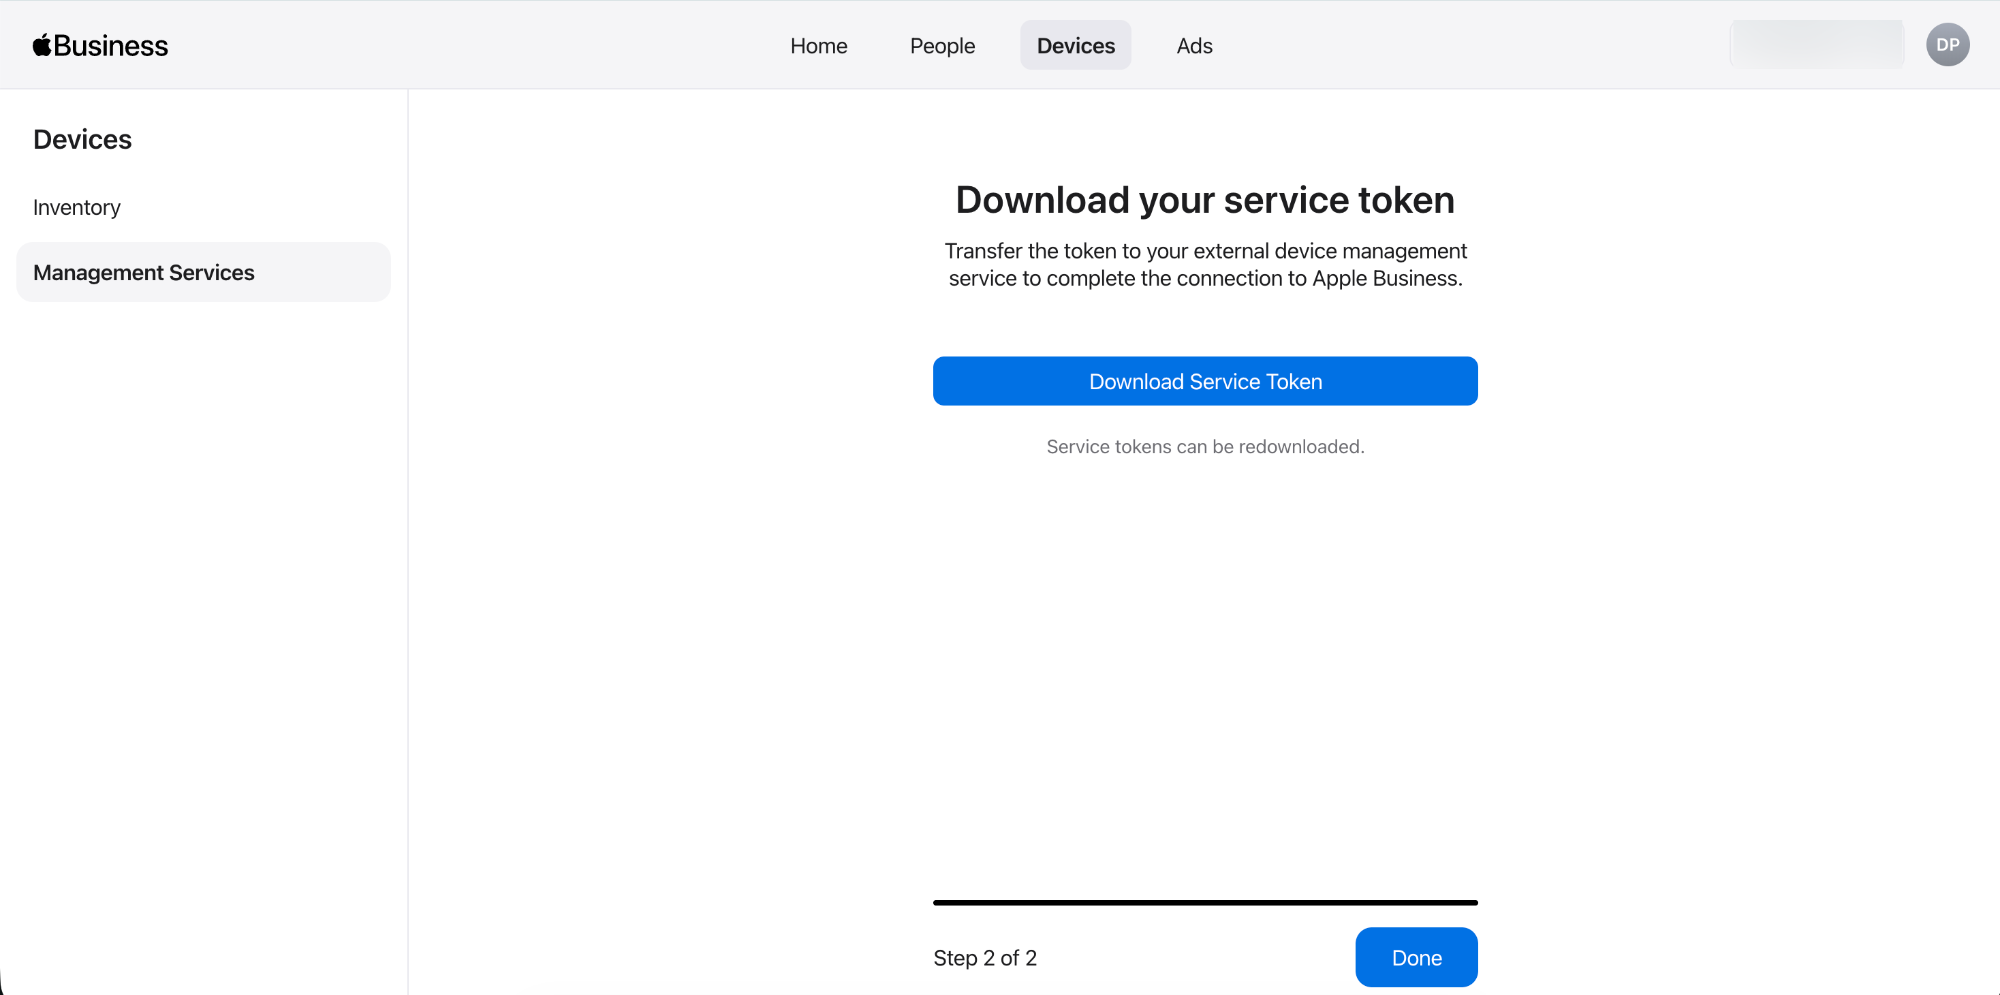
A confirmation notification will appear stating, “The MDM server is now available as a device management service.”
Step 3: Upload Token to Hexnode
- Return to the ADE settings page in Hexnode UEM console.
- Upload the MDM Server Token you just downloaded from Apple.
- Configure the enrollment settings:
- Add as Pre-approved device: Enable this to add the ADE devices as pre-approved devices.
- Default Configuration Profile: Select an existing ADE enrollment profile or create a new one.
- Save the configuration.
Step 4: Assign Devices to Hexnode Server
Devices purchased from Apple must be assigned to the specific MDM server within the Apple portal.
- Log in to Apple Business.
- Navigate to Devices > Inventory.
- Search for devices (Filter by Device Management, Enforcement Deadline, Source, Order Number, Device Type, or Storage Size)
- Select the target devices from the list, click Assign Device Management, and choose the Hexnode server (created in Step 2) from the device management service dropdown.
- Click Continue.
Step 5: Sync Devices with Hexnode
- In the Hexnode portal, go to Enroll > All Enrollments > No-Touch > Apple Business/School Manager > Devices.
- If new devices do not appear, click Sync with ADE.
- Full Sync: To completely sync all the ADE-enrolled devices go to Enroll > All Enrollments > No-Touch > Apple Business/School Manager > Devices.> Accounts and click Sync all ADE Accounts.
End-User Experience (Device Activation)
Once assigned and synced:
- The user turns on the device.
- The device connects to Wi-Fi.
- The device contacts the Apple server, detects the assigned ADE profile, and prompts for Remote Management.
- The Hexnode UEM profile installs automatically, and the device applies it to all pre-configured policies (Supervision, restrictions, etc.).
Troubleshooting Common ADE Errors
If the enrollment process does not initiate or complete with errors, check the following common issues derived from our support database.
1. “Profile Installation Failed” (On Device)
Symptom: The iOS device fails to install the profile and displays the message “Profile Installation Failed”.
Cause: This usually occurs when the device is not connected to the internet or when Stolen Device Protection is active.
Resolution:
- Check that the device is connected to a stable Wi-Fi network. If Wi-Fi is turned off, ensure cellular data is available.
- Turn off the Stolen Device Protection option in Settings before starting enrollment.
- Updating the device to the latest OS version can also help resolve the issue.
Need more help?
For a comprehensive list of error codes and advanced debugging steps, please refer to our detailed troubleshooting guides:
- Common errors while enrolling iOS devices in Hexnode UEM.
- Common errors while enrolling in Apple Business Manager.
Frequently Asked Questions
Is "ADE" the same as "DEP"?
Yes. Automated Device Enrollment (ADE) is the modern name for what was formerly known as the Device Enrollment Program (DEP). Apple rebranded the service to align with Apple Business, but the functionality—automating MDM enrollment and supervision—remains the same.
What happens if I sell or retire an ADE device?
You must release the device from Apple Business. Simply wiping the device is not enough; if it remains in Apple Business, it will attempt to re-enroll in Hexnode the next time it connects to Wi-Fi.
