Category filter
How to remotely capture screenshots on ChromeOS devices?
The Take Screenshot remote action in Hexnode UEM enables IT administrators to capture real-time visual output from managed ChromeOS devices running in kiosk mode, facilitating troubleshooting and content verification for digital signage.
Why capture screenshots remotely?
Remote screenshots provide critical visual data for diagnosing rendering issues, verifying digital signage content, and troubleshooting device behavior without requiring physical access to the endpoint.
- Troubleshooting: Identify errors or anomalies in the application interface.
- Verification: Confirm that digital signage or kiosk content is displayed correctly.
- Efficiency: Centralized monitoring from the Hexnode console saves time and resources.
Prerequisites and constraints
Before attempting to capture a screenshot, ensure the target ChromeOS device meets the following strict requirements. Failure to meet these will result in action failure.
| Prerequisite | Condition |
|---|---|
| Operating Mode | The device must be in Kiosk mode. |
| User Interaction | The Auto launch app option must be enabled within the kiosk configuration. |
| Configuration | Zero user input (mouse movement, touches, keyboard) is allowed after the action is initiated. |
Step-by-Step Guide: Capturing a screenshot
To execute the remote screenshot action on a compatible ChromeOS device:
- Log in to your Hexnode UEM portal.
- Navigate to Manage > Devices.
- Click on the identifier of the required ChromeOS device to open its details page.
- On the top-right corner of the device details page, click the Actions button.
- From the dropdown list, navigate to Others and select Take Screenshot.
Viewing captured screenshots
Once the action is successfully executed, the image is automatically uploaded to the Hexnode portal.
- Stay on the Device details page of the target ChromeOS device.
- Navigate to the Screenshots sub-tab.
- View or download the recently captured image files.
Troubleshooting action failures
Common failures are often due to user interaction or session state.
Issue: Action fails due to user input
If the device detects any user interaction (mouse, touch, keyboard) during the process, the action will fail.
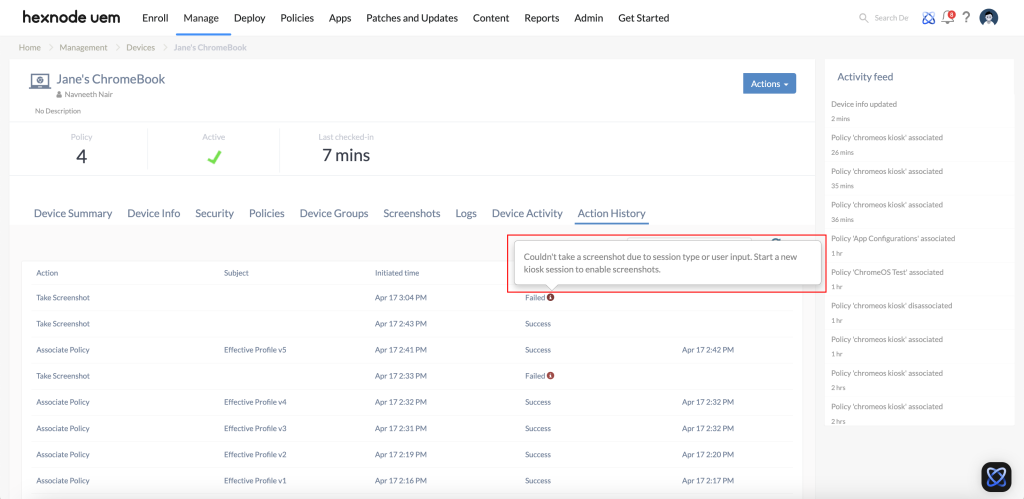
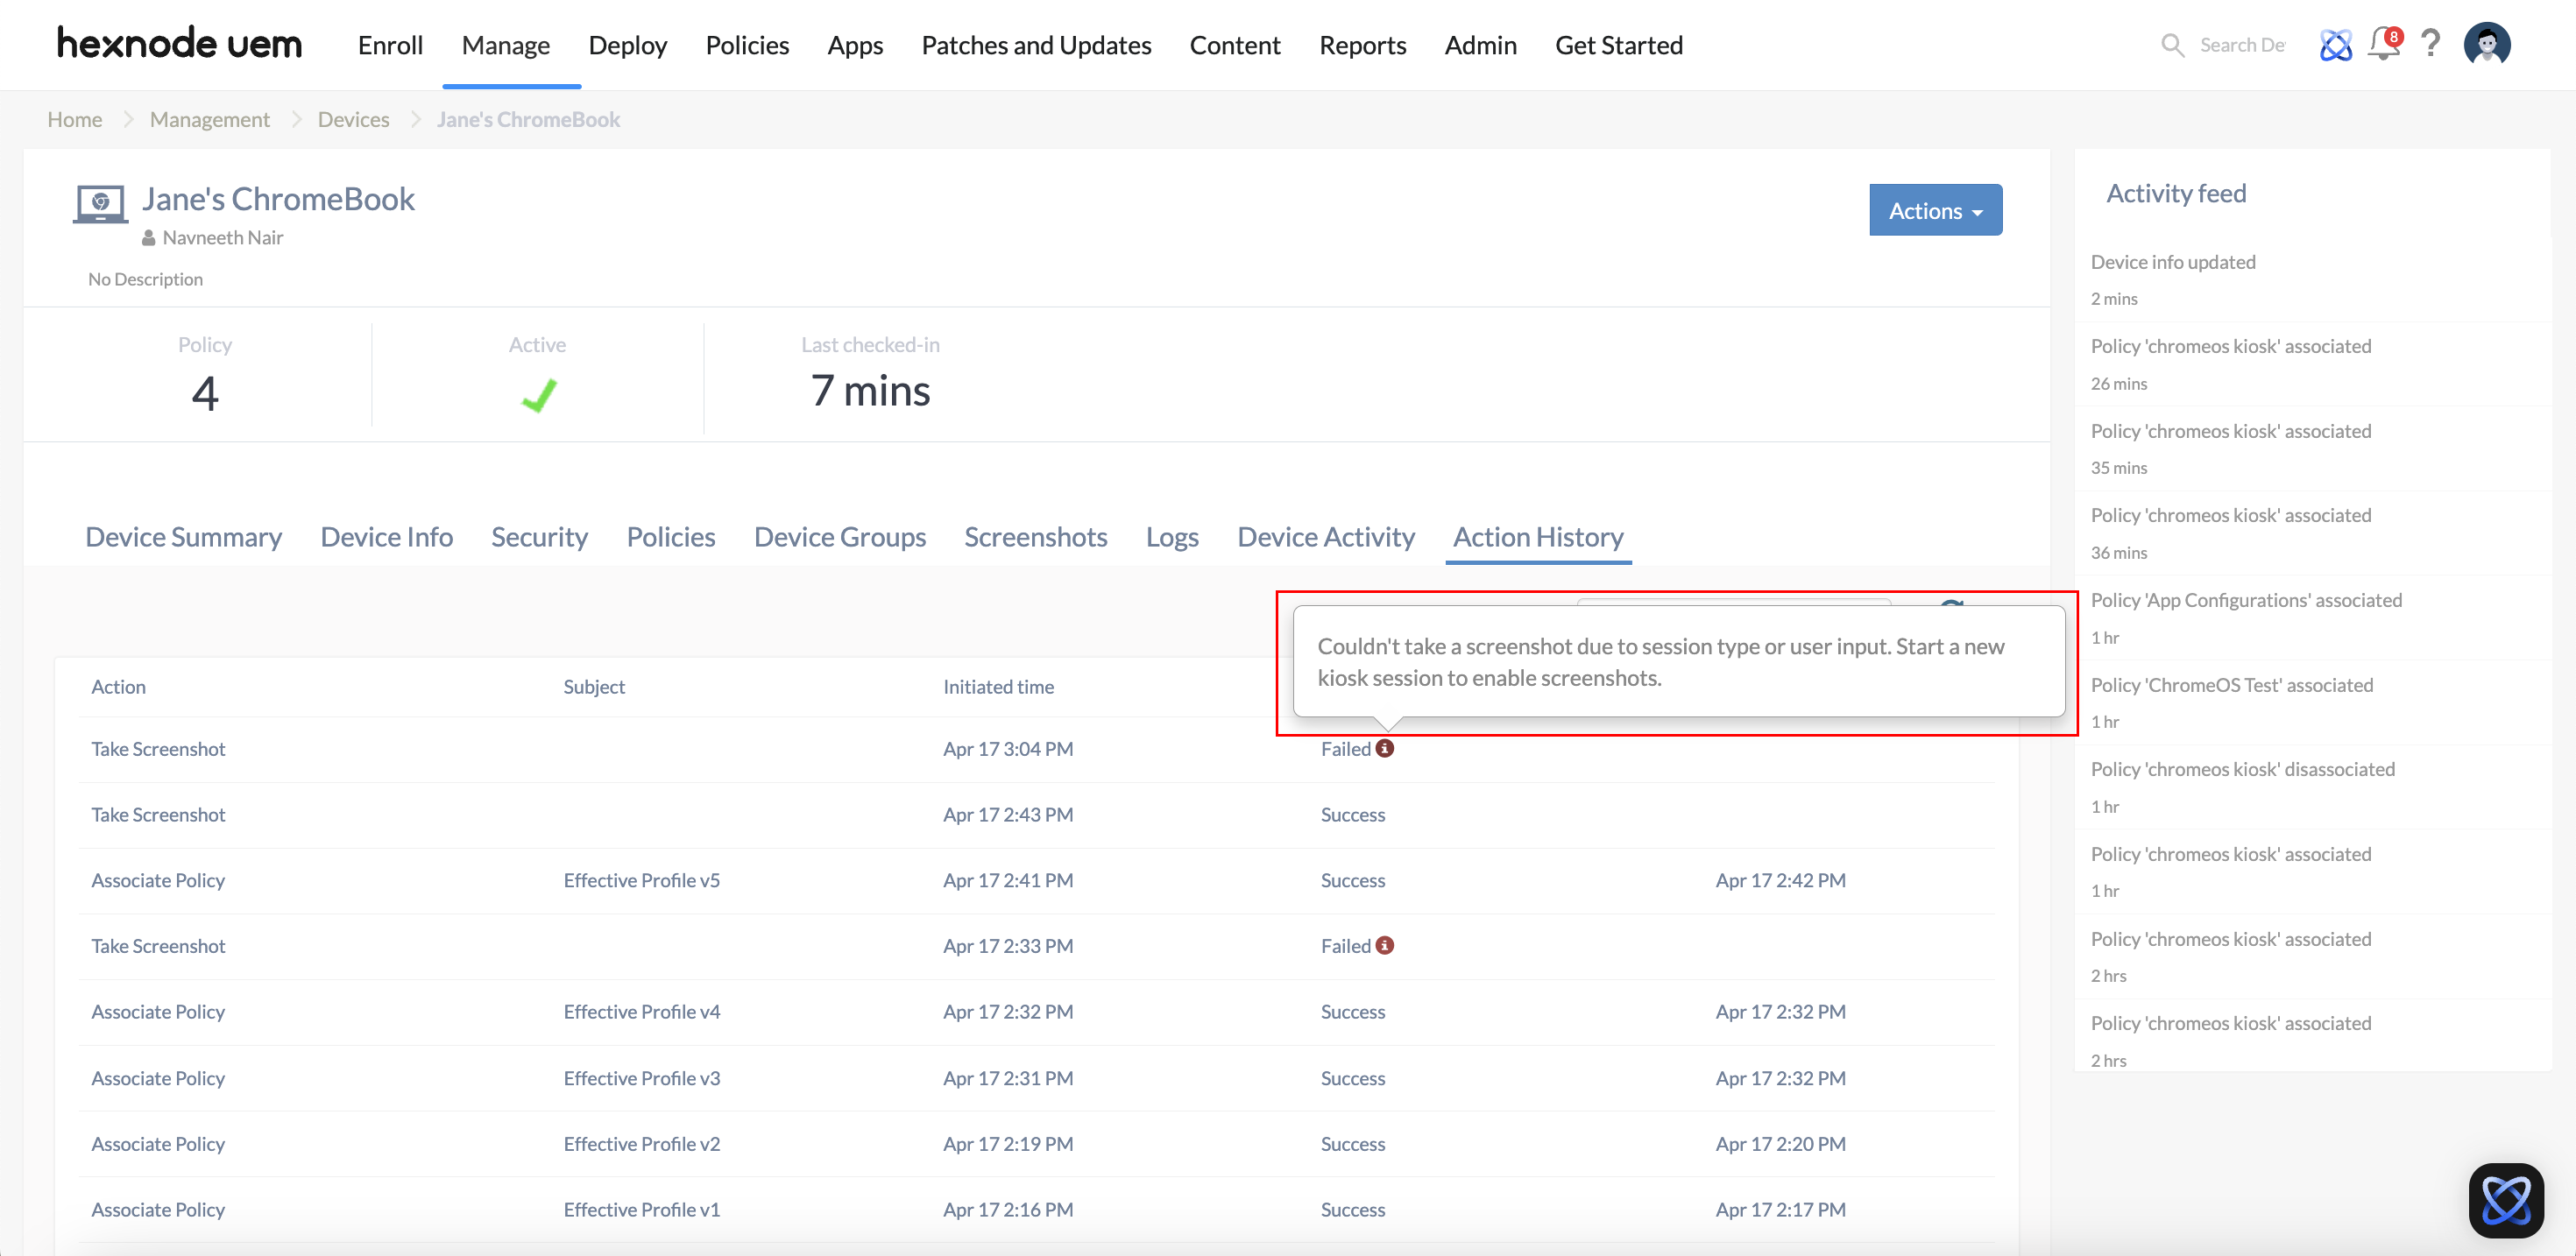
- Error Message: The Action History will display: “Couldn’t take a screenshot due to session type or user input. Start a new kiosk session to enable screenshots.”
- Resolution:
- Restart the device. This initiates a new kiosk session.
- Ensure no physical interaction occurs with the device.
- Retry the Take Screenshot action.
Frequently Asked Questions (FAQ)
Can screenshots be taken while a user is logged into a standard session?
No. The Take Screenshot action is strictly limited to Kiosk mode. If the device is in a standard user session, the action will fail to ensure privacy and security.
Is it necessary for the Kiosk app to start automatically for this feature to work?
Yes. The Auto launch app option must be enabled within the kiosk configuration. If the app is launched manually or the device is sitting on a selection screen, the screenshot action will not execute successfully.
Where can the captured images be found?
All successfully captured images are stored under the Screenshots sub-tab on the specific Device Details page within the Hexnode UEM portal.
How is a “Failed” status resolved if user interaction was detected?
The device must be restarted to initiate a fresh kiosk session. Once the device has rebooted and the kiosk app has auto-launched, the Take Screenshot action should be retried without touching the device’s peripherals.
