Category filter
How to set up iOS Global HTTP Proxy settings
Global HTTP Proxy settings allow organizations to route all HTTP network traffic through a specified proxy server. This server acts as a secure buffer between the devices and the internet, masking company server identities and protecting confidential data.
1. Configuration Workflow
Requirement: This feature is supported only on Supervised iOS devices.
To set up iOS Global HTTP Proxy settings:
- Log in to the Hexnode UEM portal.
- Navigate to Policies > New Policy > Create a fully custom policy > iOS > Security > Global HTTP Proxy and click Configure.
- Select the Proxy type: Choose between Manual or Automatic setup.
2. Technical Parameter Breakdown
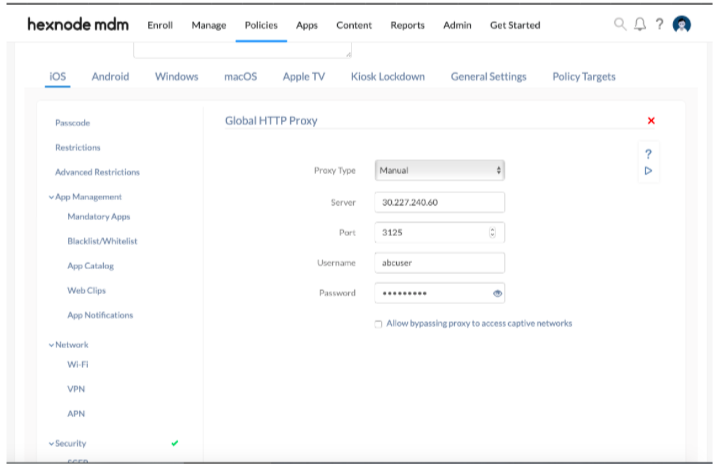
Option A: Setting up a Manual Proxy Server
Use this configuration when the proxy server details (IP/Hostname and Port) are known and static.
| Manual Proxy Setting | Description |
| Server | Mandatory. Type the IP address or the hostname of the proxy server. |
| Port | Mandatory. Enter the port number used for connecting to the client. (Default: 8080). |
| Username | Required for private proxies that necessitate a username for service access. |
| Password | The password associated with the private proxy server username. |
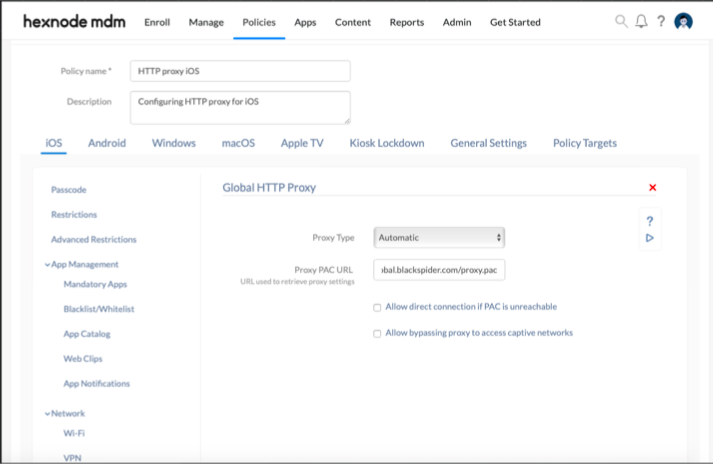
Option B: Setting up an Automatic Proxy Server
Use this configuration to define proxy rules via a Proxy Auto-Configuration (PAC) file containing JavaScript logic.
| Automatic Proxy Setting | Description |
| Default Proxy PAC URL | Mandatory. Provide the URL to the configuration script. The PAC file (e.g., function FindProxyForURL(url, host) {return "PROXY 192.168.0.222:9090";}) is referenced whenever a new URL is loaded to decide if the proxy should be used. |
| Allow direct connection if PAC is unreachable | If unchecked (Disallowed), the device is restricted from connecting to any destination address when the PAC file cannot be reached. |
Option C: Captive Network Handling
- Allow bypassing proxy to access captive networks: When selected, the proxy is disabled while accessing login pages for captive portals (public-access networks like those in hotels or airports). This ensures the user can interact with the portal and authenticate before network access is granted. By default, this option is unchecked.
3. Policy Association & Deployment
To deploy the proxy settings to devices:
- Navigate to the Policy Targets tab within the policy.
- Select the desired Devices, Device Groups, Users, User Groups, or Domains/OUs.
- Click Save.
4. What Happens at the Device End?
Once the policy is successfully associated:
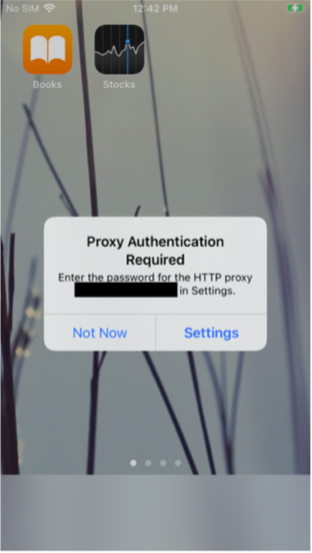
- Initial Prompt: A prompt appears on the device with two options: “Not Now” and “Settings”.
- If “Not Now” is selected, the user will be unable to access the internet.
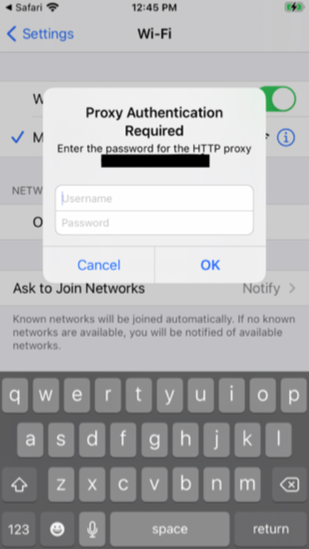
- Authentication: Selecting “Settings” directs the user to the Settings app. A second prompt appears asking for the proxy Username and Password.
- Persistence: If the user cancels the prompt, it will keep reappearing until they sign in. Internet access is restricted until the user successfully authenticates.
5. Troubleshooting & FAQs
Frequently Asked Questions (FAQs)
- Can a manual proxy be used for some sites and not others?
Manual proxy settings apply globally to all HTTP traffic. For granular routing (bypassing specific hosts), an Automatic (PAC) setup should be utilized. - What is the default port for most proxies?
While the Hexnode default is 8080, this must match the port configured on the actual proxy server. - Does this setting affect cellular data?
Yes. As a Global HTTP Proxy, it routes traffic through the proxy regardless of whether the device is on Wi-Fi or Cellular.
Troubleshooting
- Internet access unavailable: Verify the device is Supervised. Ensure the Proxy Server IP or PAC URL is reachable from the current network.
- Captive Portal issues: If users cannot log into public Wi-Fi, verify that the “Allow bypassing proxy to access captive networks” checkbox is enabled.
- Authentication loop: If the credentials prompt appears repeatedly, ensure the Username and Password provided match the proxy server’s requirements.
