Category filter
How to Scan Device Location?
The Scan Device Location remote action allows IT administrators to retrieve the instantaneous geographical coordinates of managed devices, providing real-time visibility into asset location across various operating systems.
What is the “Scan Device Location” Action?
This action fetches the immediate location of a device on demand. While administrators can schedule periodic tracking via policies, the Scan Device Location command is used for urgent, real-time location retrieval.
- Supported Platforms: iOS, Android, macOS, Windows, Android TV OS, visionOS.
- Key Functionality: Provides real-time coordinates and updates the device’s location history in the UEM console.
- Data Visibility: Admins can view current positions on a map or review a full list of traversed locations.
Prerequisites and Platform Constraints
Before executing a location scan, specific configurations must be met depending on the device platform.
| Platform | Prerequisite / Constraint |
|---|---|
| All Platforms | The Location Tracking policy must be associated with the device to unlock the scan action. |
| macOS | Must run macOS 10.11+; Wi-Fi must be enabled (even on Ethernet); Location permissions must be granted to the Hexnode UEM app. |
| Windows (Co-managed) | Requires the Enable Location Tracking remote action instead of a standard policy. |
| iOS | The Hexnode UEM app must be running. If the app is killed, the scan remains in Pending status until the app is opened and synced manually. |
Step 1: Enabling Location Tracking via Policy
The Scan Device Location action is disabled by default. Administrators must first enable tracking through a configuration policy.
- Log in to the Hexnode UEM portal.
- Navigate to Policies > New Policy.
- Enter a name and description for the policy.
- Go to General Settings > Location Tracking and click Configure.
- Set the following parameters:
- Enable Location Tracking: Check this box to activate the feature.
- Location Update Interval: Select a frequency from 15 mins to 24 hrs.
- Navigate to Policy Targets to associate the policy with specific Devices, Users, or Groups.
- Click Save.
Step 2: Executing the Scan Device Location Action
Once the policy is associated, the instantaneous scan action becomes available in the device management menu.
- Navigate to Manage > Devices.
- Select the target device or click on its name to open the Device Summary.
- Click Actions > Scanning & Monitoring > Scan Device Location.
![]()
- View Results: The location will update on the Device Summary page.
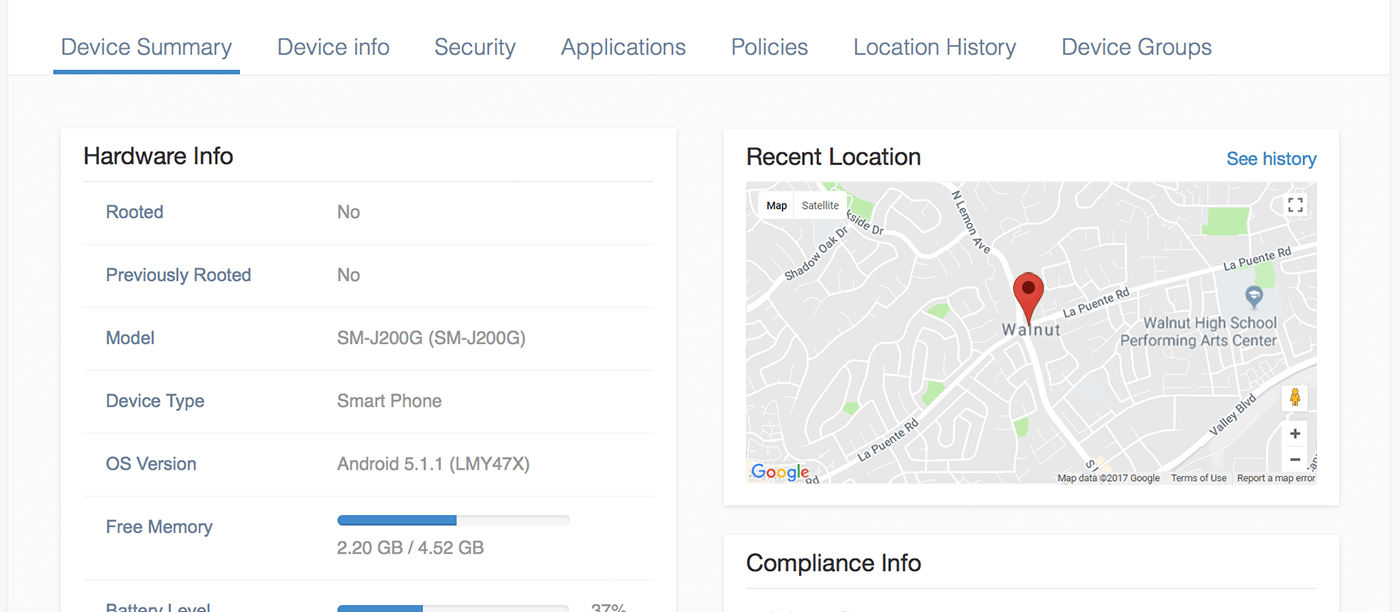
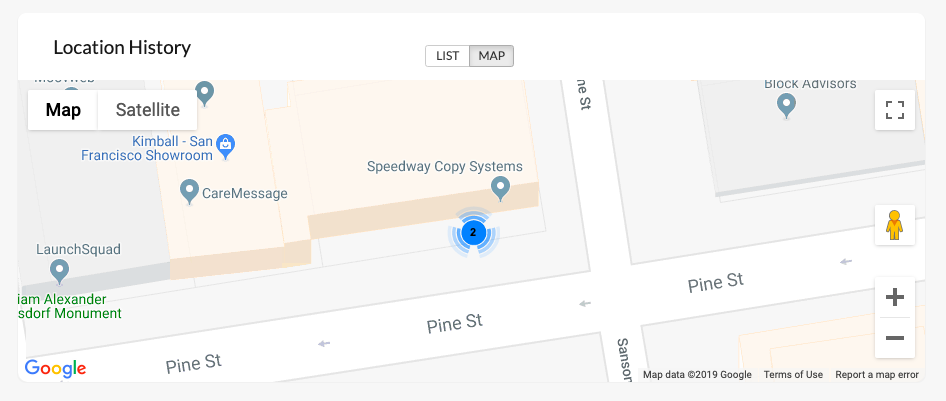
- Review History: Click See history or navigate to the Location History sub-tab to view all previous coordinates.
Manual Location Reporting (Check-in Notes)
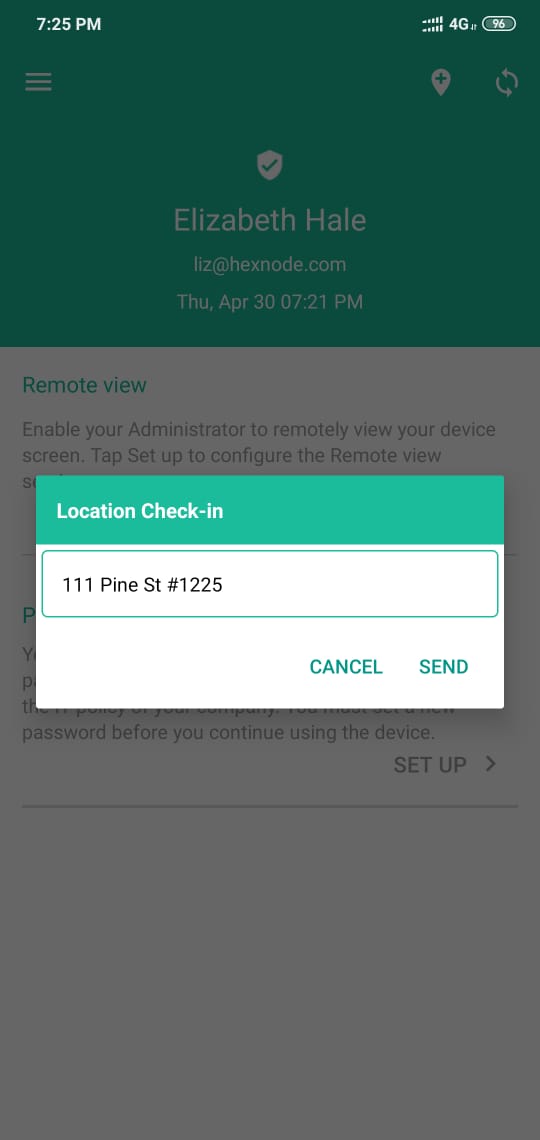
Hexnode supports user-initiated location reporting, allowing field employees to provide context alongside their coordinates.
- Location Check-in: Users on iOS, Android, and Android TV OS can use the check-in icon in the Hexnode UEM app to send their location and manual notes.
- Reporting: These entries are visible under Reports > Location Reports > Location History. Reports can be exported as CSV or PDF files or scheduled for email delivery.
- macOS Send Location: Users can manually transmit their current coordinates using the Send Location button in the macOS Hexnode UEM app.
Troubleshooting
Scan Device Location status stays in “Pending” status on an iPhone
The status of the scan action being pending indicates that the Hexnode UEM app is not running in the background. Open the Hexnode UEM app and click the Sync icon to complete the action request.
Frequently Asked Questions (FAQ)
Why is the Scan Device Location action greyed out?
The action is disabled by default. It only becomes active once a Location Tracking policy has been successfully associated with the device.

Is Wi-Fi required for location tracking on a Mac connected via Ethernet?
Yes. For macOS devices, the Wi-Fi hardware must be turned on to assist in fetching accurate location details, even if the primary internet connection is through Ethernet.
Can location reports be automated?
Yes. Administrators can schedule report delivery via email at specified times through the Location Reports section.
