Category filter
How to configure website kiosk on Windows devices?
This guide will take you through the steps to set up a website kiosk on Windows devices from Hexnode.
A website kiosk restricts device access only to a specific website or a set of websites, ensuring a secure and controlled browsing experience. This is useful for customer service portals, online learning portals, and online exam portals, where restricting access to unauthorized content is essential.
With Hexnode UEM, you can effortlessly configure a Windows website kiosk to limit users exclusively to necessary websites required for their tasks and prevent distractions while minimizing security risks associated with unrestricted browsing. In addition to specifying what the users can/cannot browse, you can enhance the website kiosk experience by customizing Kiosk Browser app settings.
Steps to configure website kiosk on Windows
To configure a website kiosk on Windows devices via Hexnode UEM:
- Log in to your Hexnode UEM portal.
- Navigate to Policies > New Policy. Give a suitable name and description (optional) for the policy. You can also choose to continue with an existing policy.
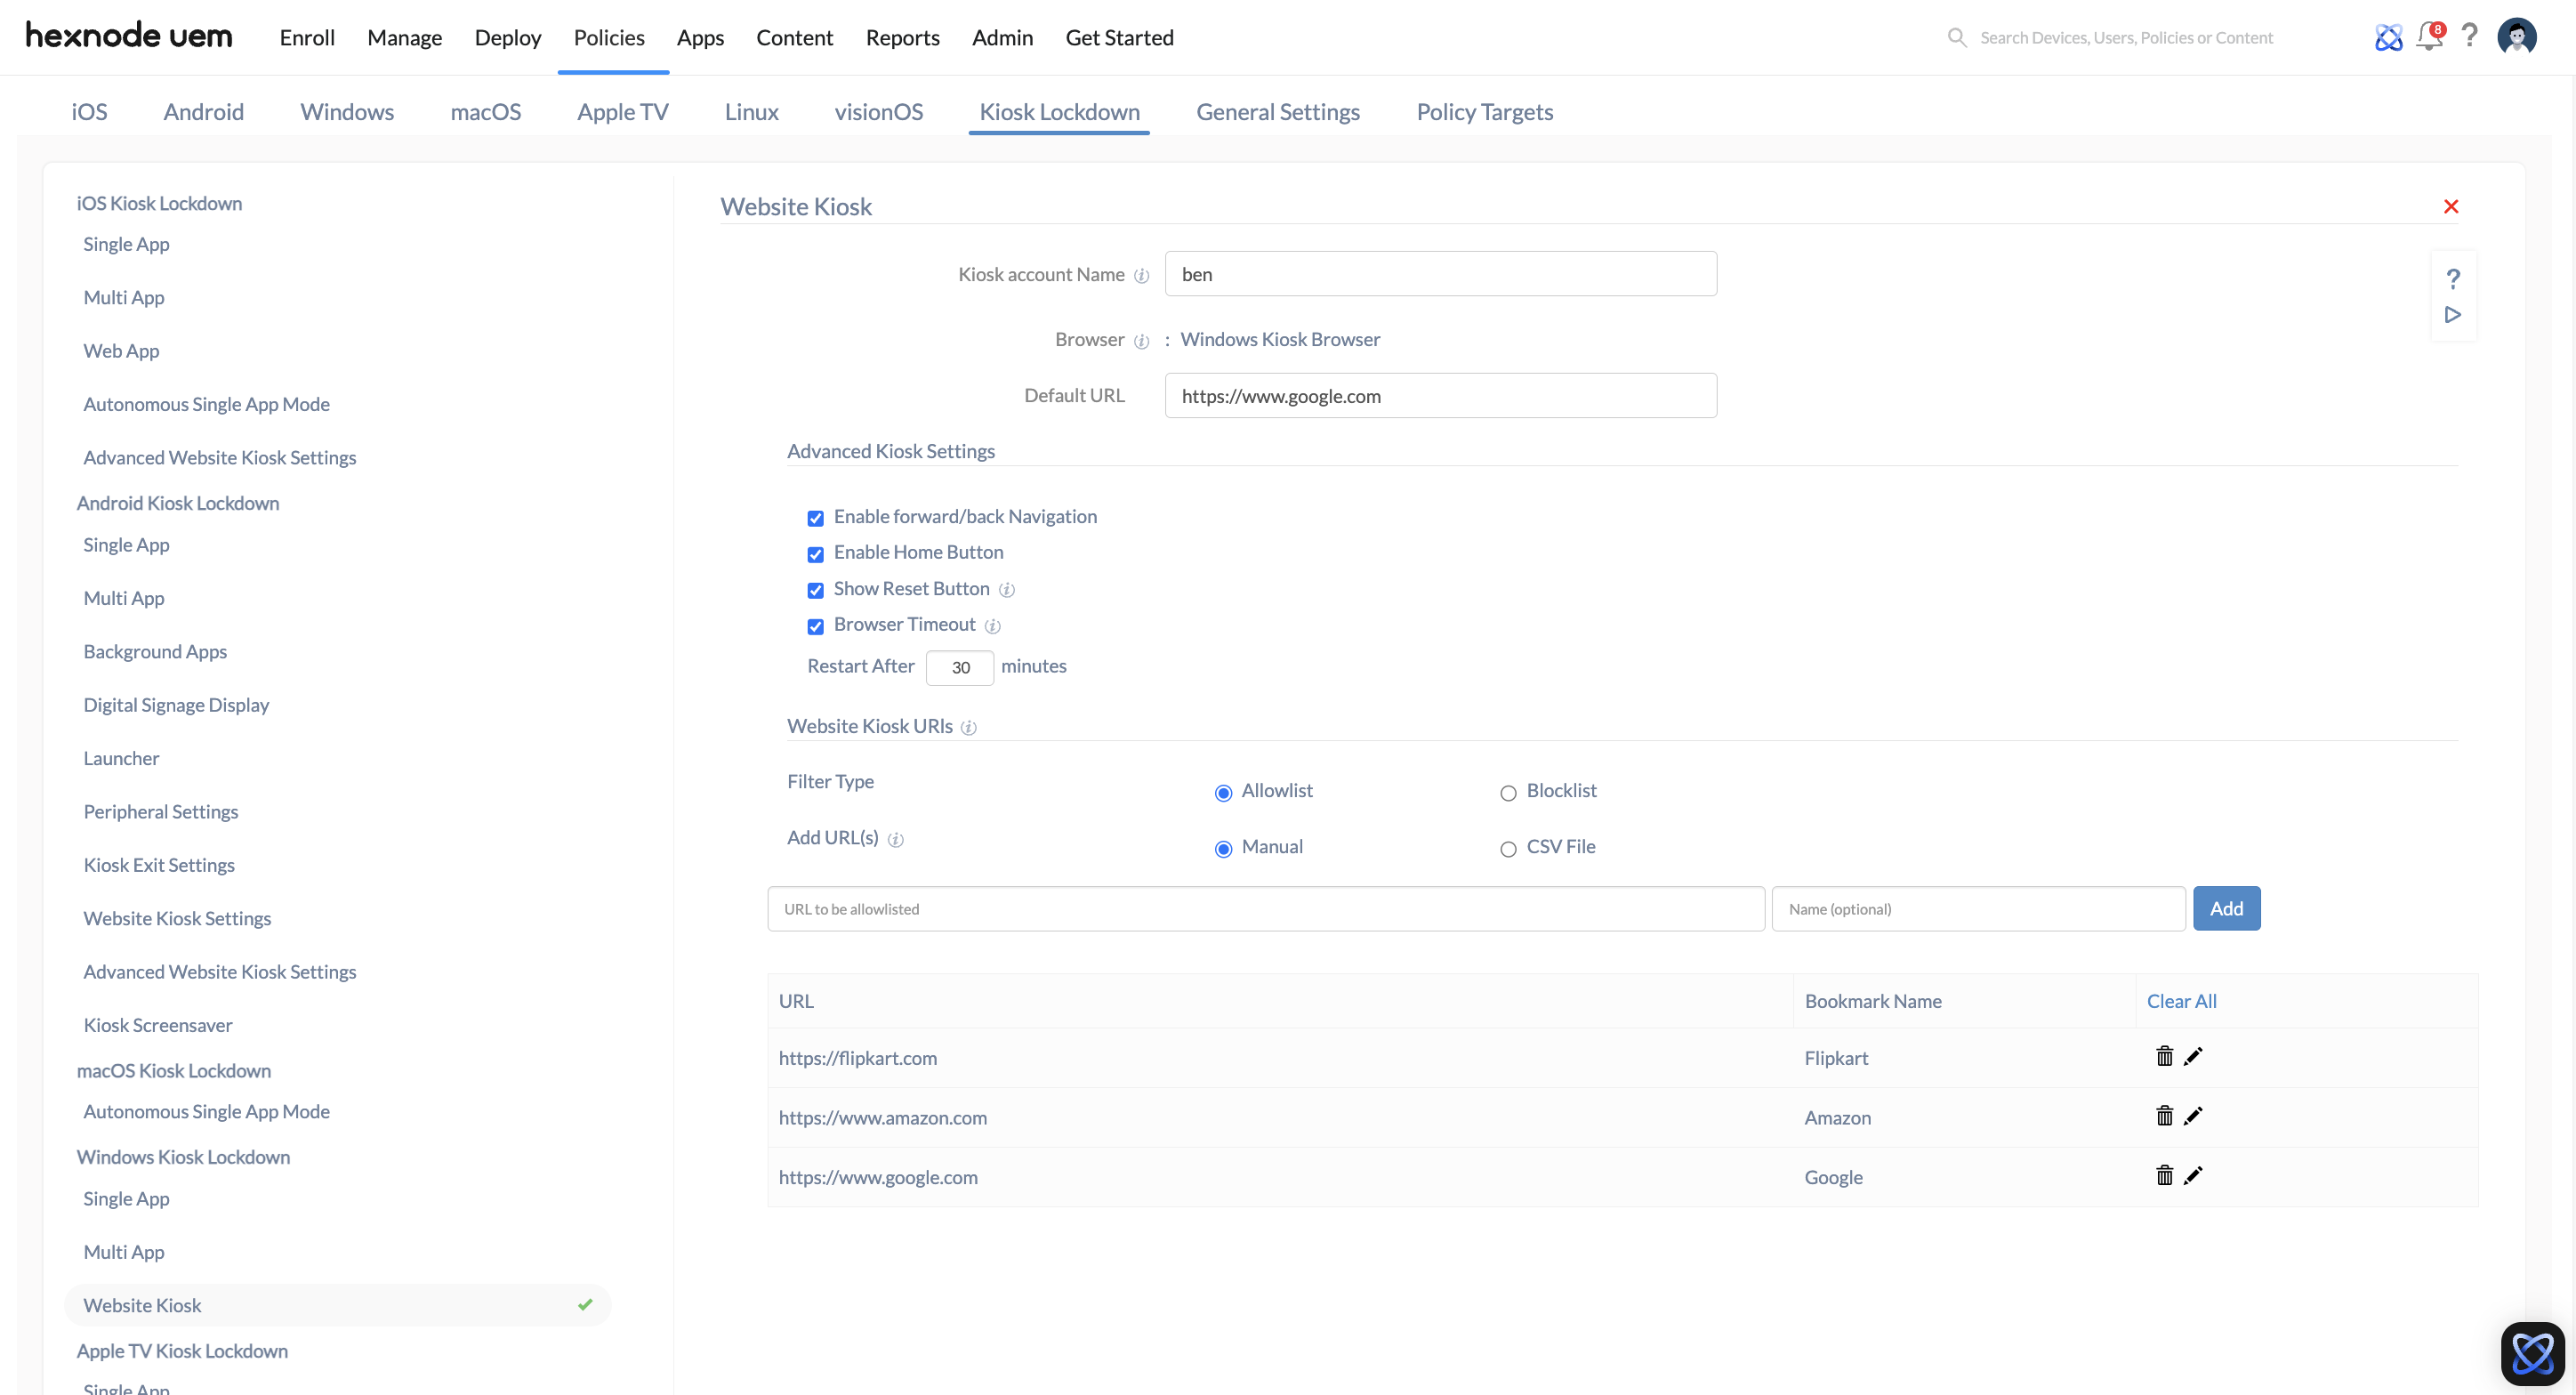
- Navigate to Kiosk Lockdown > Windows Kiosk Lockdown > Website Kiosk.
- Click Configure.
- Enter the name of the user account you want to run in website kiosk mode in the Kiosk Account Name field. If you are using the Microsoft account to enable sign in to the kiosk, you can specify the account name in either of the following formats:
- For an AD user: domain\samAccountName
- For a Microsoft Entra ID user: email address
- Under the Browser option, choose the desired browser (Kiosk Browser/Microsoft Edge) to be used while in kiosk mode.
- Provide the URL to be set as the default homepage when the kiosk mode is activated.
- In the New Tab Page URL field, enter the URL of the page that should open when the user opens a new tab in the browser (only applicable on Microsoft Edge browser).
- In the Advanced Kiosk Settings section, you can configure the following settings for the corresponding browsers:
- For Kiosk Browser:
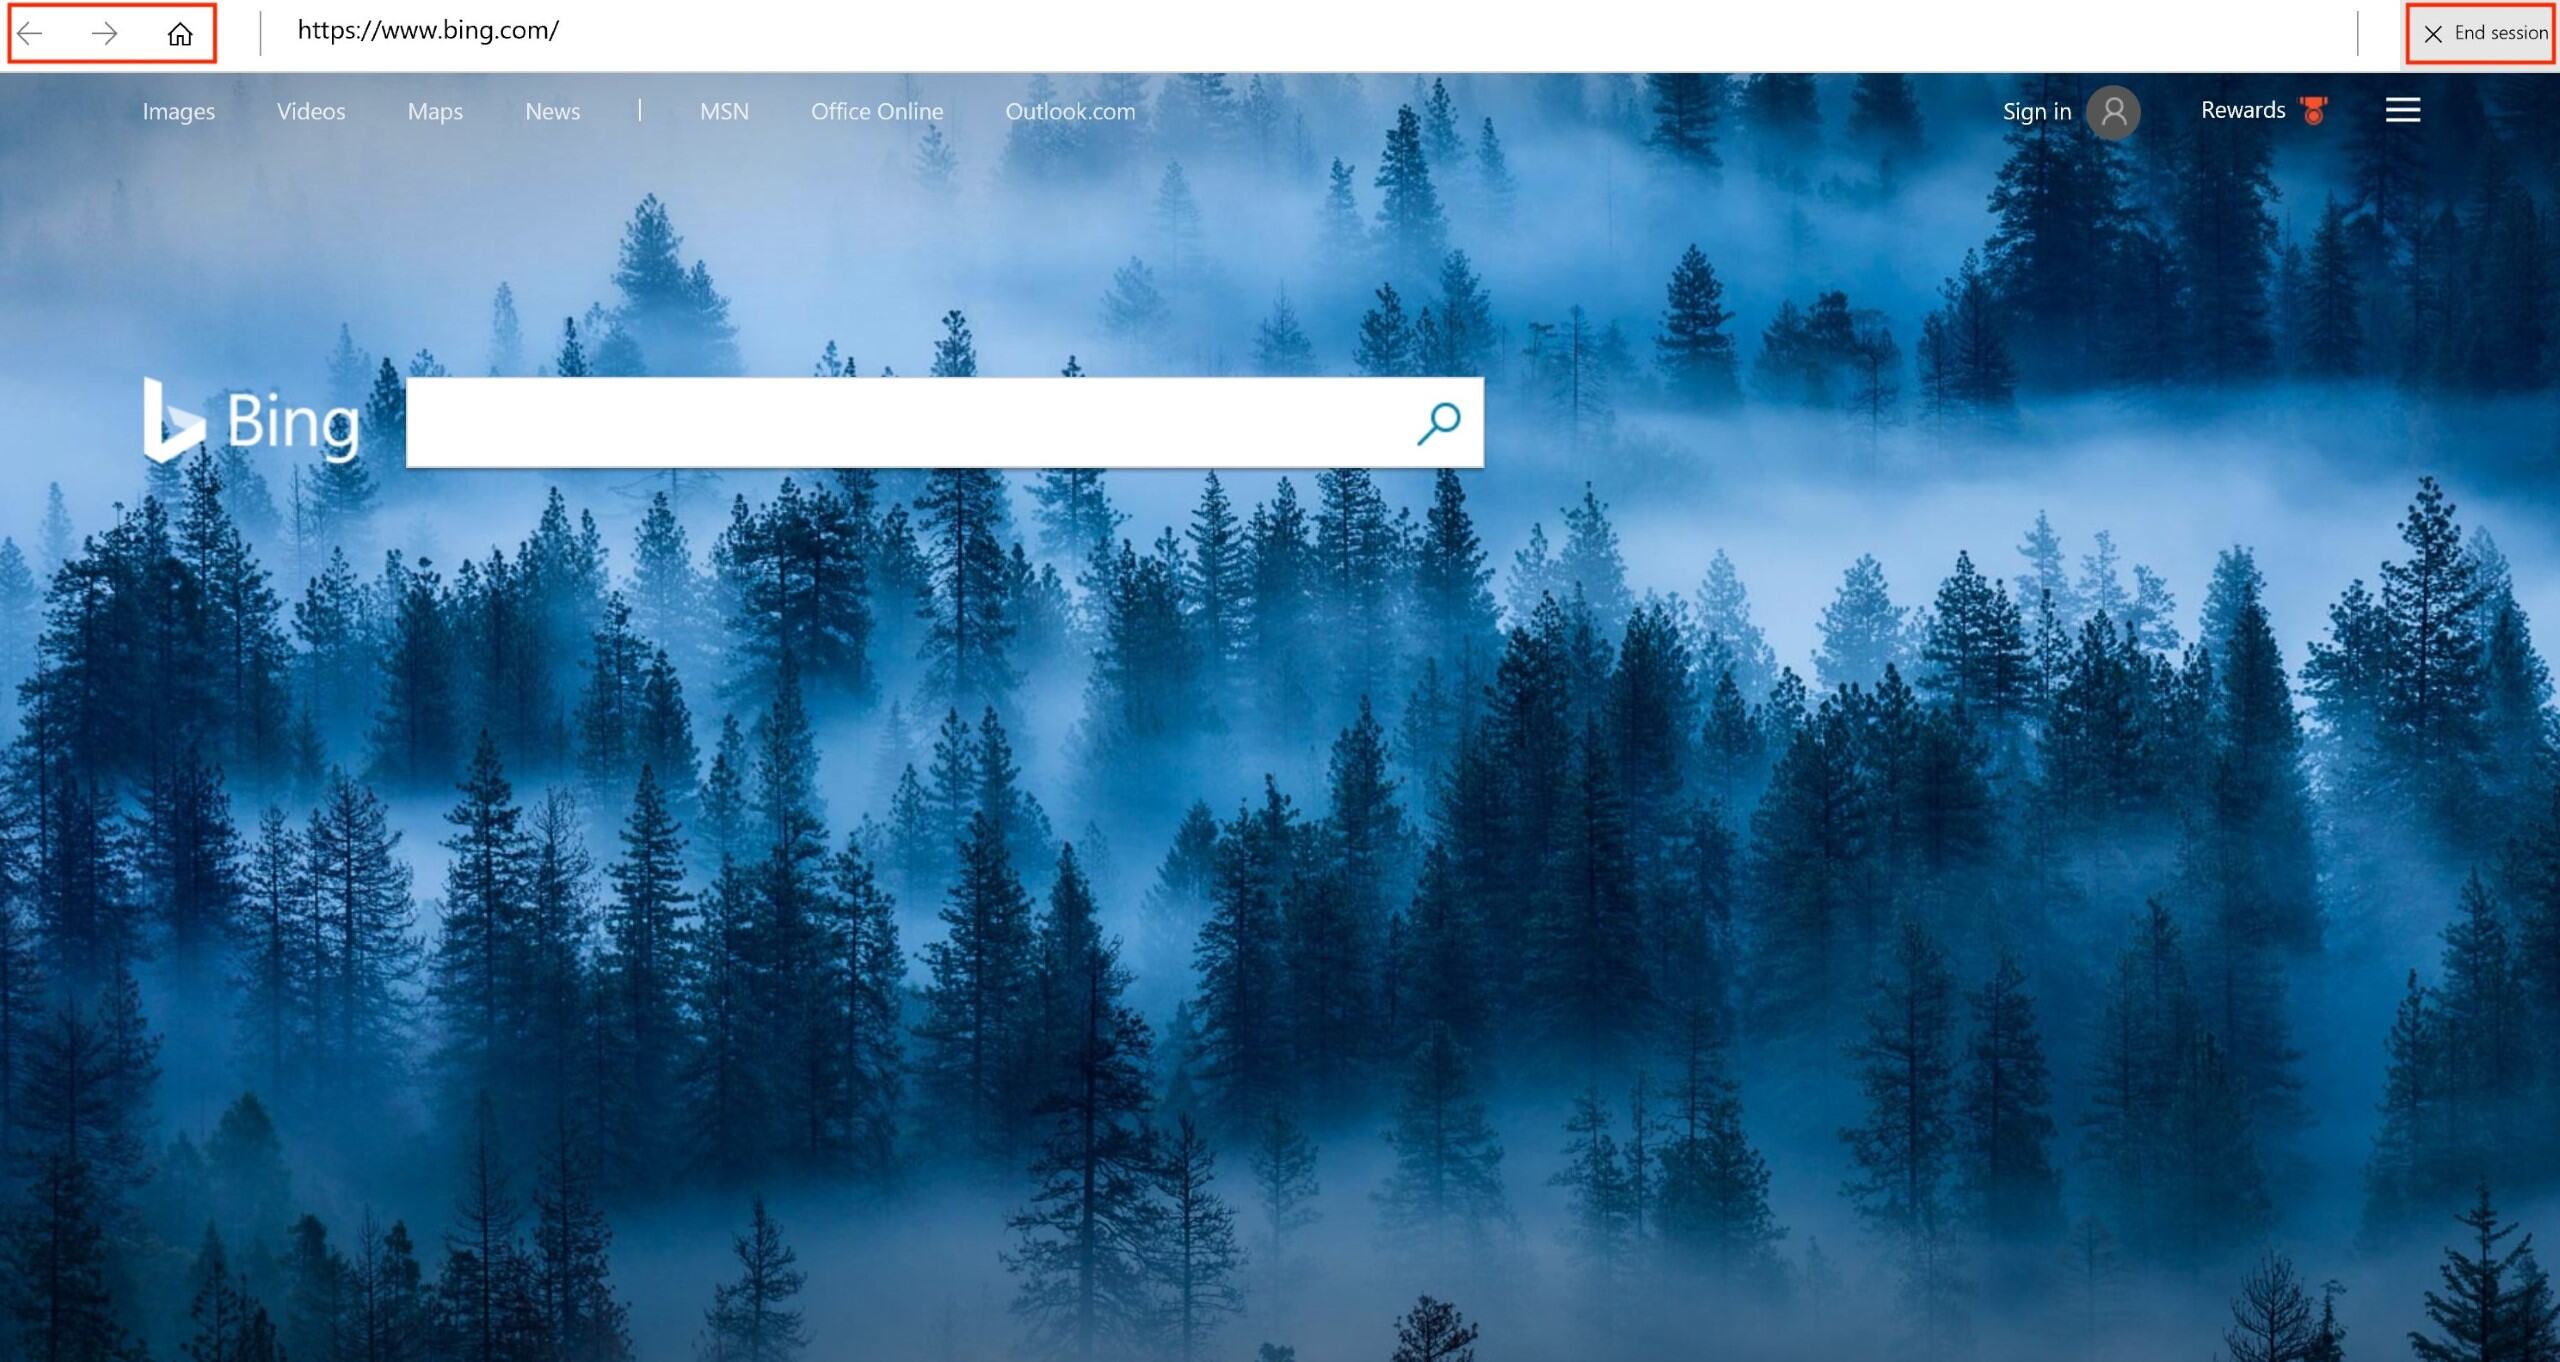
- Enable forward/back Navigation: Enabling this option allows users to navigate forward and backward through webpages within the Kiosk Browser app. The navigation buttons are located in the top left corner of the app.
- Enable Home Button: Enabling this option adds a home button to the Kiosk Browser app, alongside the navigation buttons. When clicked, it redirects users to the default website kiosk home screen.
- Show Reset Button: Enabling this option adds a reset button to the top right corner of the Kiosk Browser app. As the user clicks the reset button, they will be prompted to confirm the closure of the website kiosk session. Once confirmed, all browsing data (such as cache and cookies) will be cleared, and the browser will return to the default URL home page.
- Browser Timeout: Allows you to set an idle time (between 1 and 1440 minutes) after which the Kiosk Browser app automatically restarts. A prompt appears 30 seconds before the timeout, giving the user the option to resume or end the session. If no action is taken, the browser resets automatically.
- For Microsoft Edge
- Swipe gestures for forward/backward navigation: Enabling this option allows users to navigate forward and backward in the browser using swipe gestures.
- Home button: Enabling this displays the home button on the browser, clicking on which redirects the user to the default home page.
- Users can modify URLs in the address bar: If enabled, users are allowed to modify the web address (URL) from the address bar for browsing. If disabled, the user will be restricted from modifying the URL.
- Delete downloaded files in the kiosk session upon exit: When enabled, all files downloaded during the kiosk session will be automatically deleted upon exit.
- Idle timeout: Allows you to set an idle time after which you can select the following idle timeout actions to take place. You can select one or more actions to happen when the device goes idle:
- Close browser : Closes the browser window.
- Clear browsing history : Clears the browser history.
- Clear download history : Clears the download history.
- Clear cookies and other site data : Clears the cookies and other site data.
- Clear cached images and files : Clears the cached images and files.
- Clear password Signin : Clears the saved sign-in passwords.
- Clear autofill : Clears the saved autofill data.
- Clear site settings : Clears the site settings.
- Reload pages : Reloads the web pages.
- For Kiosk Browser:
- In the Website Kiosk URLs section, you can allowlist or blocklist URLs in kiosk mode. URLs can be added manually or uploaded via a CSV file. Manually added URLs can be edited or deleted later. To add a URL, enter the address along with the name and click Add.
- Allowlist: Add URLs that should be accessible in website kiosk mode.
- Blocklist: Add URLs that should be restricted in website kiosk mode.
- After configuring the website kiosk settings, navigate to Policy Targets to apply the policy to devices, groups, users, or domains.
- Click Save to apply the policy.
What happens at the device end?
Once the user (specified in the Kiosk Account Name field) logs in, the device will automatically launch the Kiosk Browser/Microsoft Edge app and enter Website Kiosk mode. In this mode, the device will display the default website specified in the configured policy, limiting access to any other apps or functionalities.
How to exit kiosk mode?
You can exit devices from kiosk mode either by disassociating or archiving the policy. Besides, you also need to restart the device to remove it from kiosk mode.
Method 1: Disassociate the policy
- Log in to the Hexnode UEM portal.
- Navigate to the Policies tab.
- Select the desired policy.
- Go to Policy Targets.
- Click on Remove on the right side of the device.
- Log in to the Hexnode UEM portal.
- Navigate to the Manage tab.
- Click on the device from which the policy needs to be disassociated. This will take you to the Device summary page.
- Go to Policies. Identify the policy and click on the trash icon next to the policy.
Method 2: Archive the policy
- Log in to the Hexnode UEM portal.
- Navigate to the Policies tab.
- Select the desired policy.
- Click on Manage > Move to Archive.
- Log in to the Hexnode UEM portal.
- Navigate to the Manage tab.
- Click on the device from which the policy needs to be disassociated. This will take you to the Device summary page.
- Go to Policies. Select the policy. Click on Manage > Move to Archive.
Method 3: Exit from the device end
If the above methods fail, press CTRL+ALT+DEL. This locks the screen and allows users to sign in with a different account from the login page. However, the previous user account remains in kiosk mode, and once the user logs in to the account, the kiosk mode gets relaunched.

