Category filter
How to configure VPN settings on your Windows devices
Virtual Private Network or popularly known as VPN, allows you to establish a secured and encrypted connection over the internet. It enables you to safely transmit data through an encrypted tunnel, protecting your online identity, and allows you to use public Wi-Fi networks safely, in turn supporting the user to work remotely. It also allows routing all the traffic through the specified network ensuring secure access to corporate resources. Hexnode UEM allows you to configure VPN settings on your Windows devices.
Configure VPN server settings via policy
To configure VPN settings on your Windows devices.
- Login to your Hexnode UEM portal.
- Navigate to Policies.
- Select an existing policy or create a new one by clicking on New Policy.
- Go to Windows > Network > VPN. Click Configure.
| Settings | Description |
|---|---|
| Connection type | Choose a connection type from the list. L2TP (default), PPTP and IKEv2 are the available options. |
| Connection name | Provide a name for the VPN configuration for identification. The configured connection name will be displayed among the list of available VPN connections on the device once the policy is associated with the device. |
| Server Name/ IP Address | Enter the IP address or Fully Qualified Domain Name (FQDN) of the VPN server. |
The following options will be enabled when Advanced Connection Settings is checked.
Routing address
Routing address enables you to add the list of routes to the routing table for the VPN interface. A routing table is required for spilt tunneling and allows the networking stack to identify the traffic that needs to go over the VPN interface for split-tunnel VPN.
- Address – Provide the subnet address in IPv4/v6 address format. (Mandatory)
- Subnet Size – The subnet prefix size part of the destination for the route entry. (Mandatory)
You can add multiple entries by clicking the Add button.
DNS Routing Rules
DNS routing rules allow you to set up domain names and corresponding DNS servers and proxy servers required to establish the VPN connection.
- Domain Name – Specify the domain name for the connection. (Mandatory)
- DNS Servers – Specify the DNS server IP address. (Mandatory)
- Web Proxy Servers – Specify the Web Proxy Server IP address if you are redirecting traffic through your intranet.
You can add multiple entries by clicking the Add button.
Routing policy
Specify the routing policy for the traffic coming through the network.
- Allows traffic through VPN and local network connection – In this case, only the specified traffic can go over the VPN connection while the rest of the internet traffic can go through the local network connection.
- Force all traffic through the VPN – The entire traffic gets pushed through the VPN.
Proxy
A proxy server acts as an intermediary between the device and the internet. All communication between the device and the internet is made secure by passing them through the proxy server. The available values are None, Manual and Auto Detect.
- None – This means no proxy server is configured.
- Manual – Setup proxy server manually.
- Server (If Proxy is set as Manual) – Specify the IP address for the proxy server.
- Auto Detect – Setup proxy server automatically with a proxy auto-config URL.
Configuring L2TP
| Settings | Description |
|---|---|
| Connection Protocol | Specify the connection protocol for the VPN connection. EAP is the only supported protocol. |
| User Authentication | The method with which a device can be authenticated with the VPN server. The only available option is Shared Secret. |
| Shared Secret | A key known to the VPN server and the device which is used to establish a connection between the two. |
Configuring PPTP
| Settings | Description |
|---|---|
| Connection Protocol | Specify the connection protocol for the VPN connection. EAP is the only supported protocol. |
| User Authentication | The method with which a device can be authenticated with the VPN server. The only available option is Password. |
Configuring IKEv2
| Settings | Description |
|---|---|
| Connection Protocol | Specify the connection protocol for the VPN connection. Available options are EAP and Machine Certificate. If Machine Certification is selected, then the device detects a certificate on the device certificate store to use for authentication. |
| User Authentication | The method with which a device can be authenticated with the VPN server. The only available option is Password. |
Device-wide Traffic Rules
Specify the list of traffic rules. Only traffic that matches these rules will be sent through the VPN connection. While adding multiple rules, each rule operates based on an OR with the other rules. On the contrary, within each rule, each property operates based on an AND with each other. In the case of filter values, multiple entries must be comma separated.
- IP Address – Specify the IP address to be allowed.
- Ports: Specify the ports to be allowed.
- IP Protocol: Specify the numeric value of the IP protocol to be allowed. Eg: TCP = 6 and UDP = 17.
Policies
- Remember Credentials: Enable the option to remember the end-user login credentials.
- Always On – Enable the ‘Always On’ option to automatically connect the VPN at sign-in and stay connected until it is manually disconnected.
- Bypass for local intranet traffic: Enable this option to allow local intranet traffic to bypass the VPN connection.
- Trusted Network Addresses: Specify the trusted network addresses. The device will not connect automatically if a trusted network is detected.
Associate the policy with Windows devices
If the policy has not been saved,
- Navigate to Policy Targets > +Add Devices.
- Choose the target Windows devices and click OK. Click Save.
- You can also associate the policy with device groups, users, user groups or domains from the left pane of the Policy Targets tab.
If the policy has been saved,
- Go to Policies and choose the desired policy.
- Click on the Manage drop-down and select Associate Targets.
- Choose the target entities and click Associate.
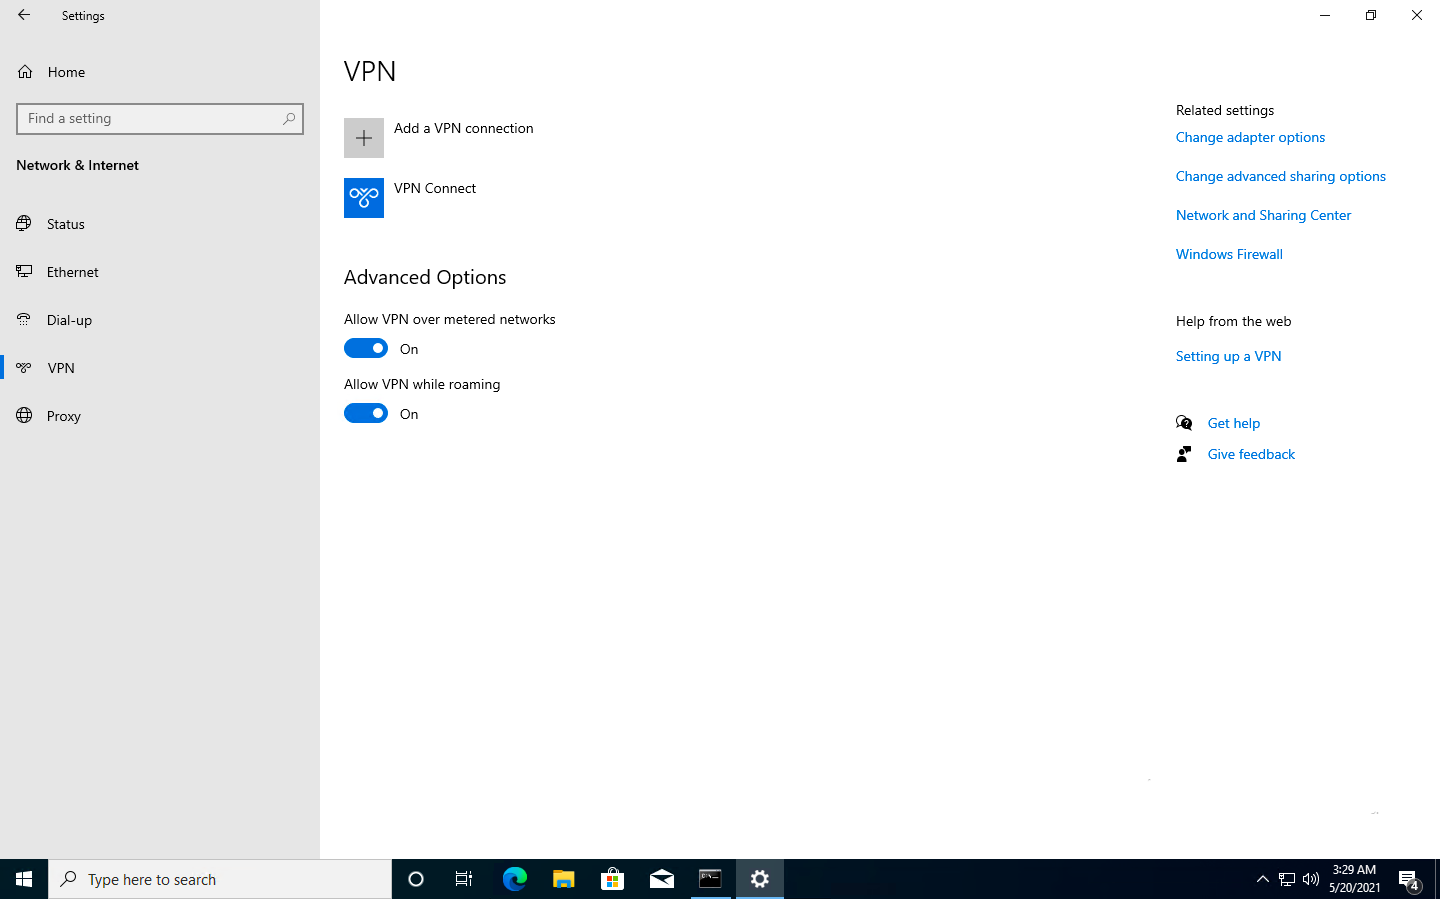
What happens on the device?
On associating the VPN server configuration with the Windows device, users will be able to view the deployed VPN network configurations among the available networks (Settings > Network & Internet > VPN). The data traffic will be permitted as the user tries to access the internet based on the VPN traffic rules.
Frequently Asked Questions (FAQs)
1. What happens if a device is offline when administrators update the VPN policy?
Policy modifications are queued within the Hexnode portal. The device will receive the updated configurations as soon as it establishes an internet connection. However, the user must manually disconnect and reconnect the VPN session for a new server, or routing changes to be applied.
2. Will enabling the “Force all traffic through the VPN” routing policy result in a loss of access to local printers?
When a Force Tunnel configuration is active, the operating system routes all traffic through the VPN interface. To maintain connectivity to local subnet devices such as printers while using this mode, administrators should enable the “Bypass for local intranet traffic” option within the policy.
3. Will the VPN automatically become active when the device leaves the office?
If you configure any network other than the office under the Trusted Network Addresses option, the VPN will remain inactive there because it is considered as a trusted environment. Once the device connects to an untrusted network, the VPN will automatically activate provided the Always On option is enabled.
Troubleshooting
1. VPN Profile not appearing on the Windows device.
Probable Cause:
The device has not synced with the UEM.
Solution:
Navigate to Settings > Accounts > Access work or school, select the account, and click Info > Sync.
2. Connected to VPN but cannot access internal websites by name.
Probable Cause:
DNS Routing Rules are missing, or the DNS suffix is not matching the internal domain.
Solution:
Ensure the DNS Routing Rules section within the associated VPN policy contains the correct internal Domain Name and the Internal DNS Server IP address. This allows the Windows networking stack to identify which DNS queries should be sent through the tunnel.
3. The “Always On” feature fails to trigger the VPN when the device is connected to public Wi-Fi.
Probable Cause:
The public Wi-Fi range is accidentally included in the Trusted Network Addresses list.
Solution:
Remove the current Wi-Fi subnet from the Trusted Network Addresses field in the policy. The VPN will only auto-connect if it detects it is on an “Untrusted” network.
4. IKEv2 connection fails with “Certificate not found” error.
Probable Cause:
The Machine Certificate was deployed to the “User” store instead of the “Local Computer” store.
Solution:
Re-deploy the certificate ensuring the certificate has been deployed to the Local Computer Store (not the User Store). IKEv2 requires the certificate to be available before the VPN policy is applied.
