Category filter
Create Enrollment Profiles for Windows devices
Windows enrollment profiles are essential for customizing and automating the initial setup and management parameters for Windows devices (PCs, laptops, tablets) joining your Hexnode UEM fleet. These profiles control device naming conventions, group assignments, and most importantly, the user authentication method.
Purpose of Enrollment Profiles
- Customization: Define unique enrollment settings for different organizational units or device ownership types (e.g., creating one profile for Finance and another for Field Techs).
- Automation: Pre-configure initial device settings (naming convention, department, asset tag) to automate inventory management.
- Security: Enforce specific authentication requirements (e.g., requiring Azure AD credentials) to verify user identity during the enrollment process.
Configuration Steps: Creating a Profile
Step 1: Access Enrollment Profiles
- Log in to the Hexnode UEM portal.
- Navigate to Enroll > Platform-Specific > Windows > Windows PCs and Tablets.
- Click on Enrollment Profiles.
- Click Create or select an existing profile to edit.
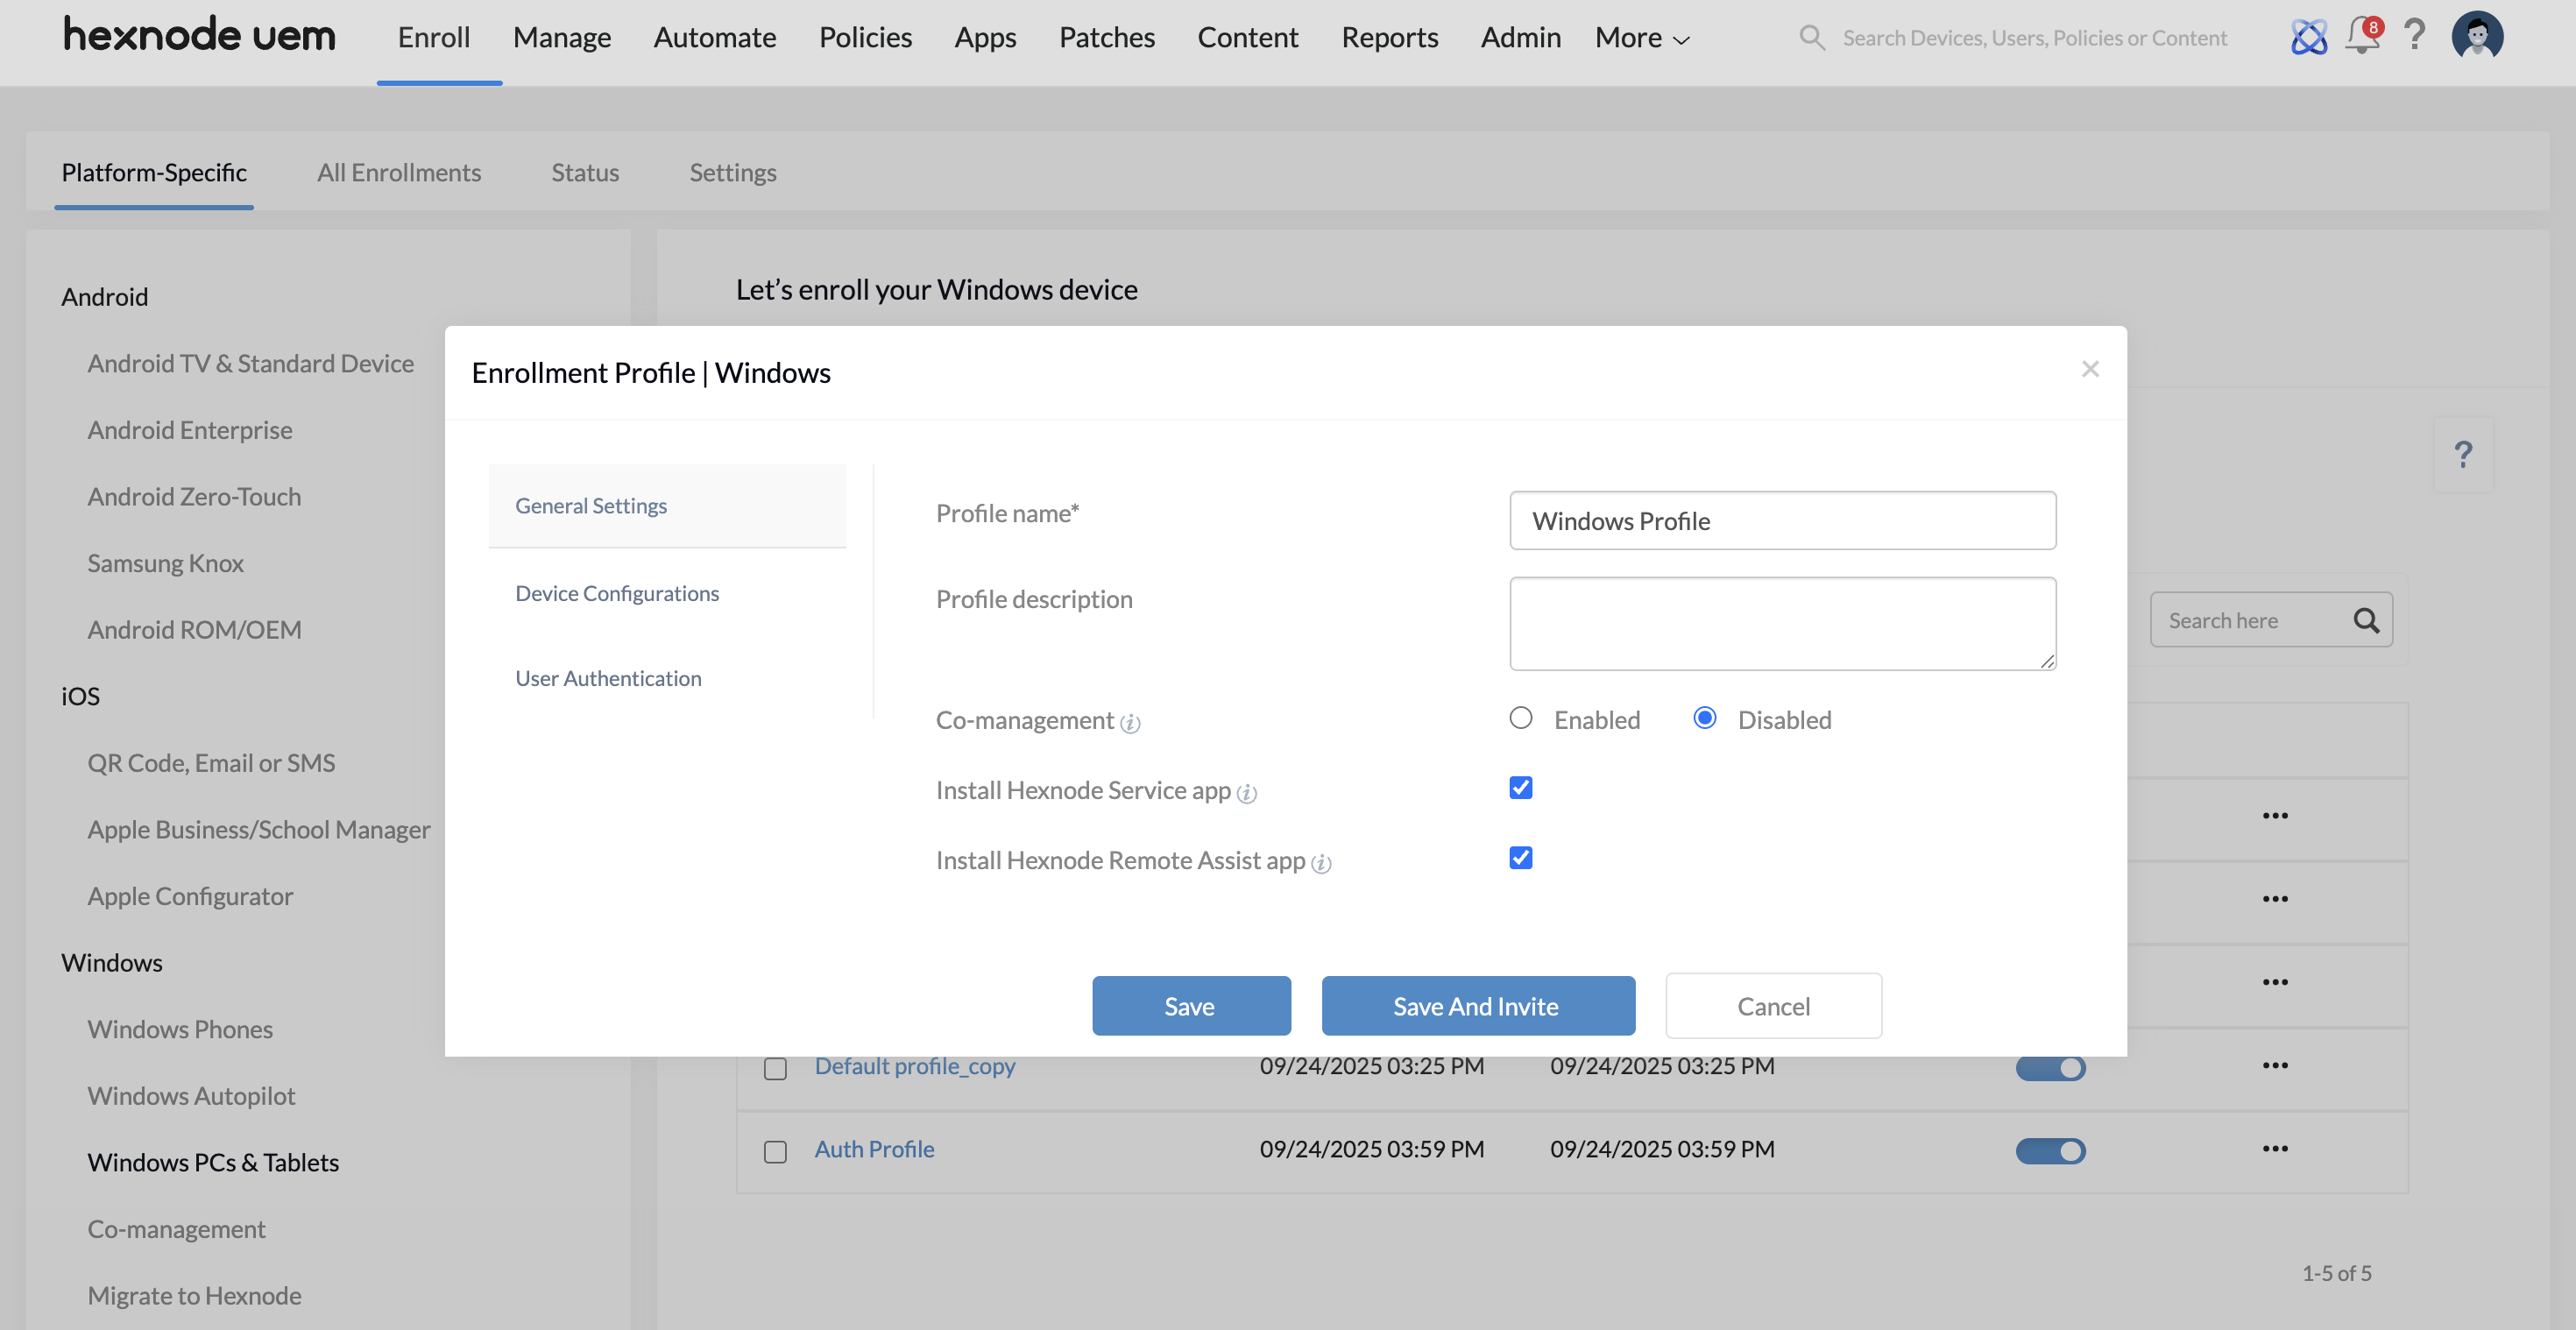
I. General Enrollment Settings
These settings define the high-level behaviour of the device during and after enrollment.
- Profile Name / Description: Used for easy identification of the profile in the Hexnode console.
- Co-management: Determines if a device already managed by another MDM (like Microsoft Intune) should be co-managed by Hexnode UEM.
- Enabled: Allows the device to be managed simultaneously by Hexnode and the existing MDM solution.
- Disabled: Hexnode takes over management, or enrollment may fail if the device is already under a strict MDM.
- Install Hexnode Service app: When checked, the Hexnode Service app is installed automatically upon enrollment.
- Note: This app is always installed if enrollment is performed via the Hexnode Installer, regardless of this setting.
- Install Hexnode Remote Assist app: Checking this option installs the Hexnode Remote Assist application, which enables remote screen sharing and control capabilities for troubleshooting and support.
II. Device Configurations
These settings determine how the device is identified, grouped, and categorized within the Hexnode UEM portal.
- Enrolled Device Name: Select a system attribute to serve as the device’s display name in the portal. Available attributes include:
- Device model
- Phone number
- Device MAC address
- Device serial number
- Device manufacturer
- Enrolled user username
- Enrolled user domain name
- Enrolled user principal name
- Enrolled user email
- Personalized device name
- Add to device groups: Select one or more device groups the device should be automatically assigned to upon successful enrollment.
- Department: Specify the organizational department (e.g., Sales, IT) the device belongs to.
- Asset Tag: Specify a unique physical asset tag number for inventory management.
- Device Notes: Include any custom or device-specific notes for easy recognition or context.

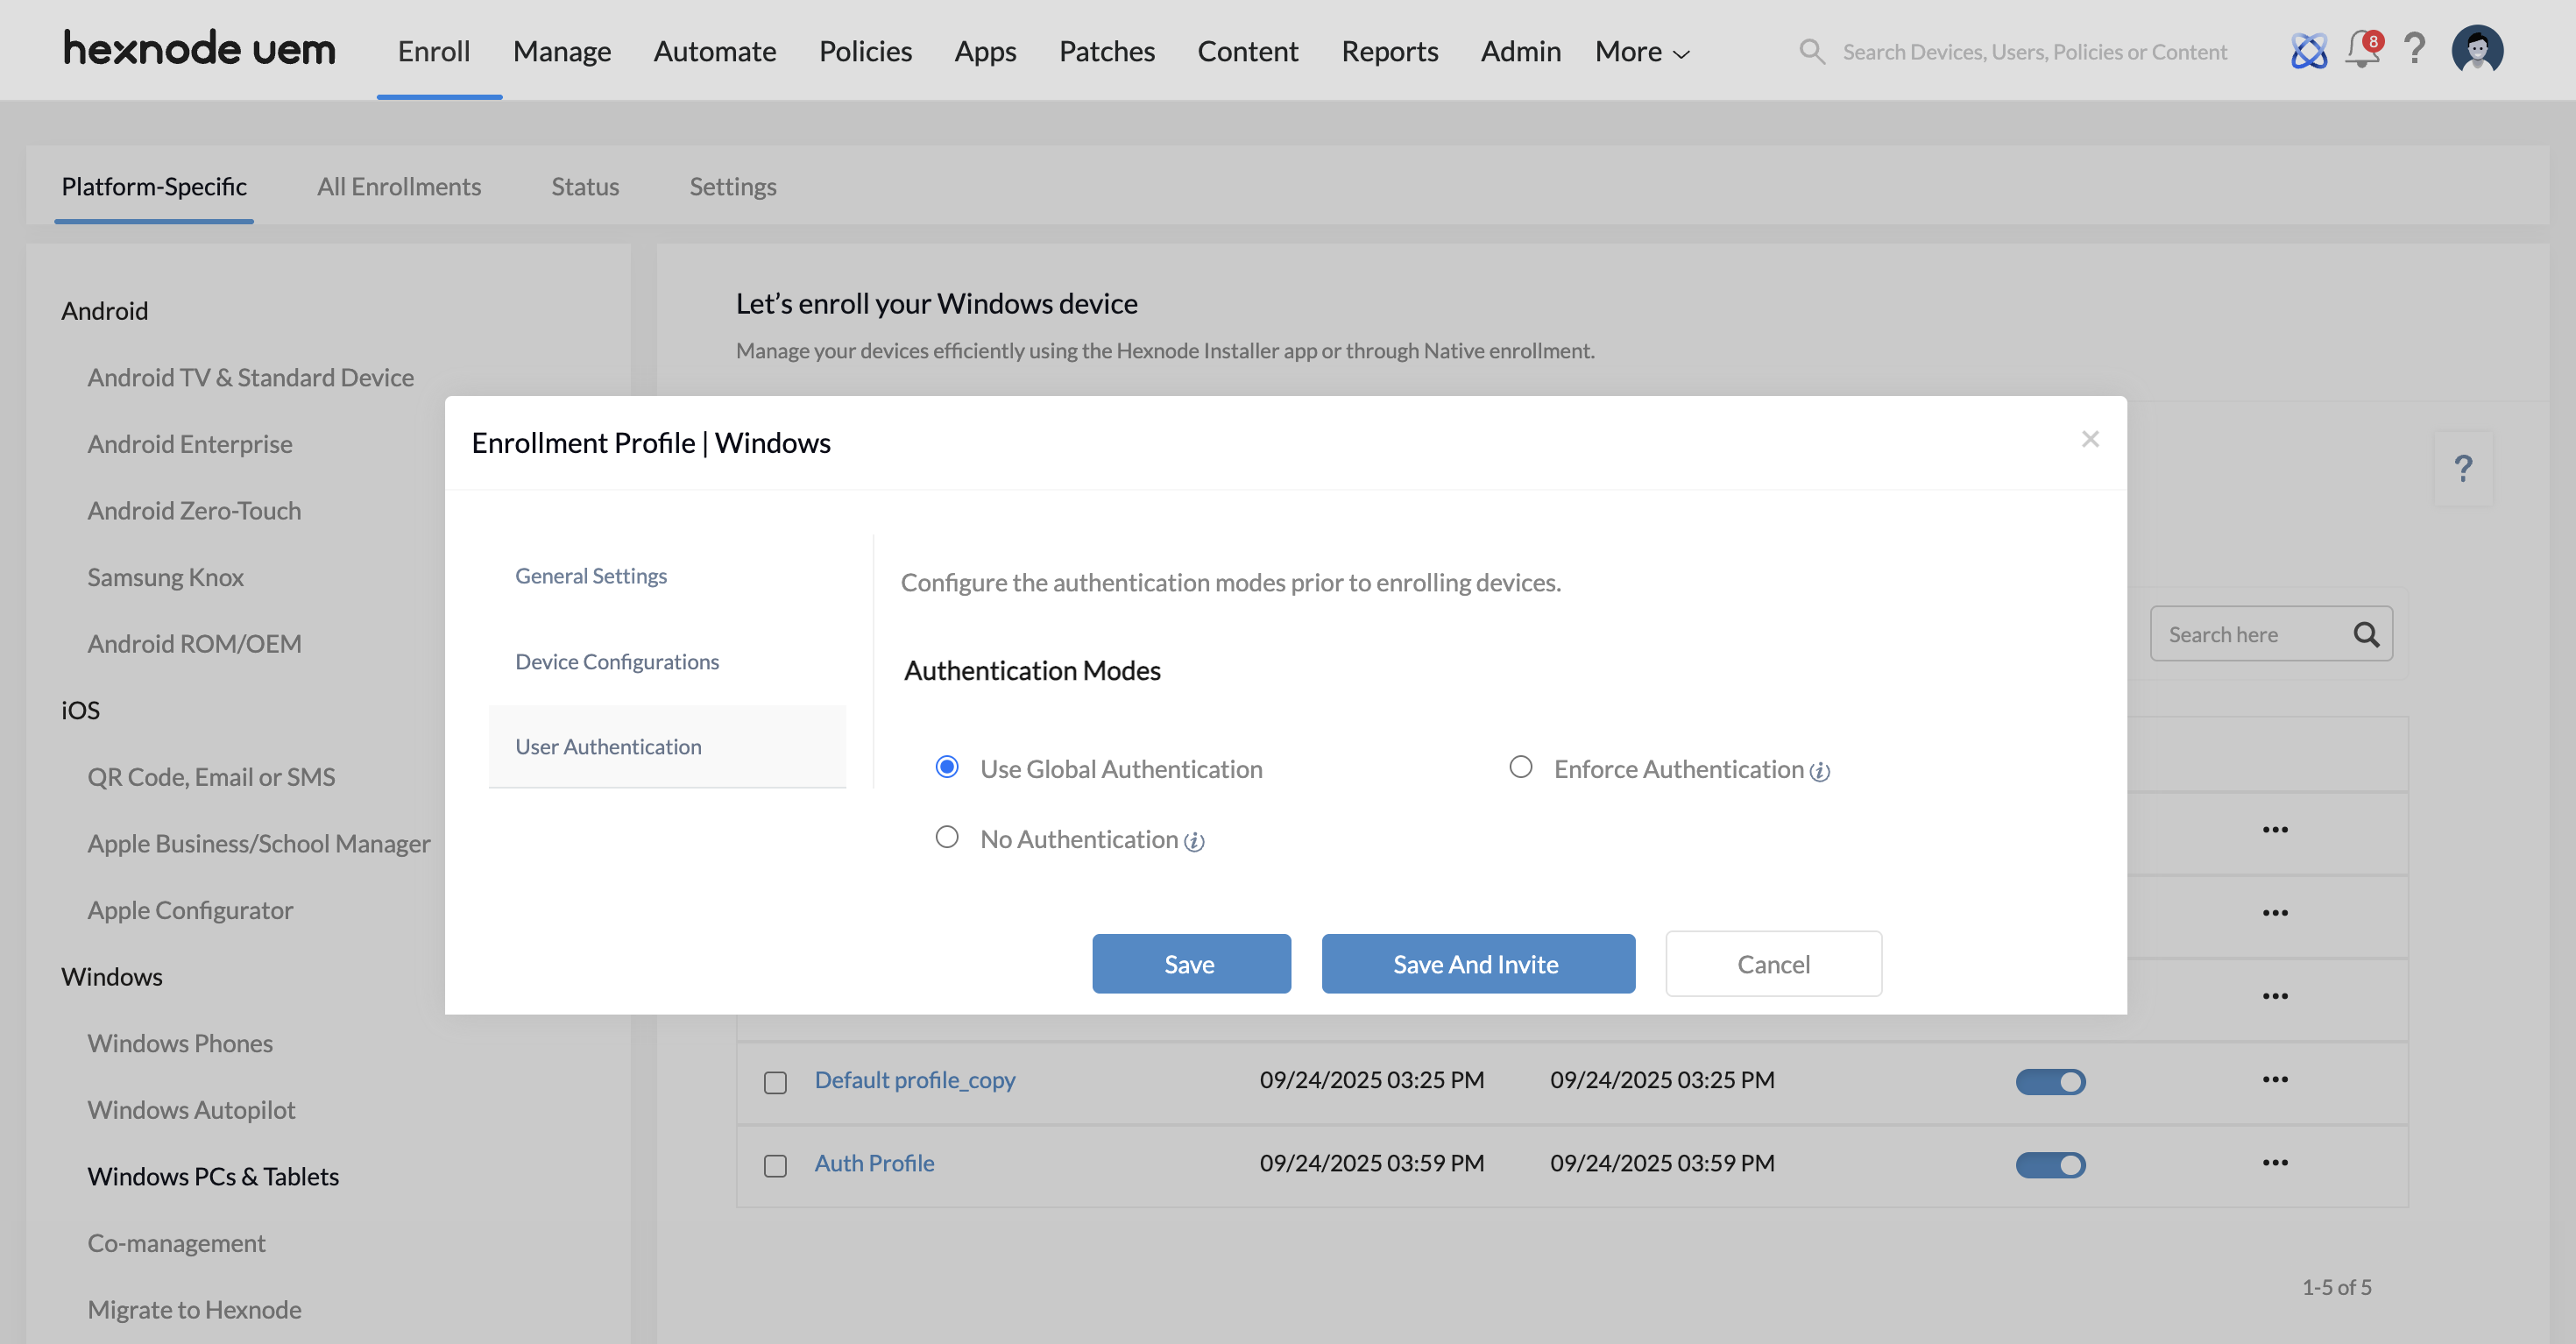
III. User Authentication Modes in Hexnode UEM
This section controls how users authenticate during the Windows device enrollment process in Hexnode UEM.
A. Enforce Authentication (Recommended)
Users must authenticate with their credentials before downloading the enrollment profile. After successful authentication, the device is automatically assigned to that user.
- User types: Choose which identity provider users can sign in with. Options include AD (Active Directory), Microsoft Entra ID (formerly Azure AD), Local (Hexnode users), Google Workspace, and Okta.
- Enrollment method: Set the profile to work with either Enrollment Request or Self Enrollment.
- Ownership: Define the device ownership as Personal, Corporate, or Let the user choose during enrollment.
B. No Authentication (Automated Assignment)
Users can enroll without entering any credentials. The device is automatically assigned to a predefined user.
- Domain: Select the domain to which the assigned user belongs, such as Local or Microsoft Entra ID.
- Assigned user: Choose the specific user and enter their password so the device can be mapped to this account.
- Ownership: Set the device ownership as Personal or Corporate.
C. Use Global Authentication
Applies the organization-wide authentication settings configured under Admin > Enrollment > Authentication Modes. Use this to keep authentication behaviour consistent across all enrollment profiles.
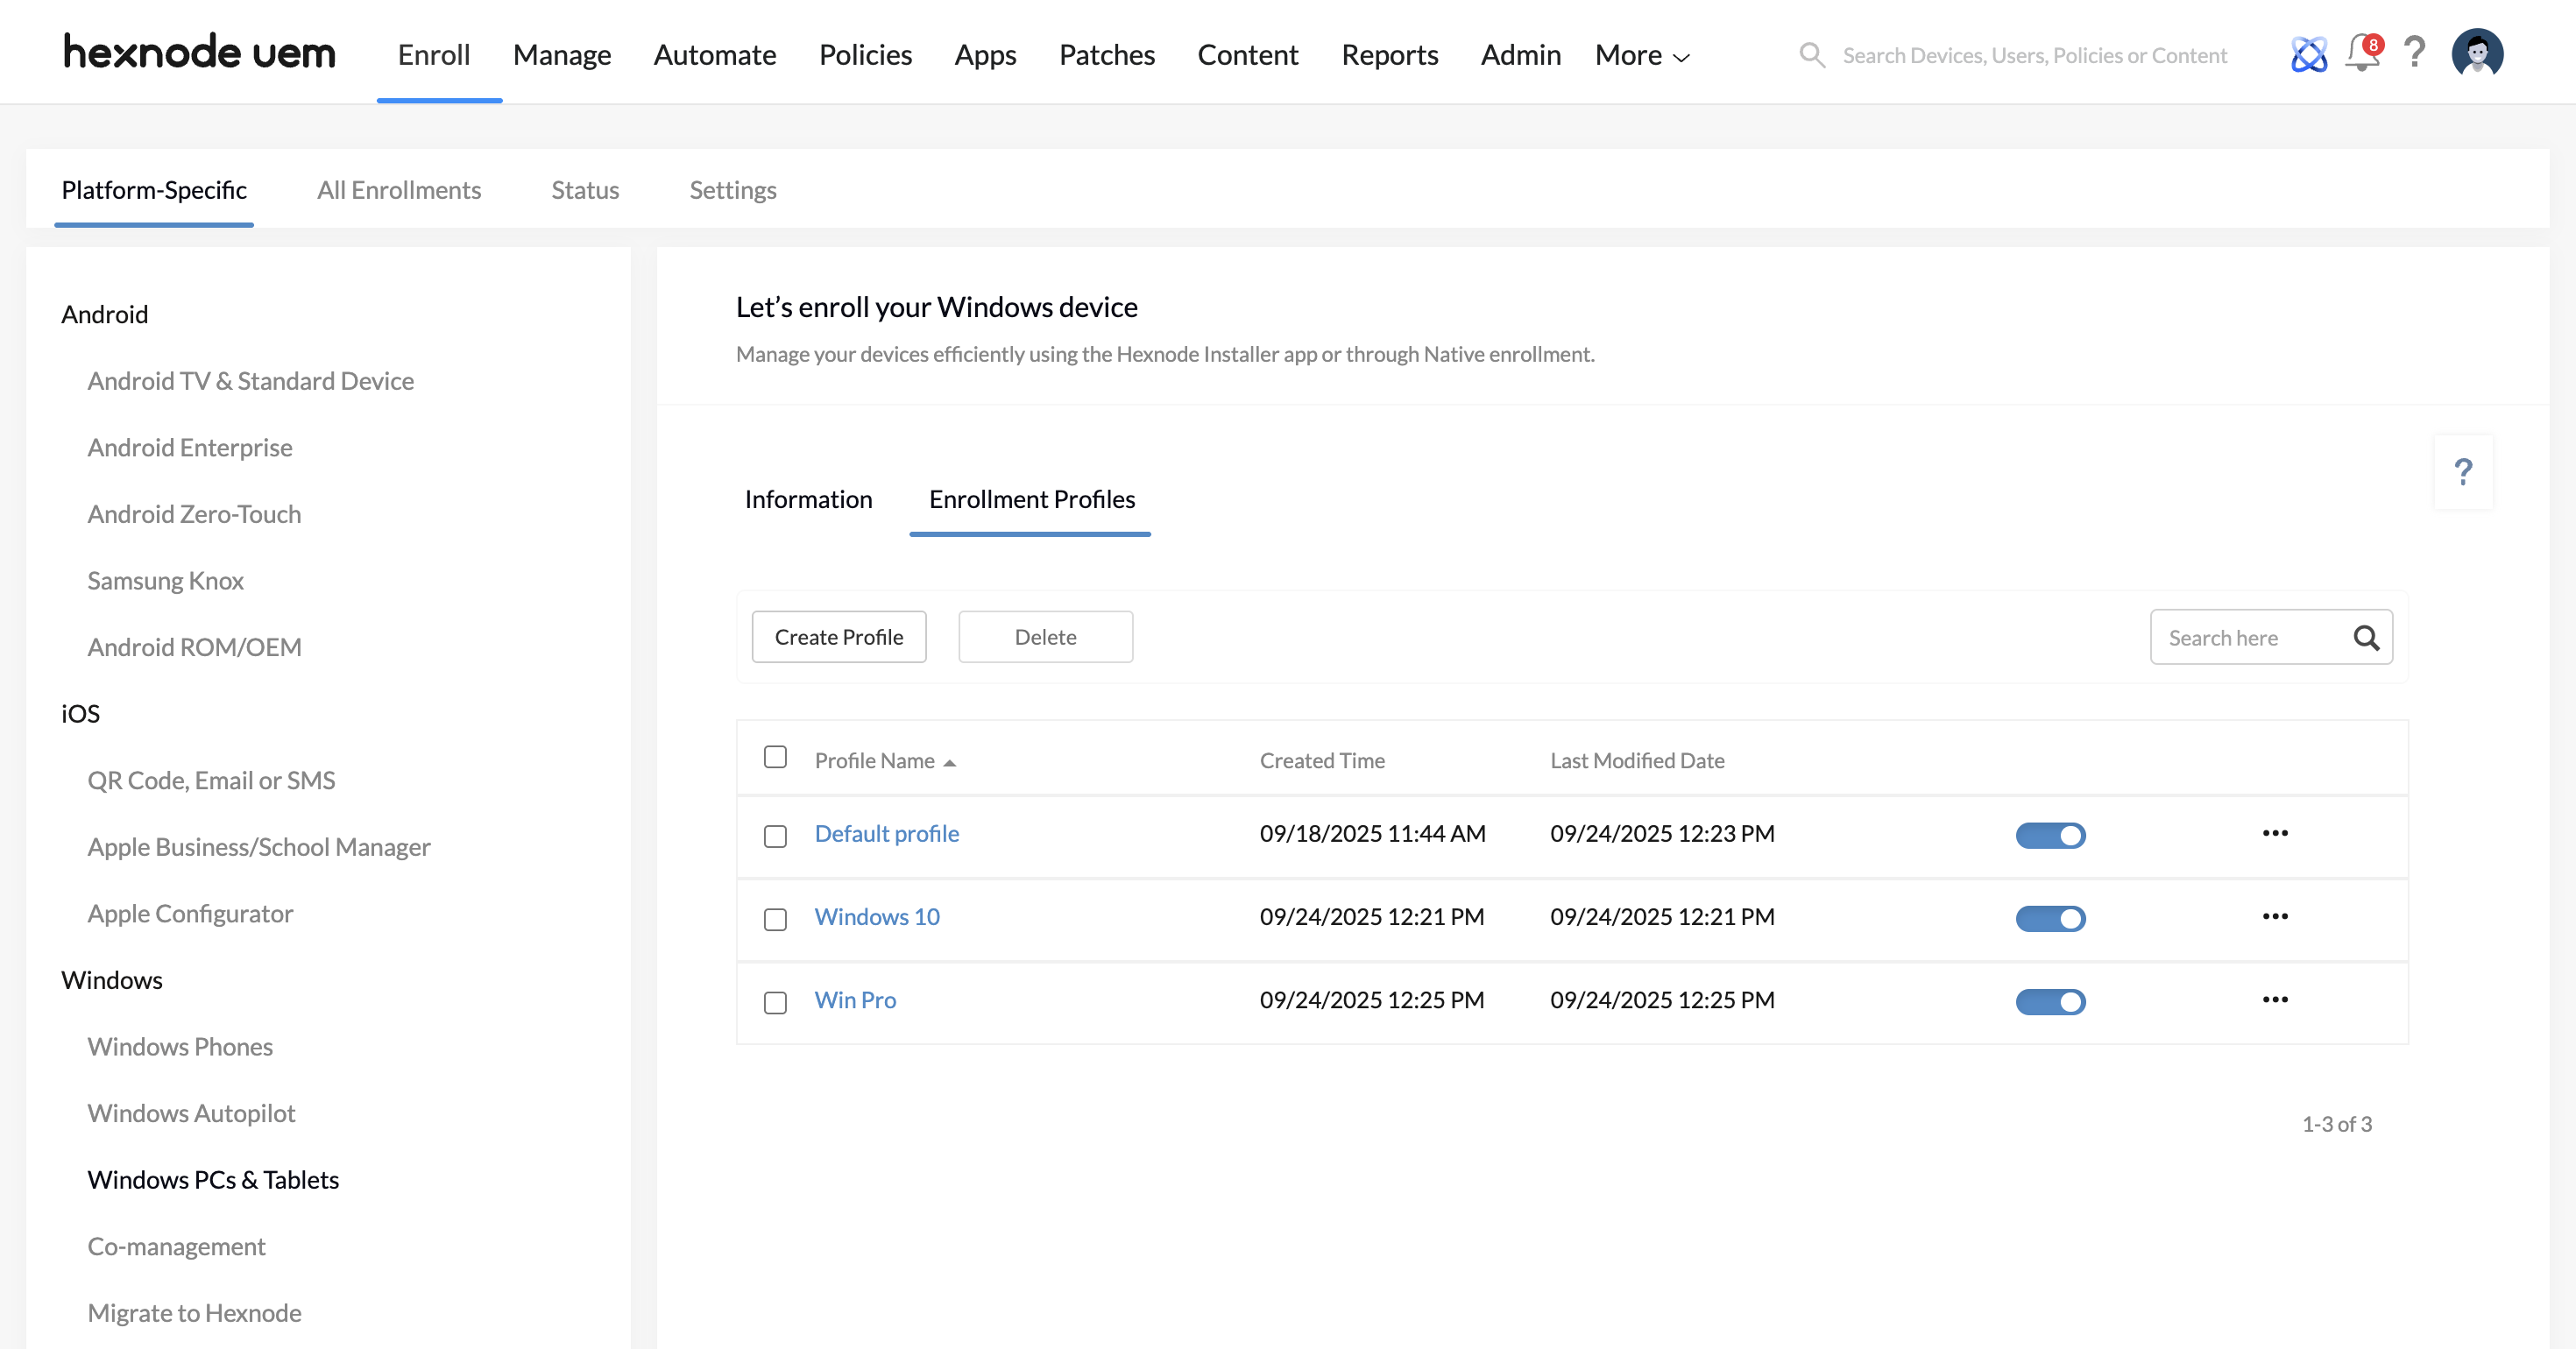
Enrollment Profiles Overview
All created enrollment profiles for Windows can be viewed under: Enroll > Platform Specific > Windows > Enrollment Profiles
- Each enrollment profile has a toggle. The profile is active only when this toggle is turned on.
- If a profile is disabled, enrollments using that profile’s enrollment URL are blocked. Users will not be able to download the profile or enroll their device with that URL.
- Selecting the ellipsis icon for an enrollment profile shows the following options:
- Clone: Create a copy of the enrollment profile.
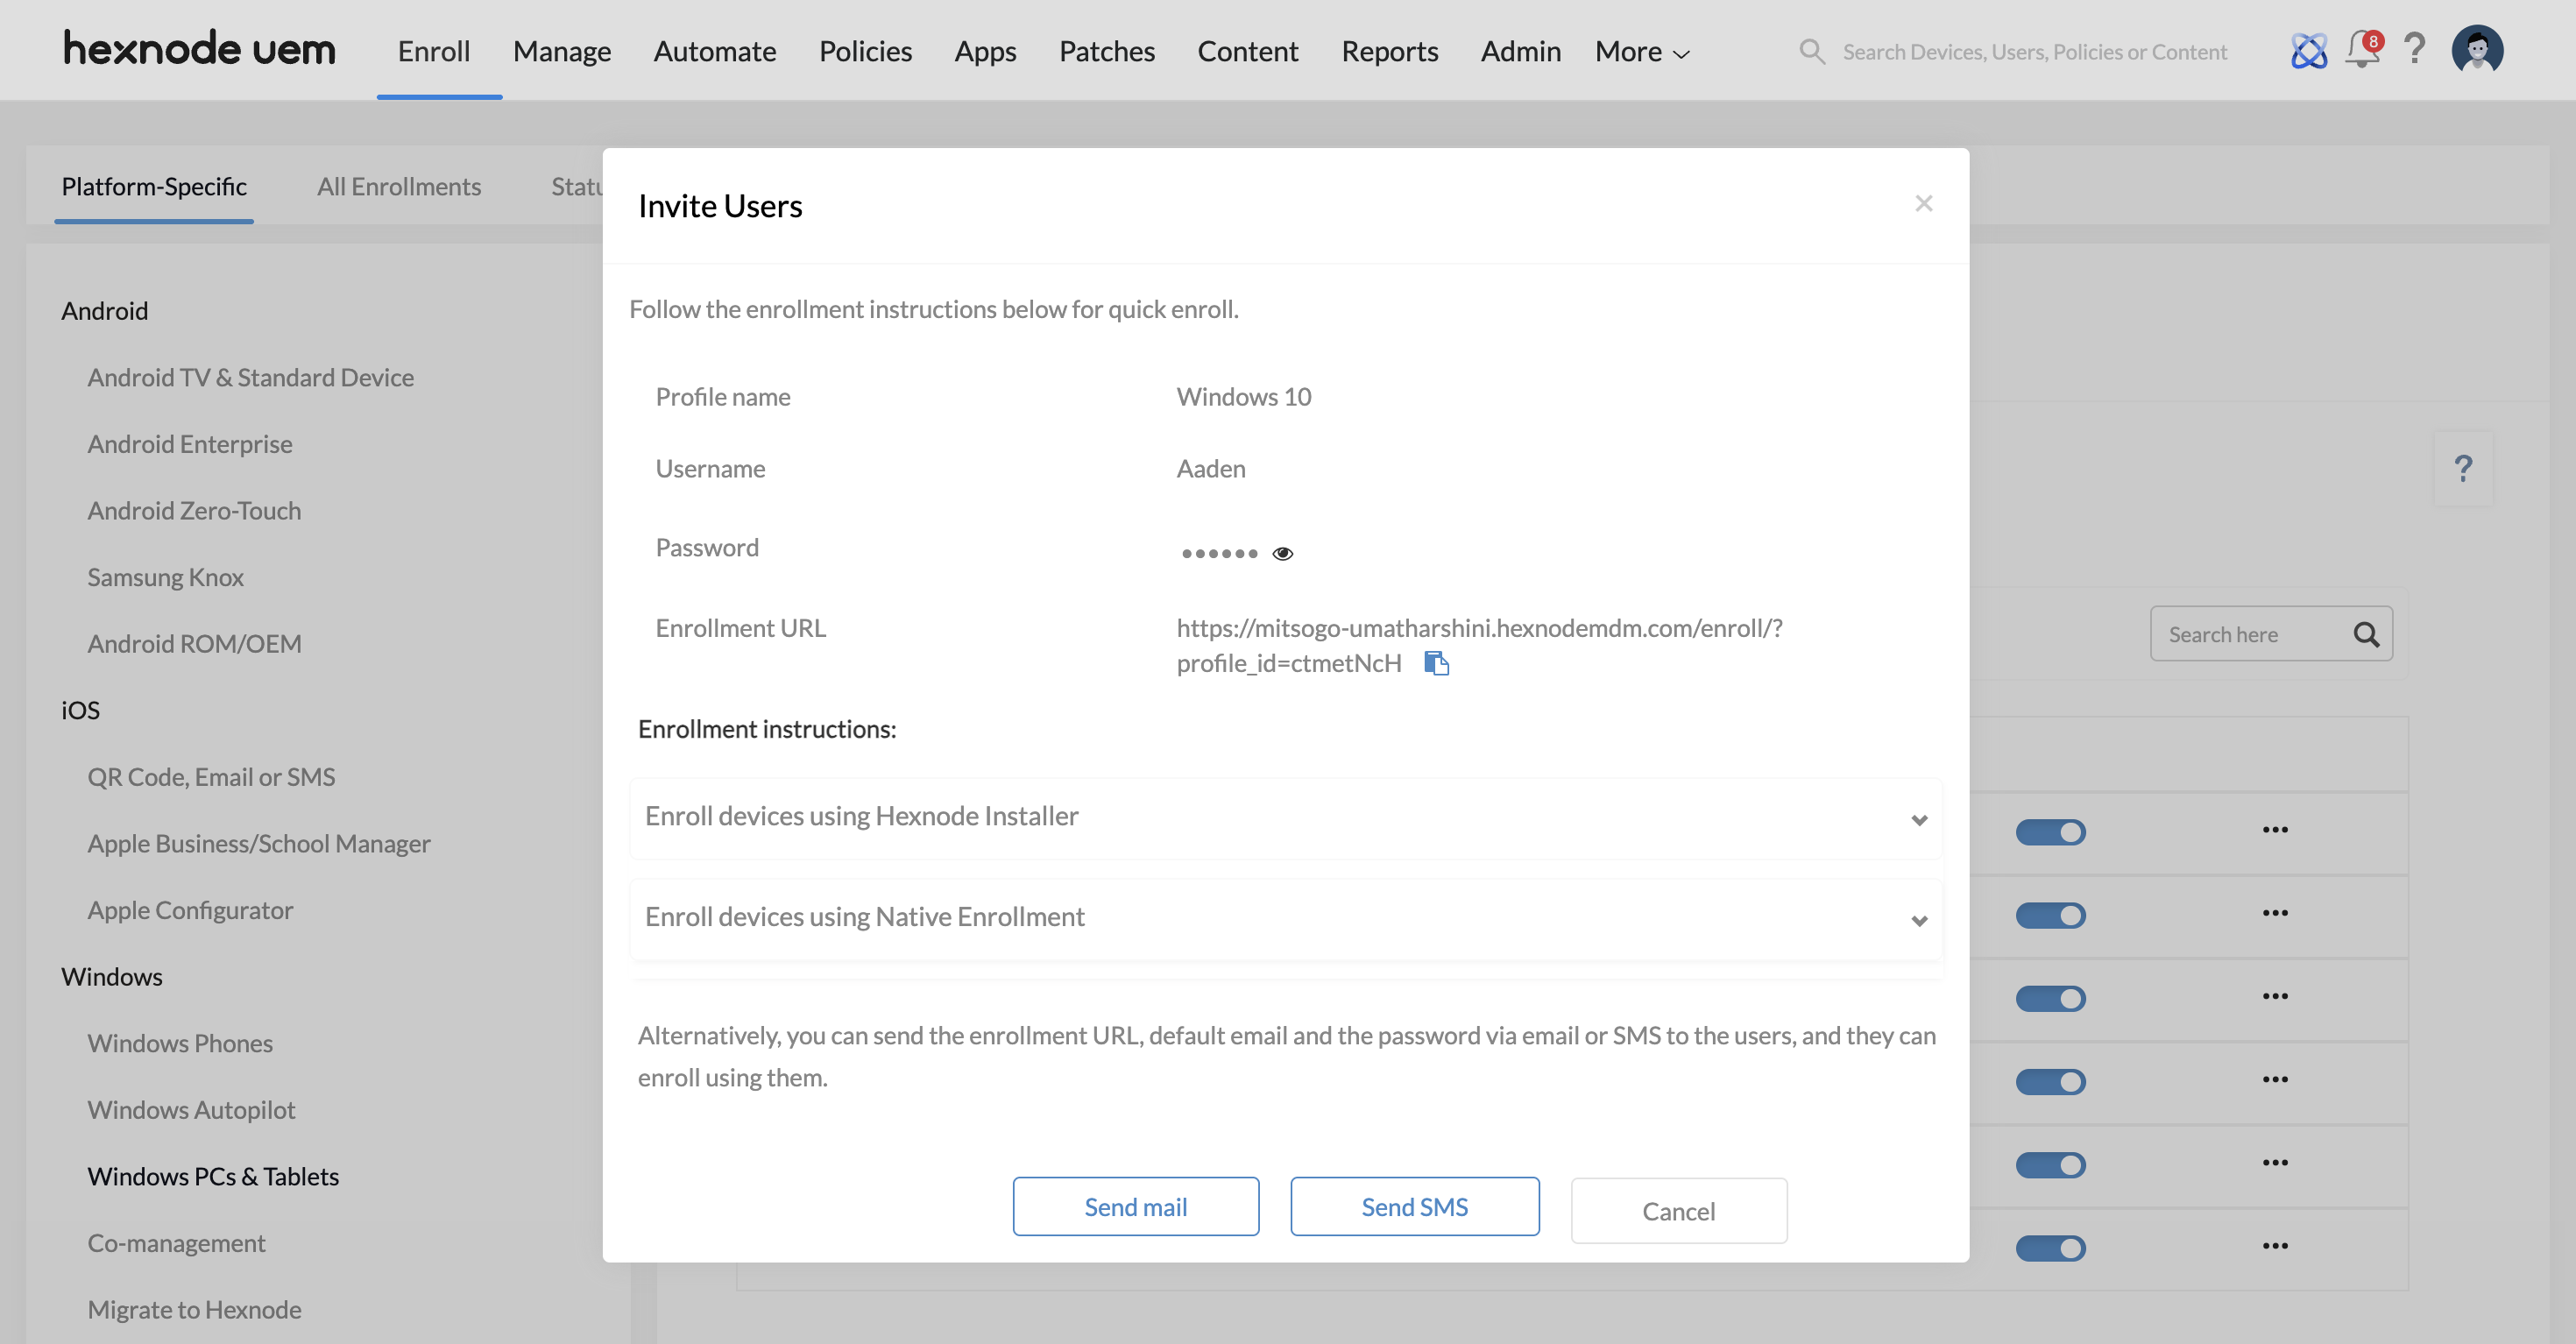
- Invite Users: Send enrollment details to users via email or SMS.
Frequently Asked Questions (FAQs)
Q1. What happens to existing devices if an enrollment profile is disabled?
Disabling a profile does not affect devices already enrolled through it. It only prevents new enrollments using that profile’s URL.
Q2: Can one enrollment profile be used for both corporate and BYOD devices?
While possible, it is best practice to create separate profiles to clearly define different authentication requirements and initial policies (e.g., a “Corporate” profile that enforces BitLocker and a “BYOD” profile with limited restrictions).
Q3: What happens if I disable an enrollment profile?
If a profile is disabled, any user attempting to access the enrollment URL linked to that profile will be blocked from downloading the MDM profile and enrolling their device.
Q4: What is the Hexnode Service App used for?
The Hexnode Service App is a supporting application installed on Windows devices that is necessary for critical management features like enforcing Kiosk Mode, deploying certain policies, and managing device restrictions.
Troubleshooting
1. Enrollment Profile Not Downloading
Symptom: The user is unable to download the enrollment profile and complete device enrollment.
Cause: The enrollment profile is disabled because its activation toggle is turned off in the Hexnode UEM console.
Resolution: Go to Enroll > Platform Specific > Windows > Enrollment Profiles in Hexnode UEM console and make sure the required profile has its toggle turned on so it is active.
