Category filter
How to install web apps on ChromeOS devices?
In Hexnode, a web app refers to any online resource that can be accessed through a URL. For example, if a company has a custom-built ticketing system hosted online for its internal support team, the IT administrator can use Hexnode UEM to deploy it as a web app on ChromeOS devices throughout the organization. This process creates a shortcut that appears in the Launcher, like any native app, making access easy and seamless for employees.
Upload a web app to the Hexnode app inventory
To upload a web app in Hexnode,
- Navigate to the Apps tab in your Hexnode UEM web console.
- Select +Add Apps > Web App.
- Enter the Name, URL of the page, Icon, and select a Category for the web app. These details determine how the app appears on the ChromeOS device.
- Click Add.
Deploy web apps on ChromeOS devices
To install web apps on ChromeOS devices,
- Login to your Hexnode UEM portal.
- Navigate to the Policies tab.
- Click on New Policy to create a new one or click on any policy to edit an existing one. Enter the Policy Name and Description in the provided fields.
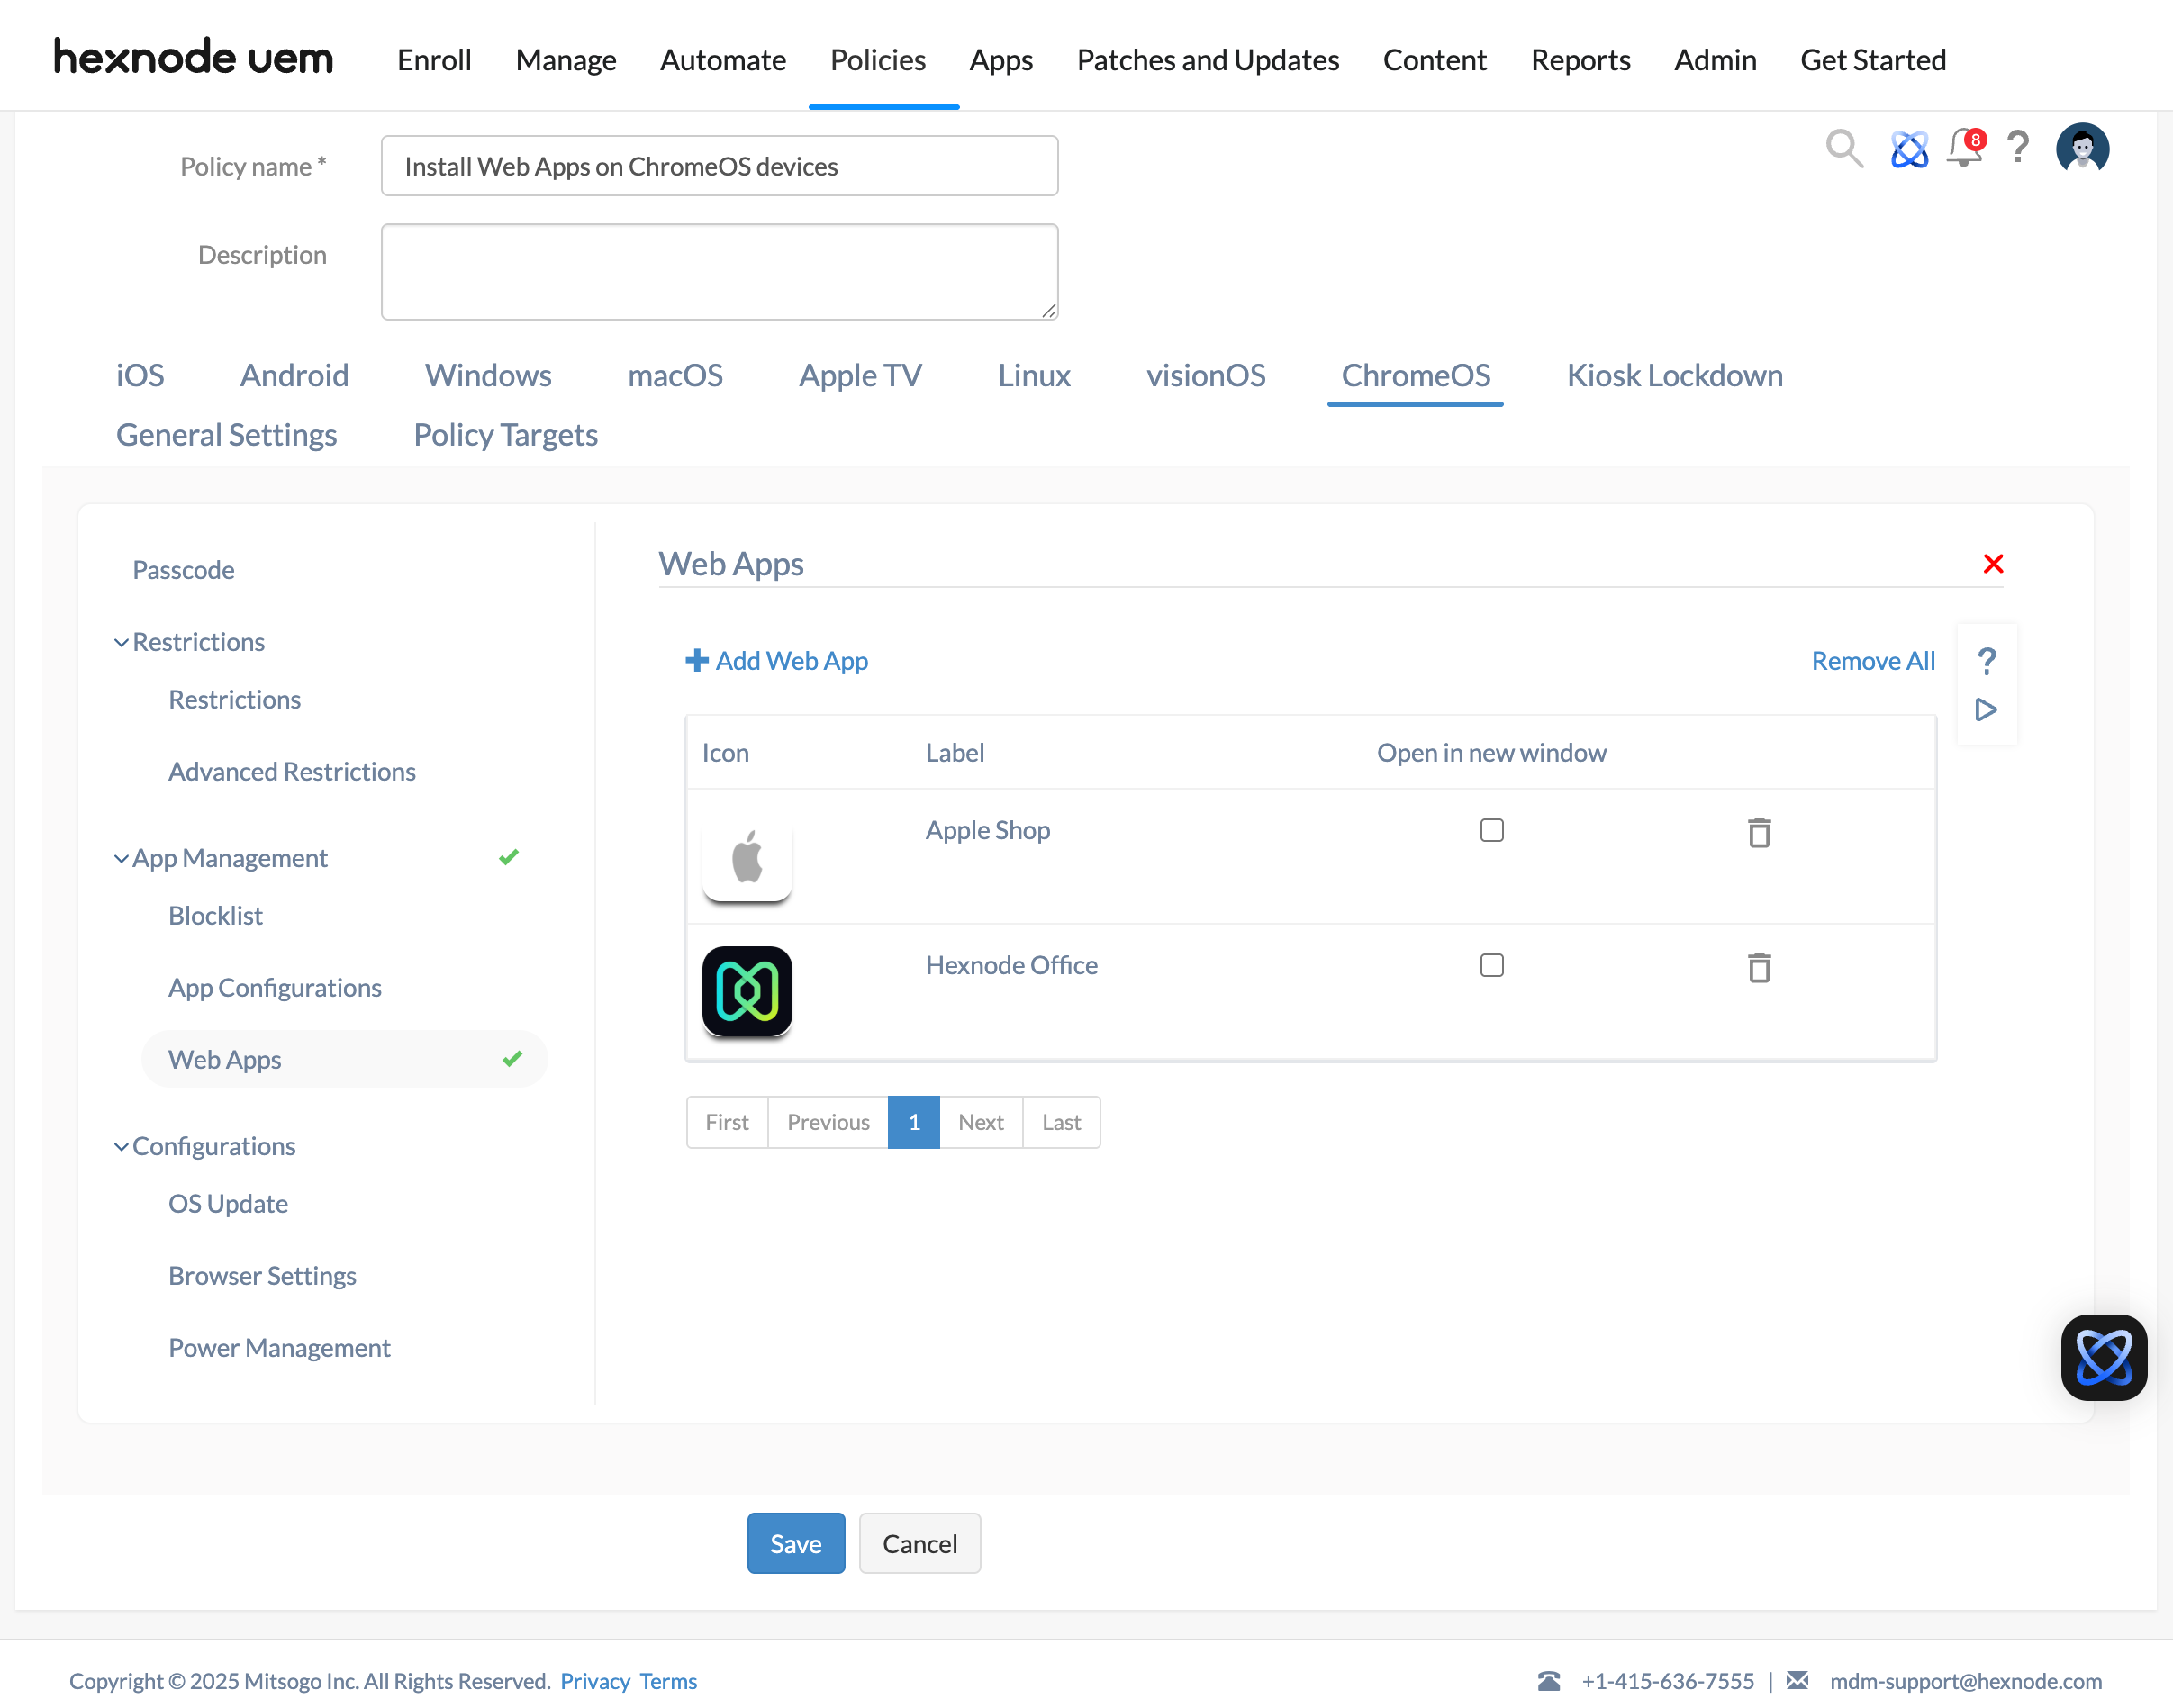
- Go to ChromeOS > App Management > Web Apps and then click Configure.
- Click on +Add Web App.
- Select the web apps to be installed and Click Done.
- You can also enable the Open in new window option to launch the web app in a separate window in the Chrome browser.
Associate the policy with target entities
- Navigate to Policy Targets > Domains/OUs.
- Click on +Add Domain/OUs. From the list, select the Google Workspace account integrated with Hexnode, indicated by the (Google) tag.
- The parent OU will be listed and is indicated with a briefcase icon to differentiate it from other domains.
- Click on the dropdown next to the parent OU to view its child OUs. Select the required Organizational Units and click OK.
- Associate the policies to the OUs, to which the target devices are assigned.
- Click Save to associate the policy to the devices with the selected Organization Units.
What happens at the device end?
Once the policy is associated, the web apps will be silently installed on the device.You can access them from the Launcher.
