Category filter
Create macOS application bundle from Hexnode
An app bundle in Hexnode is a collection of applications, scripts, and files grouped together to be deployed as a single unit. Instead of installing/deploying each component separately, IT admins can package everything around a principal app and deploy it in one go. This is especially useful when an app depends on supporting tools, configuration scripts, or companion apps to function properly.
For example, if you’re deploying a graphic design tool as the principal app, you might include supporting packages like a script to install required fonts, a file containing user manuals, and a supporting app for managing design templates. Bundling them ensures that everything is installed in the right order with the proper setup.
Creating an app bundle via Hexnode UEM
To create an app bundle for macOS devices,
- Start by logging in to your Hexnode UEM portal.
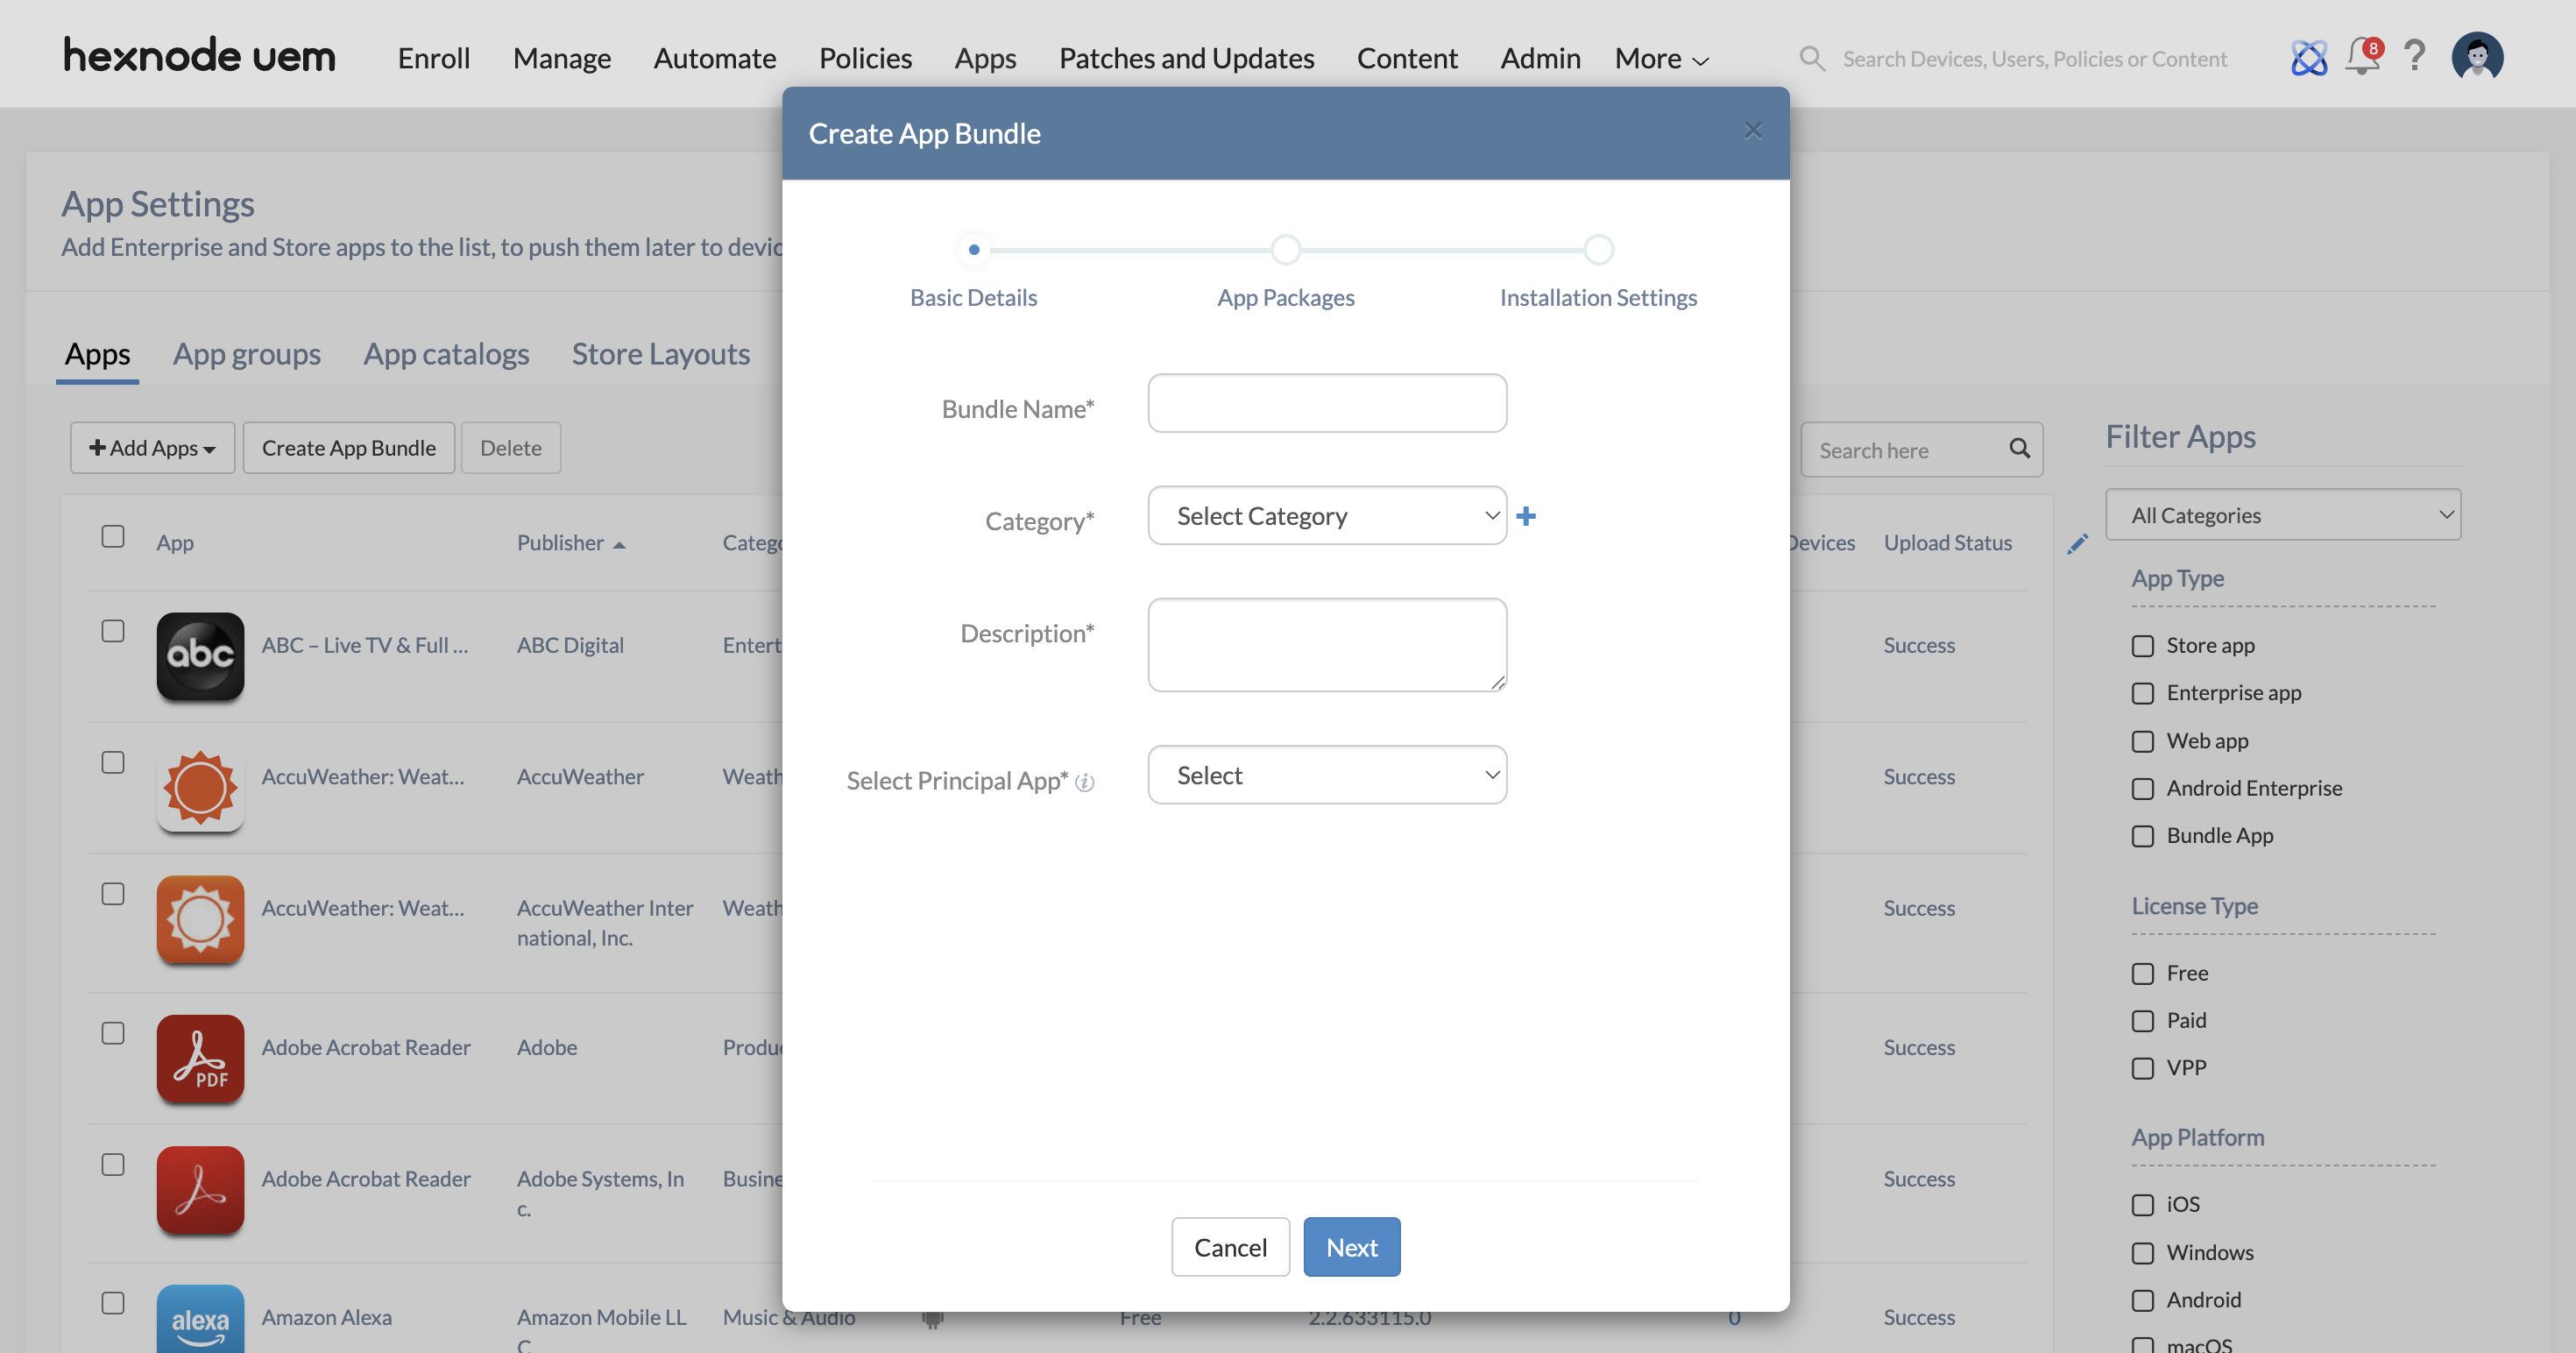
- Head over to the Apps tab and click on Create App Bundle.
- Bundle Name: Give your app bundle a name.
- Category: Pick an existing category or create a new one by clicking the + button.
- Description: Add a brief description of what this app bundle is for.
- Principal App: Choose the main app around which the bundle is built. You can only pick from enterprise apps already added to Hexnode’s app inventory.
- Click Next to proceed.
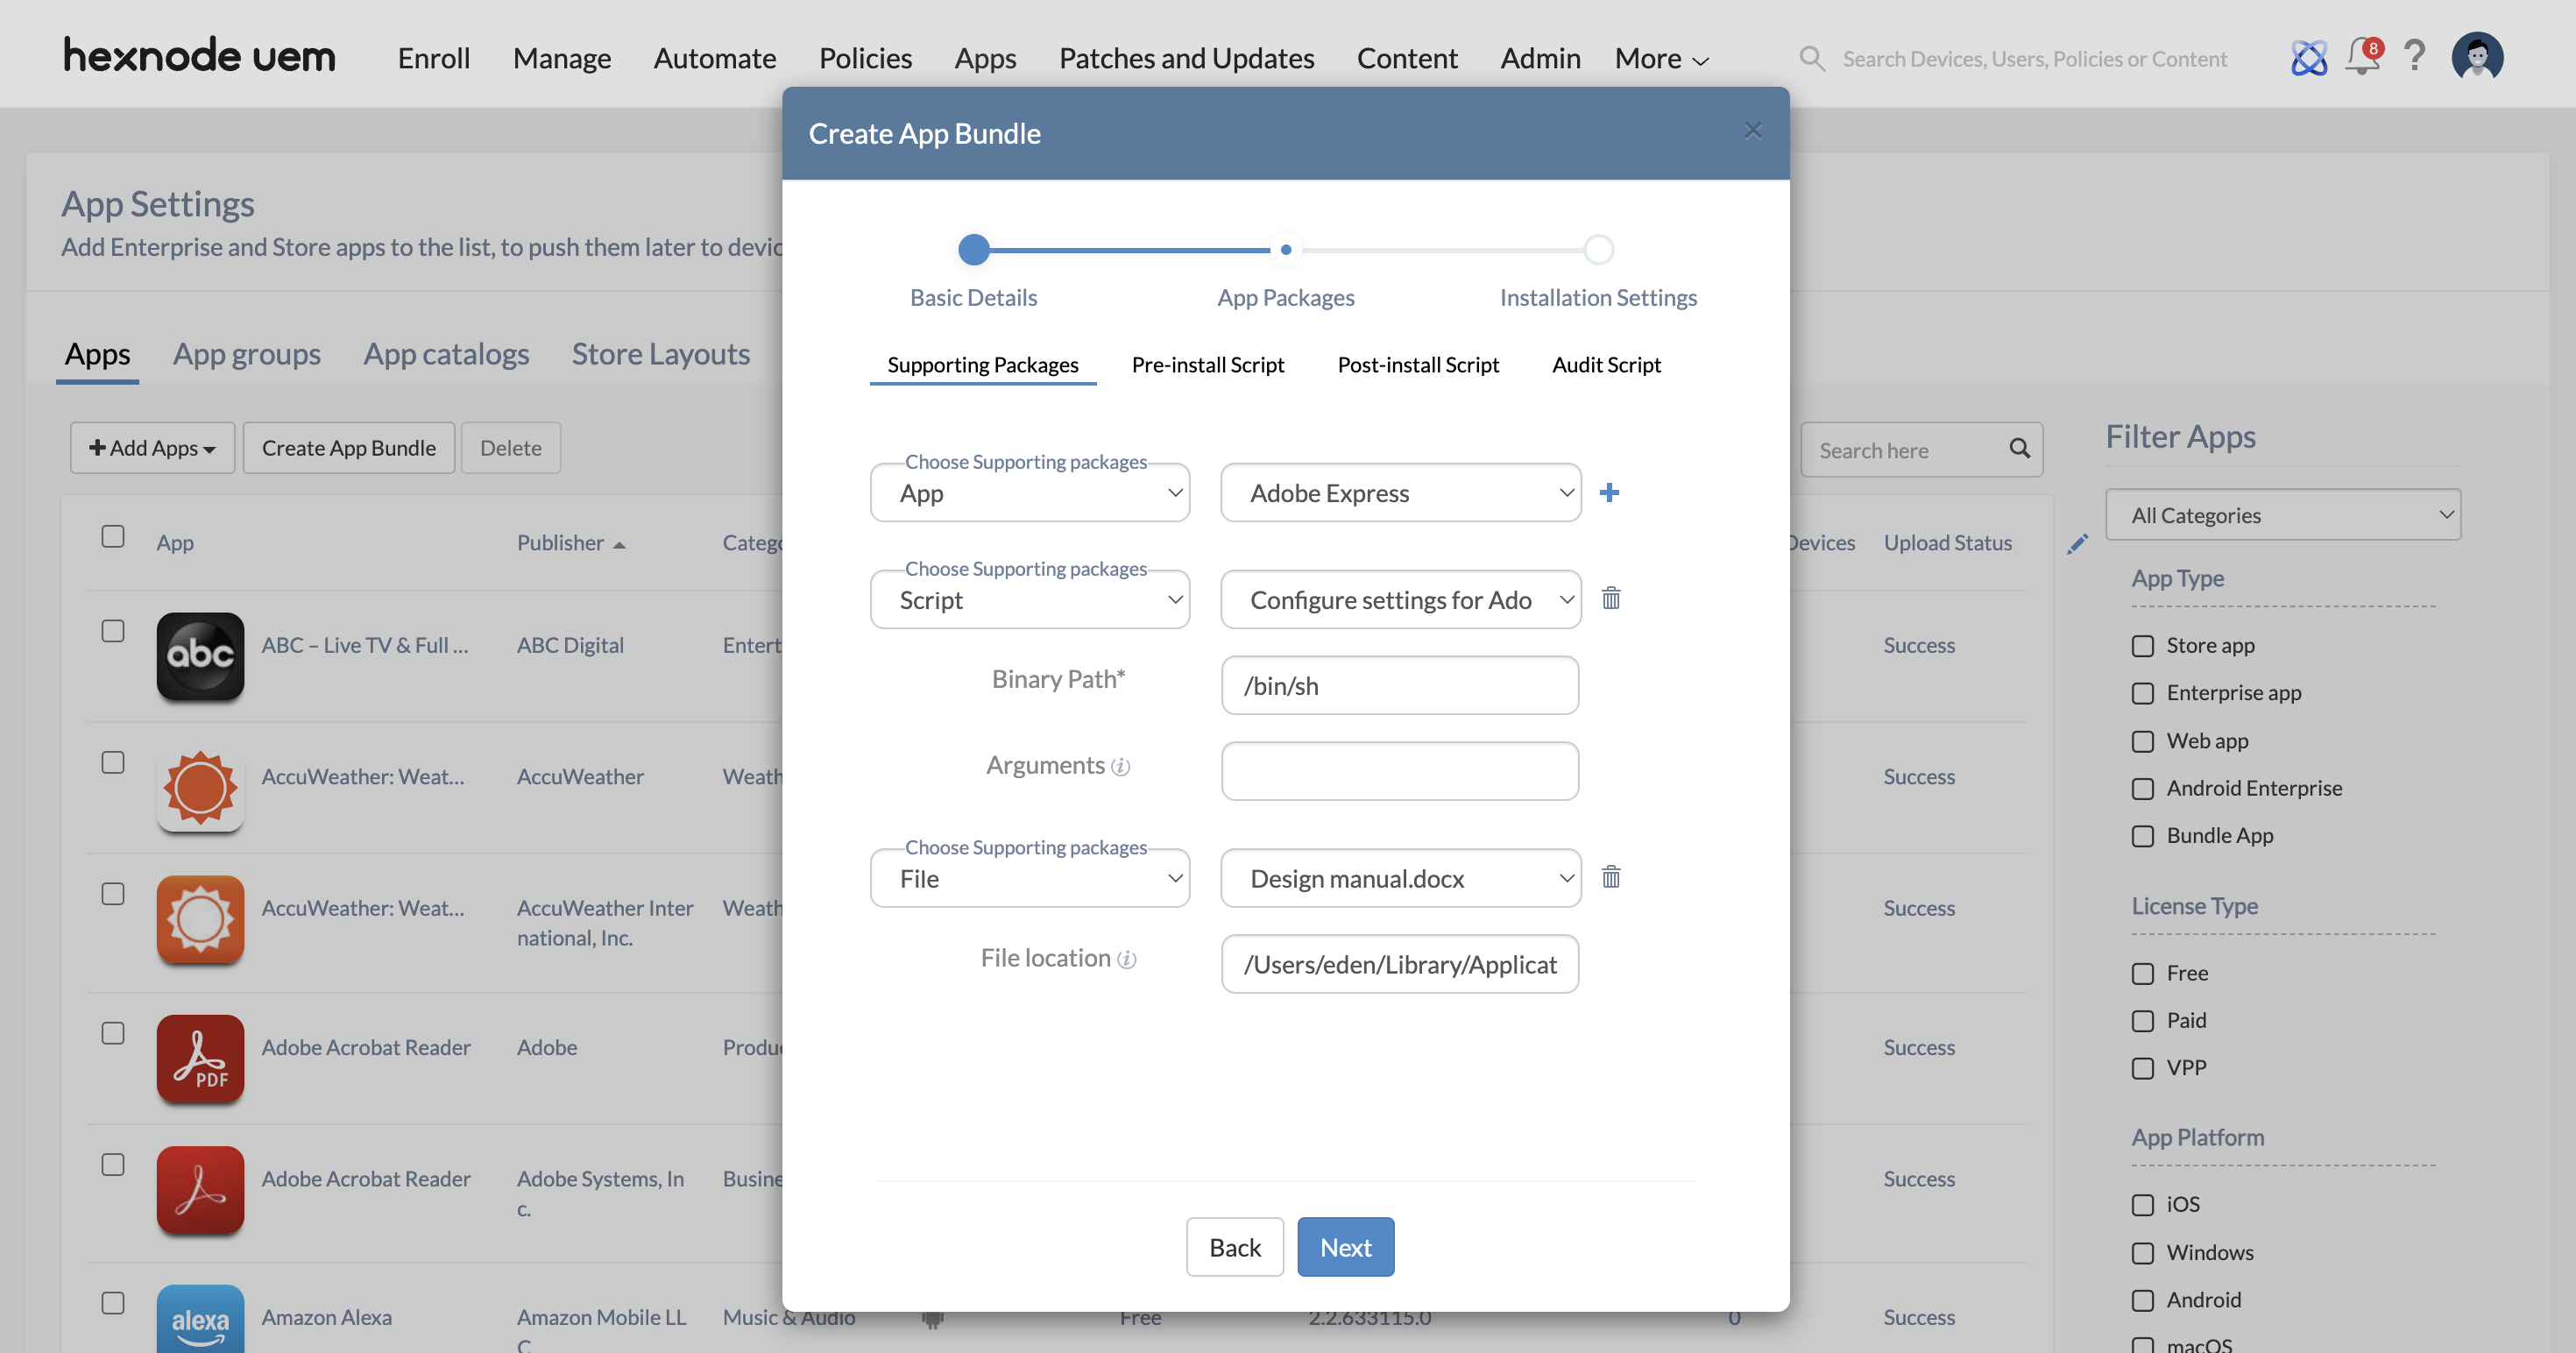
- Apps: Select from enterprise apps that have already added to the Hexnode’s app inventory. The principal app selected earlier cannot be added again as a supporting package.
- Scripts: Pick from scripts uploaded to Hexnode’s content repository.
The binary path is auto filled based on the script type:
- Perl: /usr/bin/perl
- Bash: /bin/bash
- Shell: /bin/sh
- C Shell: /bin/csh
- Zsh: /bin/zsh
- Korn Shell: /bin/ksh
- Python: /usr/bin/python
- PHP: /usr/bin/php
- Ruby: /usr/bin/ruby
You can also add arguments to be used during script execution. Wildcards are also supported here.
- Files: Choose from any files that’s been added to Hexnode’s content repository.
- Pre-install scripts: They are executed before the package installation. These scripts are used to verify if the system meets the application’s requirements and to perform any custom actions before installation. Failure of the pre-install script can cancel the installation attempt.
- Post-install scripts: They are executed after an application is installed on the system. These scripts are used to configure application settings, provide necessary permissions or install additional components or plugins. Failure of the post-install script can log error, but the installation will be considered complete as the script is executed after the installation is completed.
- Audit scripts: They can check for files, folders, apps, and settings to gather information about the installed application on the system. This ensures that the application is configured correctly. Failure of the audit script triggers re-installation if the audit script is customized in such a manner. However, the app installation will be successful.
- Click Next to proceed.
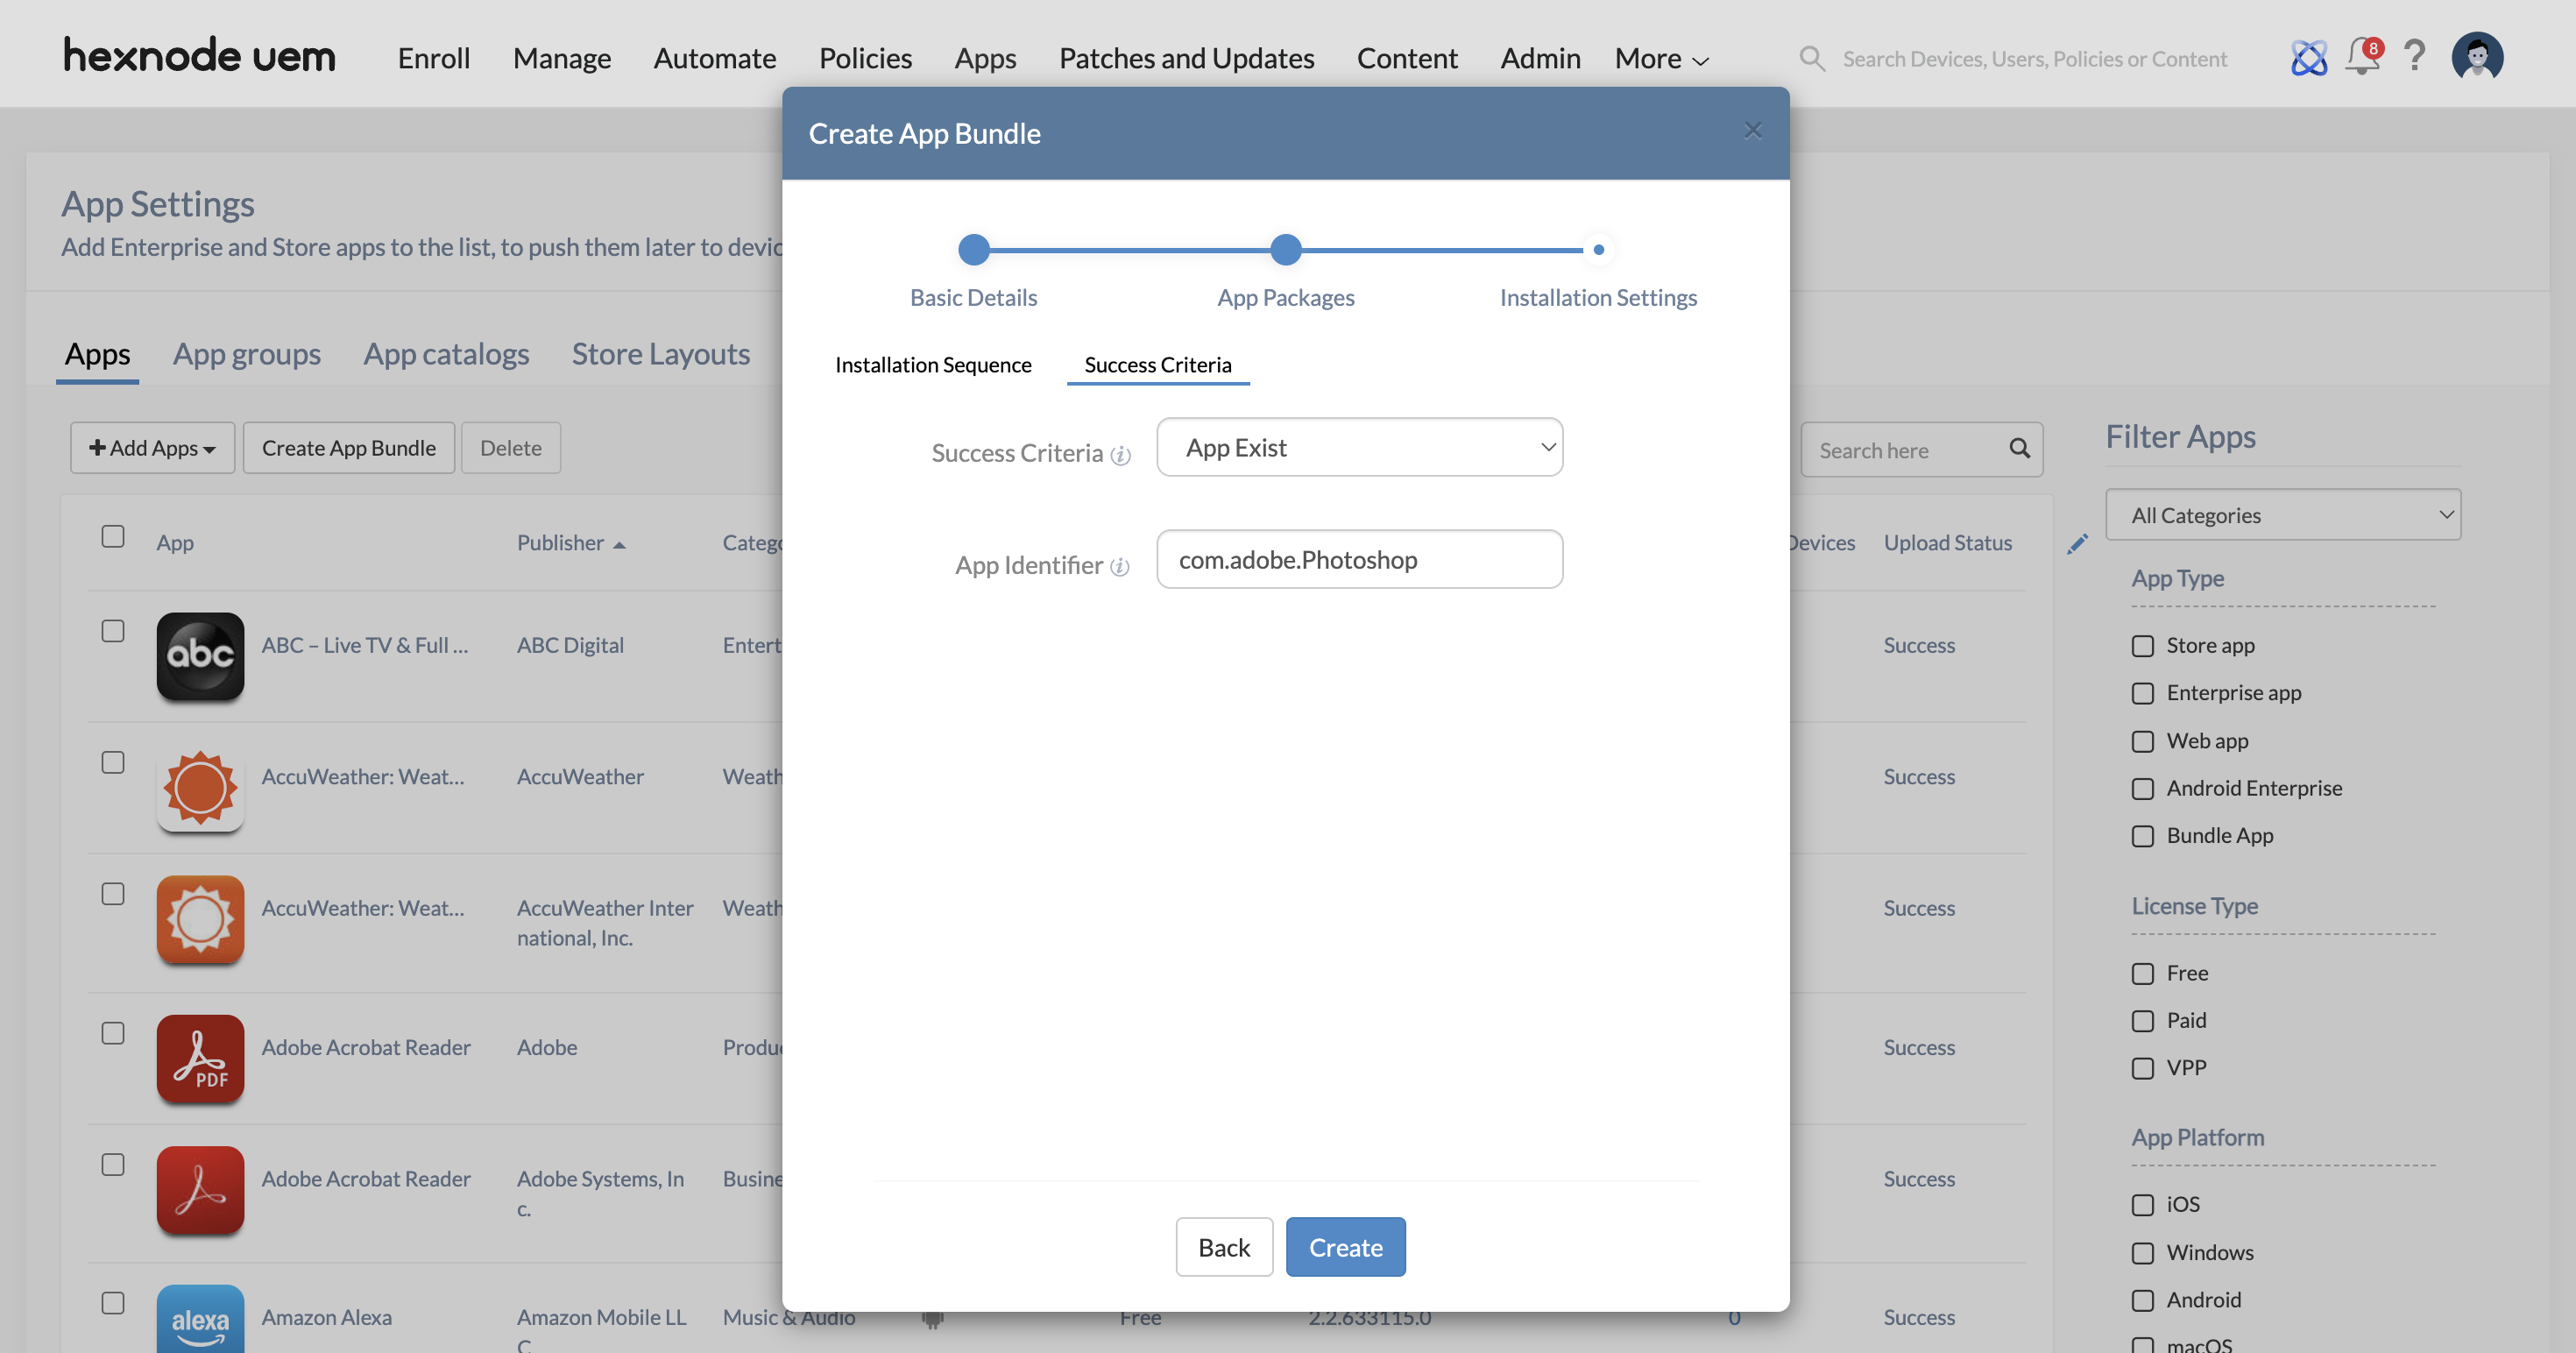
- App exists: Verifies that the app(s) inside the app bundle is present on the device using its bundle ID. You can enter multiple bundle IDs separated by commas or semicolons.
- Path exists: Verifies that a specific file path exists on the device. This confirms that the app was installed at the expected location.
- Finally, click Create to save the app bundle and add it to hexnode app inventory.
Supporting Packages
You can include apps, scripts, or files as supporting components in the bundle.
Additional scripts you can also configure:
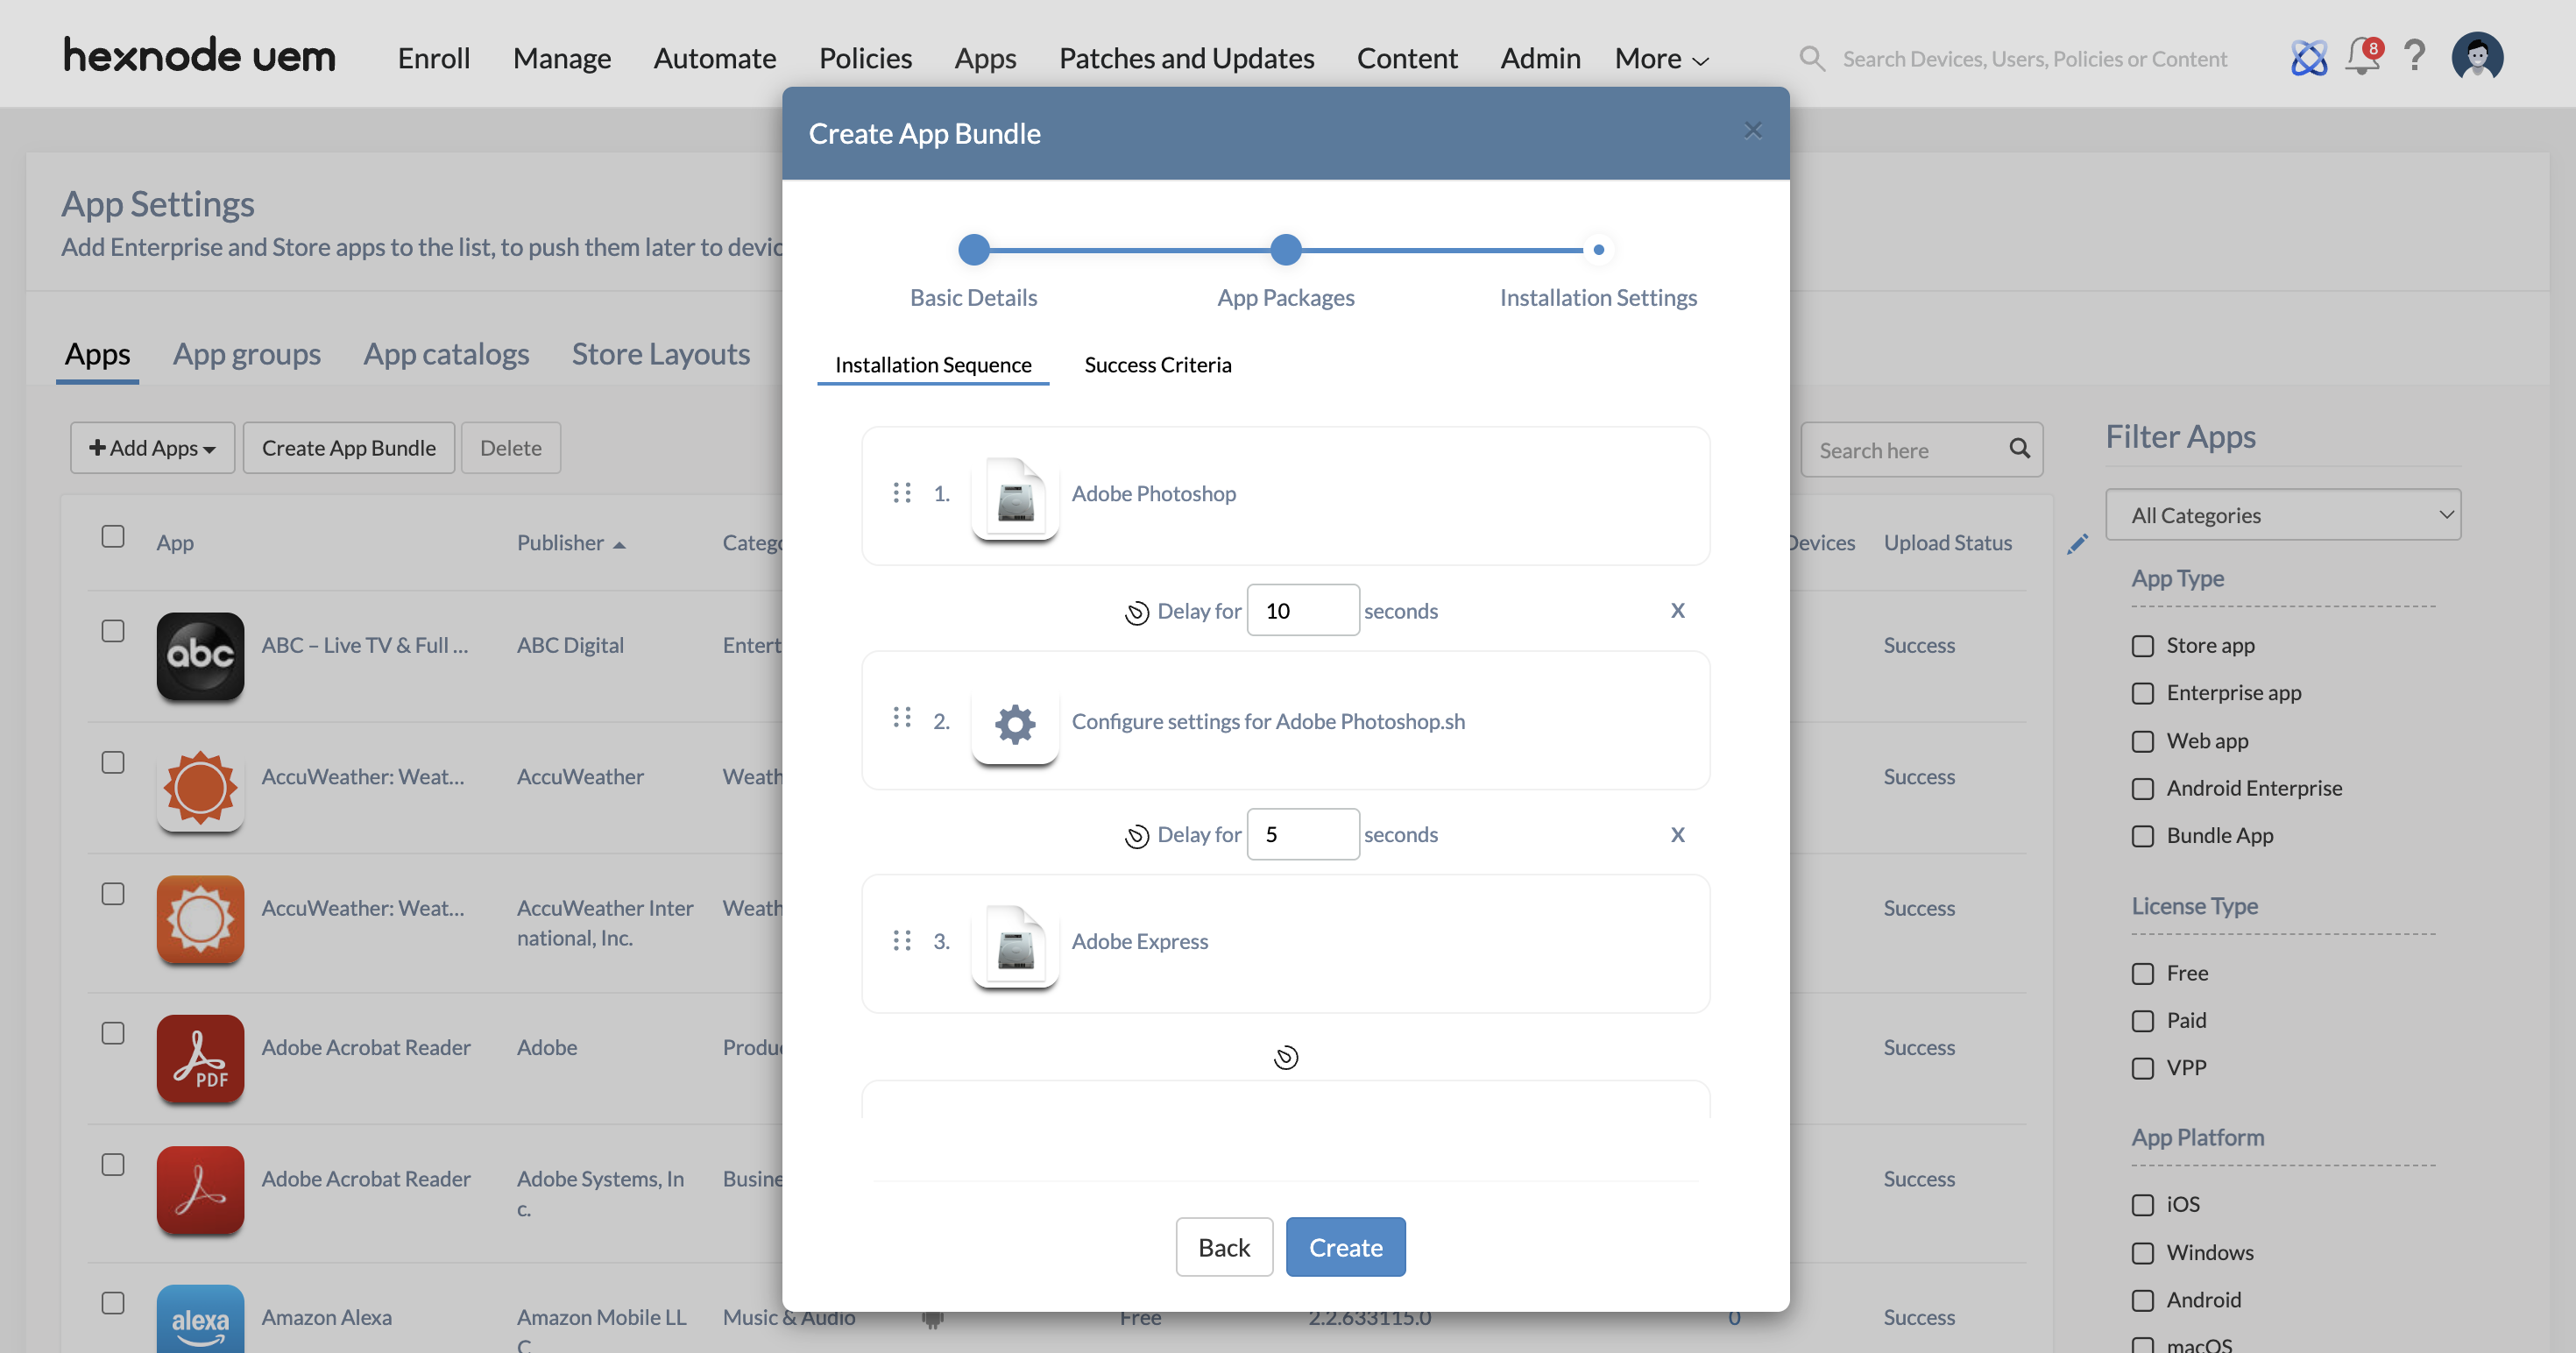
Installation Sequence
Set the exact order in which the principal and supporting packages should be installed. Just drag and drop the packages into the order you want. Between each package, there is a timer icon. Click on it to set a delay before the next item begins installing.
Success Criteria
Defining a success criterion helps ensure the app was installed as expected. It lets administrators verify specific parameters like app identifiers, or installation paths after deployment. If the selected criteria are met, the app is treated as successfully installed even if discrepancies exist in the enterprise file. You can track the result directly from the Action History of the device in the Hexnode UEM console.
You can choose one of the following:
Deploying app bundle(s) to macOS devices
Once the app bundle is added to the inventory, you can deploy the apps to the target devices/groups using two methods: Required Apps policy and Install Application action.
- Log in to your Hexnode UEM portal.
- Go to the Manage tab.
- Choose the target device(s) from the list of enrolled devices.
- Click the Actions drop-down, and under the Application section, choose Install Application.
- Select the desired app bundle and click Install.
- Log in to your Hexnode UEM portal.
- Go to Policies > New Policy. You can also choose to continue with an existing policy. Enter the policy name and description (optional).
- Select macOS > App Management > Required Apps. Click Configure.
- Click +Add drop-down. Choose either of the following options:
- Add App: To deploy one or more app bundles from the app inventory.
- Add Group: To deploy a group of apps or app bundles as a whole. You can create an app group by navigating to Apps > App groups.
- Choose the desired app bundle from the list and click Done.
- Next, associate the policy with target devices by navigating to the Policy Targets tab.
- Select the required Devices/Device Groups/Users/User Groups/Domains/OUs to which the policy is to be associated.
- Click on Save.


