Category filter
Set up Linux Kiosk Mode with a single app
This document will guide you in configuring Linux kiosk mode with a single application using Hexnode.
In modern organizational environments, devices deployed in public-facing or shared spaces often need to be optimized for a single function, preventing users from accessing other system functions, settings, or unauthorized applications. Locking down a device to a specific application helps minimize distractions and restrict access to only the intended function. The Single App Kiosk for Linux remotely enforces kiosk settings on the endpoints, ensuring that only a specified app runs on the device.
Configure Linux Kiosk mode – Single App
To configure single app kiosk mode on Linux,
- Login to your Hexnode UEM console.
- Navigate to the Policies tab.
- Click on New Policy to create a new policy or select an existing policy. Provide the name and description (optional) for the policy.
- Navigate to Kiosk Lockdown > Linux Kiosk Lockdown > Single App.
- Click on Configure.
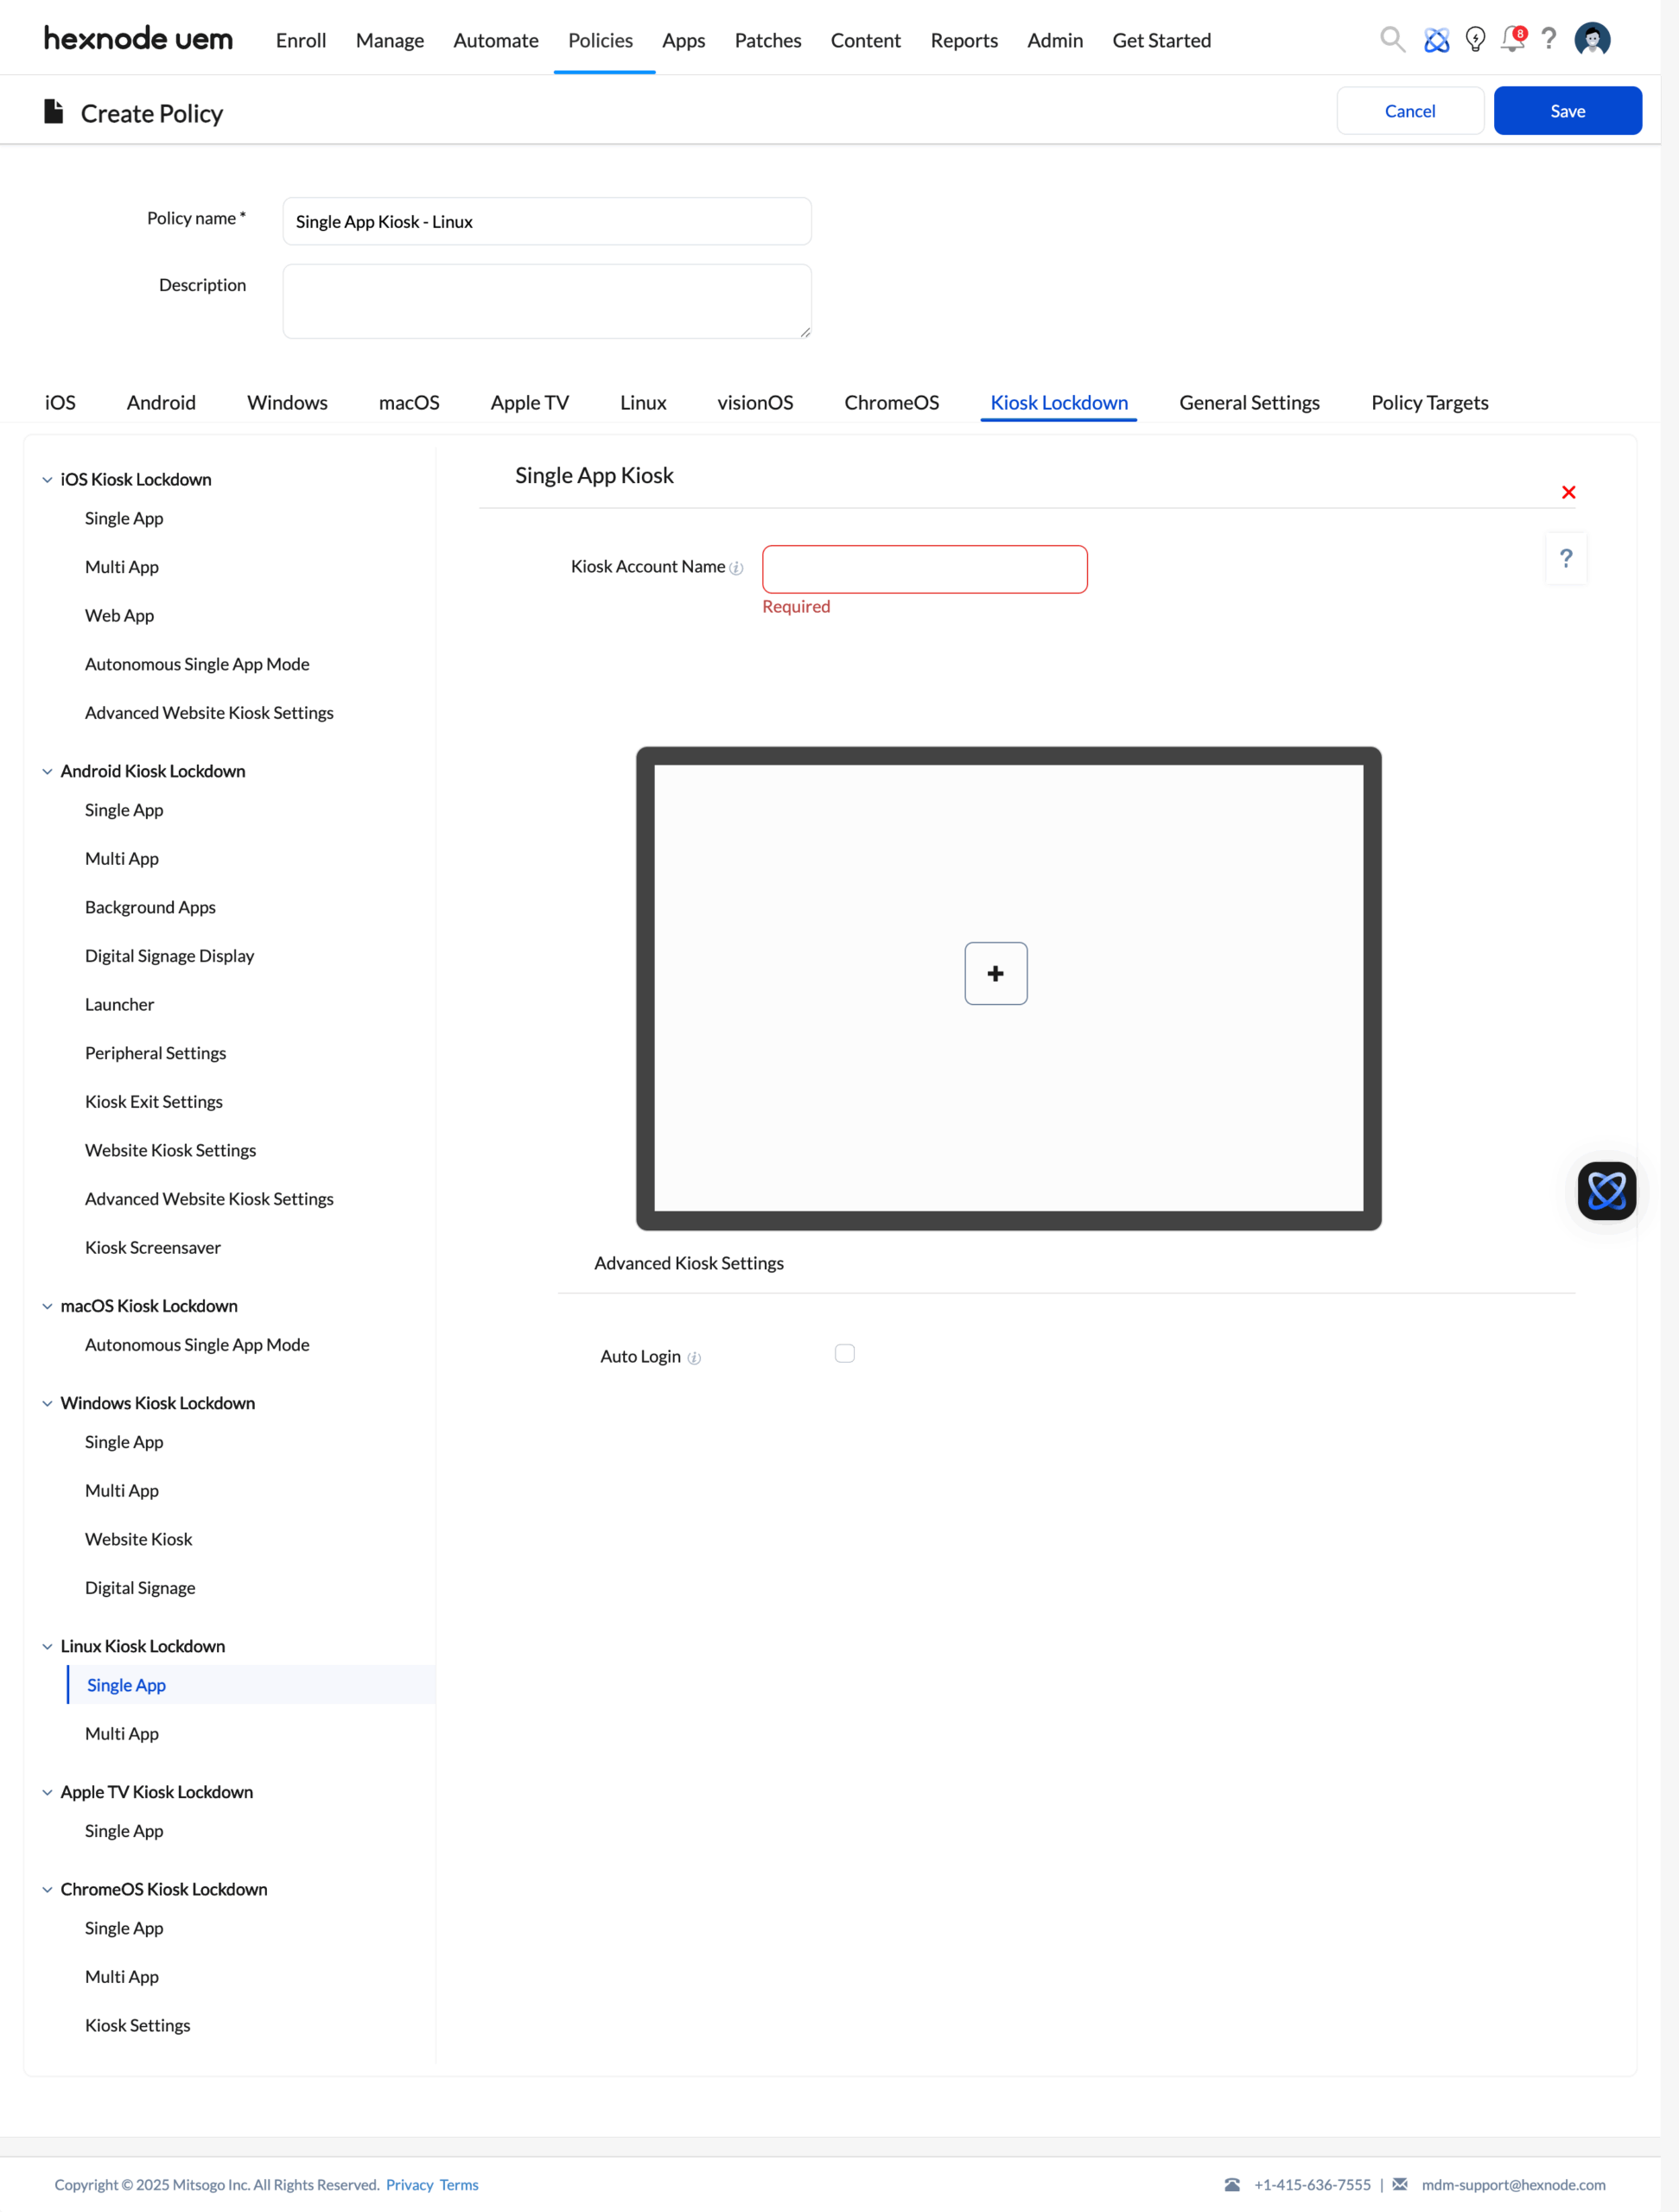
Upon clicking Configure, you will see the following options:
- Kiosk Account Name: Provide the username for the account that will be configured as the kiosk account.
- Click on the plus (+) sign to add the desired application to the kiosk. Select an application from the list of available options.
- Next, you can configure Advanced Kiosk Settings:
- Auto Login: When enabled, the device will automatically log in to the kiosk account without prompting for credentials.
- Auto Login: When enabled, the device will automatically log in to the kiosk account without prompting for credentials.
- Click on Policy Targets and associate the policy with the target device(s).
How to associate the policy with devices?
If you haven’t saved the policy yet,
- Navigate to Policy Targets.
- Click on + Add Devices, search and select the required devices to which you need to apply the policy and click OK.
- Click on Save to apply the policies to the devices.
To associate the policies with a device group, select Device Groups from the left pane under Policy Targets, and follow the above instructions. Similarly, you can associate the policy with Users, User Groups, or Domains/OUs from the same pane.
If you’ve already saved the policy,
- Select the required policy, click on Manage and select Associate Targets.
- Select Device/ User/ Device Group/ User Group/ Domain/OUs.
- Search and select the devices/ users/ device groups/ user groups/ domains/OUs to which you need to apply the policy and click Associate.
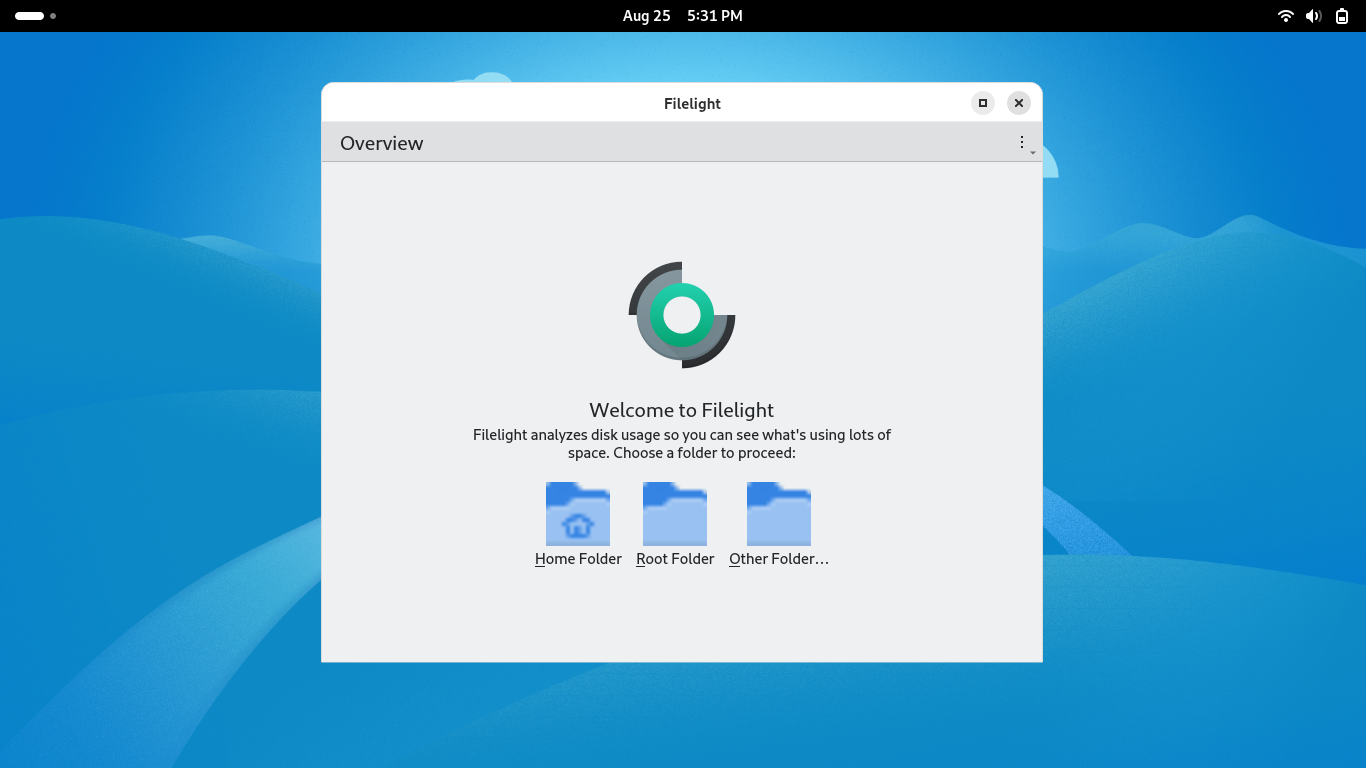
What happens at the device end?
When Filelight is selected as the kiosk application in the policy, it will launch automatically on the device, and the device will enter kiosk mode, allowing access only to the Filelight app and restricting all other applications and system features.