Category filter
How to unlock a disabled iPhone?
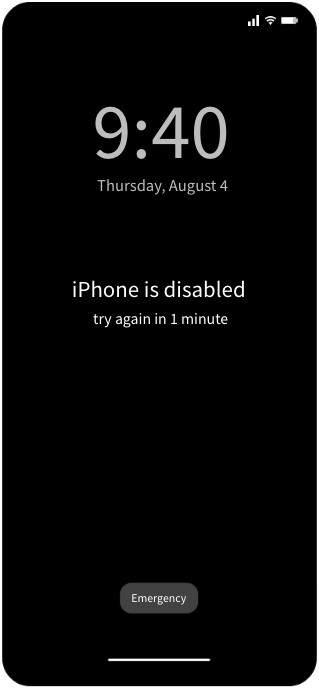
While it is essential to keep iPhones secure with a password, forgetting the passcode or entering the wrong one too many times can lead to the device being locked. In situations like these, there are various approaches to unlocking the disabled iPhone. One of these methods involves utilizing a UEM solution like Hexnode, specifically if the iPhone is enrolled. This document provides an overview of multiple techniques that can be utilized to unlock a disabled iPhone.

Remotely unlock a disabled iPhone without data loss
If your device is managed by Hexnode UEM, you can try using the Clear Password remote action to remove the password of the disabled device.
To remove the device password:
- Login to your Hexnode UEM portal.
- Navigate to Manage > Devices.
- Select the iOS device which is disabled.
- From Actions, select Clear Password.
Unlock a disabled iPhone by wiping data
If your iPhone is disabled, one option to unlock it is by performing a complete wipe and starting afresh. This process involves reinstalling the operating system, effectively returning it to a clean state.
The solutions provided below involve erasing or wiping the device, which will restore the device to its original settings and result in the loss of data. After the device is wiped, if you have a backup available, you can restore your iPhone using that backup to recover your data and settings.
Wipe using Hexnode UEM
You can try Hexnode’s Wipe Device remote action to restore the device to its original factory settings.
To wipe the device:
- Login to your Hexnode UEM portal.
- Navigate to the Manage tab.
- Click on the iOS device you wish to wipe.
- From the Actions drop-down, select Wipe Device.
- Click Wipe, in the confirmation dialog.
- Click Confirm to initiate the device wipe.
Wipe using Find My iPhone
Follow these steps to remotely wipe your iPhone from a web browser:
- Visit https://www.icloud.com/ and sign in using your Apple ID associated with the iPhone.
- Scroll down the page and click on Find My. From the devices list, select your iPhone.
- Click on Erase this Device option. Click Next on the pop-up after reading the details in the message.
- Enter your Apple ID password to proceed.
- After the wipe, if you have a backup available, you can restore your iPhone using that backup.
If you have another Apple device linked to the same Apple ID, you can utilize the built-in Find My app on that device to perform the same action, eliminating the need to use a browser.
Follow these steps to remotely wipe your iPhone using the Find My app:
- Open the Find My app on your Apple device.
- Tap on Devices and select the relevant iPhone from the list.
- Tap on Erase this Device and click on Continue after reading the message.
- Enter a message in the box (optional) and click on Erase.
- When erasing the device from Mac, you will be asked to enter the phone number (optional).
- Enter the Apple ID password.
- If possible, restore your iPhone from a backup to recover your data and settings.
Wipe using iTunes or Finder
Apple’s iTunes and Finder are popular tools for synchronizing and managing iPhones with PCs and Macs. They can also be used for backing up and recovering iPhones connected via USB-to-Lightning cable or USB –C to USB-C. Wiping an iPhone with iTunes is a common approach, especially when the device is disabled.

To wipe an iPhone using Recovery Mode, you can follow these steps:
- Connect your iPhone to a Mac having Finder or iTunes open.
- For iPhone 6s and earlier models, press and hold the Home button and top (or side) button simultaneously until the Recovery Mode screen appears.
- For iPhone 7 and 7 Plus models, simultaneously press and hold the top (or side) button and volume down button until the Recovery Mode screen appears.
- To enter Recovery Mode on iPhone 8 or later models, press the volume up button, then quickly release it. Next, press the volume down button, then quickly release it. Finally, press and hold the side button until the Recovery Mode screen appears.
- Once the Recovery Mode screen appears in iTunes or Finder, select the option to recover the iPhone when prompted with the pop-up message. Then, follow the on-screen instructions to complete the recovery process.


