Category filter
Automate App Distribution for macOS devices
This document will help you automate App Distribution for macOS devices from Hexnode UEM.
App distribution in Hexnode UEM allows you to silently deploy apps to macOS devices, but sometimes it isn’t just about installing a single app. You might have dependencies like a companion app or a set of required files that need to be in place for the installation to work smoothly. Maybe certain scripts need to run before or after the installation, or you want to track whether the installation was successful with an audit script. And if your devices are shared, installing the app to the currently logged-in user account might be a must.
By combining app distribution with Automation, you can define when and how apps are deployed. While app bundles let you customize the install order, include scripts at different stages, and configure success criteria, Automation takes it a step further. You can schedule installations based on device activity or time, target specific devices using included or excluded groups, and configure whether the installation should be silent or user-notified. You can also choose to install the app for all users or just the currently logged-in user, and ensure that each deployment meets your exact requirements.
Automate app distribution on macOS devices
- Log in to the Hexnode UEM portal.
- Navigate to the Automate tab.
- Click New Automation and select macOS as the platform.
- Name: Enter a name for the automation.
- Description: Optionally, include a brief description outlining the purpose or scope of the automation.
- Click Next to continue.
- Selecting applications to deploy
- Configuring supporting packages and scripts
- Defining installation flow and success criteria
- Setting the deployment mode
- Click the Add button next to Select apps to deploy.
- A window will appear showing the enterprise apps that have already been added to the Hexnode’s app inventory.
- Select the apps you wish to deploy and click Confirm.
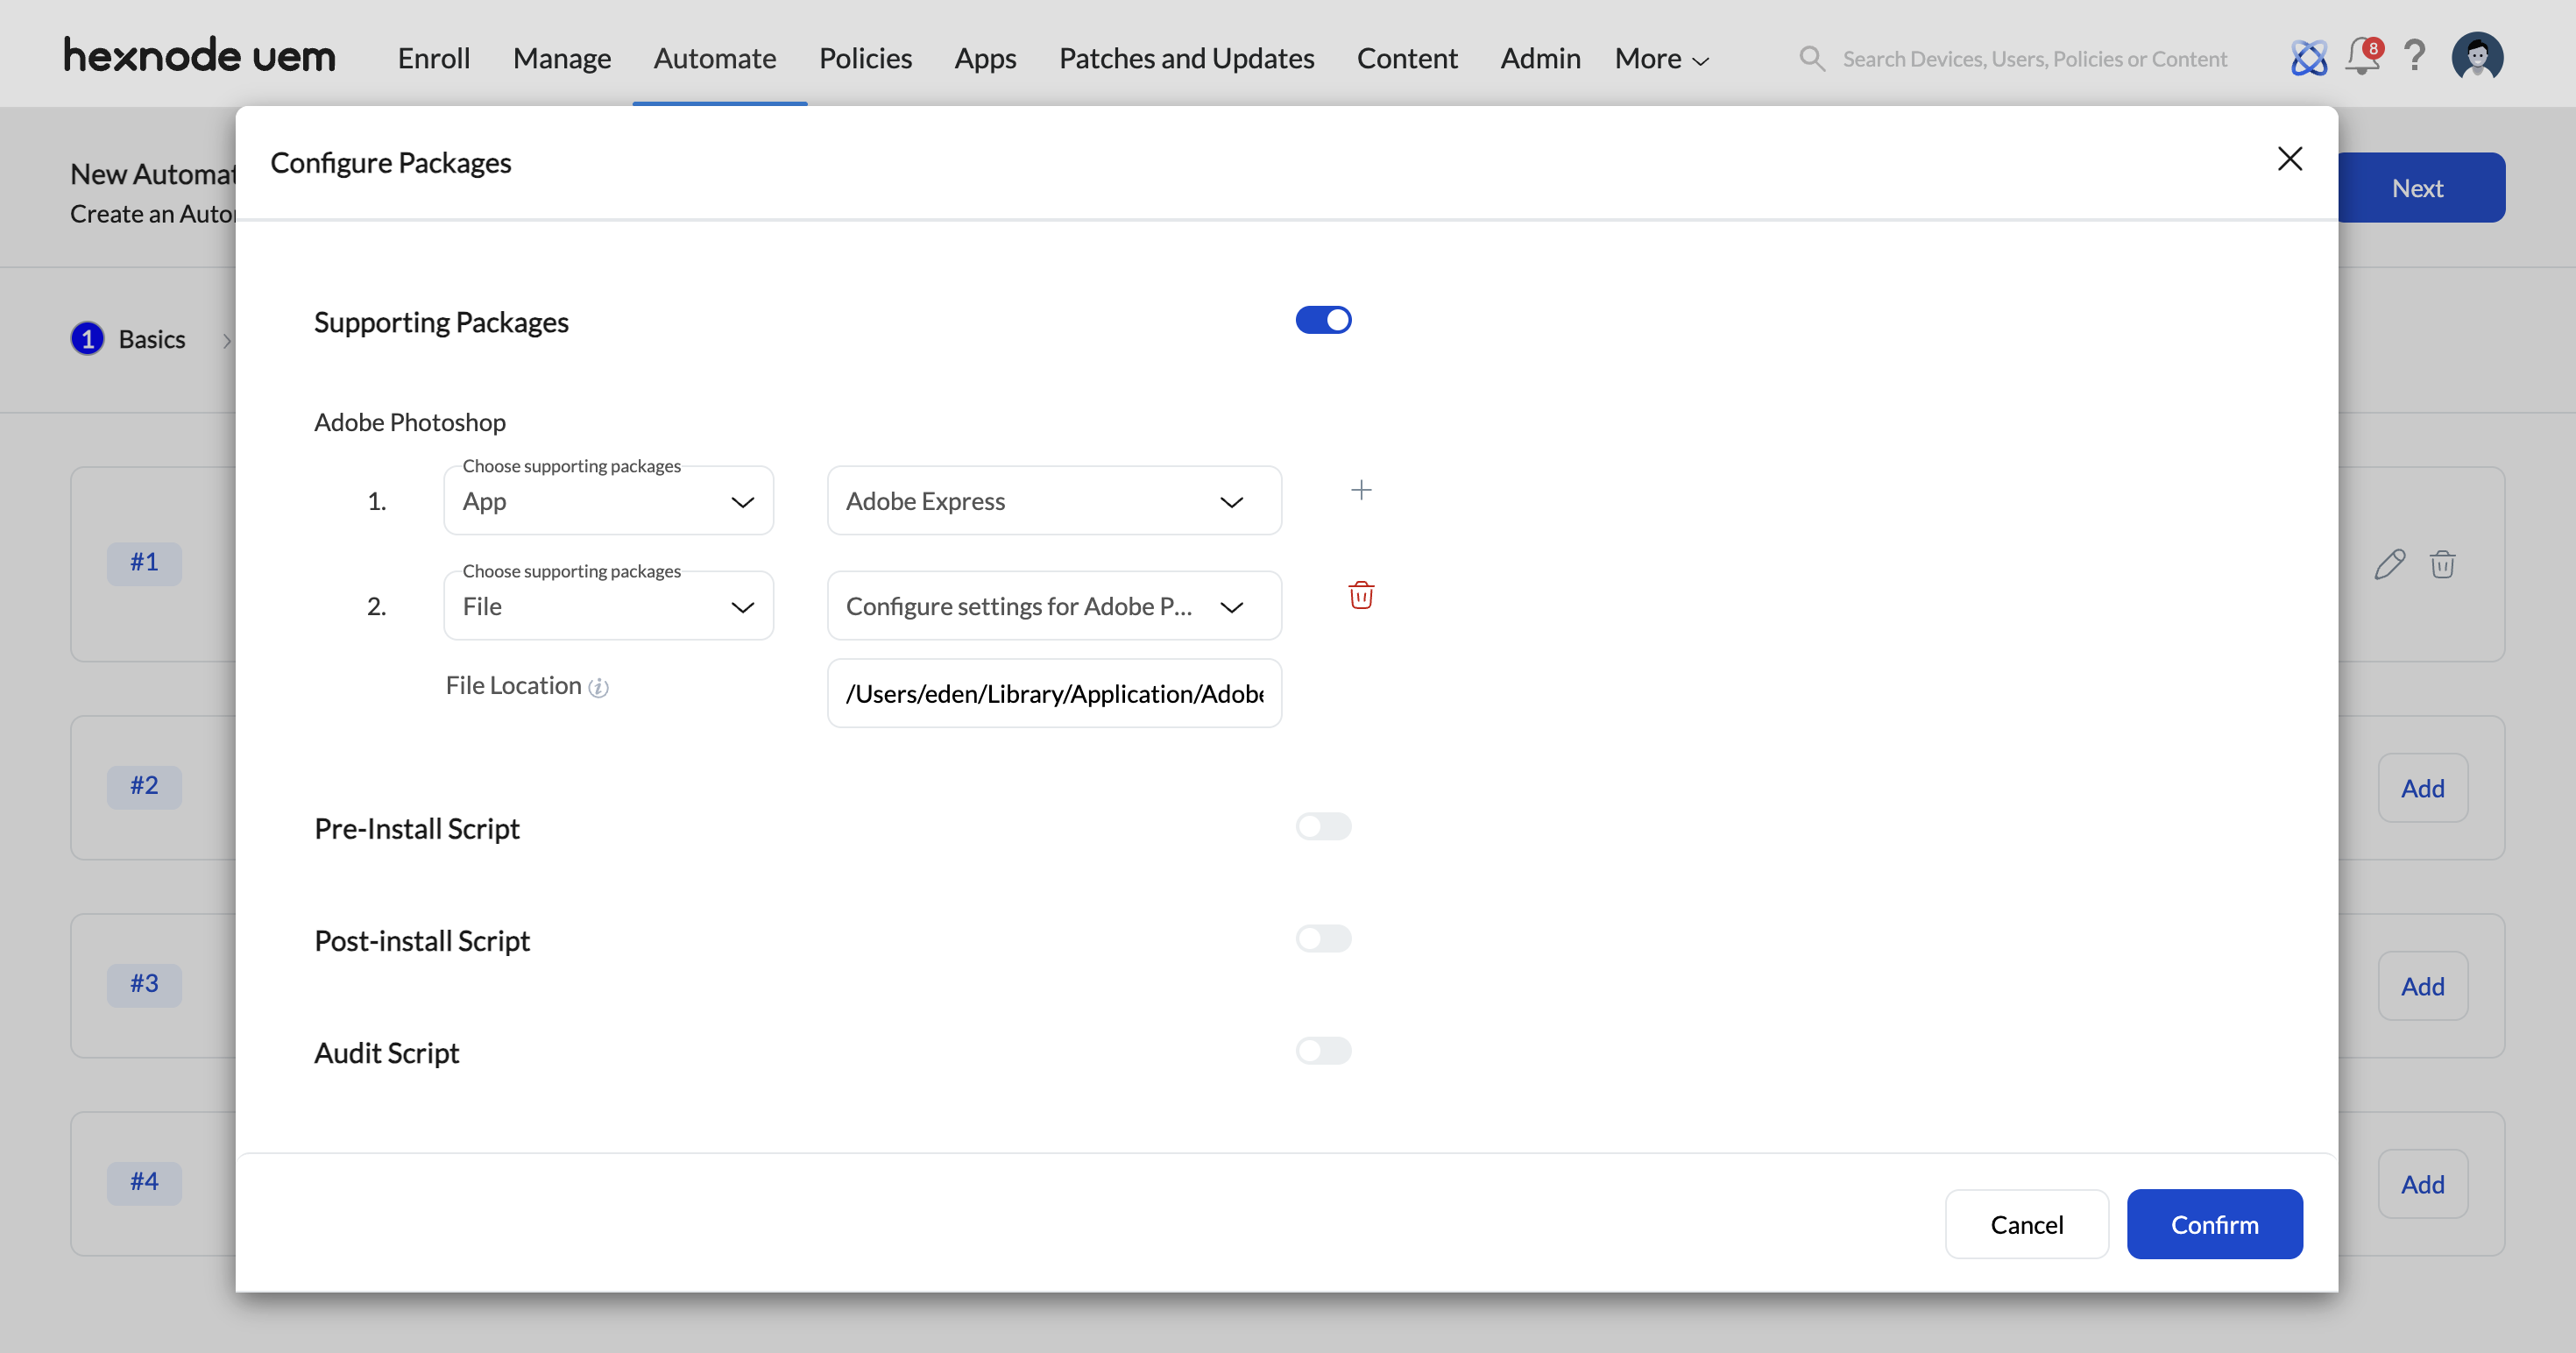
- Click the Add button next to Configure supporting packages, pre-install scripts, post-install scripts, audit scripts.
- Supporting Packages
You can include:
- Apps: Select from enterprise apps that have already added to the Hexnode’s app inventory. The main app selected earlier cannot be added again as a supporting package.
- Files: Choose from any files that’s been added to Hexnode’s content repository.
- Scripts
- Pre-install scripts: They are executed before the package installation. These scripts are used to verify if the system meets the application’s requirements and to perform any custom actions before installation. Failure of the pre-install script can cancel the installation attempt.
- Post-install scripts: They are executed after an application is installed on the system. These scripts are used to configure application settings, provide necessary permissions or install additional components or plugins. Failure of the post-install script can log error, but the installation will be considered complete as the script is executed after the installation is completed.
- Audit scripts: They can check for files, folders, apps, and settings to gather information about the installed application on the system. This ensures that the application is configured correctly. Failure of the audit script triggers re-installation if the audit script is customized in such a manner. However, the app installation will be successful.
- For each script, enable the respective toggle and select a script from the Hexnode’s content repository. You can also add arguments for the scripts as well.
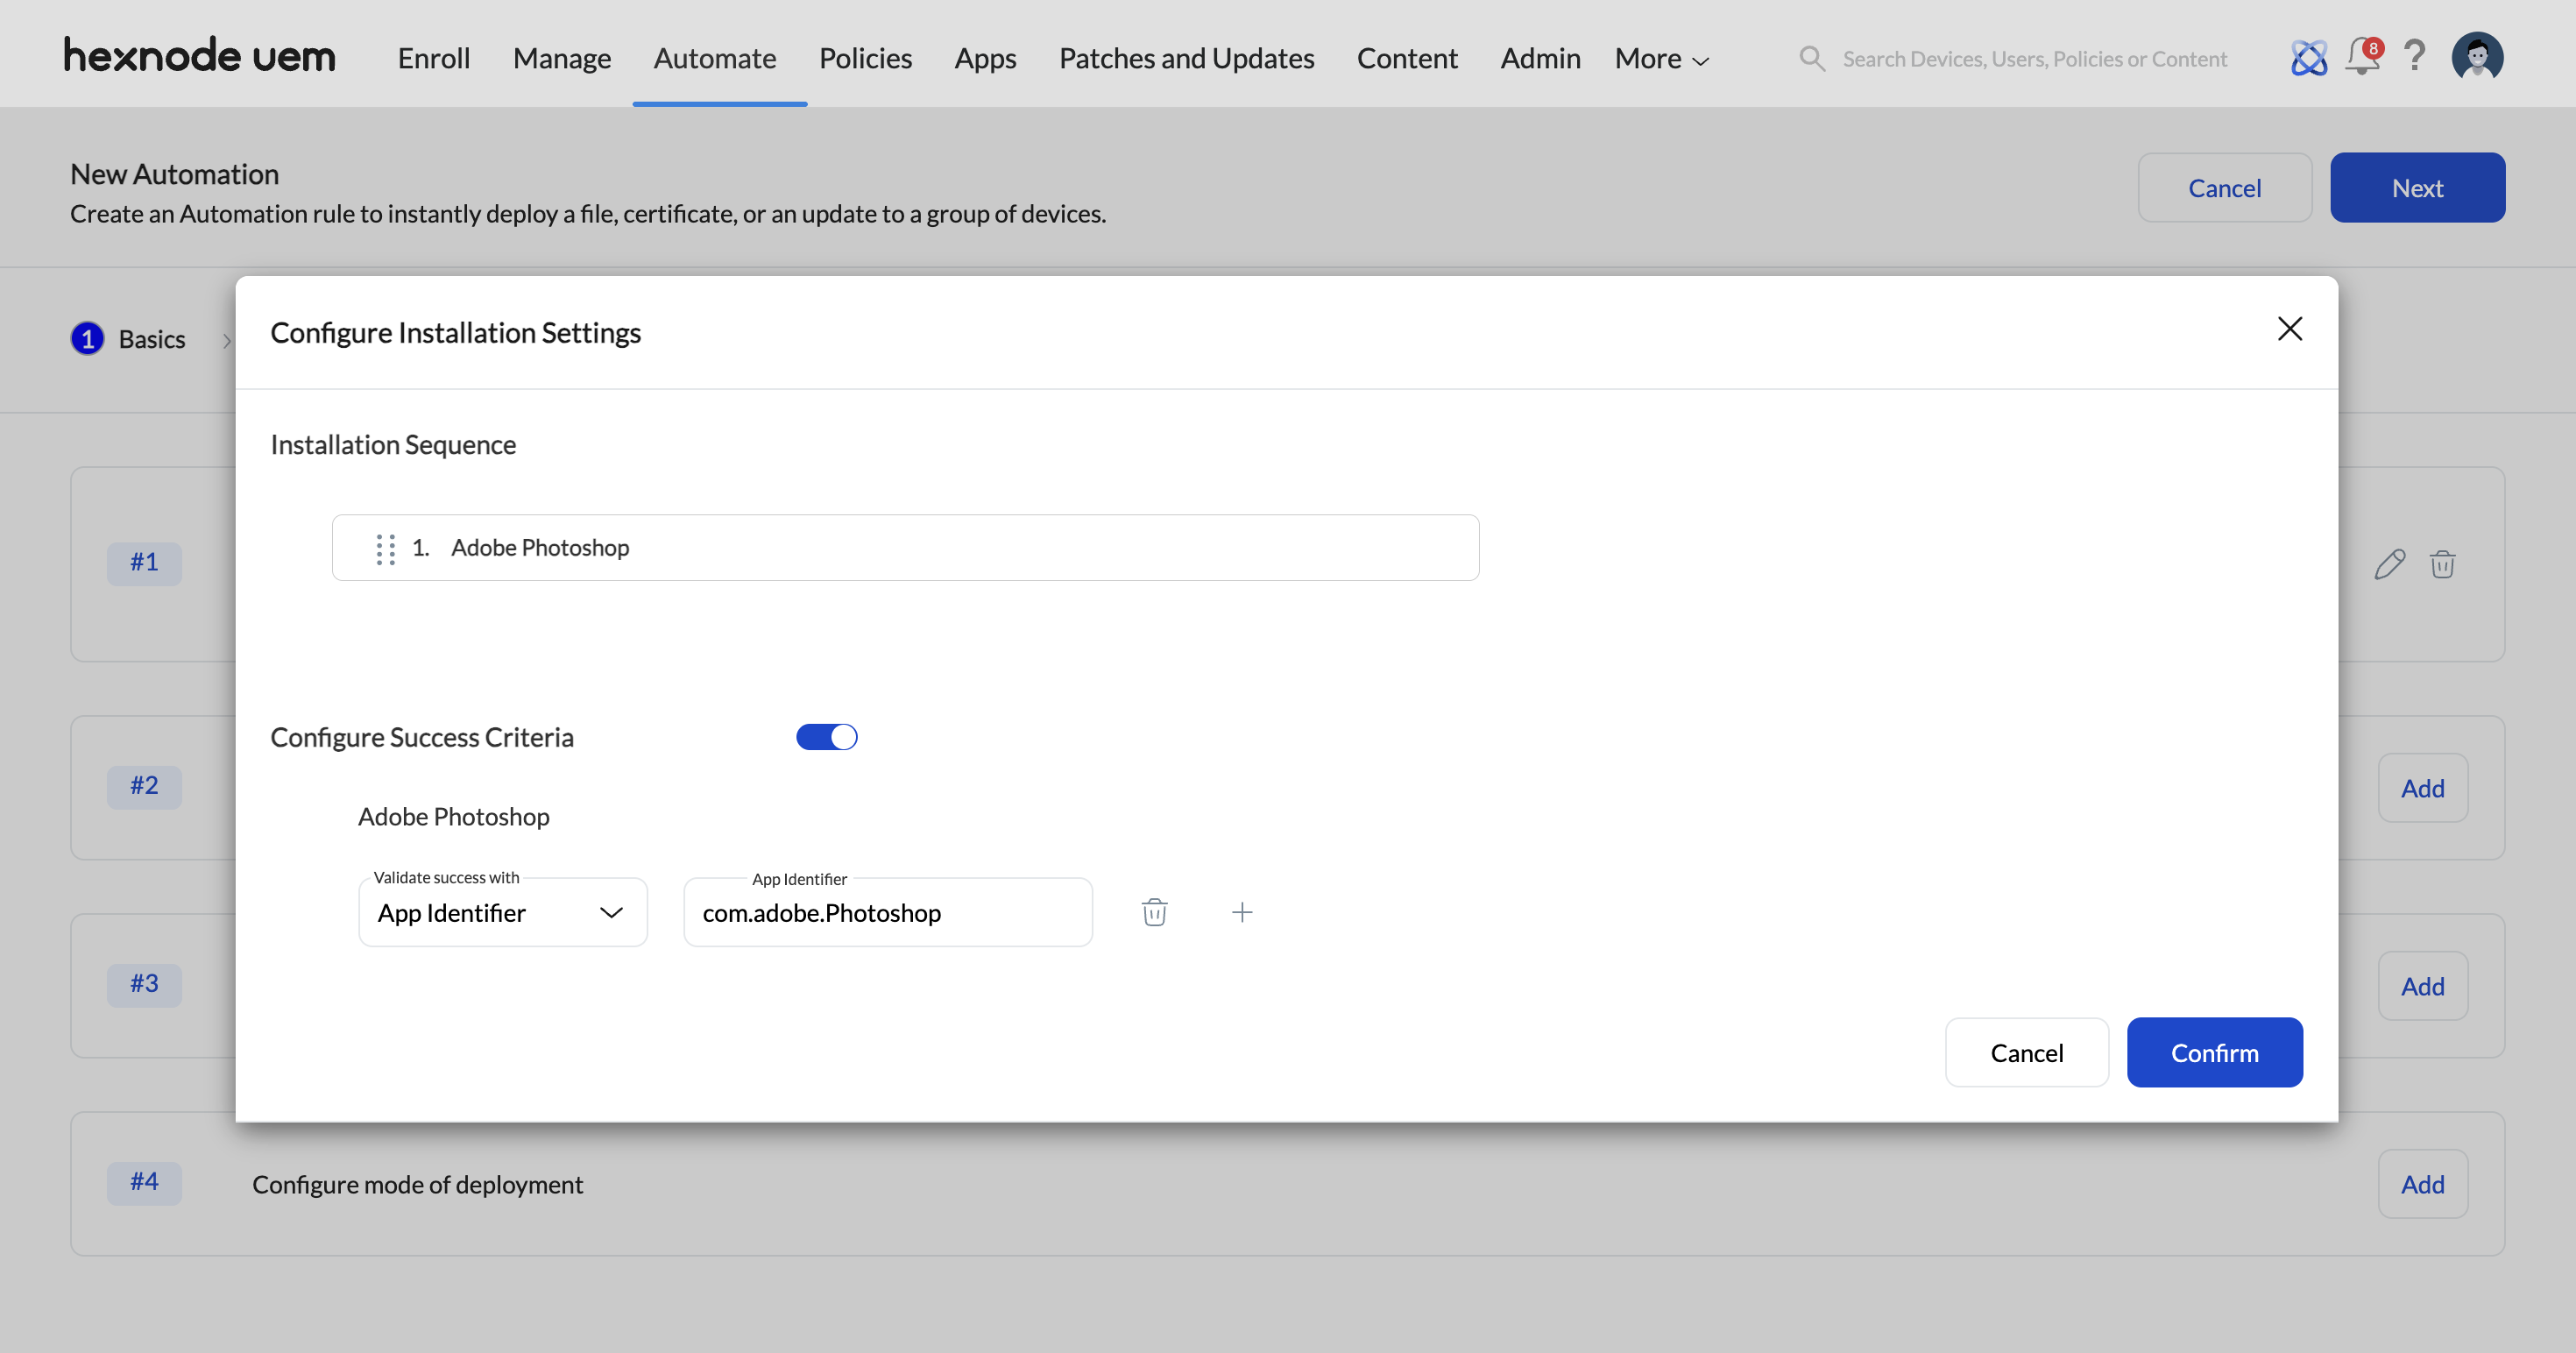
- Click Add next to Set installation flow to configure installation sequence and success criteria for the apps.
- Installation Sequence
Arrange the selected apps in the desired installation order using drag-and-drop.
- Success Criteria
Defining a success criterion helps ensure the app was installed as expected. It lets administrators verify specific parameters like app identifiers, or installation paths after deployment. If the selected criteria are met, the app is treated as successfully installed even if discrepancies exist in the enterprise file. You can track the result directly from the Action History of the device in the Hexnode UEM console.
You can configure the following:
- App Identifier: Verifies that the deployed app(s) are present on the device using its bundle ID. You can enter multiple bundle IDs separated by commas or semicolons.
- File Path: Verifies that a specific file path exists on the device. This confirms that the app was installed at the expected location.
Click the + button if you want to configure both “App Identifier” and “File Path” as success criteria. In that case, both conditions must be met for the installation to be considered successful.
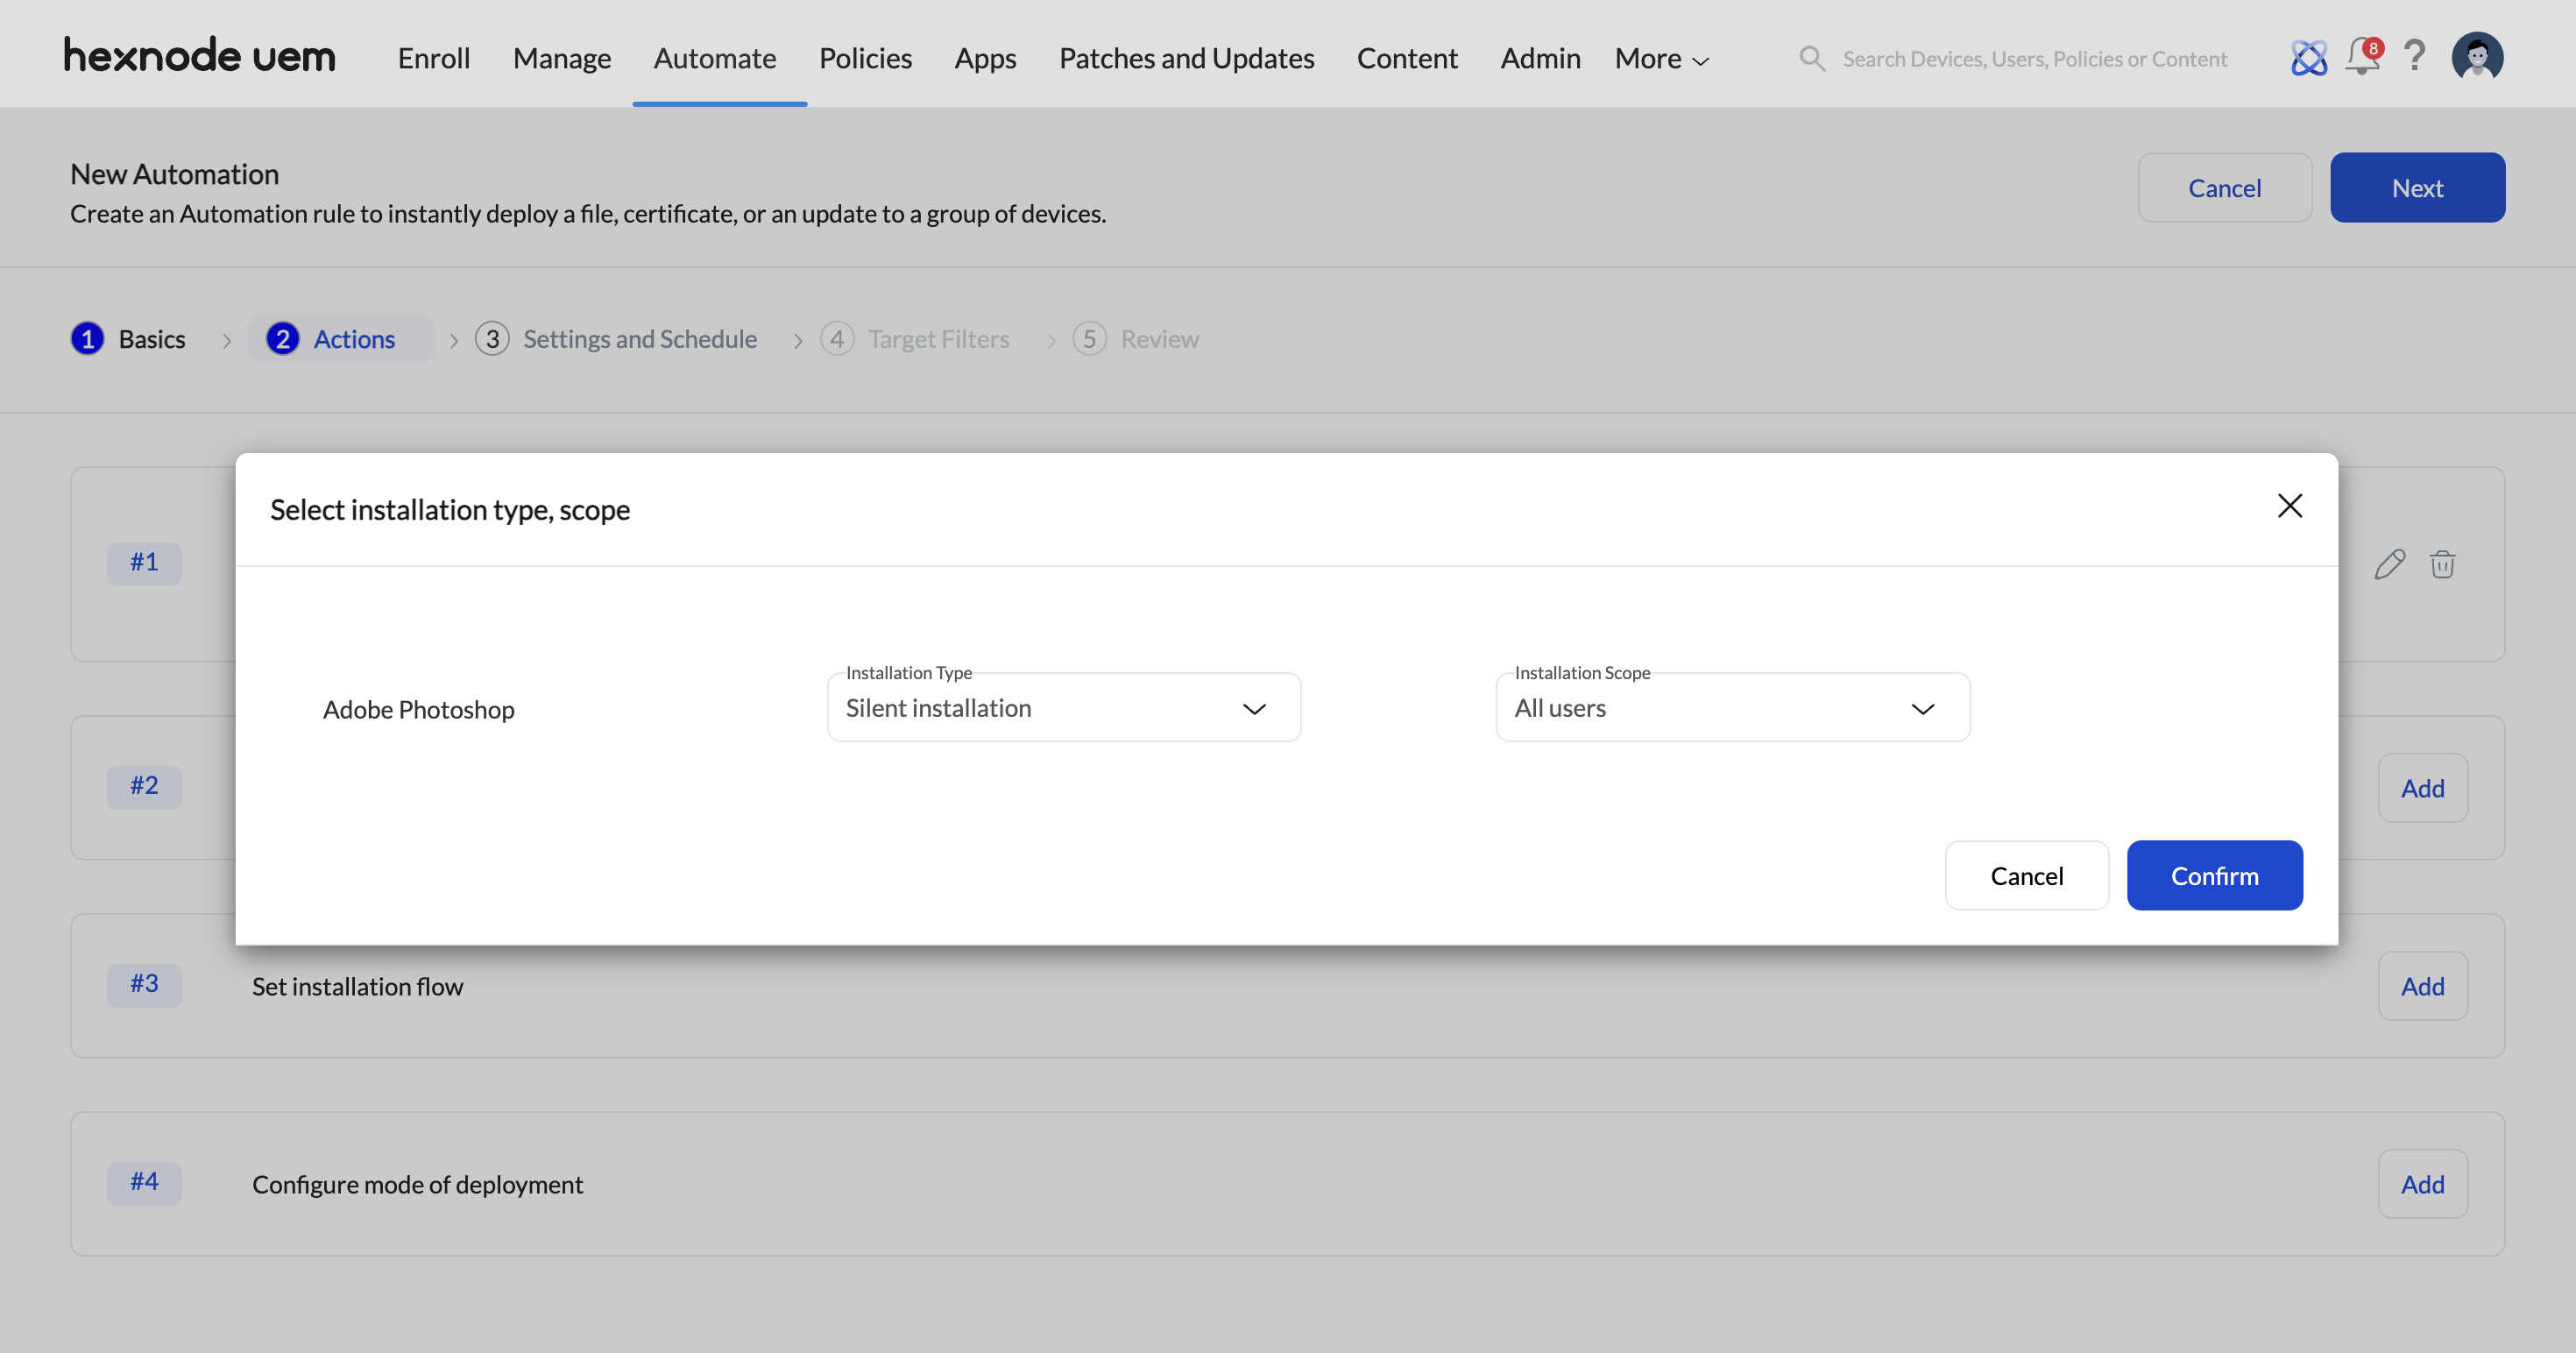
- Installation Type
- Silent Installation: Installs without notifying the user.
- Notified Installation: Informs the user before app installation.
- Installation Scope
- All users: Installs the app(s) for all user profiles on the device.
- Current user: Installs only for the currently logged-in user.
- Once the actions are selected, click Next.
- Time: You can define the exact time when the action will be executed on the device.
Initiate: You can configure the action initiation frequency. Choose between three options:
- Once, ASAP: Executes the automation immediately after creation.
- Once: Runs the automation at a specified date and time.
- Repeat at a set schedule: Repeats the automation based on a defined frequency.
Scheduling options:
- Scheduled Date (for the Once option) – Select a specific date for automation initiation in MM/DD/YYYY format.
- Scheduled Day (for the Repeat at a set schedule option) – Choose how often the automation repeats:
- Everyday – Triggers the automation daily.
- Selected days – Runs on specific days of the week.
- Monthly – Executes on a specific day each month (e.g., the 10th).
- Scheduled Time (for both Once and Repeat at a set schedule options) – Set the exact time for automation execution in HH:MM format and select the time zone.
- Activity: Define the device activity that will trigger the action on the device.
Initiate: You can configure when the action should initiate. Choose between five options:
- On Device Enrollment: Triggers the action when the device is enrolled. The automation action will be applied only to newly enrolled devices after their initial device scan.
- On Device Compliance: Triggers the action when the device is compliant.
- On Device Non-Compliance: Triggers the action when the device is non-compliant.
- On Location Compliance: Triggers the action when the device is location compliant.
- On Location Non-Compliance: Triggers the action when the device is not location compliant.
- Once you have configured the Settings and Schedule, click Next.
- After setting the filters, click Next.
- Once you have reviewed the automation, click Save.
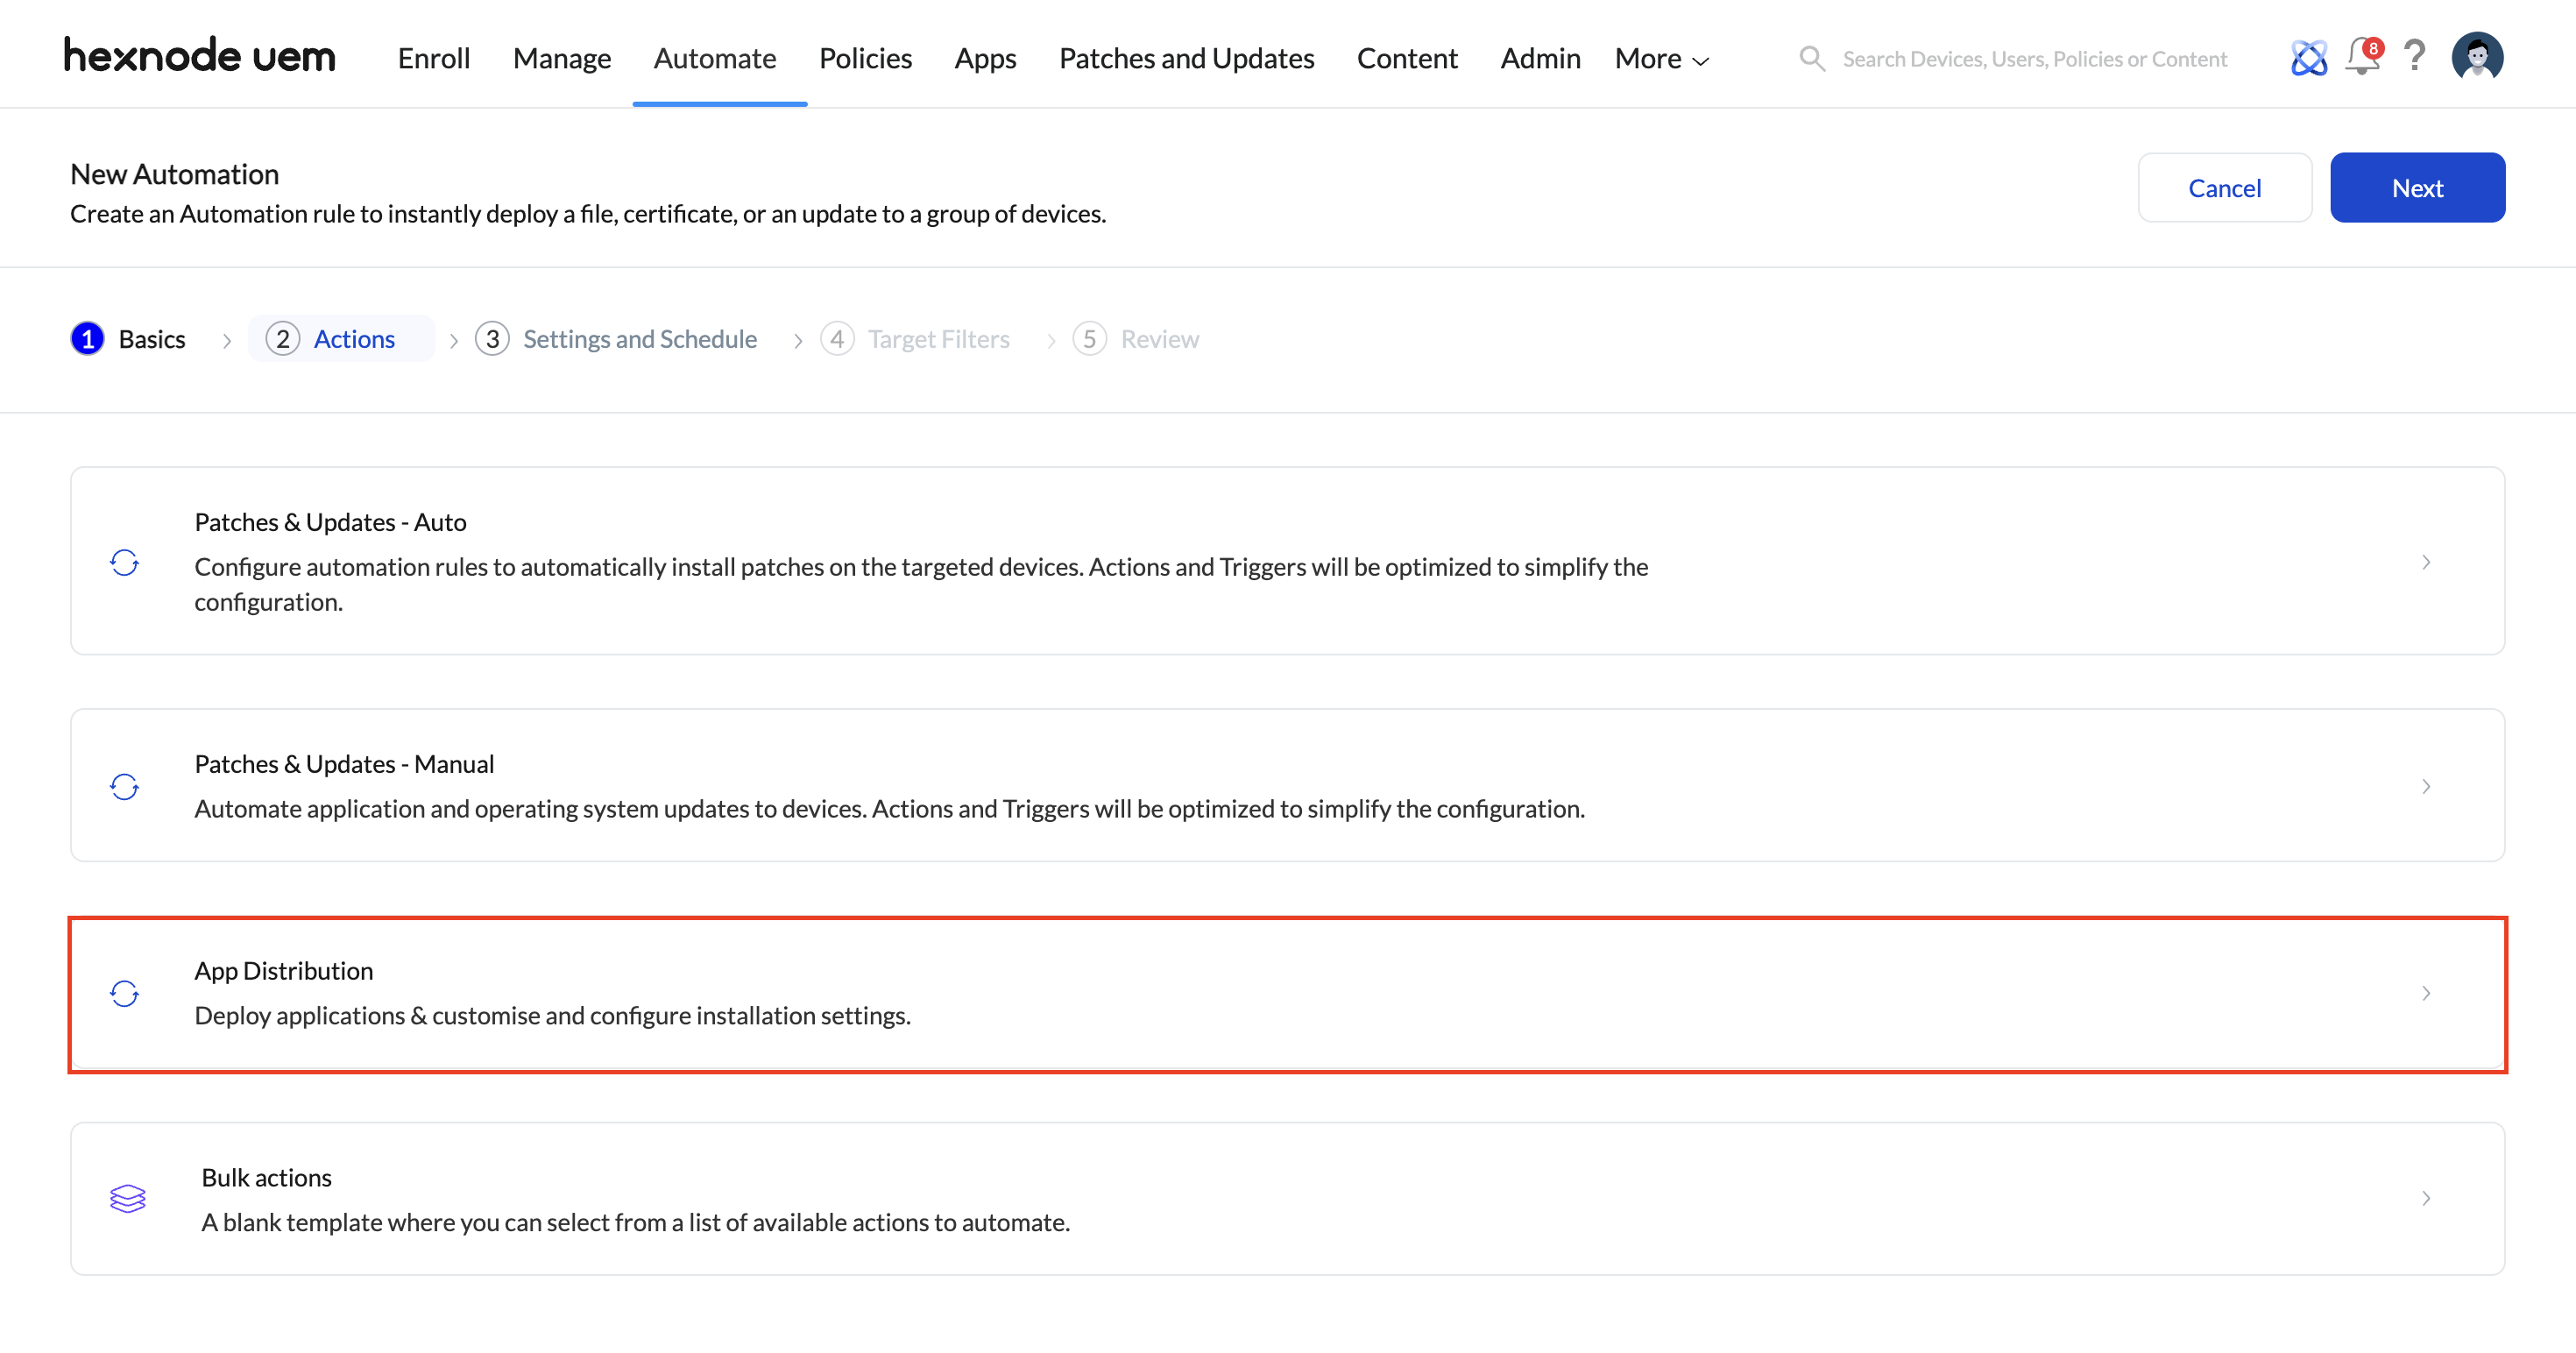
Select App Distribution to deploy applications to macOS devices and customize and configure their installation settings.
The process includes four main stages:
Select apps to deploy
Configure supporting packages, pre-install scripts, post-install scripts, audit scripts.
Set installation flow
Configure mode of deployment
Click Add next to Configure mode of deployment to configure installation type and installation scope for the apps.
This section lets you configure the automation scheduling and related settings. You can trigger the action based on two criteria:
Configure target filters in this section. Specify options for Included groups, Excluded groups, and custom filters by selecting the Filters option.
Review the configured automation settings. Click Edit to modify any section if needed.


