Category filter
Configure Okta Device Trust with Hexnode UEM
What is Okta Device Trust?
Okta Device Trust (ODT) ensures that only managed devices meeting specific requirements can access applications protected by Okta Single Sign-On (SSO). In other words, it verifies that the device is both managed and compliant before allowing users to sign in.
Why should you integrate Okta Device Trust with Hexnode?
Okta Device Trust enforces rules for device-based access. With Hexnode UEM, organizations can automate the deployment of the Okta Verify app, assign Okta authentication policies to the right devices, and maintain control over which devices are included in trust enforcement.
Why does this integration matter?
This integration combines Hexnode’s device management strengths with Okta’s identity and access management capabilities, delivering an end-to-end security framework where only trusted, compliant, and corporate-managed devices can access sensitive business resources.
Which platforms support Okta Device Trust with Hexnode?
- macOS
- Windows
- iOS
- Android (supported only for devices enrolled via Android Enterprise)
How does Hexnode integrate with Okta Device Trust?
The process of enforcing Device Trust with Hexnode begins with deploying the Okta Verify app to devices. Once installed, users complete Okta FastPass authentication, establishing trust between the device and Okta. From there, Okta applies Device Trust rules to control access.
Why is the Okta Verify app required?
It collects device information and works with Okta FastPass to verify whether a device is compliant. Without Okta Verify, ODT cannot function.
Which OS versions support the Okta Verify app?
- macOS 13+
- Windows 10 (21H2, 22H2) and Windows 11
- iOS 16+
- Android 11+
What are the prerequisites for ODT integration?
Before configuring Okta Device Trust:
- Your Okta tenant must have Okta Identity Engine with FastPass enabled.
- You must be a Super Admin in Okta to create the API Service Integration.
- The Okta Verify app must be assigned to your Hexnode UEM portal through the Apps and Books section in Apple Business Manager/School Manager to enable its deployment on macOS devices.
- Your organization must be enrolled in Android Enterprise to enable the installation of the Okta Verify app on Android devices.
How to configure Okta Device Trust with Hexnode UEM?
The following steps guide you through configuring Okta Device Trust (ODT) within Hexnode UEM:
Step 1: Integrate Hexnode with Okta Device Trust
Step 2: Create authentication policies in Okta admin console
Step 1: Integrate Hexnode with Okta Device Trust
- Log in to your Hexnode UEM portal.
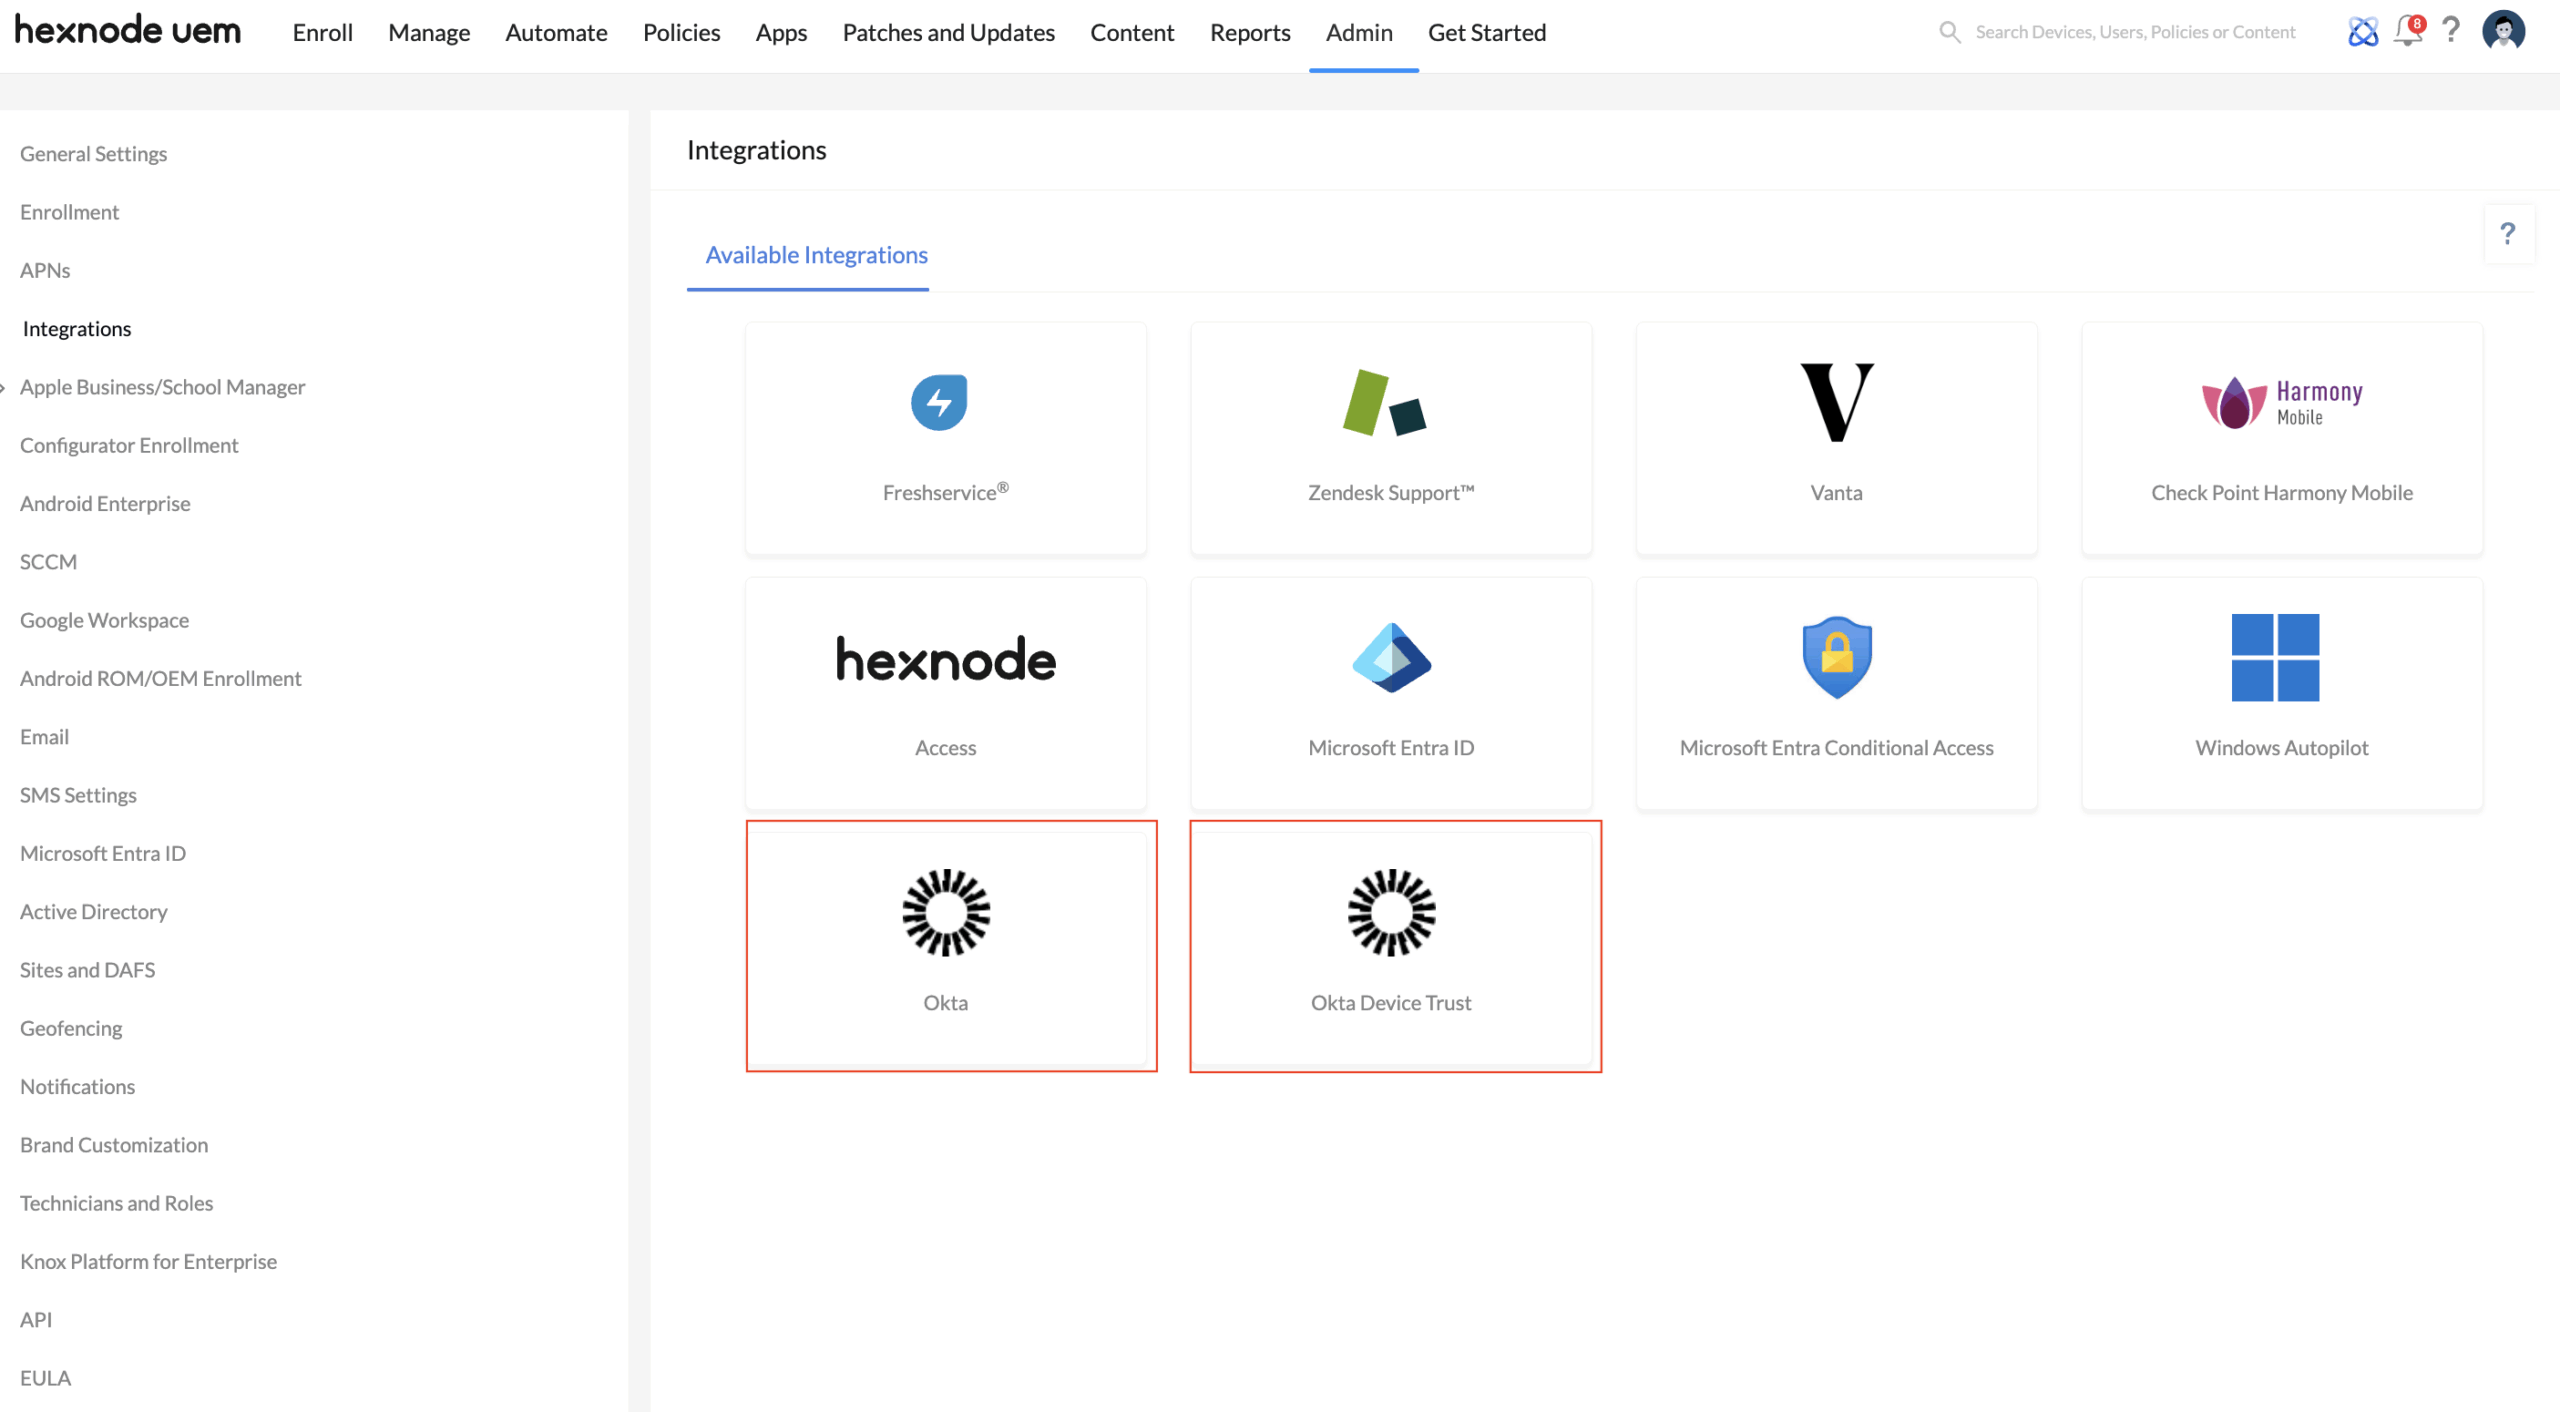
- Navigate to Admin > Integrations.
- Click on the Okta Device Trust tile.
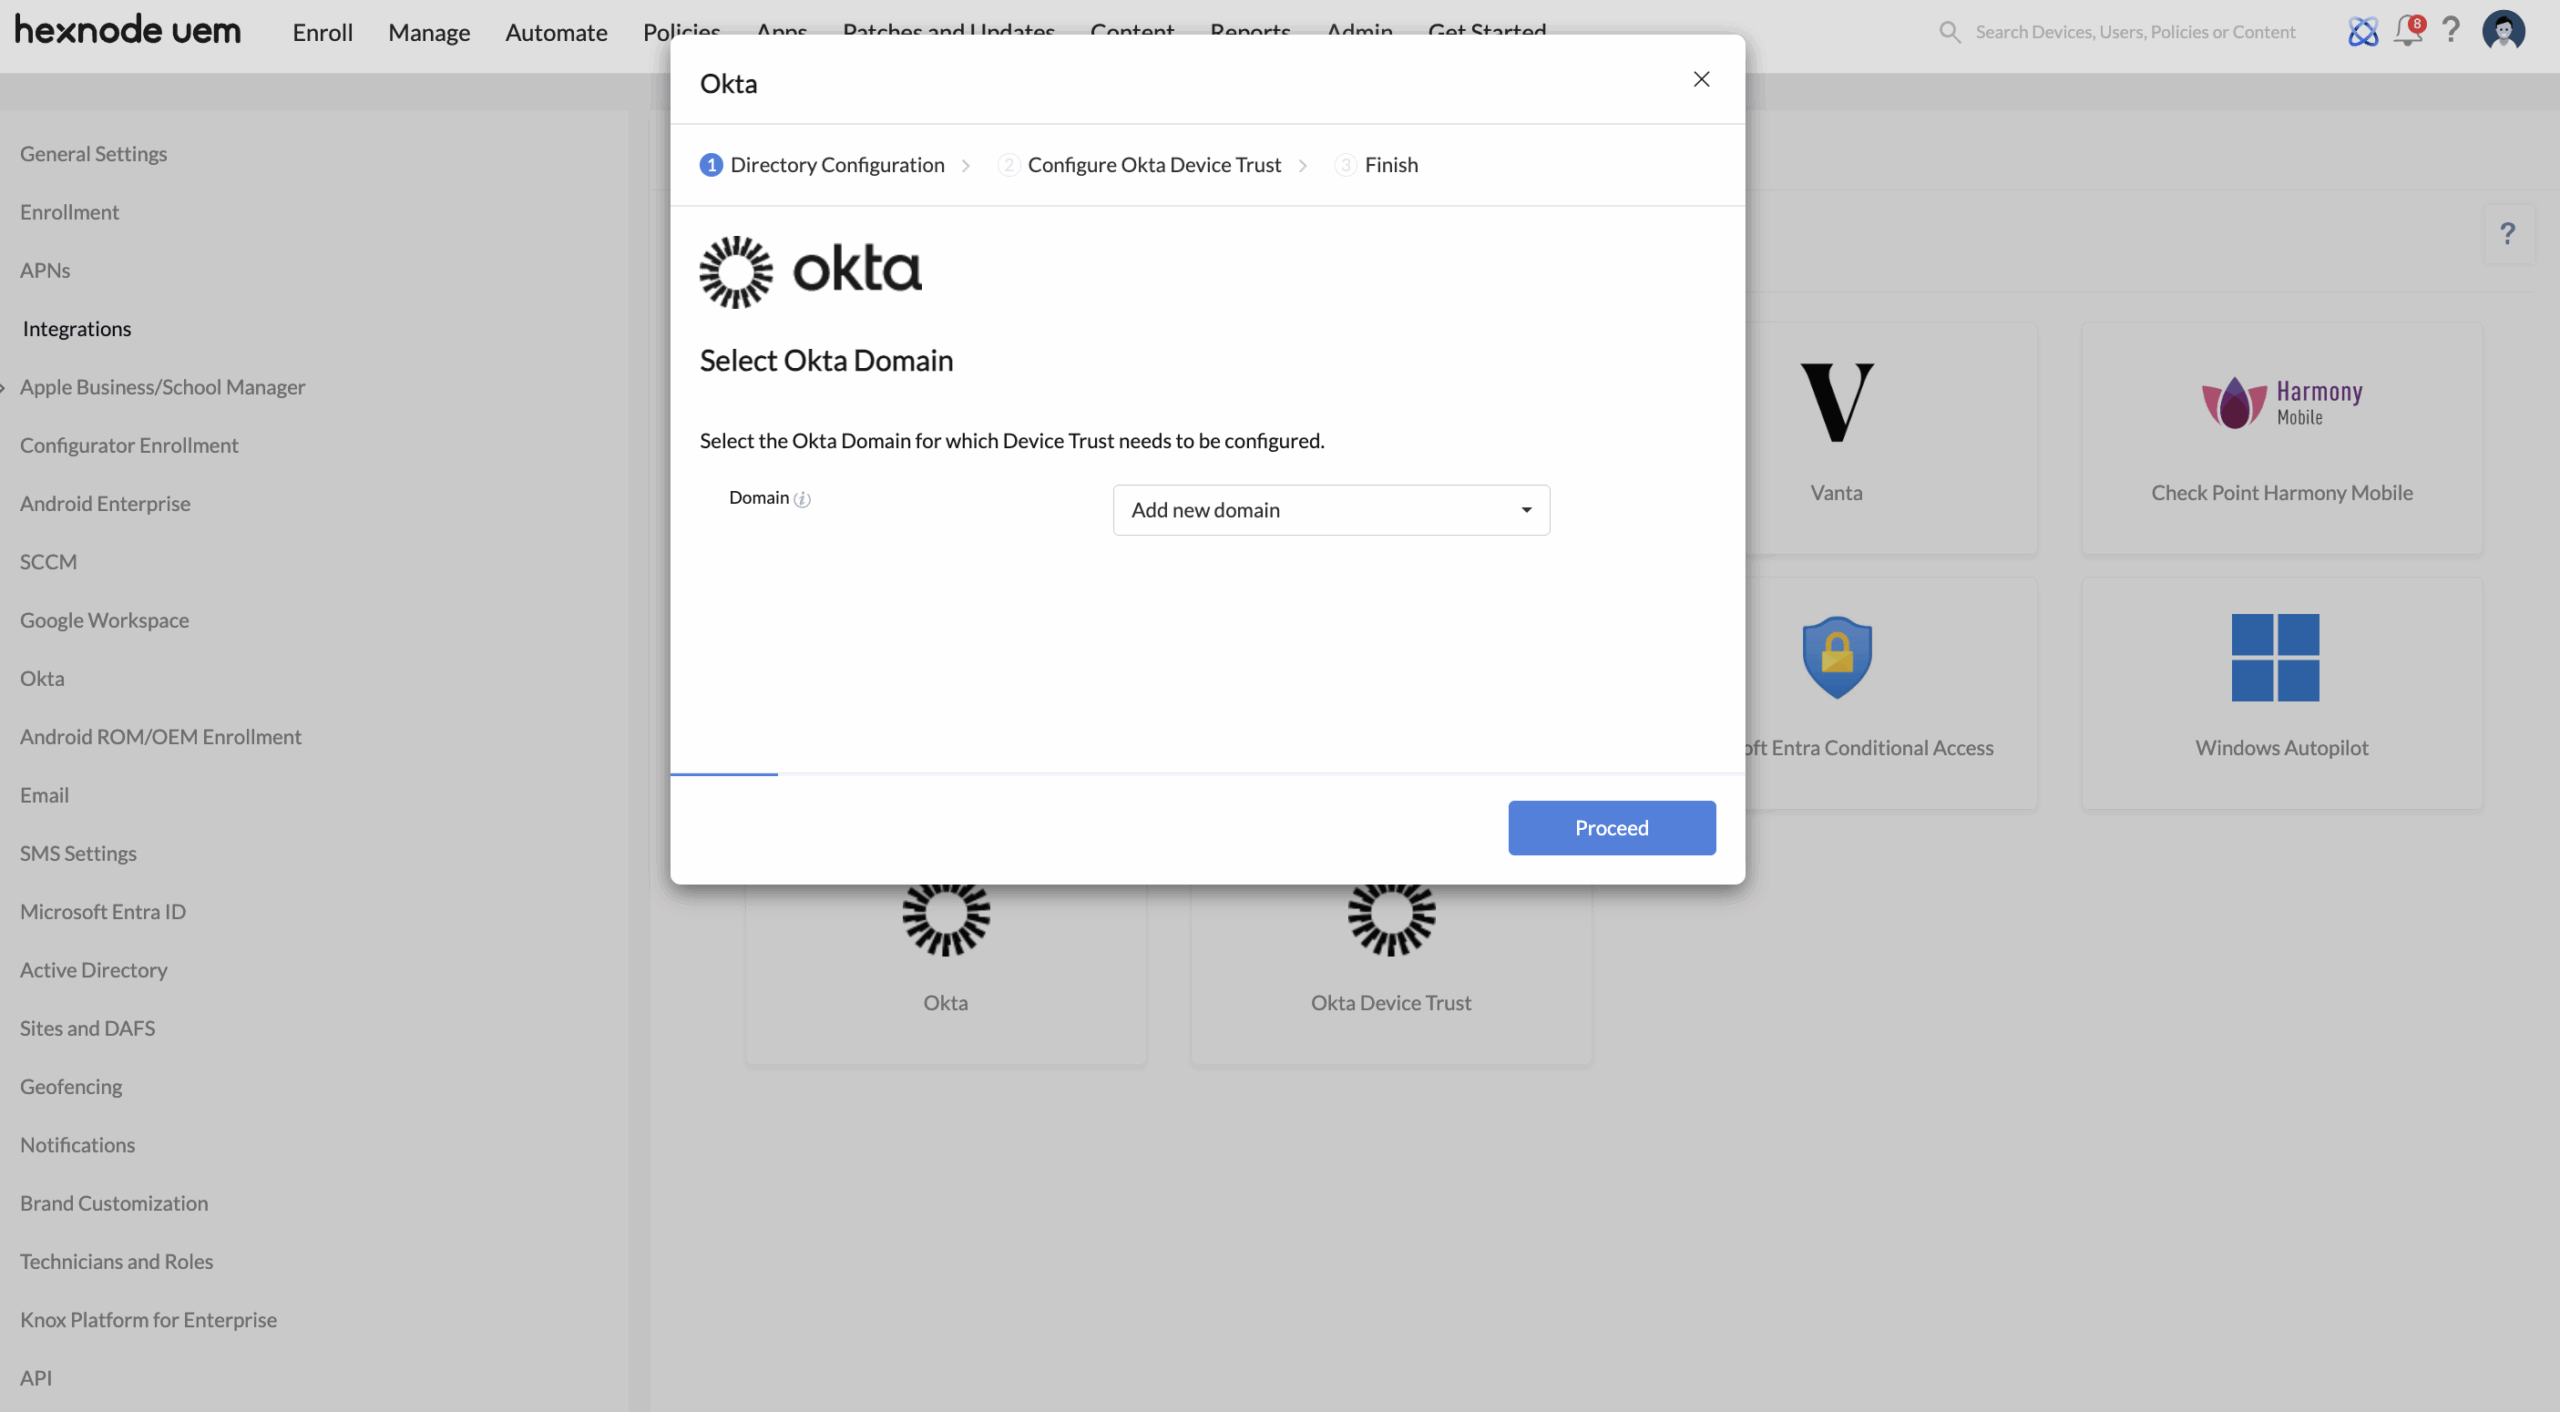
- A prompt will ask for your organization’s Okta domain credentials.
- Choose the configured Okta domain from the dropdown menu and click Proceed. If no Okta domain has been set up yet, you can create a new integration by selecting Add new domain and following the steps outlined in Okta integration document.
- Click Next.
- Log in to your Okta admin console.
- Navigate to Applications > API Service Integrations.
- Click Add Integration.
- Select Hexnode Device Trust from the options and click Next.
- Click Install & Authorize in the following window.
- A pop-up will display the Client Secret for your Hexnode Device Trust integration. Copy this secret (it appears only once) and keep it secure.
- Click Done.
- Log in to your Okta admin console.
- Go to Security > Device Integrations > Add platform.
For Android devices:
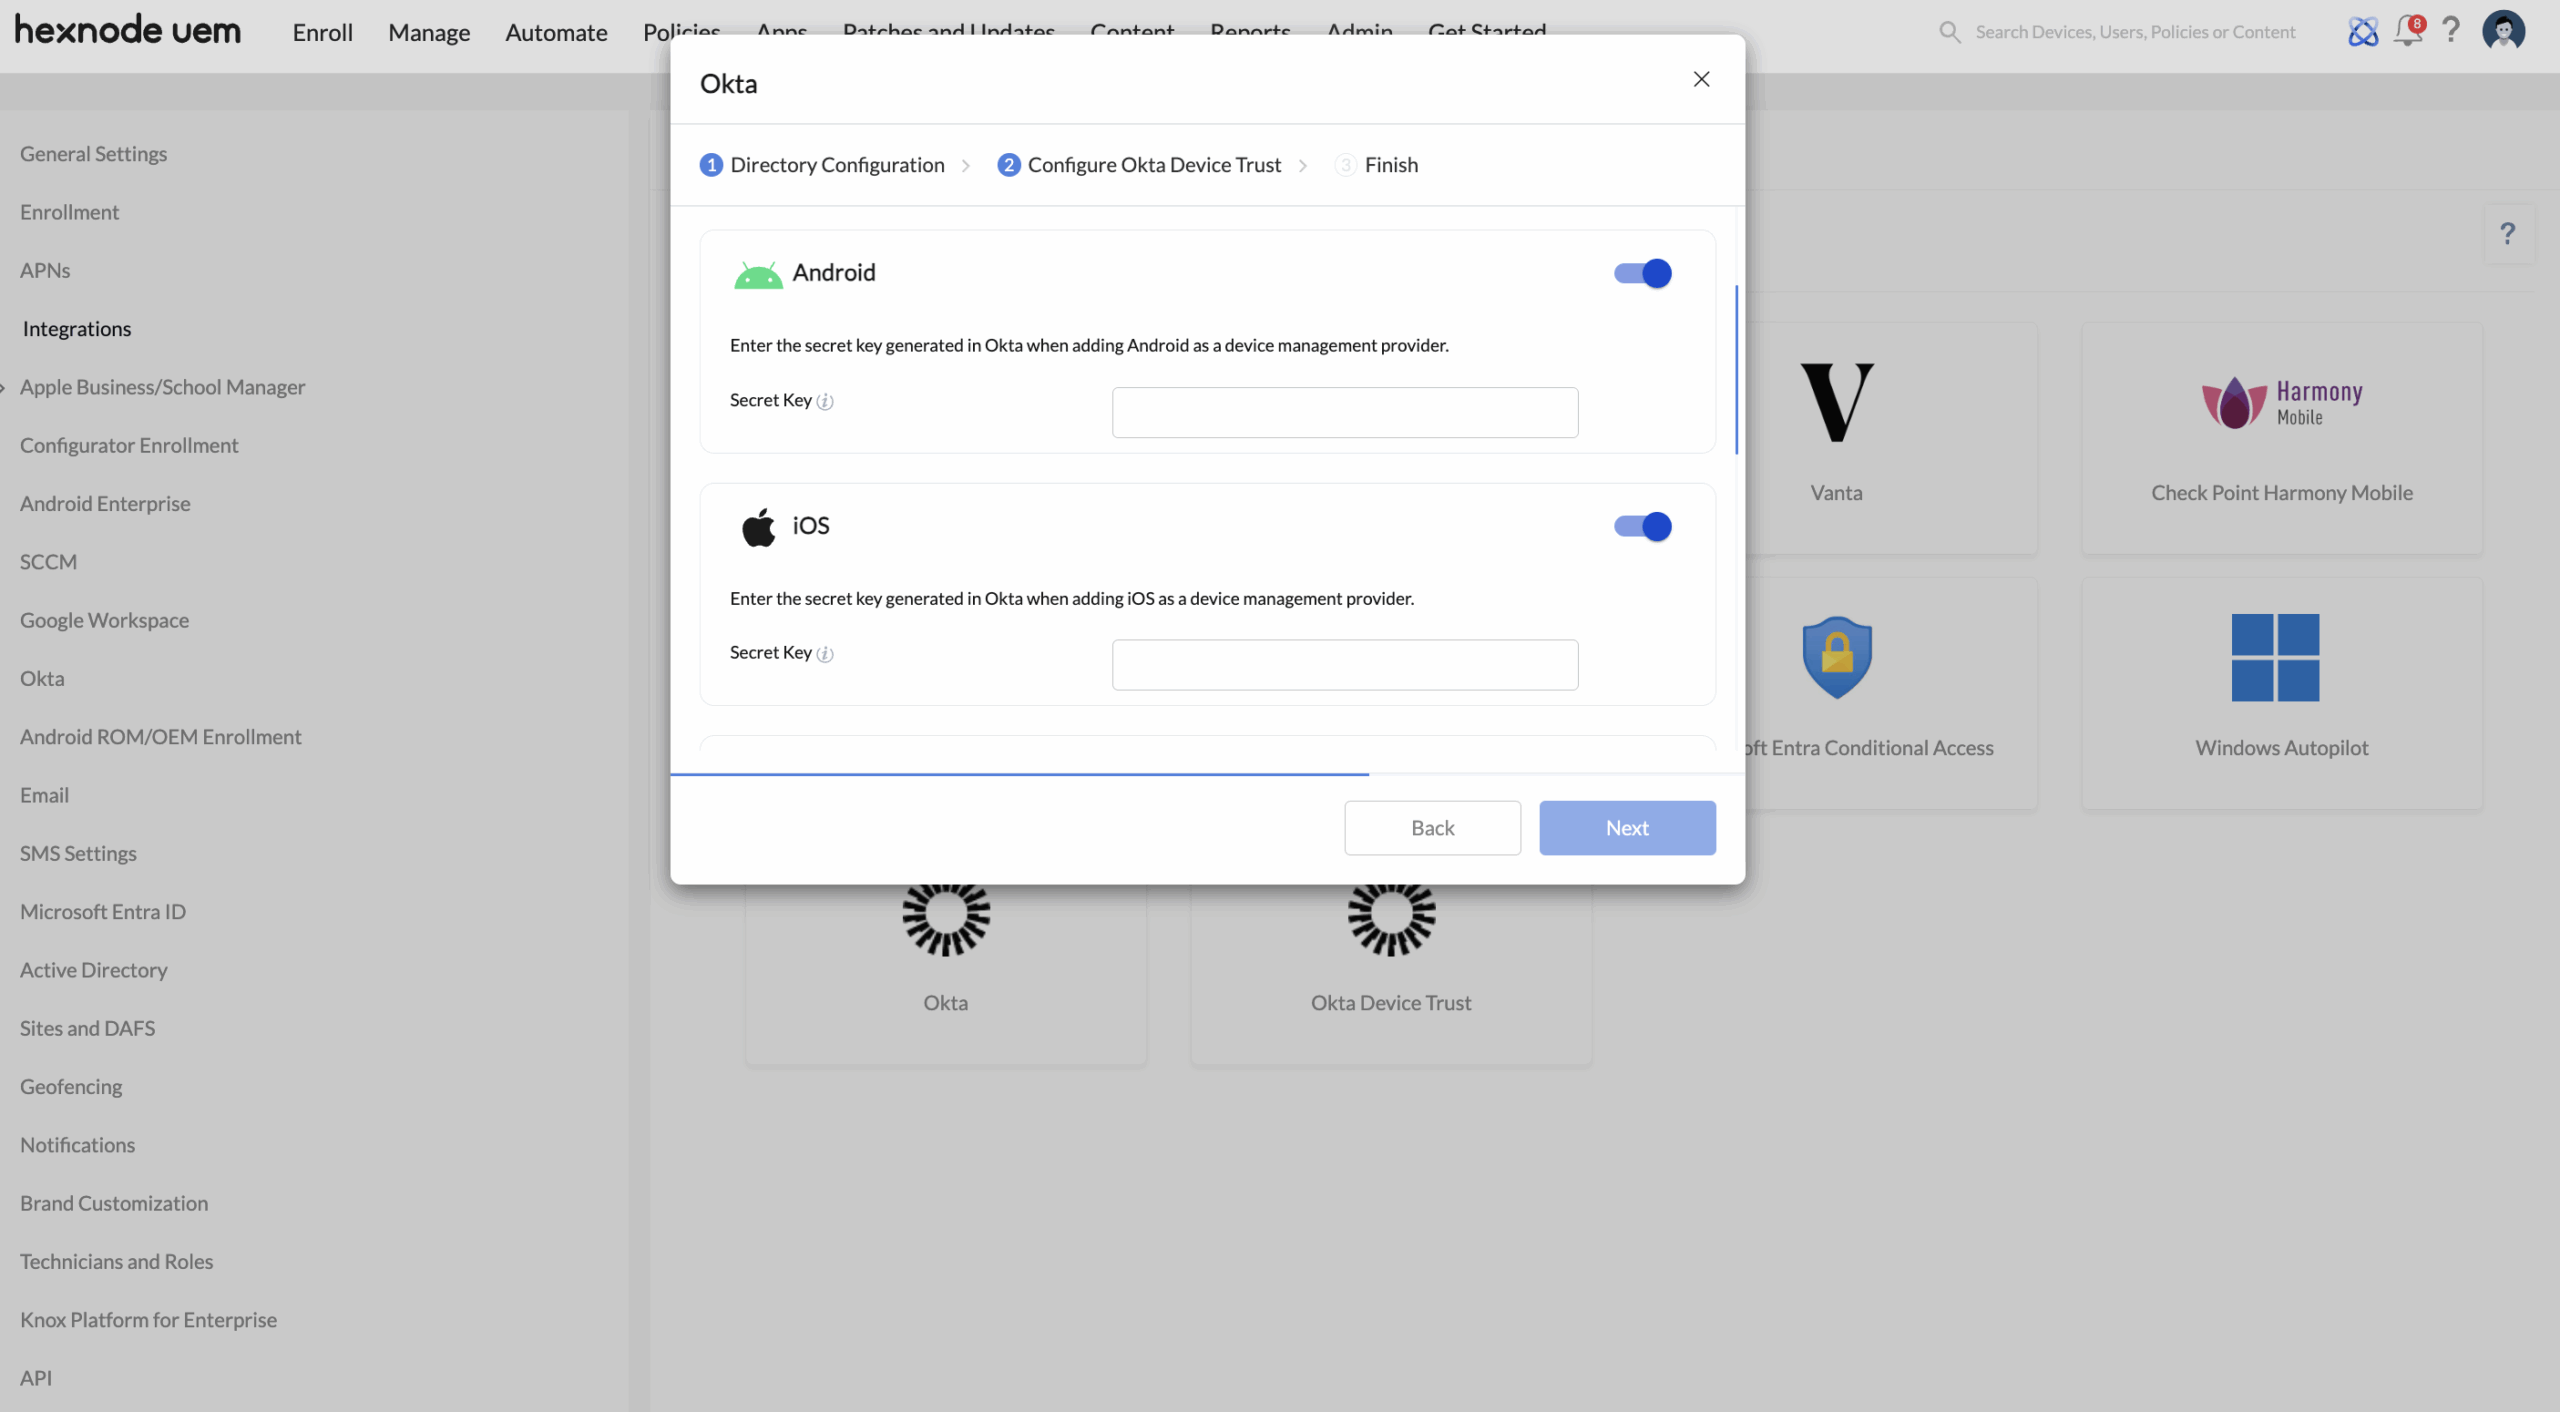
- Enter the device management provider’s name (Hexnode UEM) and the enrollment link (e.g., https://yourportalname.hexnodemdm.com/enroll).
- Copy the Secret Key and store it securely for later use in the Hexnode UEM portal.
- Click Save.
For iOS devices:
- Enter the device management provider’s name (Hexnode UEM) and the enrollment link (e.g., https://yourportalname.hexnodemdm.com/enroll).
- Copy the Secret Key and store it securely for later use in the Hexnode UEM portal.
- Click Save.
For macOS devices:
- Select the certificate authority, choose the SCEP URL challenge type, and click Generate to create the SCEP URL.
- Copy the generated SCEP URL and Secret Key for later use in the Hexnode UEM portal.
- Click Save.
For Windows devices:
- Select the certificate authority, choose the SCEP URL challenge type, and click Generate to create the SCEP URL.
- Copy the generated SCEP URL and Secret Key for later use in the Hexnode UEM portal.
- Click Save.
You must also generate and download a CA certificate from the Okta console to configure Windows as a platform in the Hexnode UEM console.
- In the Okta admin console, go to Security > Device Integrations.
- Select the Certificate authority tab.
- Locate the Okta CA Certificate Authority and click the Download x509 certificate icon under the Actions column.
- Enable the required platform(s) and enter the necessary details such as Secret Key, SCEP URL, CA Certificate, and Subject.
- After configuring the platforms, click Next.
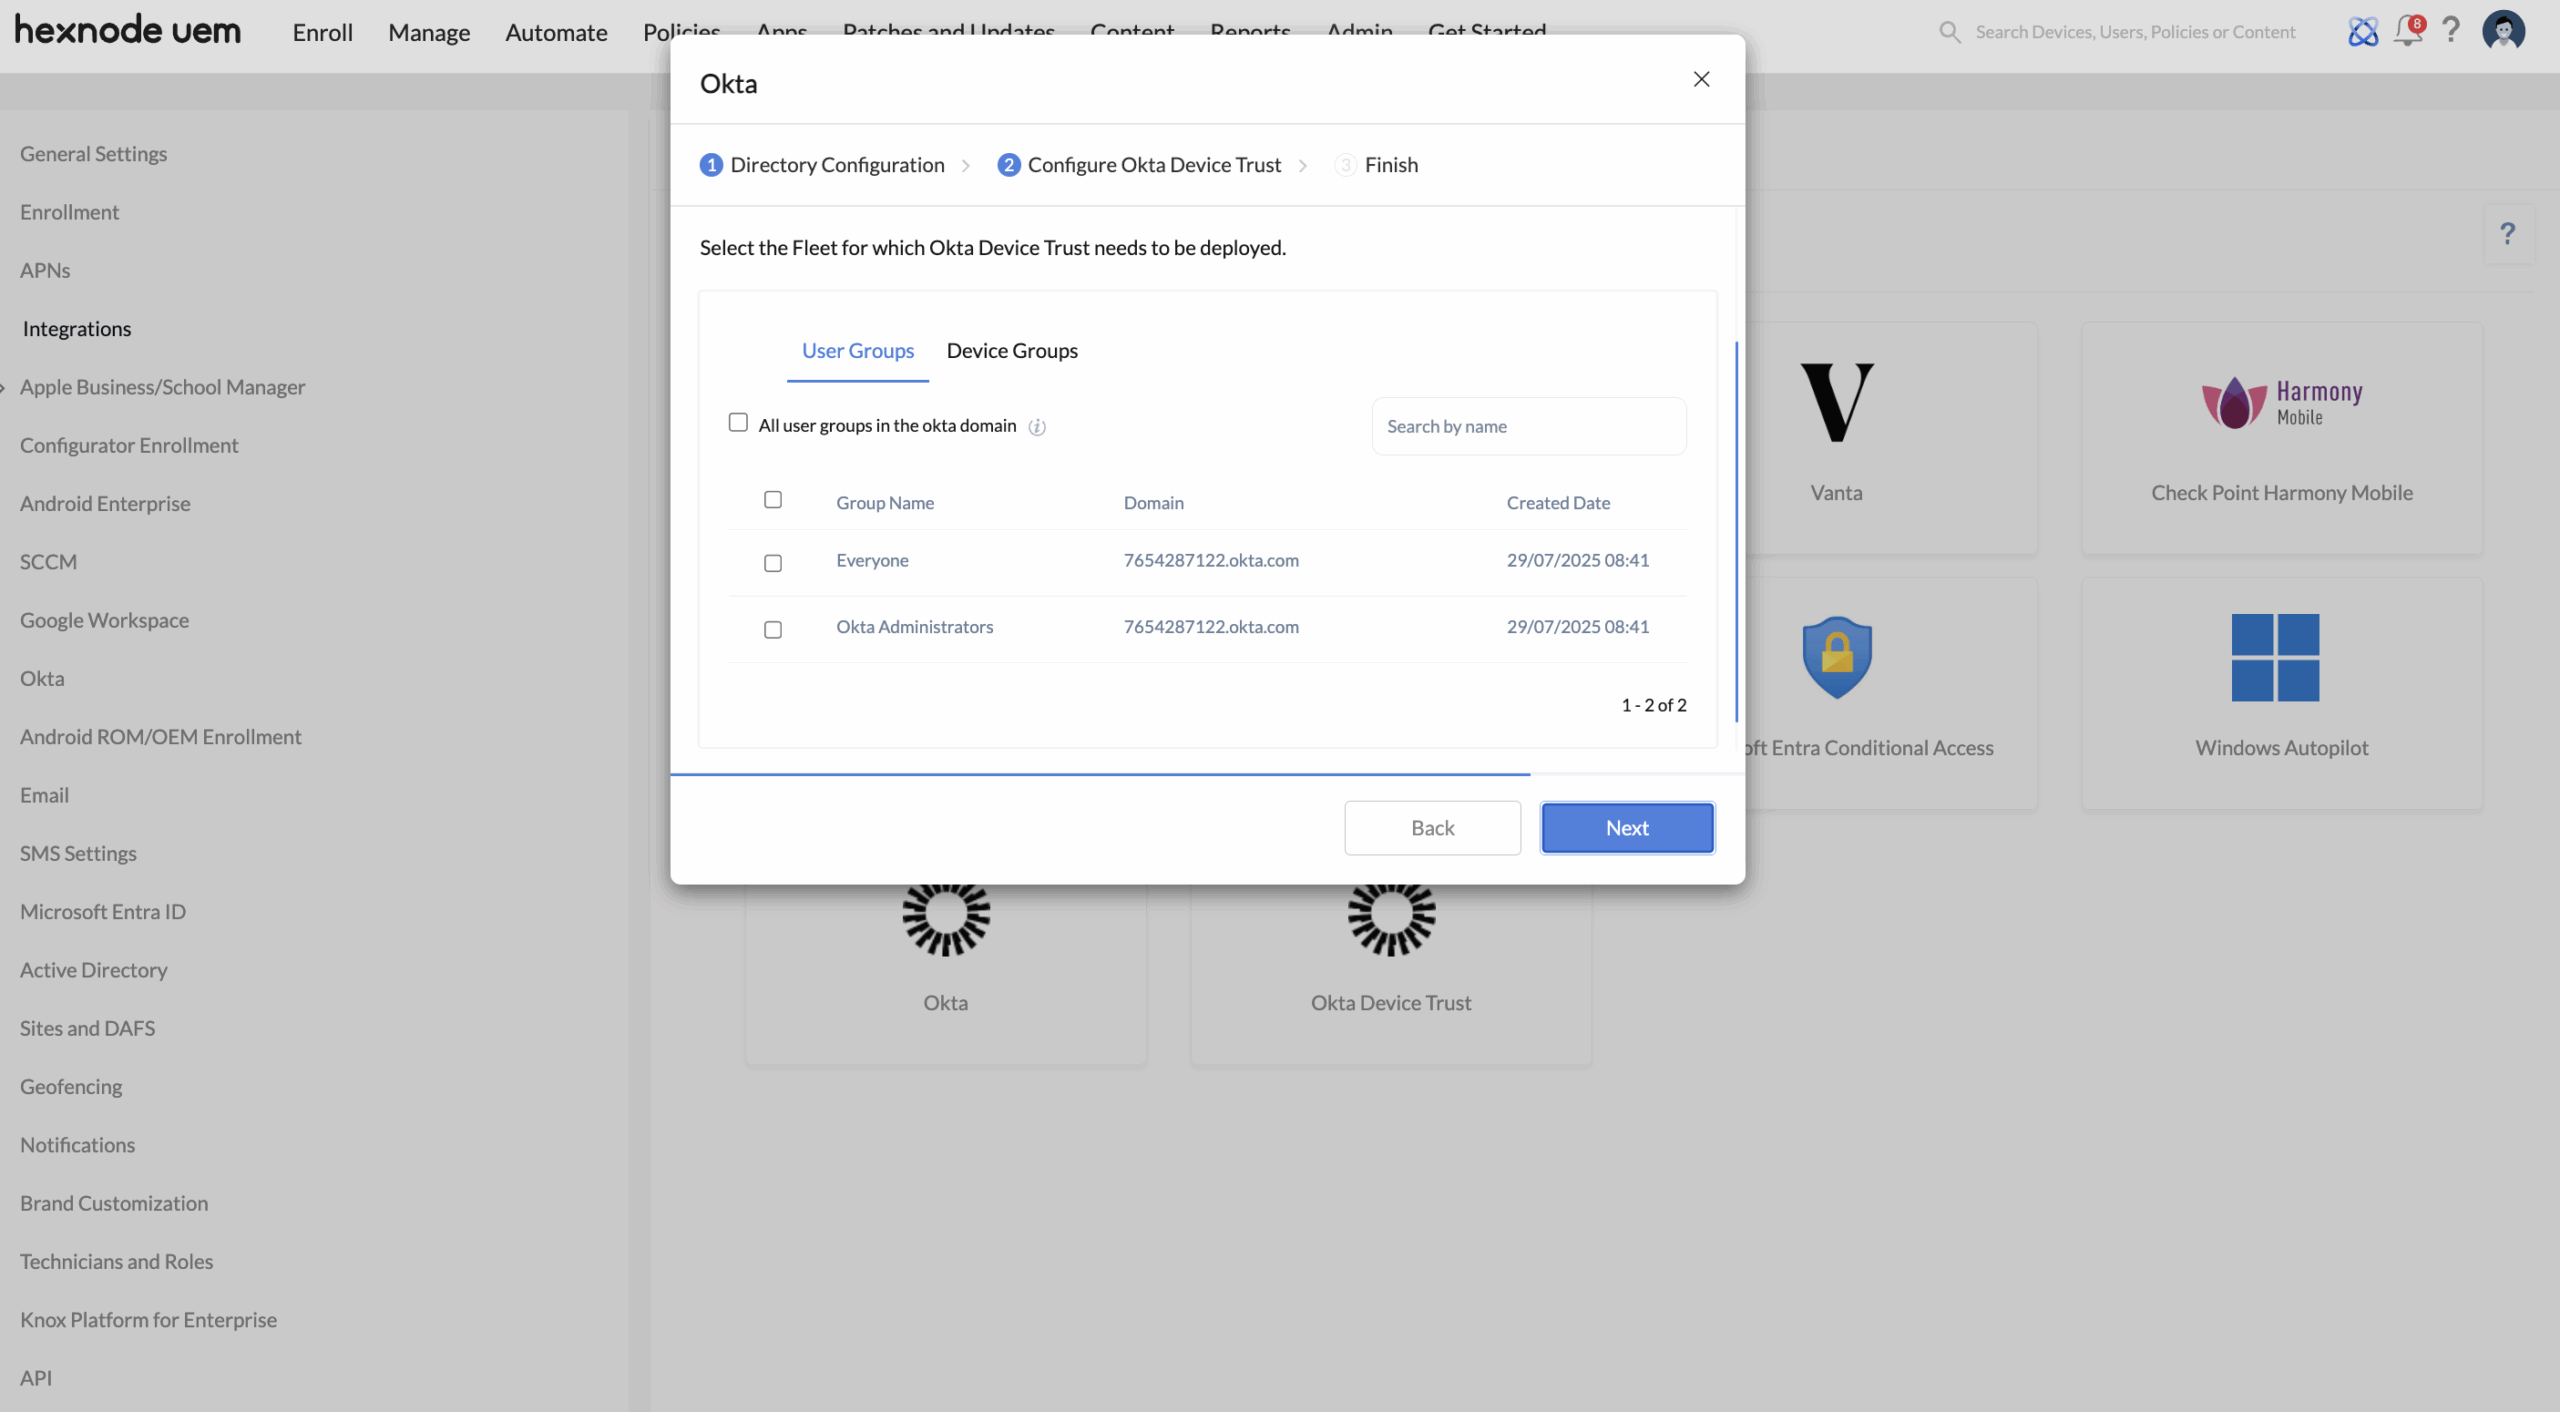
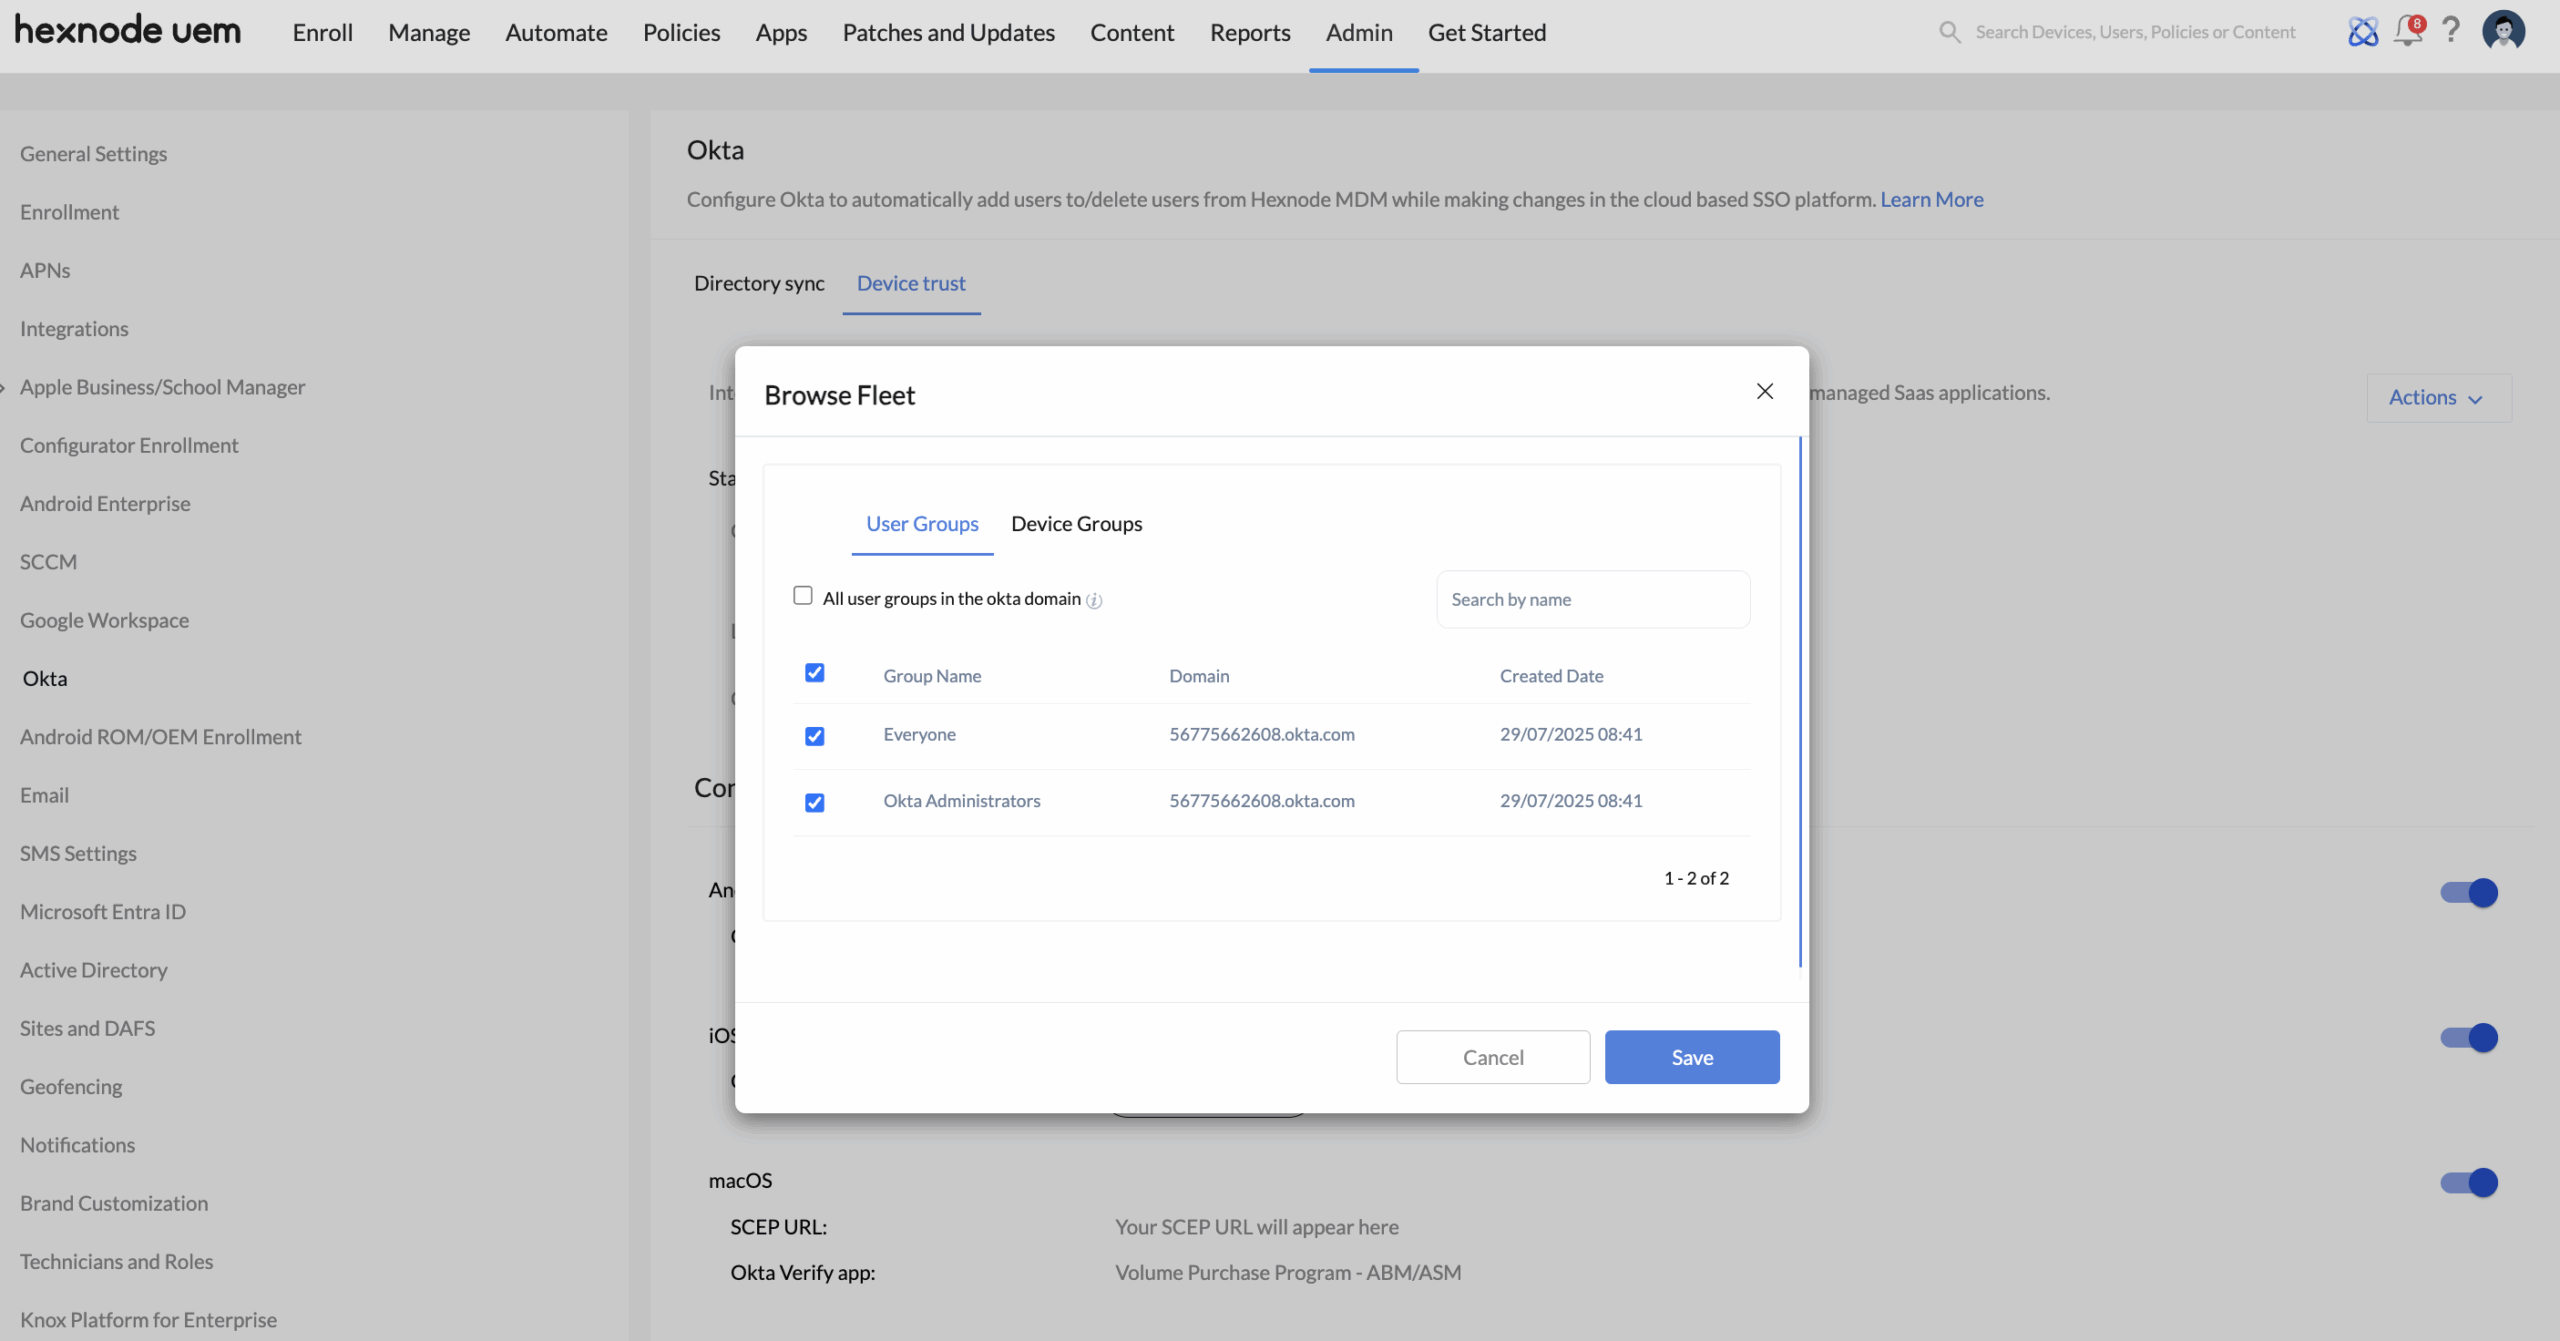
- Select the user/device groups for Okta Device Trust deployment.
- User group assignment: These are Okta user groups imported into Hexnode through the Okta integration. During Okta Device Trust setup, the admin selects one or more of these groups to be included in Device Trust enforcement. Only devices owned by users in the selected groups are considered for Okta Device Trust enforcement.
- Device group assignment: These are groups of enrolled devices created in the Hexnode console. During Okta Device Trust setup, the admin selects one or more of these device groups. Hexnode verifies whether each device belongs to a user in the Okta domain configured for Okta Device Trust integration in the Hexnode UEM portal and considers only those devices for Okta Device Trust enforcement.
For example, if a device group has 6 devices and 4 are linked to users from the Okta domain configured for Okta Device Trust integration in the Hexnode UEM portal, only those 4 devices will be included in device trust enforcement.
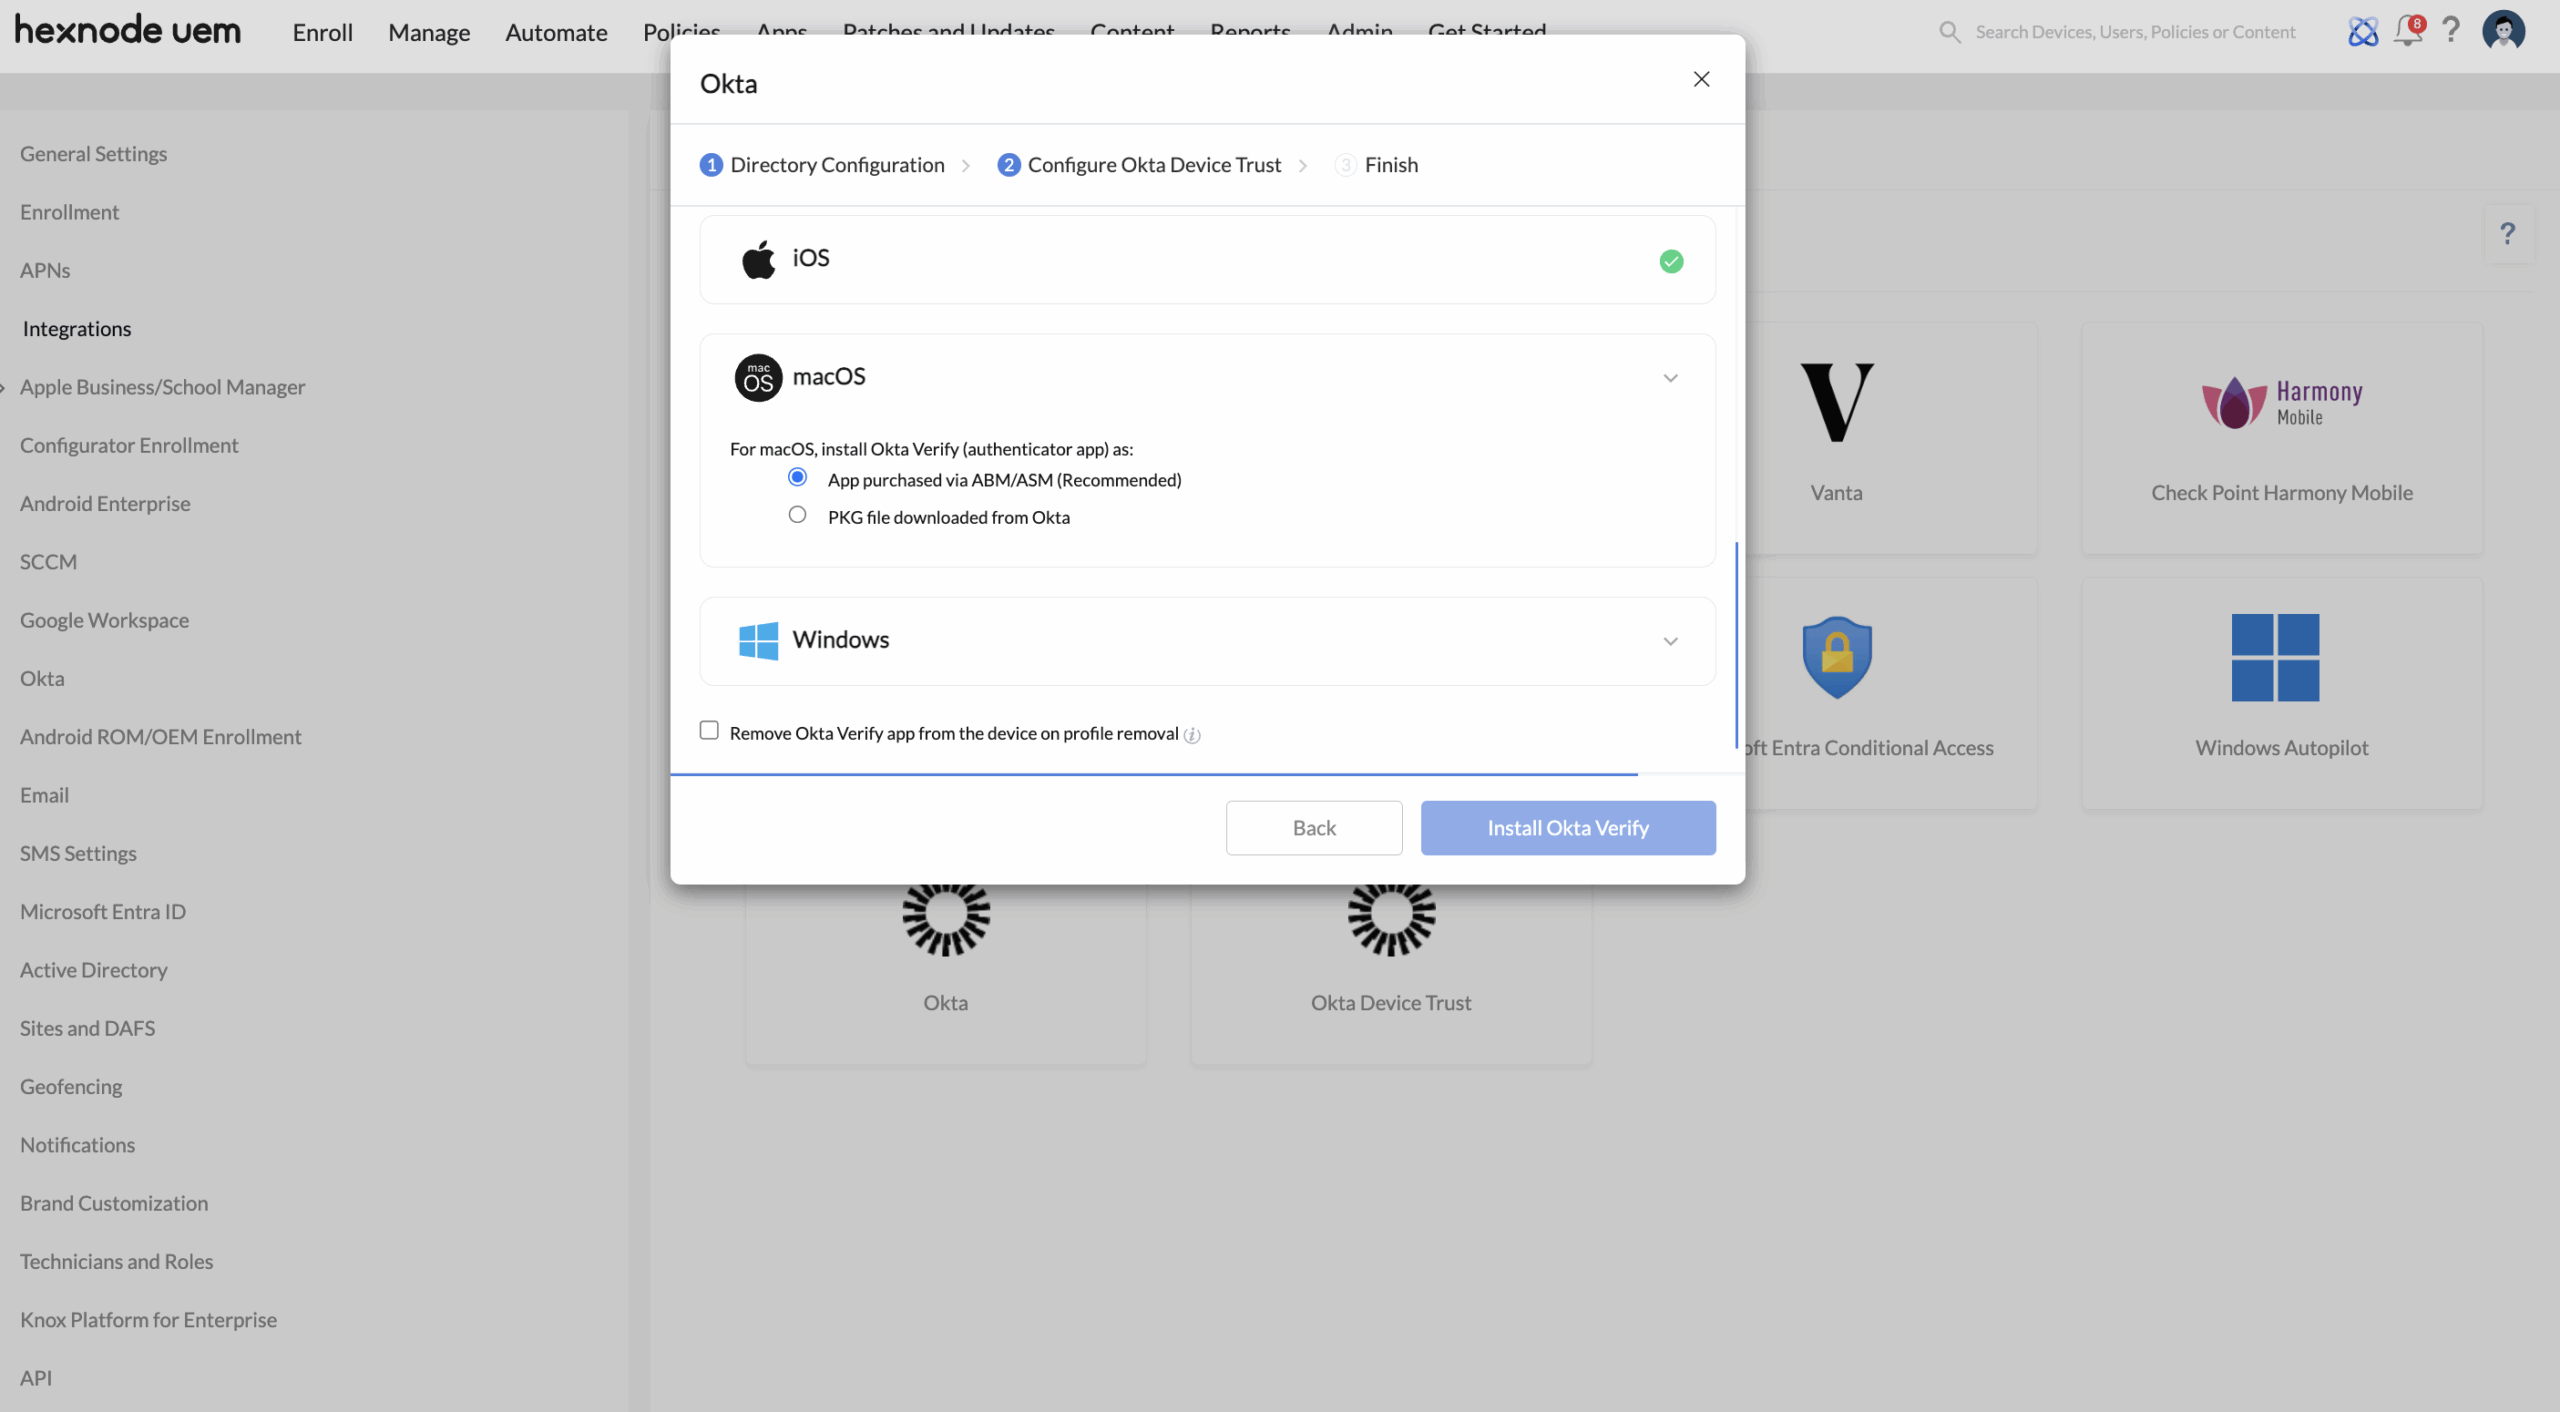
- Option 1: App purchased via ABM/ASM (Recommended).
- Login to your Apple Business/School Manager account.
- Navigate to the Apps and Books section.
- Search for the Okta Verify app and select it.
- In the window that appears, under Assign to, choose the server token where the app license should be assigned.
- Enter the required quantity of app licenses.
- Click Get to assign the app to the selected server token.
The Okta Verify app will now be assigned to the specified server token. This token must be used when adding your VPP account to the Hexnode UEM portal.
- Option 2: PKG file downloaded from Okta – Checking this option automatically triggers the Okta Verify app installation on the device end.
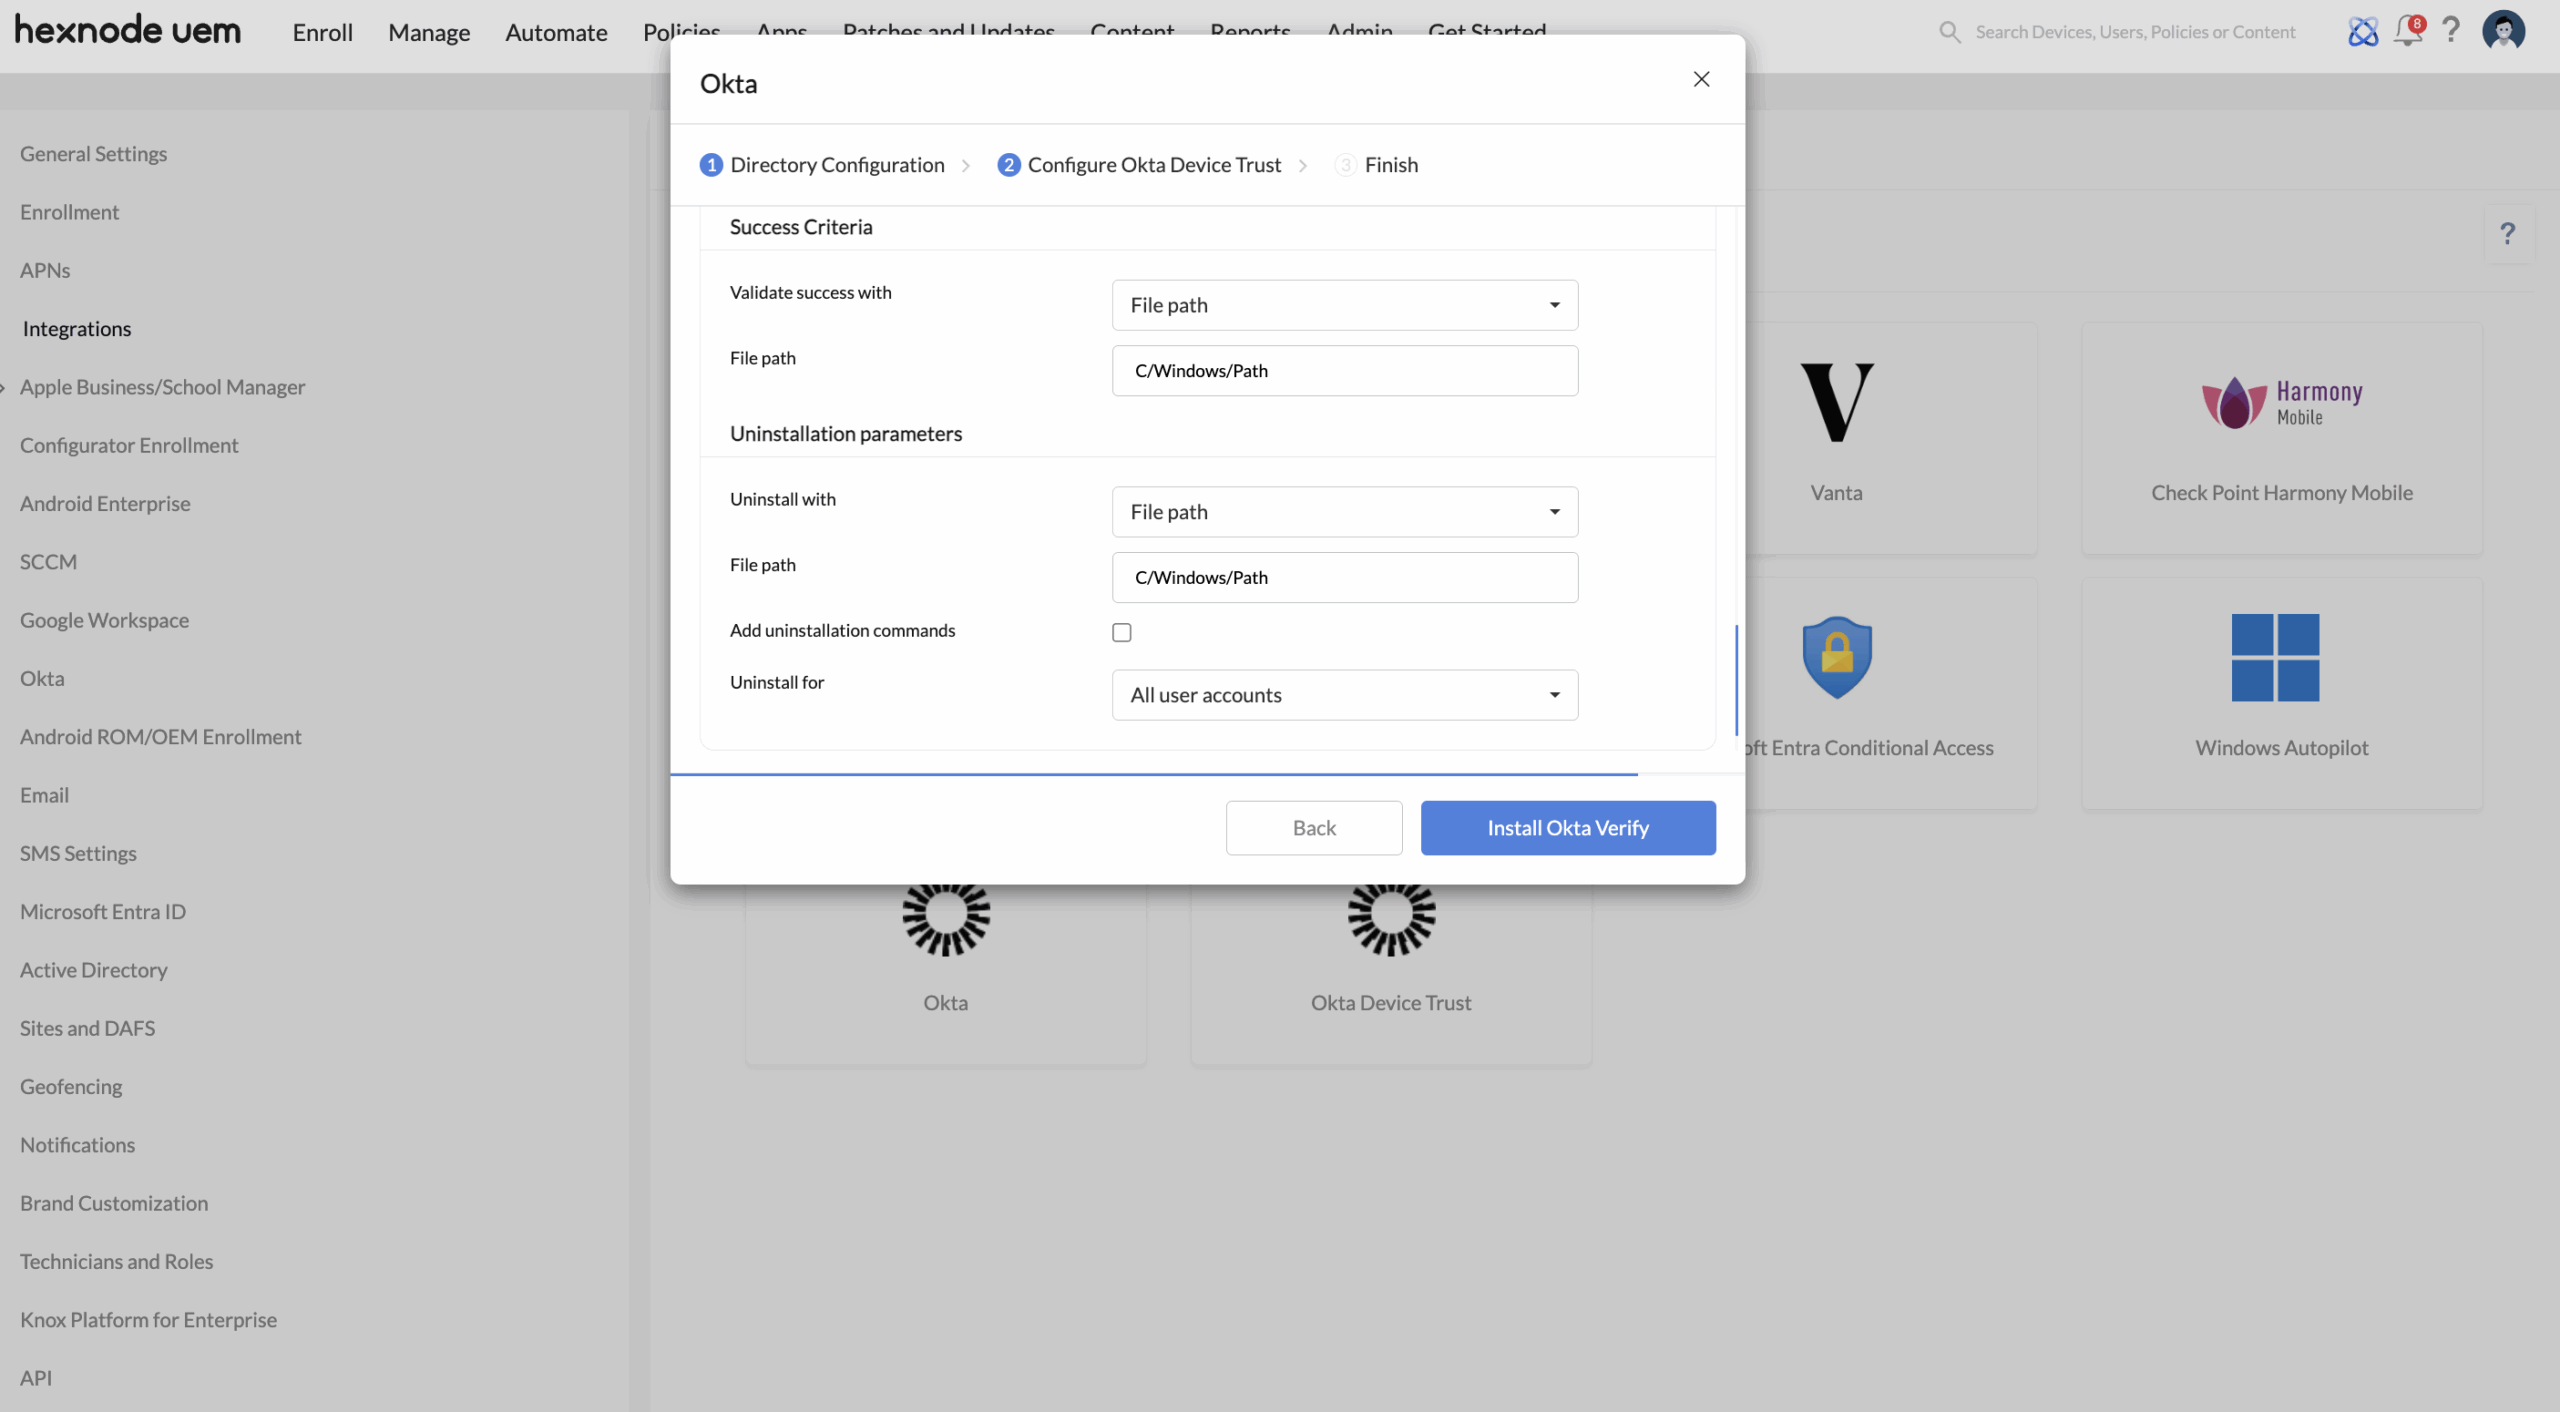
- Option 1: Upload file – Upload the EXE file downloaded from Okta.
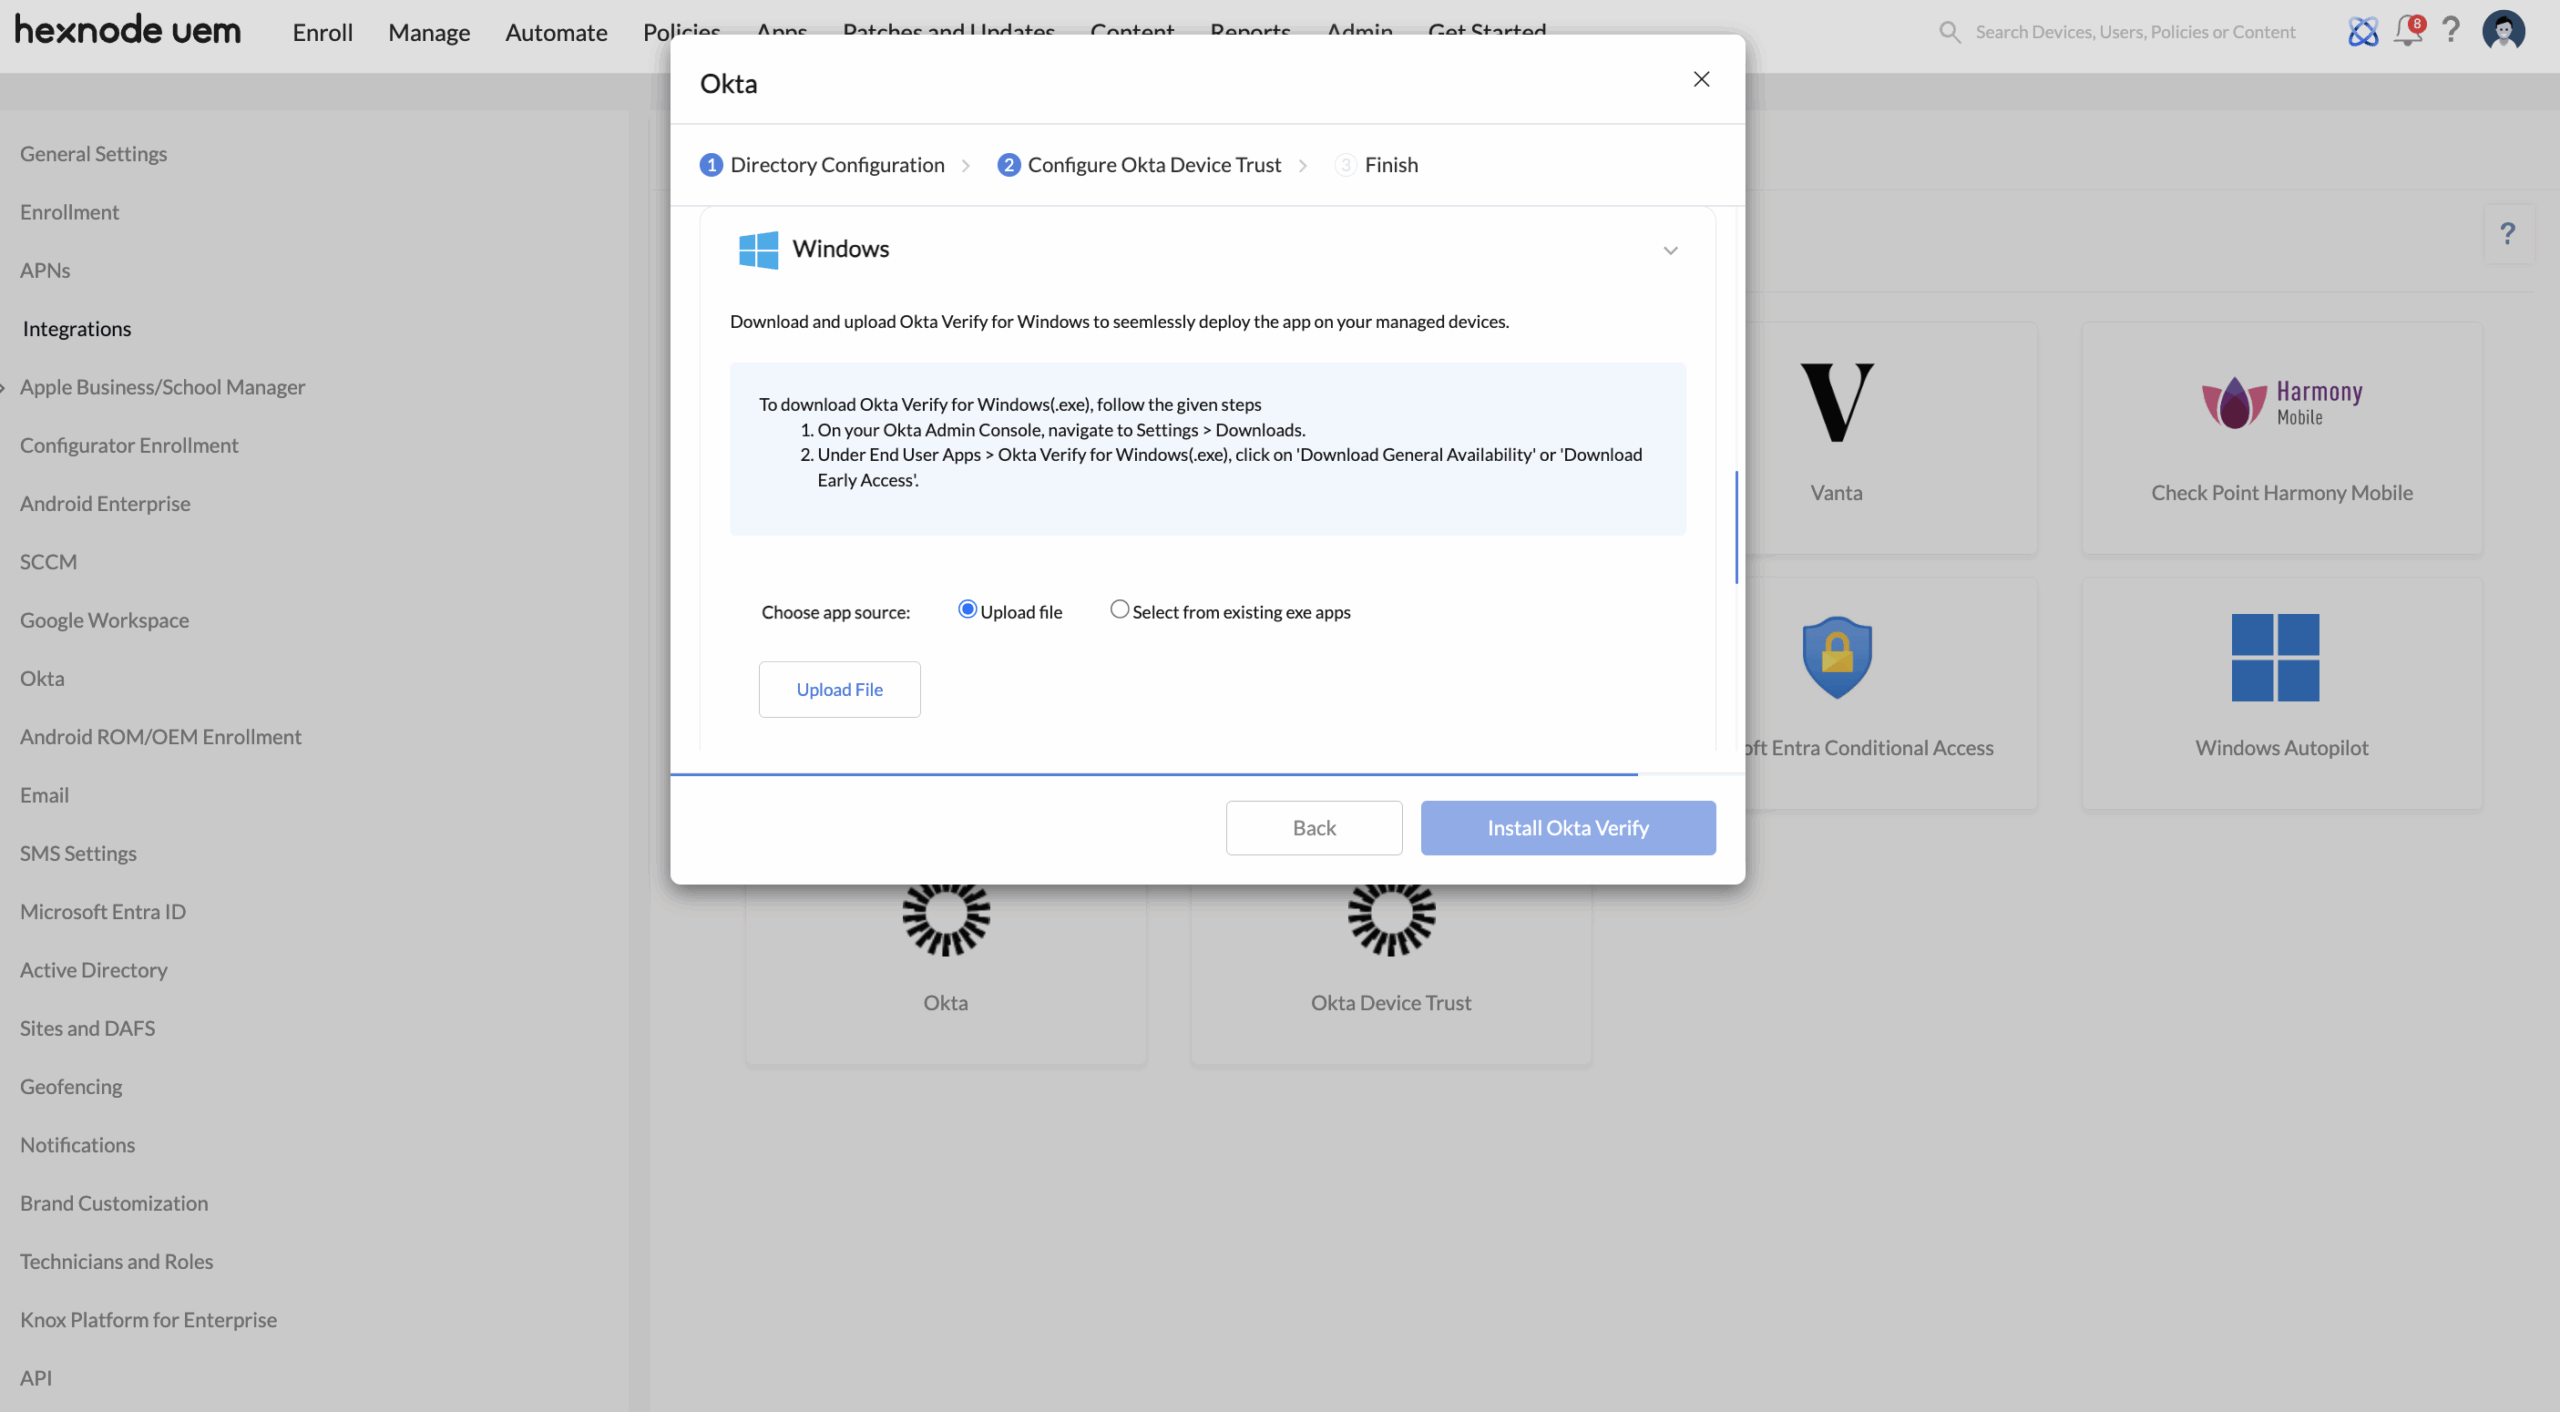
- In your Okta admin console, go to Settings > Downloads.
- Under End User Apps > Okta Verify for Windows (.exe), choose either Download General Availability or Download Early Access.
- Upload the downloaded EXE file to the Hexnode UEM console during the Integrate Hexnode with Okta Device Trust step to proceed with the installation of Okta Verify.
- Configure the basic app details such as App Name, Category, and Description.
- Define the success criteria and uninstallation parameters.
- Option 2: Select from existing exe apps:
- Choose the pre-uploaded Okta Verify EXE file from your Hexnode UEM app inventory.
- Hexnode will automatically populate the app details, success criteria, and uninstall settings that were defined in the EXE app.
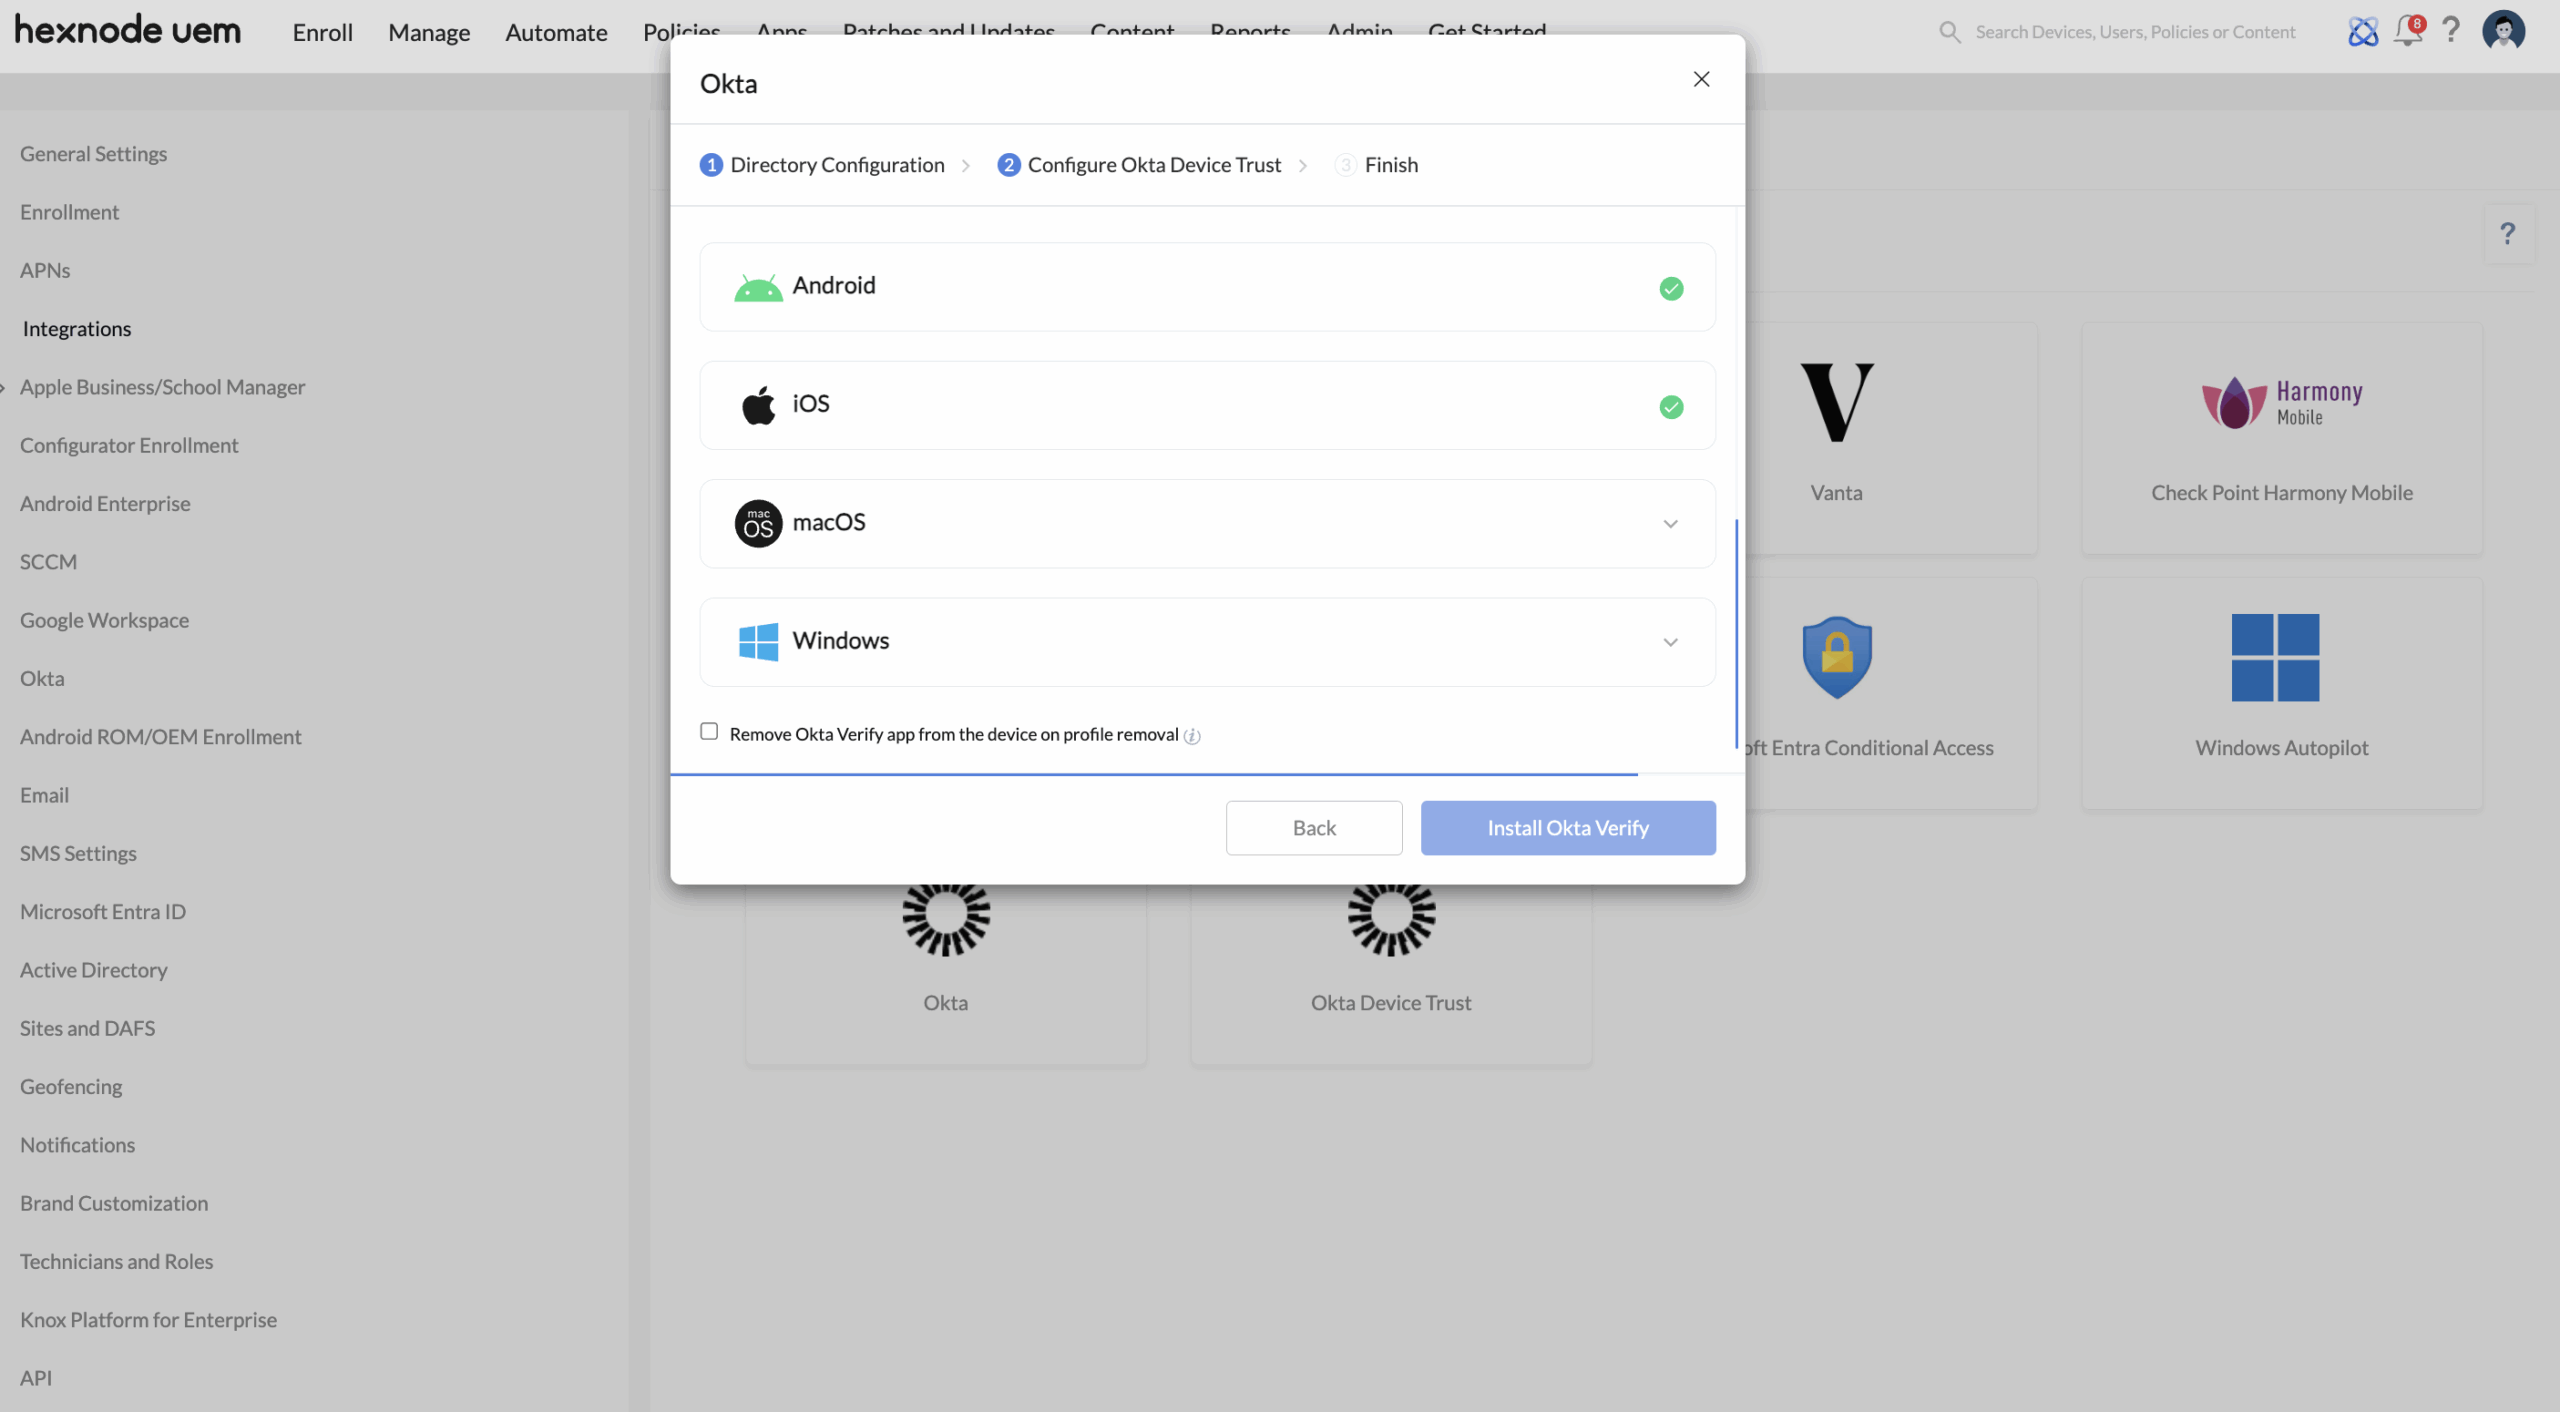
- Click Install Okta Verify to complete the Okta Device Trust integration.
- Log in to Okta admin console.
- Go to Security > Authentication Policies > Add a policy.
- Enter a name and description for the policy, then click Save.
- Add the necessary rules and assign apps based on your organization’s access requirements. For detailed guidance, refer the Authentication policies document.
Once the Okta domain is configured, proceed with the following steps to complete the Okta Device Trust integration:
Generate API service integration credentials in Okta admin console
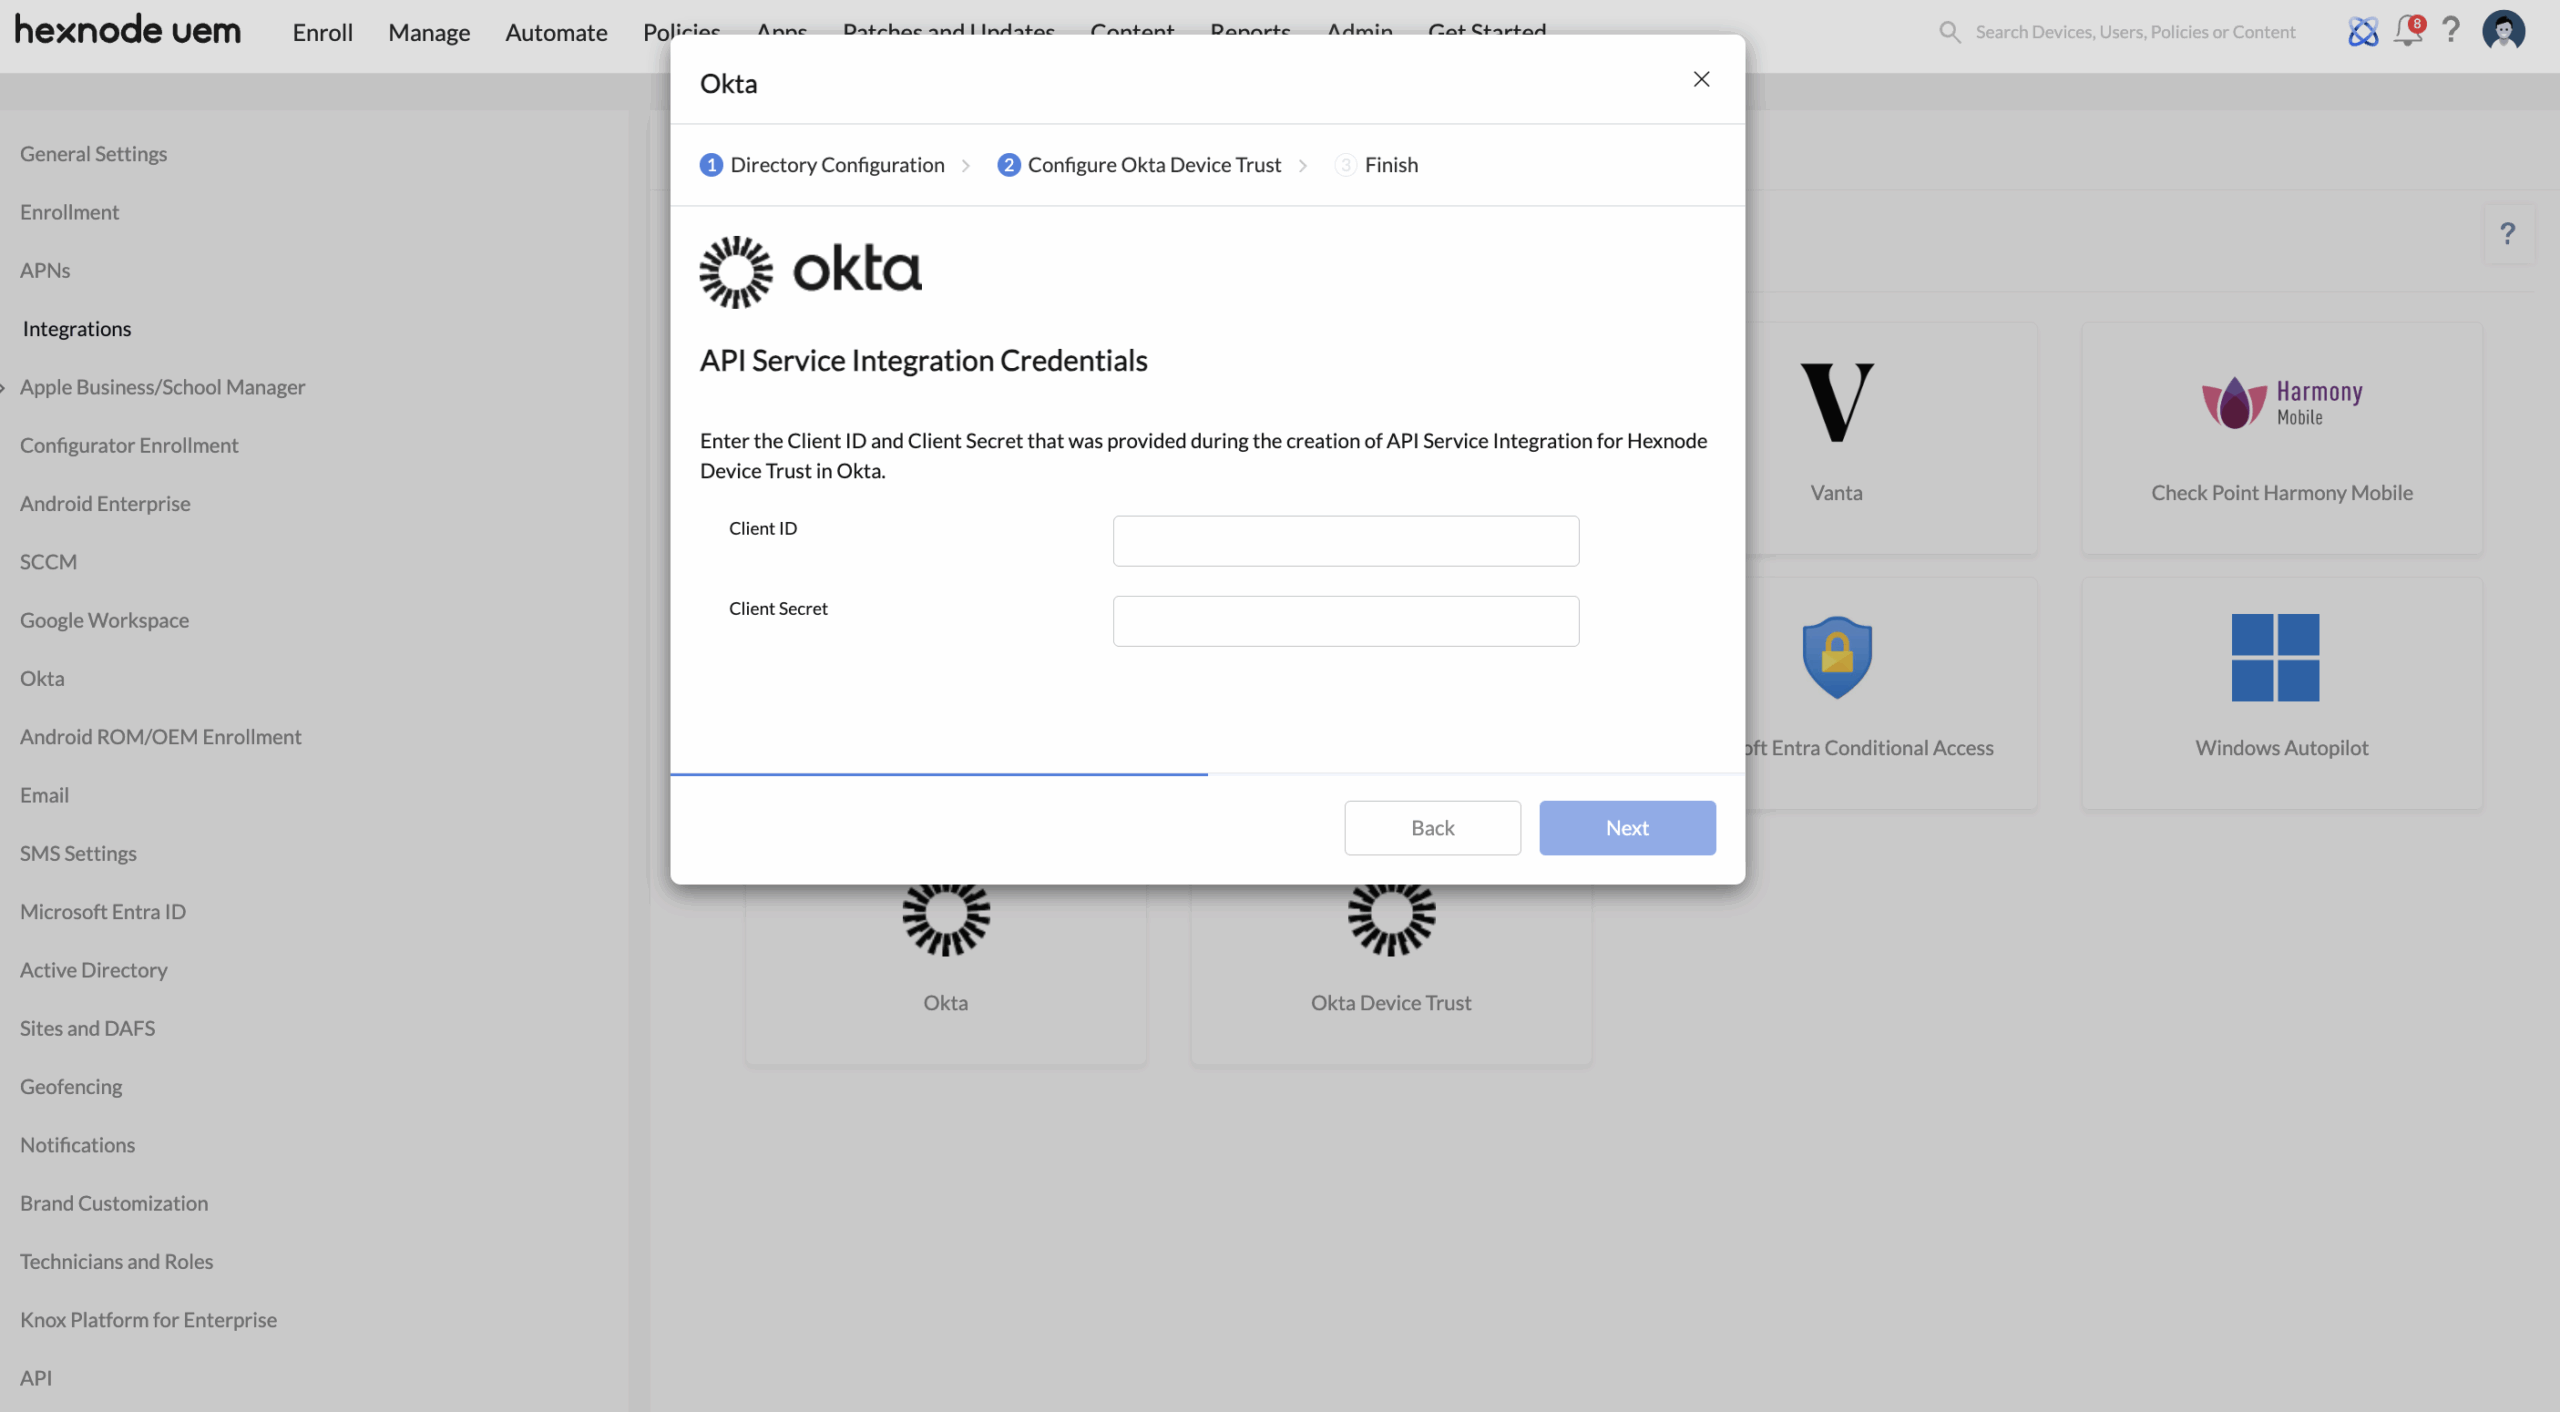
This step involves generating client credentials required for Hexnode to communicate securely with Okta.
You’ll be redirected to the Hexnode Device Trust integration page in the Okta admin console, where you can view the integration details such as the Okta domain and Client ID.
Return to the Hexnode UEM portal, enter the Client ID and Client Secret into their respective fields on the API Service Integration Credentials page, and then click Next to proceed.
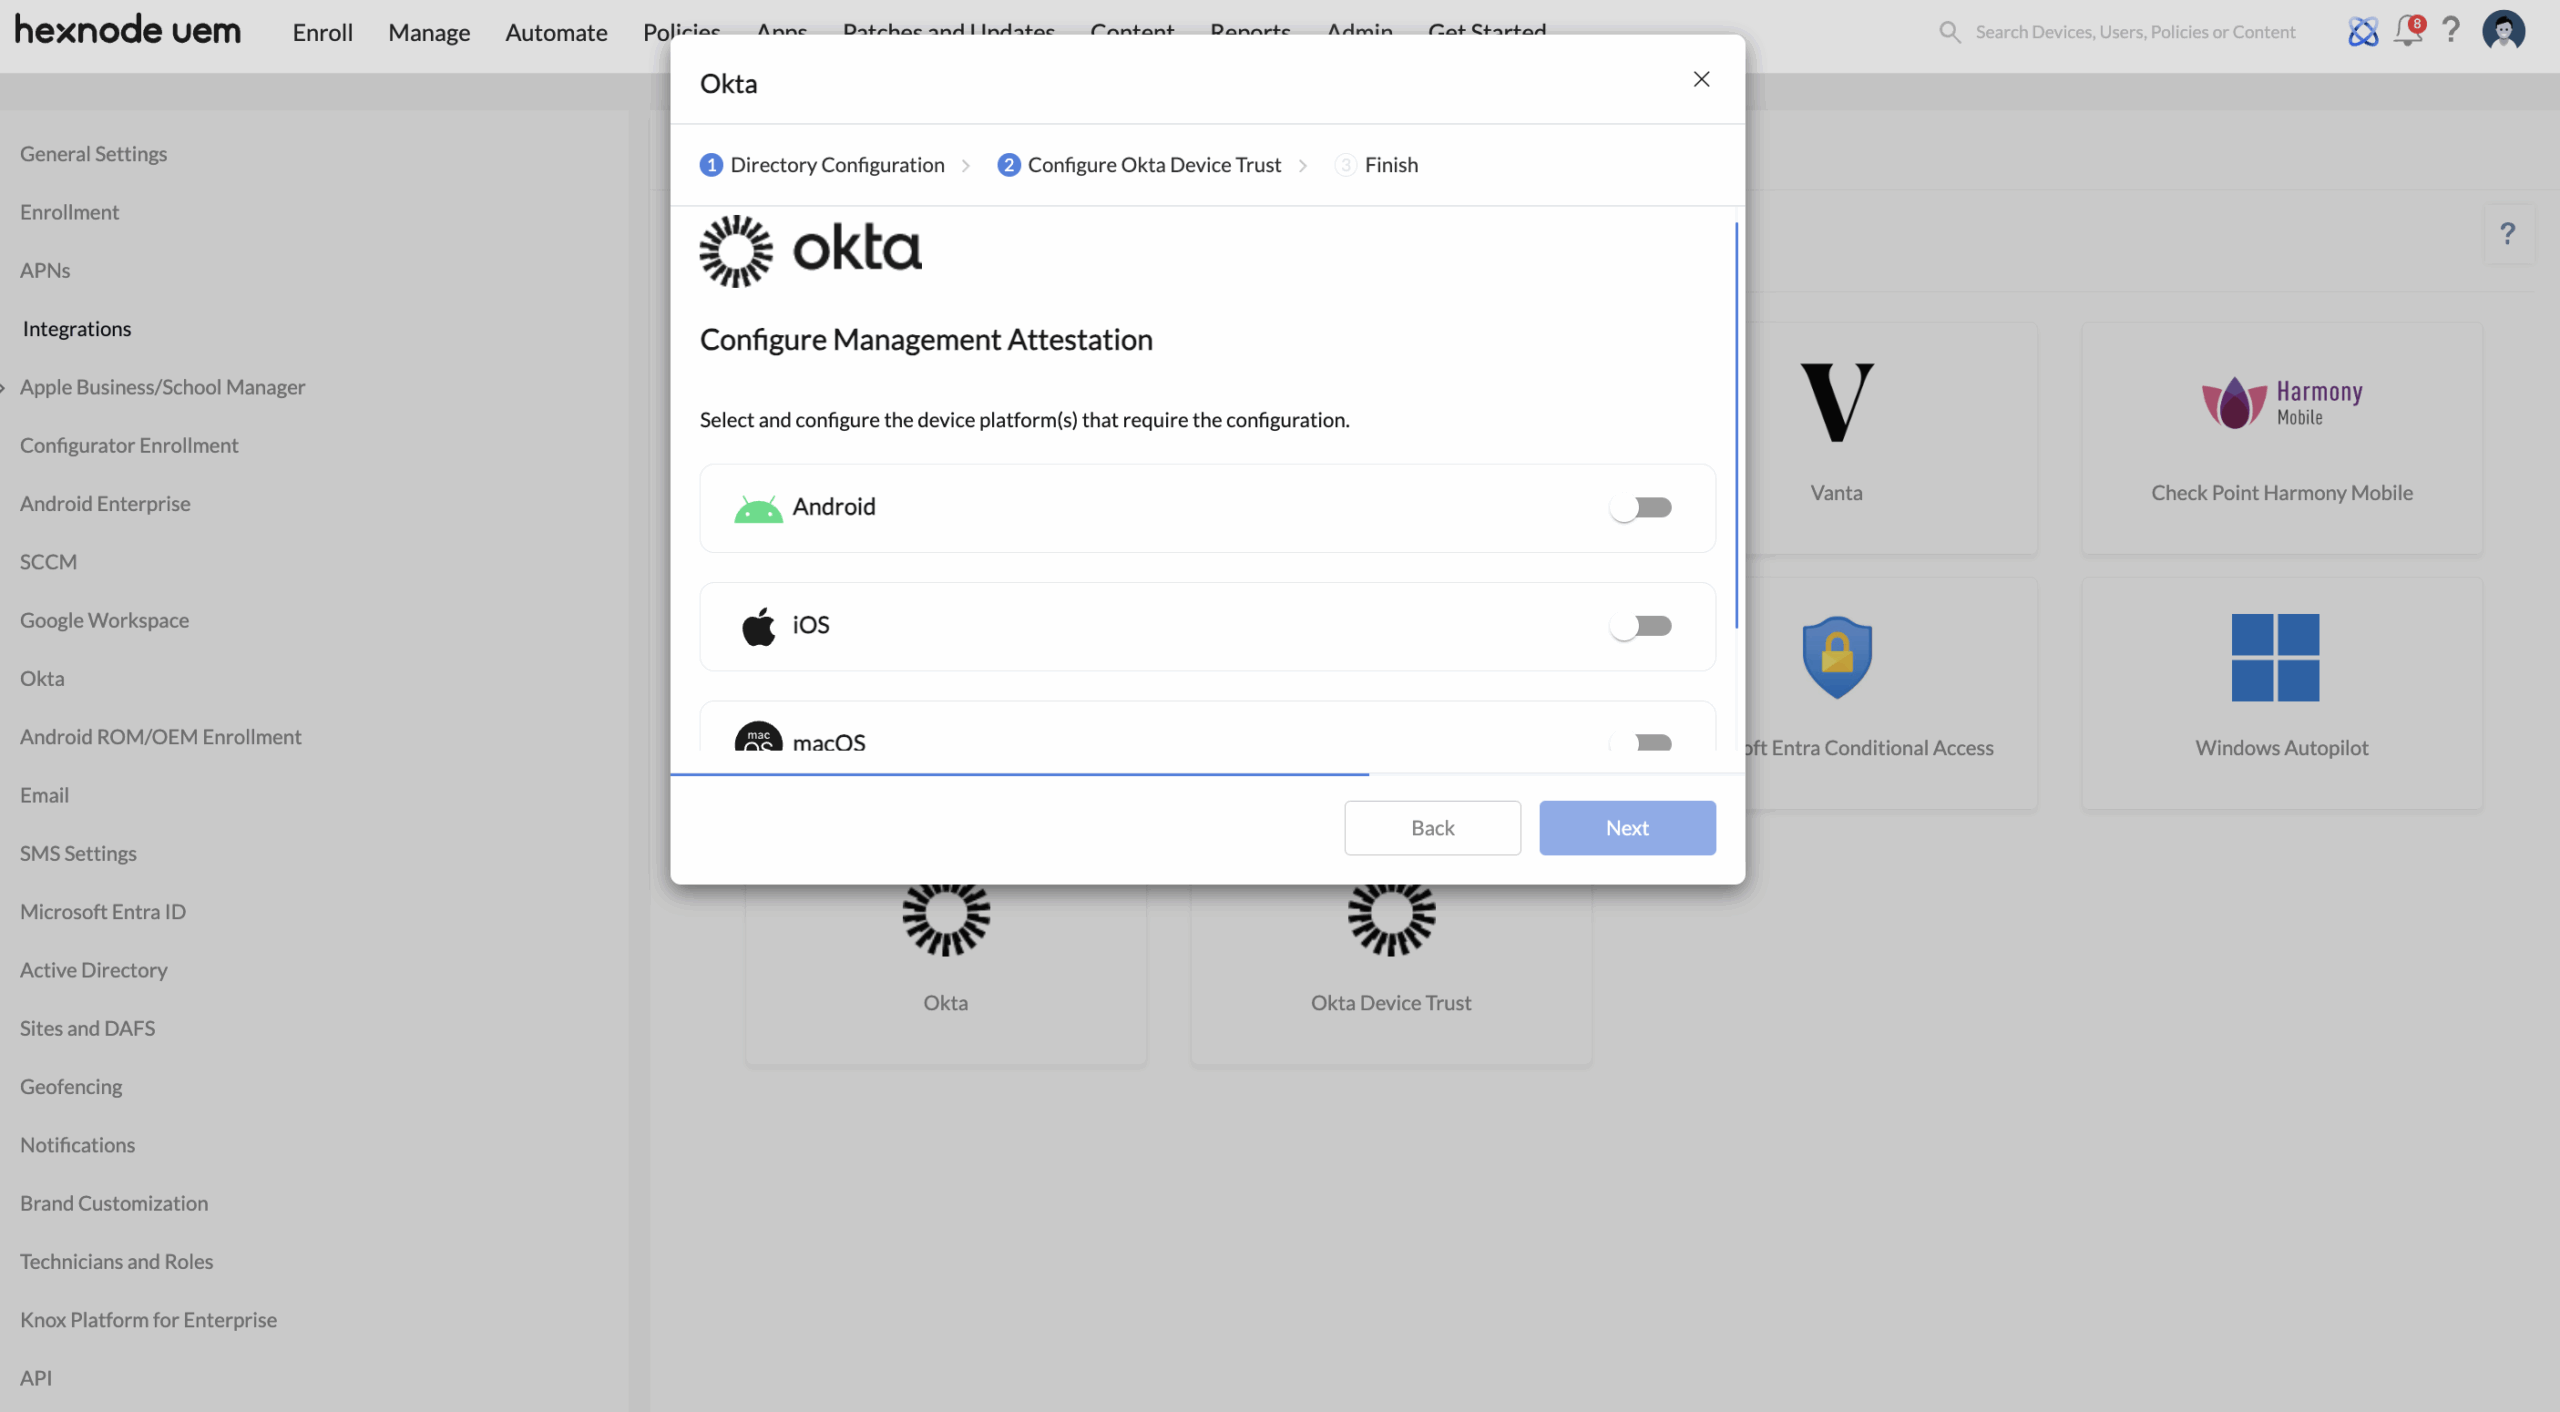
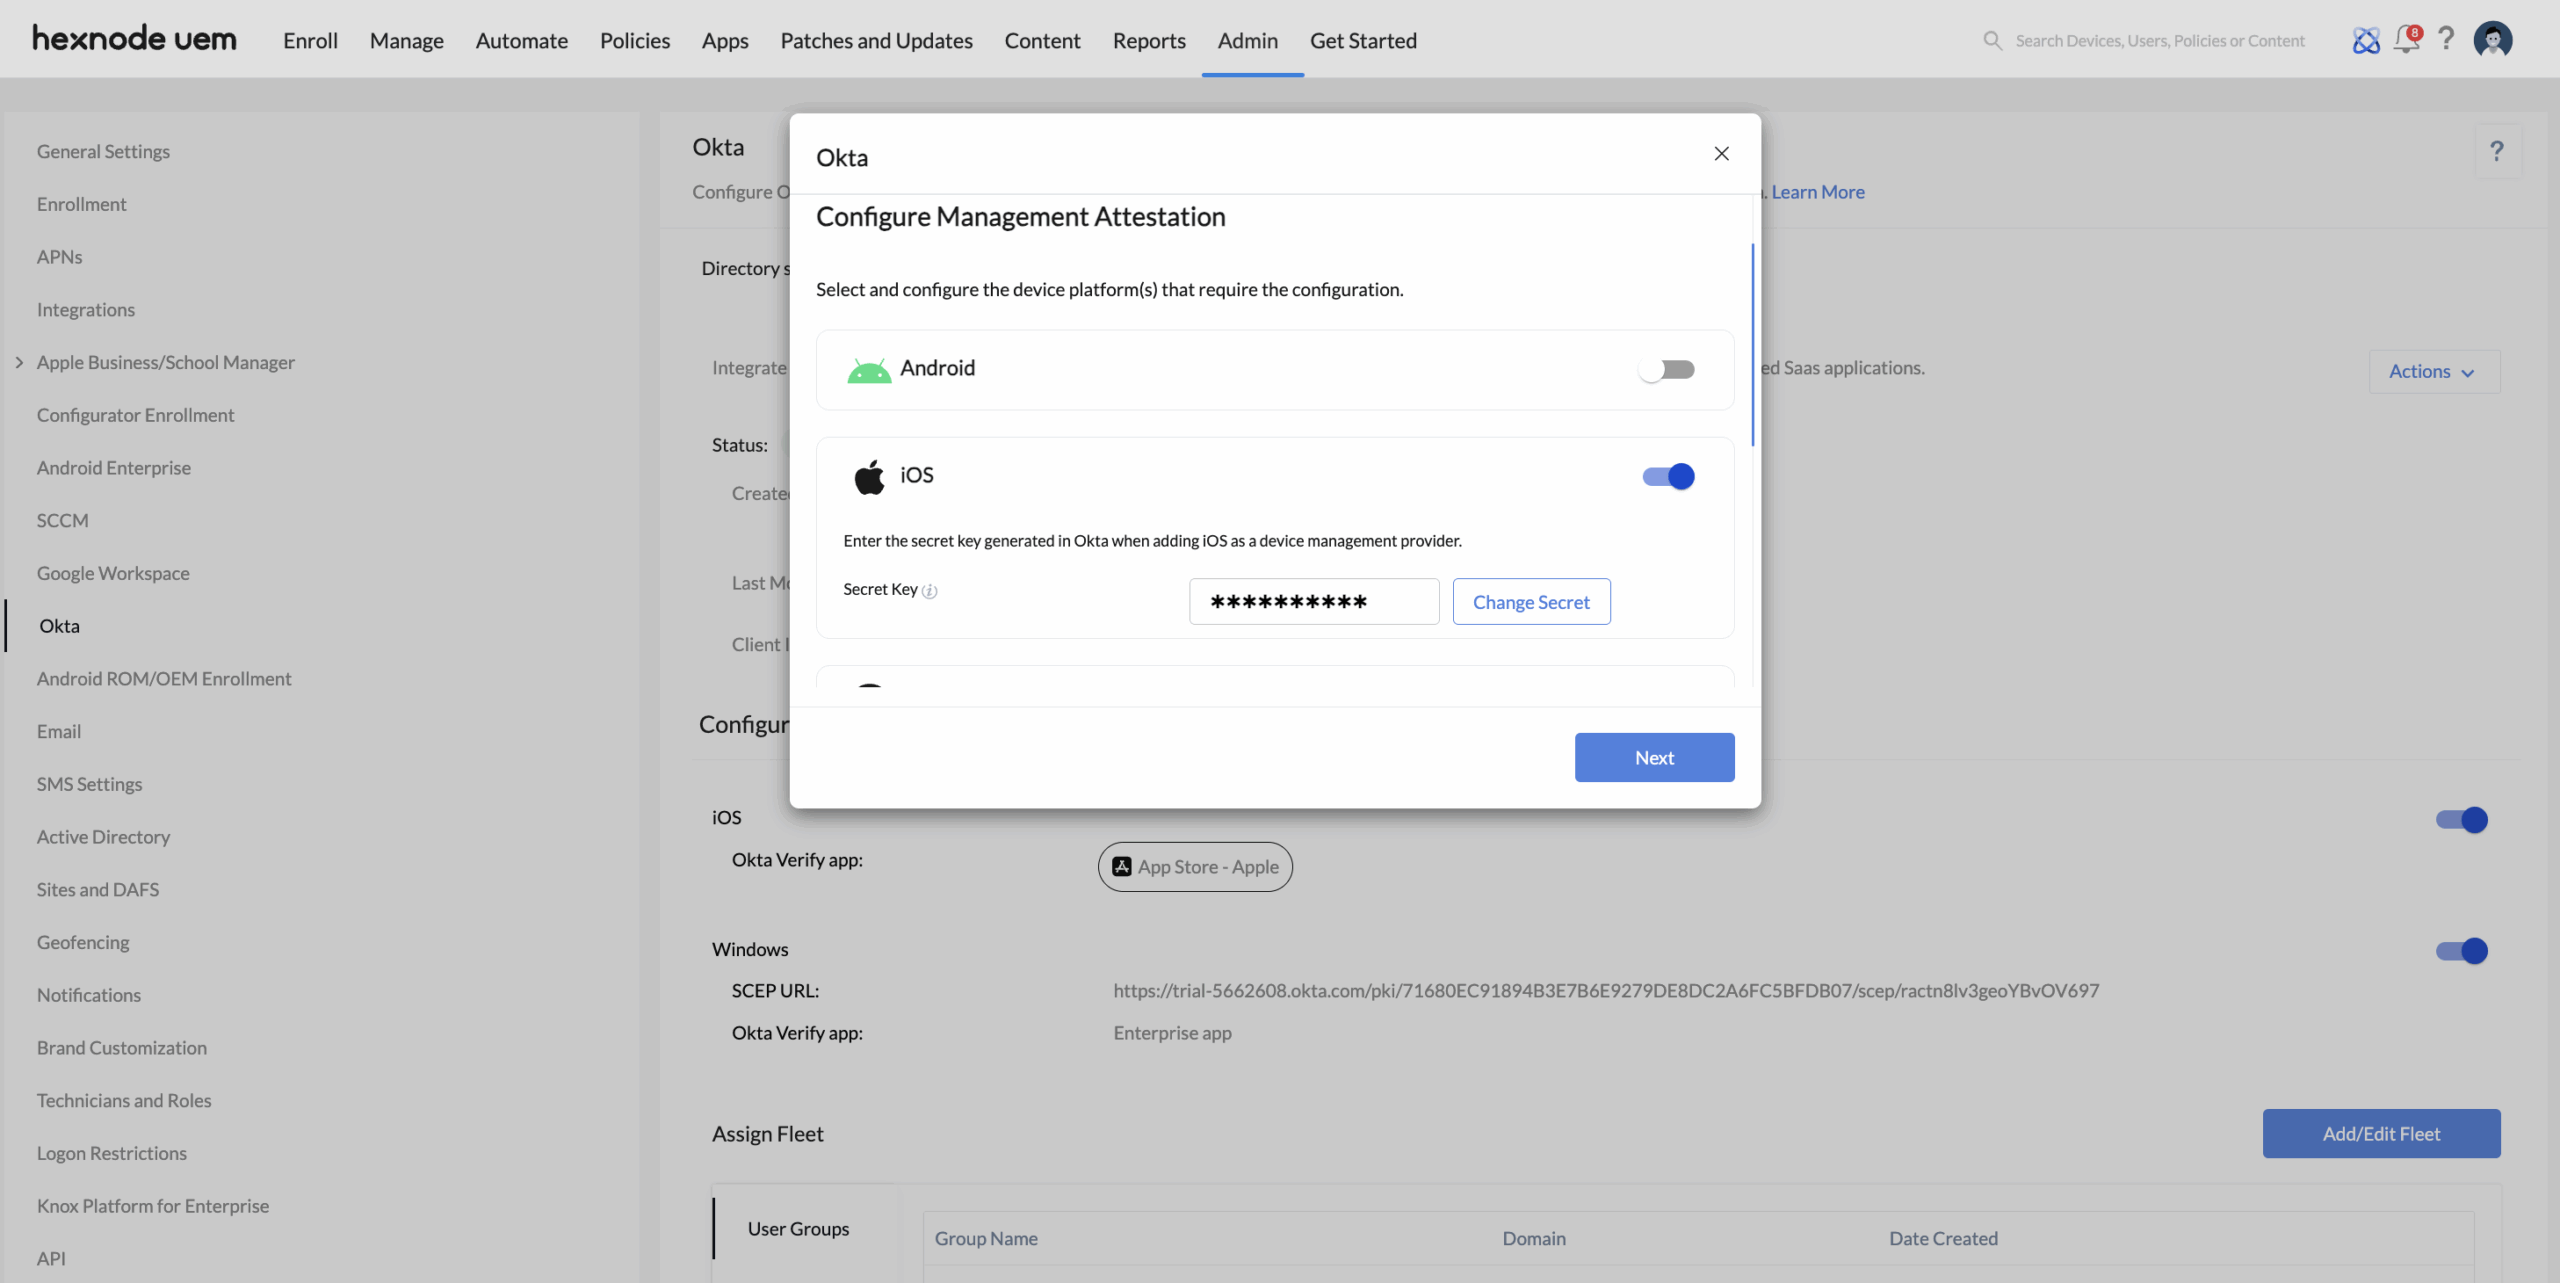
After entering the API service integration credentials, you’ll be directed to the Configure Management Attestation page. This is where you configure the device platform(s) – iOS, Android, macOS, or Windows – on which you intend to deploy the Okta Verify app.
Configure device platforms in Okta
Before configuring device platforms in Hexnode UEM, you must first set them up in the Okta admin console and generate the necessary credentials for use in Hexnode. Follow the steps below to complete the setup.
Configure device platforms in Hexnode
Back in the Hexnode UEM portal, on the Configure Management Attestation page, use the credentials generated in Okta to set up your device platforms in Hexnode.
Assign users and devices
Once the device platforms are configured, the next step is to define which users and devices will be governed by Okta Device Trust policies within Hexnode UEM. This happens in two ways:
Configure installation methods for macOS and Windows
After selecting the endpoints, the next window prompts you to install Okta Verify and complete the integration.
On iOS and Android, installation occurs automatically on the device.
For macOS and Windows devices, choose one of the following installation methods.
Installation methods for Okta Verify app on macOS devices
Choose from the following two options to install the Okta Verify app on macOS devices.
Installation methods for Okta Verify app on Windows devices
Choose from the following two options to install the Okta Verify app on Windows devices.
Step 2: Create authentication policies in Okta admin console
To define access control rules for your organization’s resources, you’ll need to set up authentication policies in the Okta admin console. Here’s how:
How devices function once Okta Device Trust is integrated?
After the successful integration of Okta Device Trust with your Hexnode UEM console, the Okta Verify app is deployed to the devices selected during configuration. Once the app is successfully installed on a device, the user can set it up using their Okta credentials and then log in to any of the apps allotted by the organization.
After logging in, when a user attempts to access any application on the device that is protected by an authentication policy configured in the Okta admin console, Okta checks whether the device meets the required security conditions, such as being managed or compliant. If the device satisfies the policy criteria, access is granted; otherwise, access is denied.
Managing Okta Device Trust in Hexnode after integration
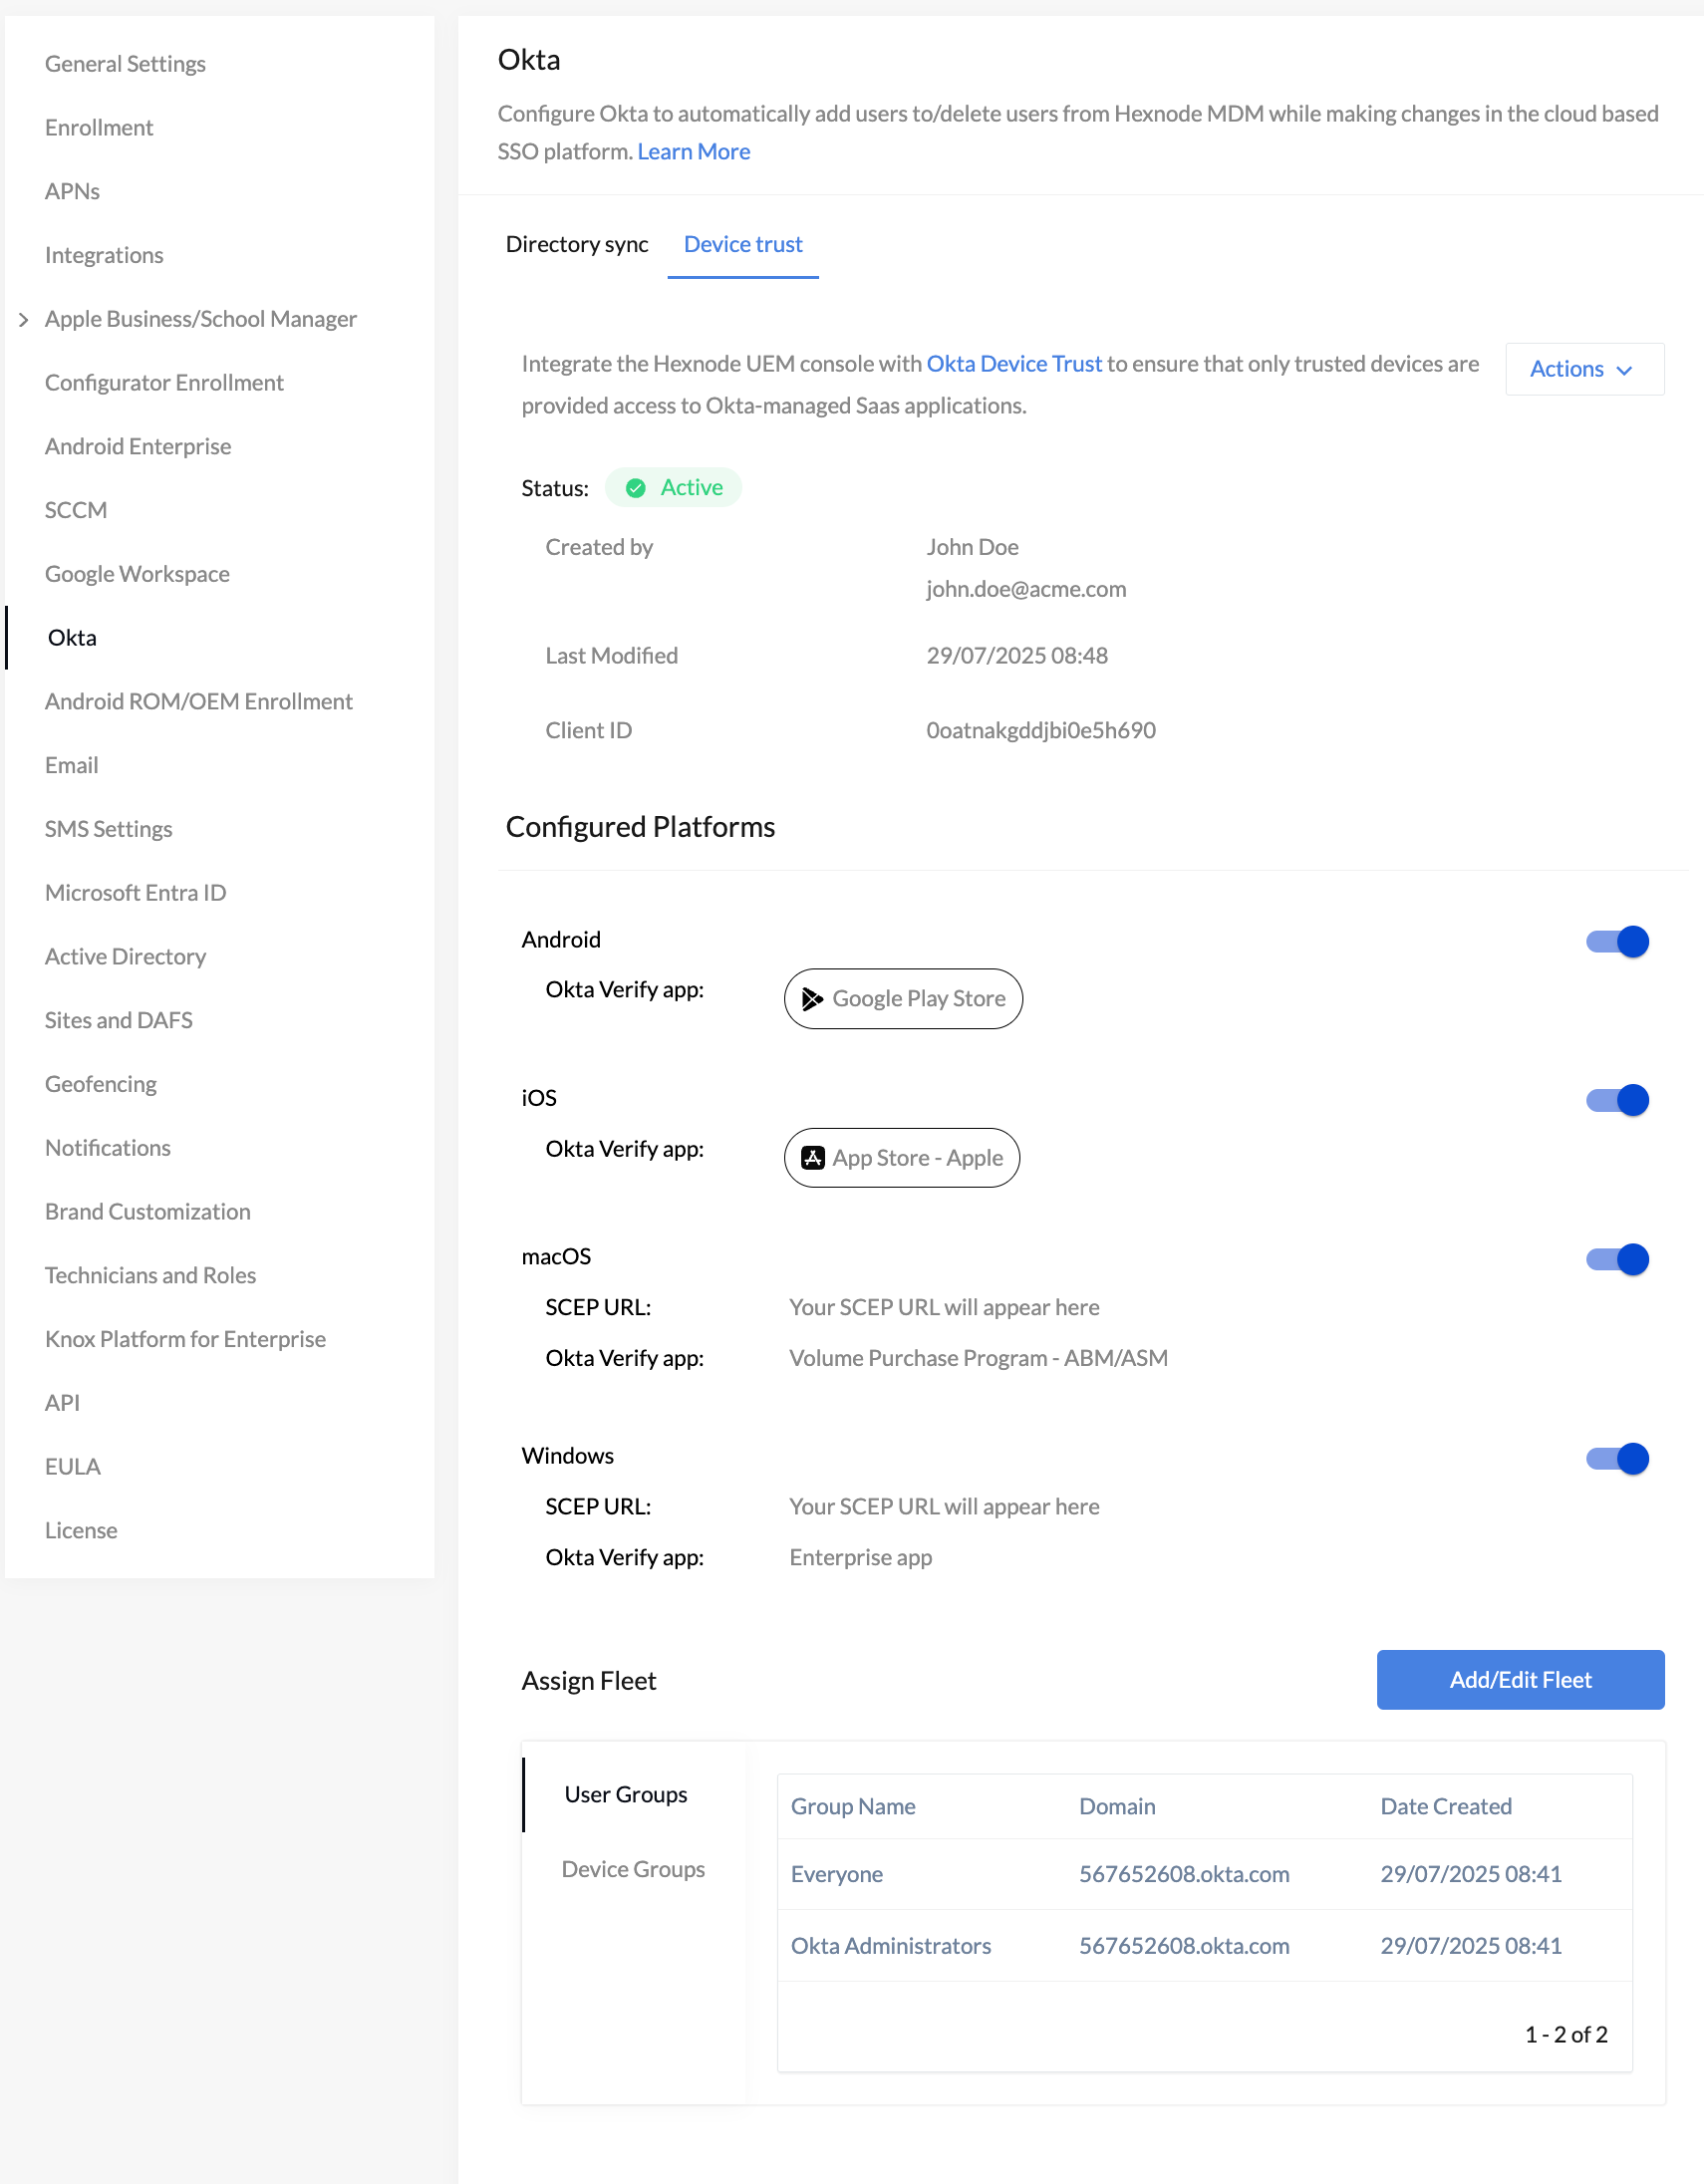
You can review and manage your Okta Device Trust settings anytime in Hexnode UEM console.
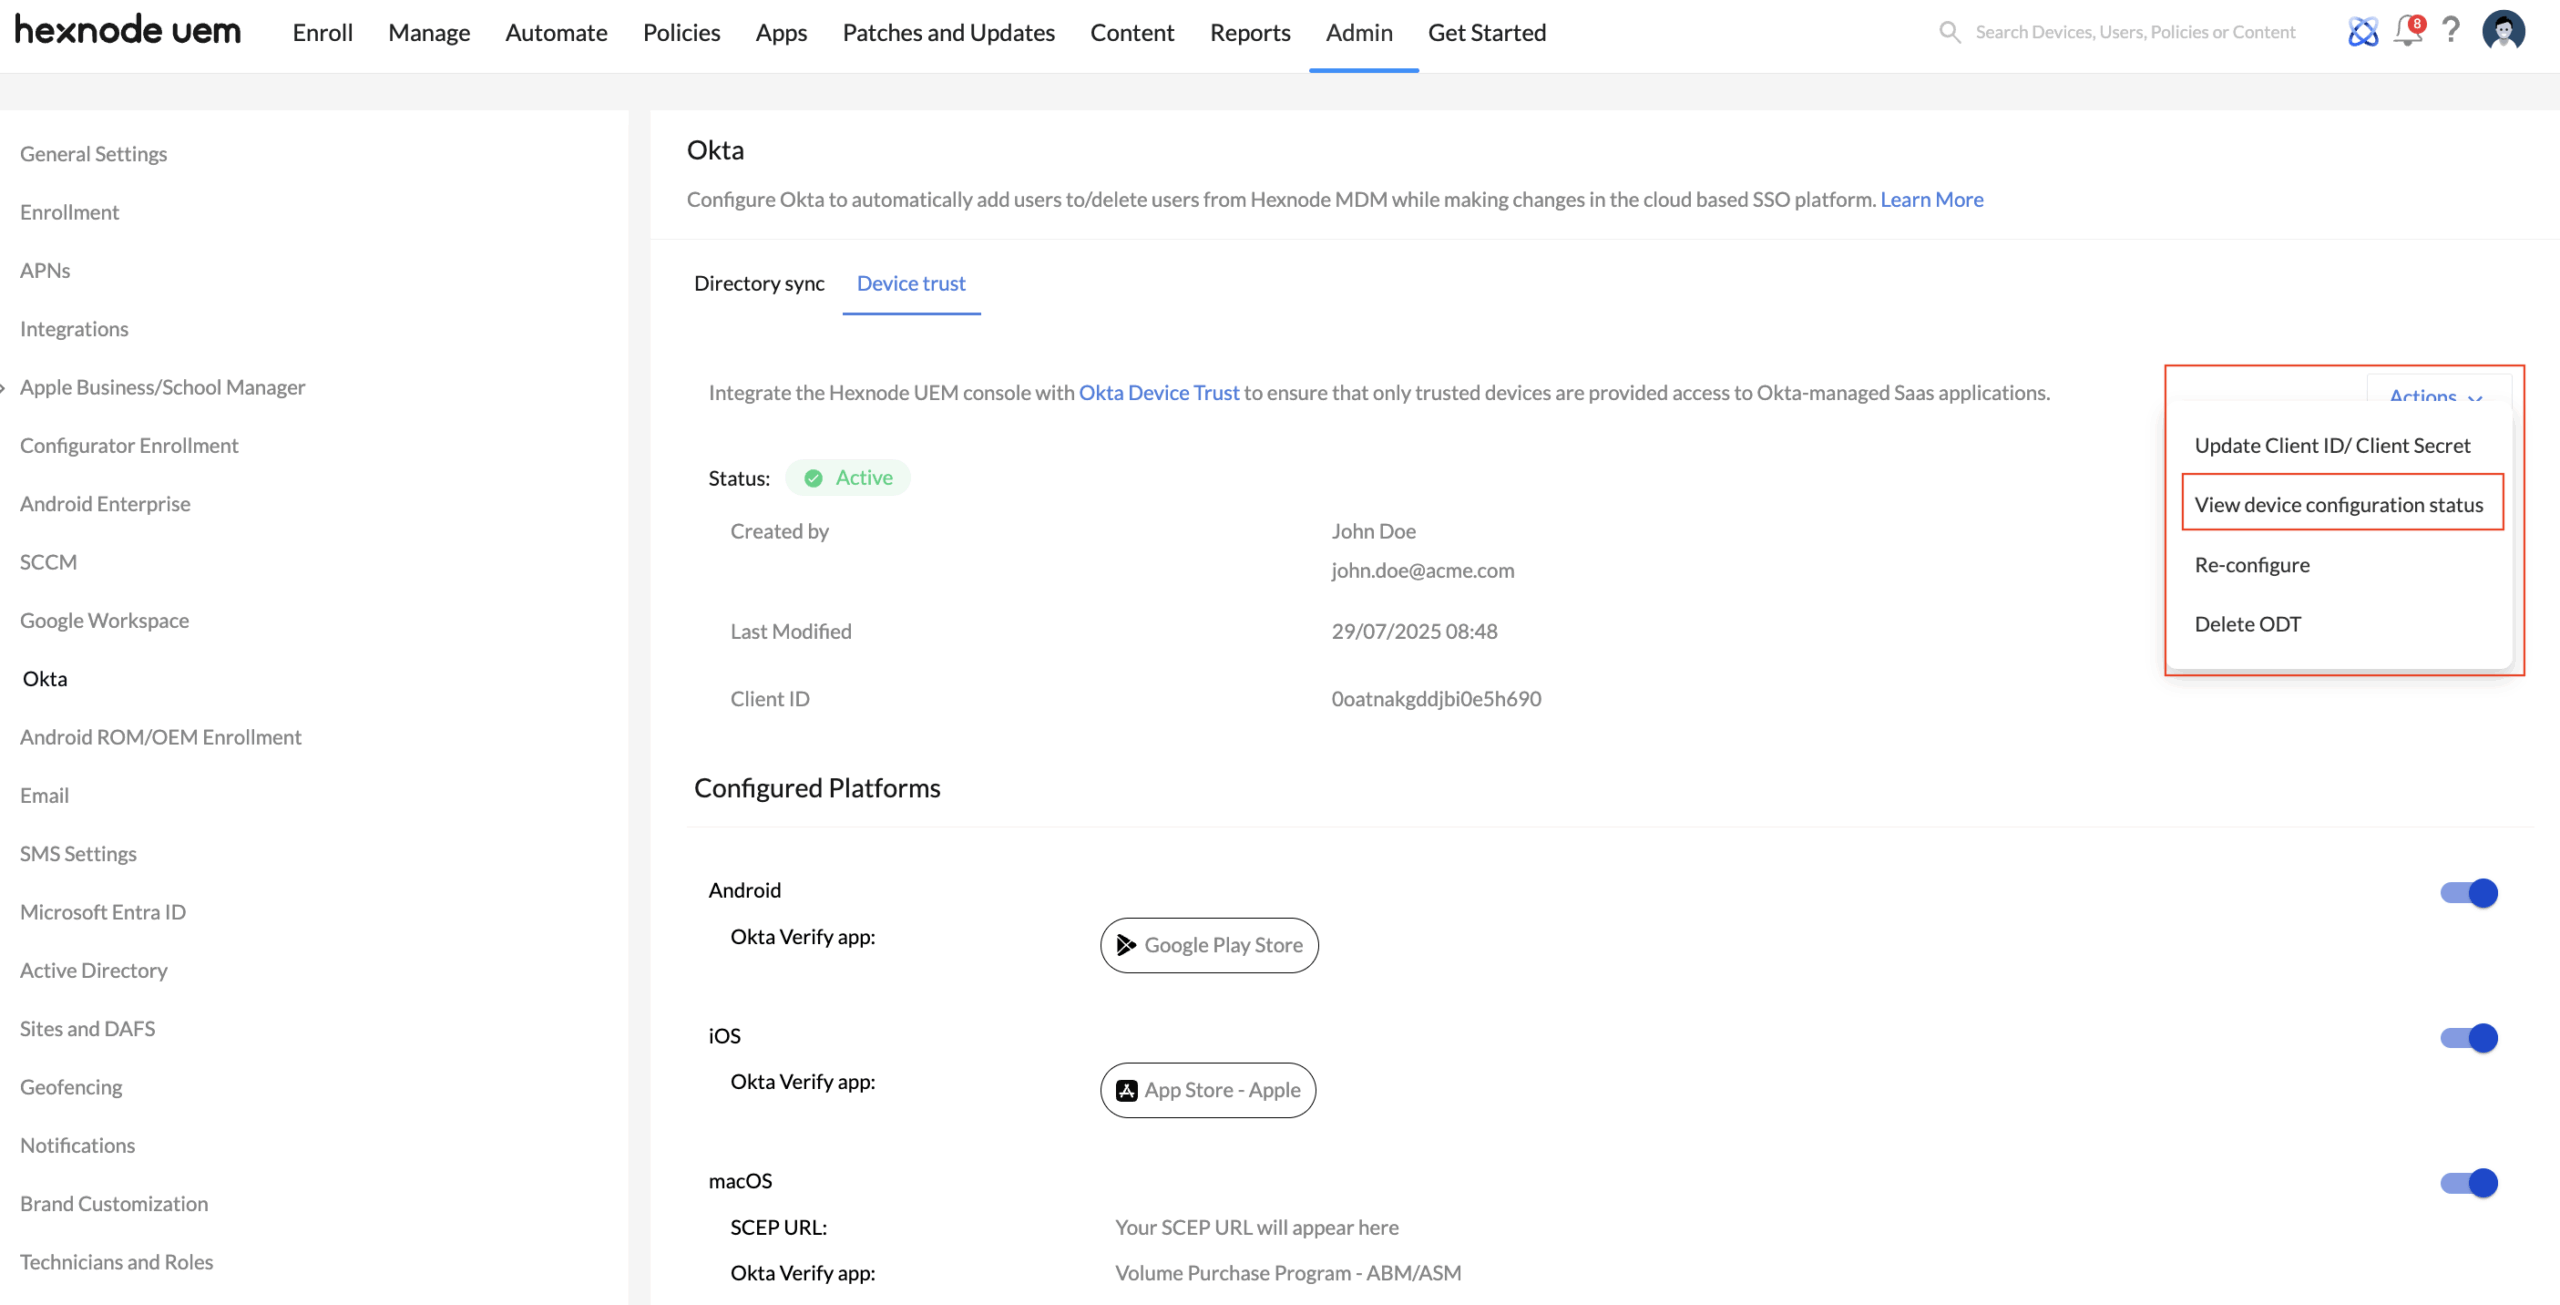
Go to Admin > Okta > Device Trust, then click on Actions, where you will be able to:
- Update Client ID/Client Secret: You can update the existing Client ID and Client Secret in your Hexnode UEM portal by adding new Okta domain credentials. Click the Update Client ID/Client Secret to go to the Okta Device Trust integration page, where you can input the new values.
- View device configuration status: You can check the status of configured Okta Device Trust by clicking on the View device configuration status option. This section displays information such as the ODT status of configured device platforms, Okta Verify app installation and configuration, ODT SSO extension deployment, SCEP profile association status, and more. You can also export these details in CSV or PDF format and share them with technicians available in your Hexnode UEM portal via mail.
- Re-configure device platform(s) attestation: You can update the configuration of platforms that have already been set up in the Hexnode UEM console. Clicking the Re-configure option will redirect you to the Configure Management Attestation page within the Hexnode’s Okta Device Trust configuration. There, you can modify the platform settings and update them with a new client secret obtained from the Okta admin console.
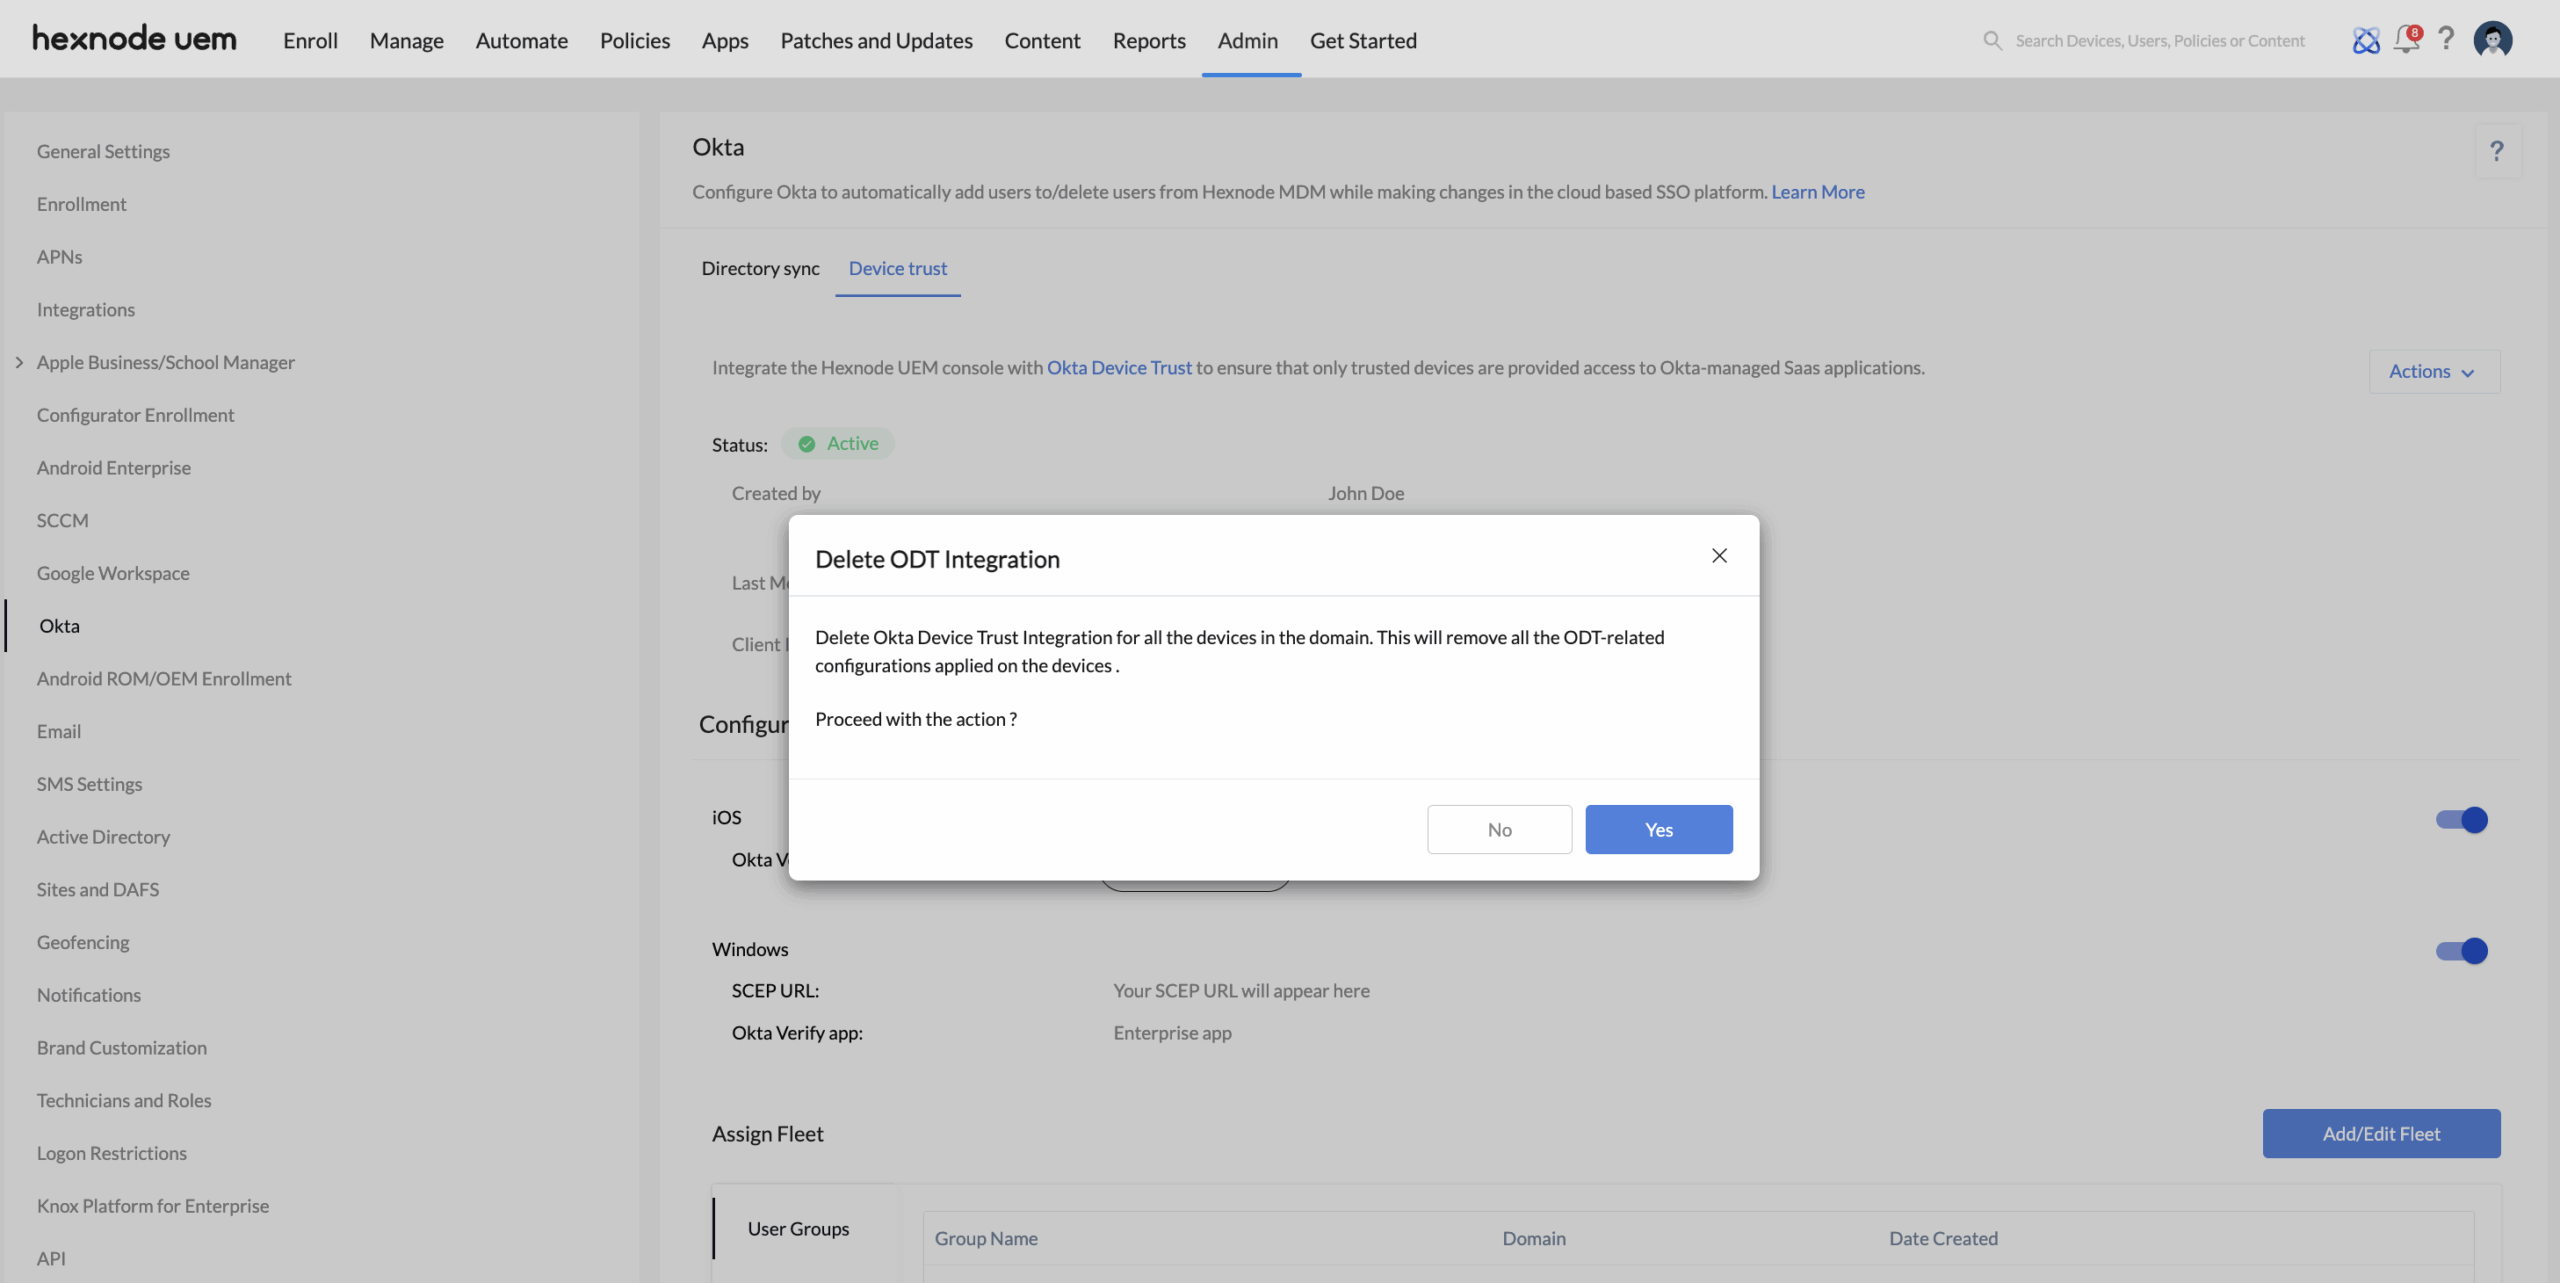
- Delete Okta Device Trust: Deleting Okta Device Trust will remove all related configurations from the devices managed in your Hexnode UEM console.
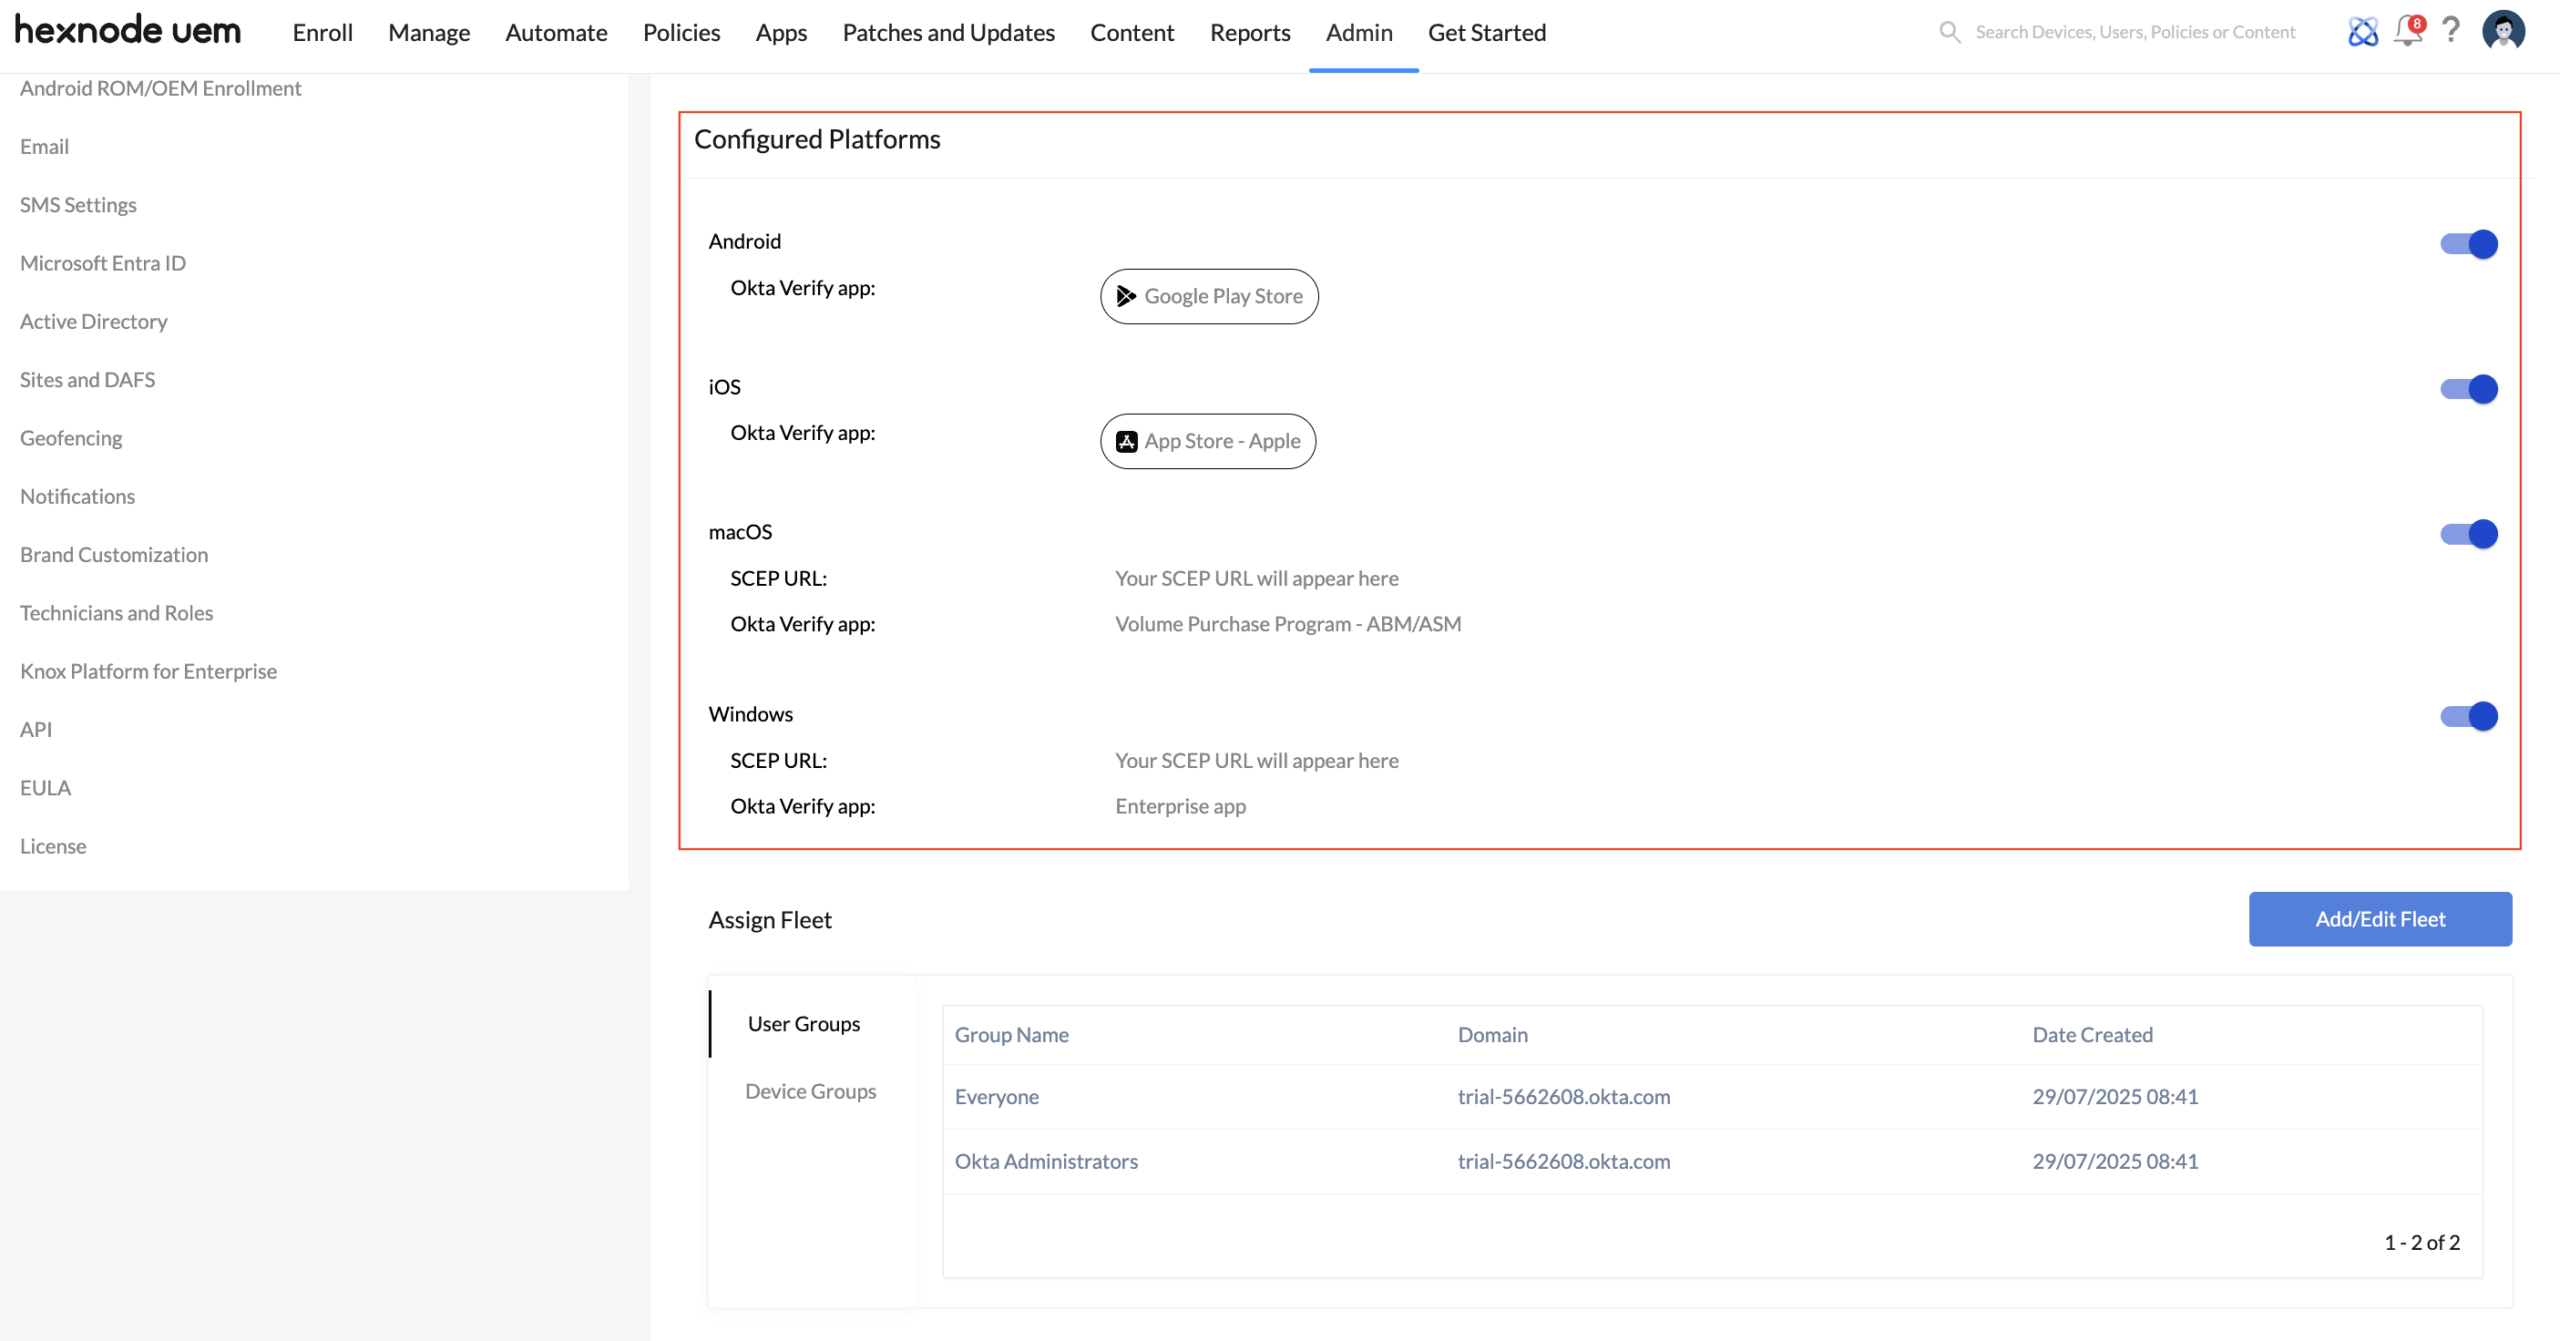
- Disable Okta Device Trust for configured platforms: You can disable the Okta Device Trust integration for individual platforms from this section. A list of configured platforms will be displayed, each with a toggle button. Simply use the toggle to enable or disable the Okta Device Trust integration for the respective platform.
- Add or edit user/device groups: You can add or modify the user and device groups linked to your Okta Device Trust configuration from within the Hexnode UEM portal. To do this, click the Add/Edit Fleet option. This will open a window where you can:
