Category filter
Configure network settings in managed guest sessions on ChromeOS devices
This document will help IT administrators configure network settings in managed guest sessions on ChromeOS devices.
If you’re managing ChromeOS devices in a shared environment like schools, libraries, or kiosks, managed guest sessions are a great way to offer secure, controlled access without requiring users to sign in. But to make sure everything runs smoothly and securely, it’s important to configure the right network settings.
To manage this effectively, IT administrators can use Hexnode’s Network settings feature to easily manage everything from proxy configurations and VPN settings to DNS controls and SSL policies in managed guest sessions on ChromeOS devices.
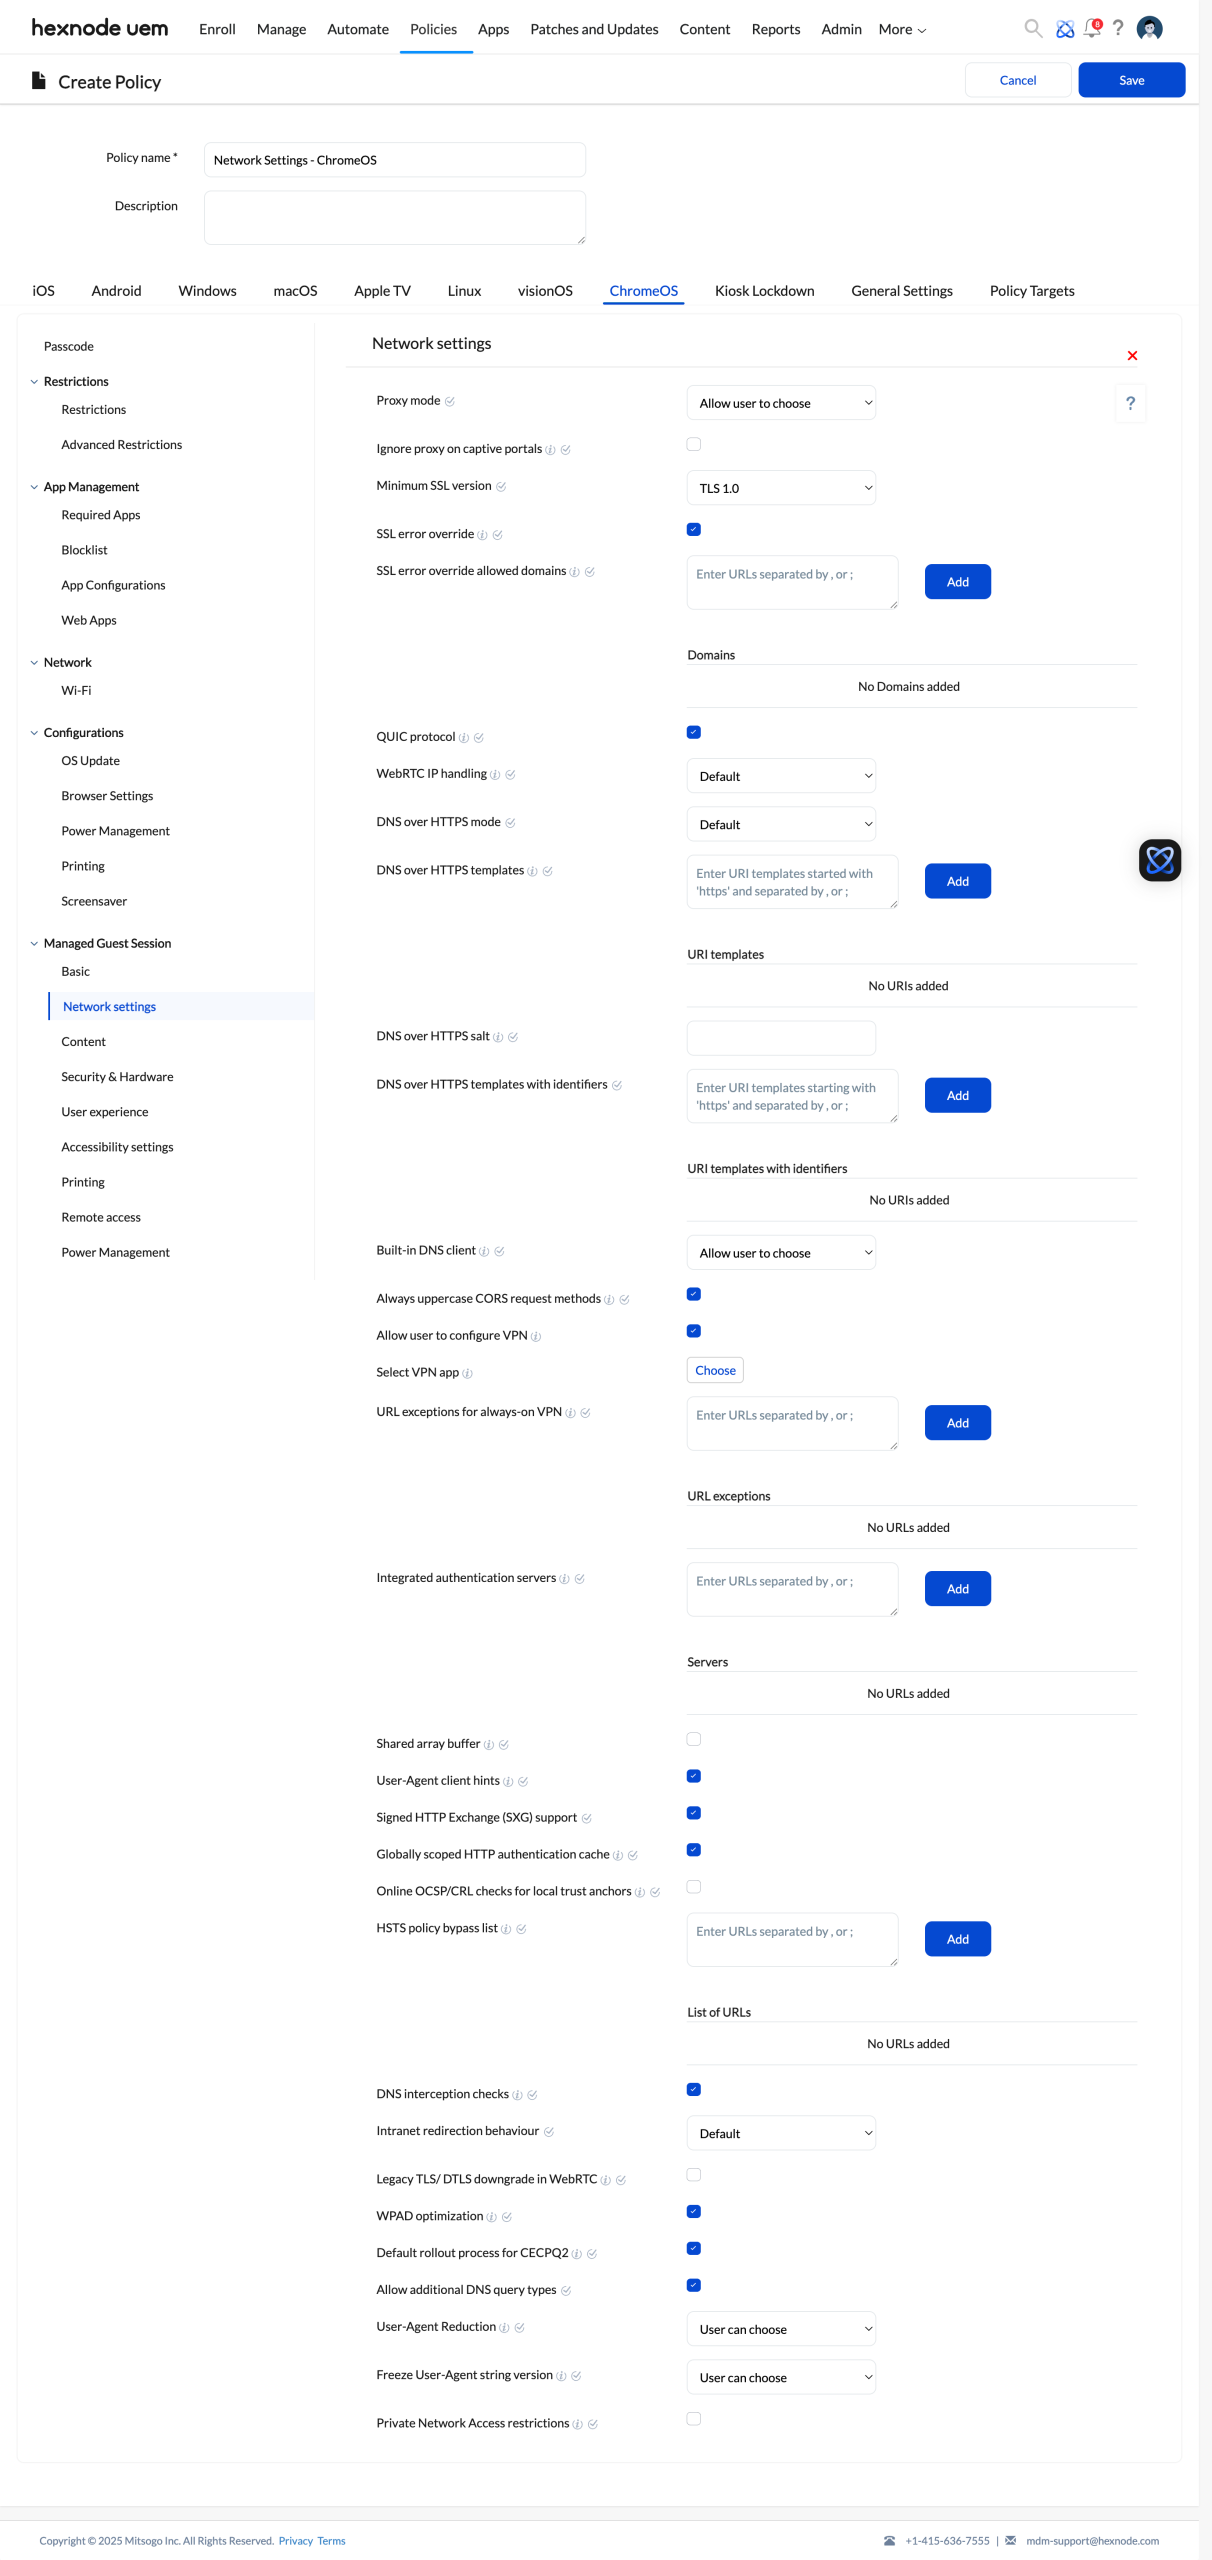
Network Settings
To configure network settings in managed guest sessions on ChromeOS devices,
- Login to the Hexnode UEM portal.
- Go to the Policies tab. Click on New Policy to create a new policy or modify an existing one.
- Provide the name and description (optional) for the policy.
- Navigate to ChromeOS > Managed Guest Session > Network settings. Click on Configure.
The following settings are available to configure,
| Setting | Description | Supported OS Version |
|---|---|---|
| Proxy mode | Choose how to specify proxy server settings. The available options include:
|
ChromeOS 11+ |
| Server URL (Available only when Fixed-servers option is selected) | Specify the URL of the proxy server. | ChromeOS 11+ |
| URL bypass list (Available only when Fixed-servers option is selected) | Specify the list of URLs that should not use the configured proxy server. Enter the URLs in the field, separated by commas (,) or semicolons (;). | ChromeOS 11+ |
| PAC server URL (Available only when PAC script option is selected) | Specify the URL of the proxy .pac file. | ChromeOS 11+ |
| Ignore proxy on captive portals | If checked, Chrome will bypass the configured proxy settings when accessing captive portal pages. | ChromeOS 41+ |
| Minimum SSL version | Defines the minimum Transport Layer Security (TLS) version allowed for your users’ connections. The available options include,
| ChromeOS 66 – 91 |
| SSL error override | This setting controls whether users can bypass SSL error warnings and proceed to websites that have SSL certificate issues. | ChromeOS 44+ |
| SSL error override allowed domains | Specify the list of domains where users are allowed to bypass SSL error warnings and continue to the website despite SSL issues. Use *. before a domain to include all its subdomains (e.g., *.example.com), or use * to allow all domains. The URLs should be separated by commas (,) or semicolons (;). | ChromeOS 90+ |
| QUIC protocol | This setting controls whether Google Chrome uses the Quick UDP Internet Connections (QUIC) protocol for network communication. When unchecked, Chrome uses TCP instead of QUIC. | ChromeOS 43+ |
| WebRTC IP handling | Specify which IP addresses and network interfaces WebRTC uses to find the best connection. The available options include,
|
ChromeOS 91+ |
| DNS over HTTPS mode | Controls how remote Domain Name System (DNS) queries are resolved using the HTTPS protocol. The available options include,
| ChromeOS 78+ |
| DNS over HTTPS templates | Specify the URI templates of the preferred DNS over HTTPS resolvers to be used by the system. URI templates must start with https:// and should be separated by commas (,) or semicolons (;). |
ChromeOS 80+ |
| DNS over HTTPS salt | Specifies the salt value used for hashing identifiers within DNS-over-HTTPS URI templates. |
ChromeOS 110+ |
| DNS over HTTPS templates with identifiers | Specify the URI templates for DNS-over-HTTPS resolvers that include identity information and an optional salt value. URI templates must start with https:// and should be separated by commas (,) or semicolons (;). |
ChromeOS 110+ |
| Built-in DNS client | Specifies whether the built-in DNS client is used in Chrome browser. The available options include,
|
ChromeOS 73+ |
| Always uppercase CORS request methods | If checked, request methods are converted to uppercase when matching against the Access-Control-Allow-Methods response header during CORS preflight. | ChromeOS 79 – 83 |
| Allow user to configure VPN | When unchecked, users are prevented from manually disconnecting from a VPN. | |
| Select VPN app | Select the VPN app that will handle user traffic. | |
| URL exceptions for always-on VPN | Specify the list of URLs that users are allowed to access when the VPN is not connected. The URLs should be separated by commas (,) or semicolons (;). | ChromeOS 122+ |
| Integrated authentication servers | Specifies which servers are allowed for Integrated Windows Authentication (IWA). When Chrome gets an authentication challenge from a proxy or from a server that is part of this allowed list, integrated authentication is then turned on. The URLs should be separated by commas (,) or semicolons (;). |
ChromeOS 86+ |
| Shared array buffer | If checked, sites that are not cross-origin isolated are allowed to use SharedArrayBuffers. | ChromeOS 91+ |
| User-Agent client hints | If checked, Chrome sends User-Agent Client Hints headers with requests, providing detailed information about the user’s browser and environment allowing servers to optimize responses and analytics. | ChromeOS 84 – 93 |
| Signed HTTP Exchange (SXG) support | If checked, Chrome will accept web content served as Signed HTTP Exchanges (SXG). | ChromeOS 75+ |
| Globally scoped HTTP authentication cache | If checked, Chrome will use a single global HTTP authentication cache for the user profile. This means credentials entered on one site can be automatically used on other sites, enabling legacy login methods. | ChromeOS 80+ |
| Online OCSP/CRL checks for local trust anchors | If checked, Chrome will always perform online OCSP/CRL revocation checks for certificates issued by locally installed CA certificates. If revocation status can’t be determined, the certificate will be treated as revoked. | ChromeOS 30+ |
| HSTS policy bypass list | Specify hostnames that will bypass HTTP Strict Transport Security (HSTS) checks. HSTS is a security feature that forces browsers to only connect to websites using HTTPS. The URLs should be separated by commas (,) or semicolons (;). | ChromeOS 78+ |
| DNS interception checks | If checked, Chrome will perform DNS interception checks to determine if it is behind a proxy that redirects unknown hostnames. | ChromeOS 80+ |
| Intranet redirection behaviour | Specifies how Chrome handles intranet redirection through DNS interception checks. The available options include,
|
ChromeOS 88+ |
| Legacy TLS/ DTLS downgrade in WebRTC | If unchecked, WebRTC peer connections will not be allowed to downgrade to legacy versions of TLS or DTLS (such as DTLS 1.0, TLS 1.0, or TLS 1.1) protocols. | ChromeOS 87 – 120 |
| WPAD optimization | If checked, Chrome will optimize Web Proxy Auto-Discovery (WPAD), allowing the browser to automatically locate and use proxy servers more efficiently. | ChromeOS 35+ |
| Default rollout process for CECPQ2 | If unchecked, Chrome will not follow the default rollout process for CECPQ2 (Combined Elliptic-Curve and Post-Quantum 2), a post-quantum key-agreement algorithm used in TLS. CECPQ2 produces larger TLS messages that, in rare instances, may cause issues with certain networking hardware. Disabling CECPQ2 can help resolve these network problems while troubleshooting. | ChromeOS 91 – 113 |
| Allow additional DNS query type | If checked, Chrome is allowed to query additional DNS record types when making insecure DNS requests. | ChromeOS 92+ |
| User-Agent Reduction | Specify how much information is included in the User-Agent header sent by Chrome. The available options include,
| ChromeOS 98+ |
| Freeze User-Agent string version | Allows to freeze the major version number in the User Agent string to avoid issues on apps and websites caused by the major version reaching three digits. The available options include,
| ChromeOS 99 – 117 |
| Private Network Access restrictions | If checked, Private Network Access warnings are enforced, and requests to more private network endpoints are blocked. | ChromeOS 120+ |
Associate the policy with target entities
If you haven’t saved the policy,
- Navigate to Policy Targets.
- Select Domains/OUs.
- Click on +Add Domains/OUs.
- The Browse Domain/OU window will appear.
- From here, select the Google Workspace account that is integrated with Hexnode, (eg: example.kmanaged.com(Google))
- Next, locate the Parent OU, which is represented by a briefcase icon. Select the Parent OU to associate the policy with it, or
- Click the dropdown icon beside the Parent OU to expand and select the required Child OU(s).
- Once selected, click OK, then Save to apply the changes.
If you have already saved the policy,
- Navigate to Policies > My Policies and select the required policy.
- Click on Manage > Associate Targets.
- Select Domains/OUs.
- From here, select the Google Workspace account that is integrated with Hexnode, (eg: example.kmanaged.com(Google)).
- Next, locate the Parent OU, which is represented by a briefcase icon. Select the Parent OU to associate the policy with it, or
- Click the dropdown icon beside the Parent OU to expand and select the required Child OU(s).
- Click on Associate.
