Category filter
How to set up Wi-Fi on macOS devices?
Over the years, macOS devices have gained popularity in the enterprise environment. MacBooks and iMacs have great significance within corporates as they characterize the quality and security standards of Apple devices. Managing macOS devices in organizational environments necessitates the deployment of basic device settings and configurations for enterprise use. Creating macOS Wi-Fi configurations from the UEM console helps the devices connect to the specified network automatically. Hexnode aids the administrators in setting up the network configuration across a large number of devices with the help of policies. Hence, the users need not establish a network connection manually to get connected to the corporate network.
Set up Wi-Fi network via policy
To configure Wi-Fi networks remotely via policy,
- Log in to your Hexnode UEM portal.
- Navigate to Policies > New Policy. Assign a suitable name and description (optional) for the policy. You can also choose to continue with an existing policy.
- Go to macOS > Network > Wi-Fi. Click Configure.

| Wi-Fi settings | Description |
|---|---|
| Service Set Identifier | The name of a Wi-Fi network abbreviated as SSID. |
| Auto join | The devices will automatically get connected to the network configured here when they come in the vicinity of the Wi-Fi network. Enabled by default. |
| Hidden Network | Enable this setting if your Wi-Fi network is hidden. A hidden network does not broadcast its SSID and hence, will not appear in the list of available wireless networks. |
| Security Type | Security type specifies the security protocol to be used for authentication. Select a security type and configure the remaining options accordingly. The available security types are None, WEP, WPA/WPA2, Any (Personal), WEP Enterprise, WPA/WPA2 Enterprise, Any (Enterprise), WPA2/WPA3, WPA3, WPA2/WPA3 Enterprise, and WPA3 Enterprise. |
‘None’ specifies that no security type has been set for the Wi-Fi network, making the devices prone to vulnerability. Instead, if WEP, WPA/WPA2, Any (Personal), WPA2/WPA3, or WPA3 security types are selected, the admin should enter a valid password for the devices to connect automatically to the network.
Alternatively, to set up an enterprise network, additional settings should be configured as mentioned below:
Configure security settings for WEP Enterprise, WPA/WPA2 Enterprise, Any (Enterprise), WPA2/WPA3 Enterprise, and WPA3 Enterprise networks

| Settings | Description |
|---|---|
| Accepted EAP types | Select the authentication framework for your enterprise network. The available options are TLS, LEAP, EAP-FAST, TTLS, PEAP, and EAP-SIM. TTLS is enabled by default. |
| Inner Identity
(If TTLS is selected) |
The available options are PAP (default), CHAP, MS-CHAP, and MS-CHAPv2. PAP is the least secure one, which sends the password as a plain text. CHAP is secure than PAP. Instead of a plain text, a random number and the result of a hash function (which is performed on the password) is sent. MS-CHAP is another variant of CHAP and is introduced by Microsoft. MS-CHAP requires mutual authentication. In mutual authentication, any data is sent between the device and the server only after the device proves its identity to the server, and the server proves its identity back to the device. |
| Use PAC
(Applicable only if EAP-FAST is selected) |
Protected Access Credentials (PAC) can be used for Wi-Fi network connections. Select this option to use an existing PAC file if any. |
| Provision PAC
(If PAC is used) |
The server creates a PAC file for a specific user by authenticating with the user’s password and adds it to the device. The PAC file can be used to make a connection with the network. |
| Provision PAC Anonymously
(If PAC is provisioned) |
PAC is provisioned without authenticating with the server. |
| Username | The account name of the user. Use the wildcard %username% to fetch the data automatically from the UEM console. |
| Use per connection password | The device will prompt for a password every time the user tries to connect to the network. |
| Password
(If Per connection password is not used) |
If a password is not required for every connection, then a one-time password can be provided here. |
| Identity Certificate | To authenticate the connection, the identity certificate is sent to the server when the device gets connected to the Wi-Fi network. You can add a certificate by navigating to Security > Certificates > Add Certificate, and they will be displayed in the Identity Certificate. Choose one among them. |
| Outer Identity | In response to an EAP identity request, the value entered here will be sent as the identity. For authentication, first, the outer identity will be sent in a secure tunnel, followed by the actual identification (username) of the user. |
Setting up Proxy
A proxy server serves as an intermediary between the devices and the internet. The devices can be secured from external attacks. There are three options available, None, Manual and Automatic.
To skip setting up a proxy server, choose None. To set up a proxy, choose any of the other two options.
Manual Proxy Configuration
If you are setting up the proxy manually, enter the below details:
- Server: The IP address of the proxy server.
- Port: Port number associated with the proxy server.
- Authentication: Username to get authenticated to the server.
- Password: Password associated with the username provided above.
Automatic Configuration of Proxy Server
Choose this option to get the proxy set up automatically by providing the proxy server URL, and Hexnode will take care of the rest.
Associate the configured policy with macOS devices
If the policy has not been saved,
- Navigate to Policy Targets > +Add Devices.
- Choose the target devices and click Ok. Click Save.
- You can also choose to associate the policy with device groups, users, user groups, or domains from the left pane of the Policy Targets tab.
If the policy has been saved,
- Go to the Policies tab and choose the desired policy.
- Click on the Manage drop-down, select Associate Targets.
- Choose the target entities and click Associate.
What happens at the device end?
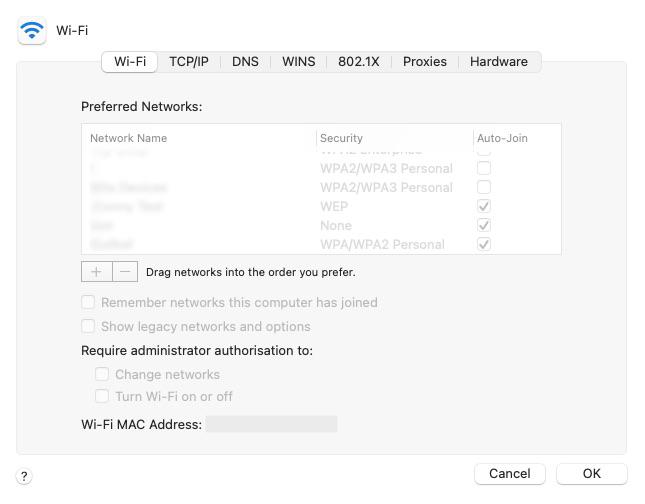
Once the policy is associated, the Wi-Fi configuration will get saved on the Mac under System Preferences > Network.

It will also appear alongside all the Wi-Fi networks saved on the Mac on opening the Advanced settings window.