Category filter
How to set up Global HTTP Proxy for Android Devices
Configuring HTTP Proxy settings makes sure that all HTTP network traffic passes only through the configured proxy server. Having a global HTTP proxy helps in preventing any possible attacks like phishing, buffer overflow, SQL injection etc.
Configure Global HTTP Proxy Settings
- Login to your Hexnode portal.
- Navigate to Policies.
- Select an existing policy or create a new one by clicking New Policy> New Blank Policy. Name the policy and provide a brief description (optional).
- From Android > Security, select Global HTTP Proxy, and click Configure.
- You will have the following options to be configured.
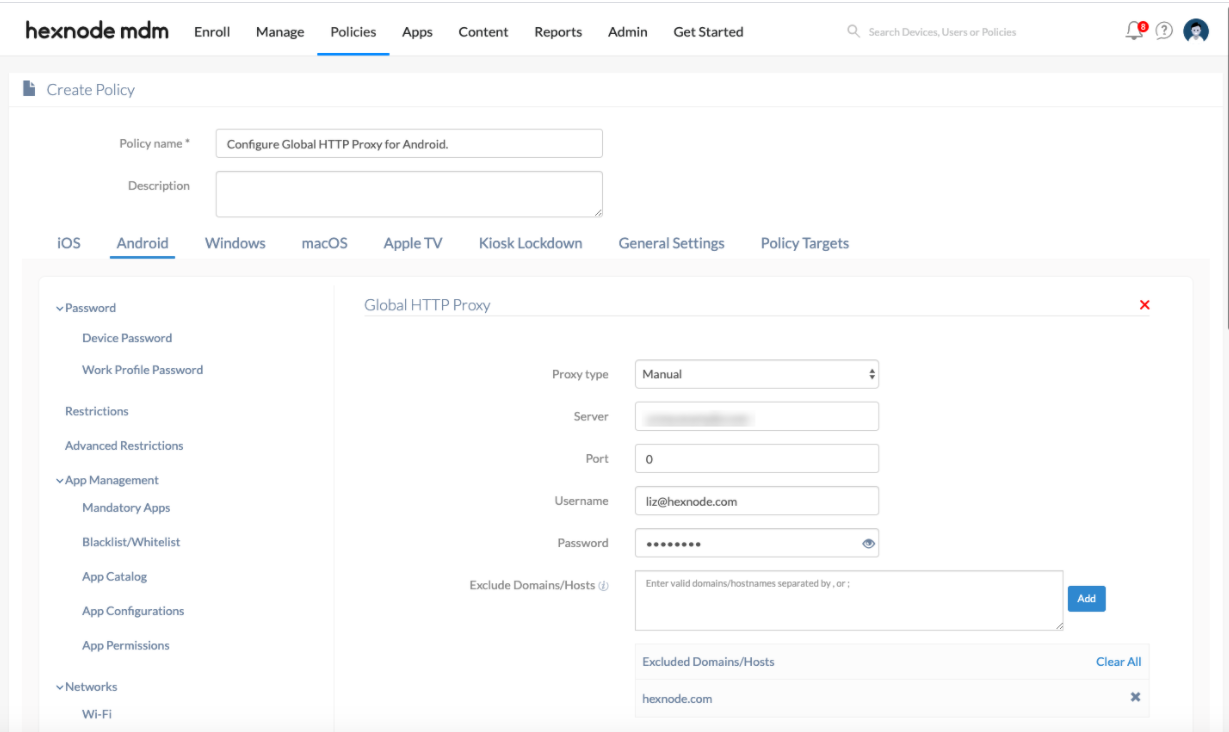
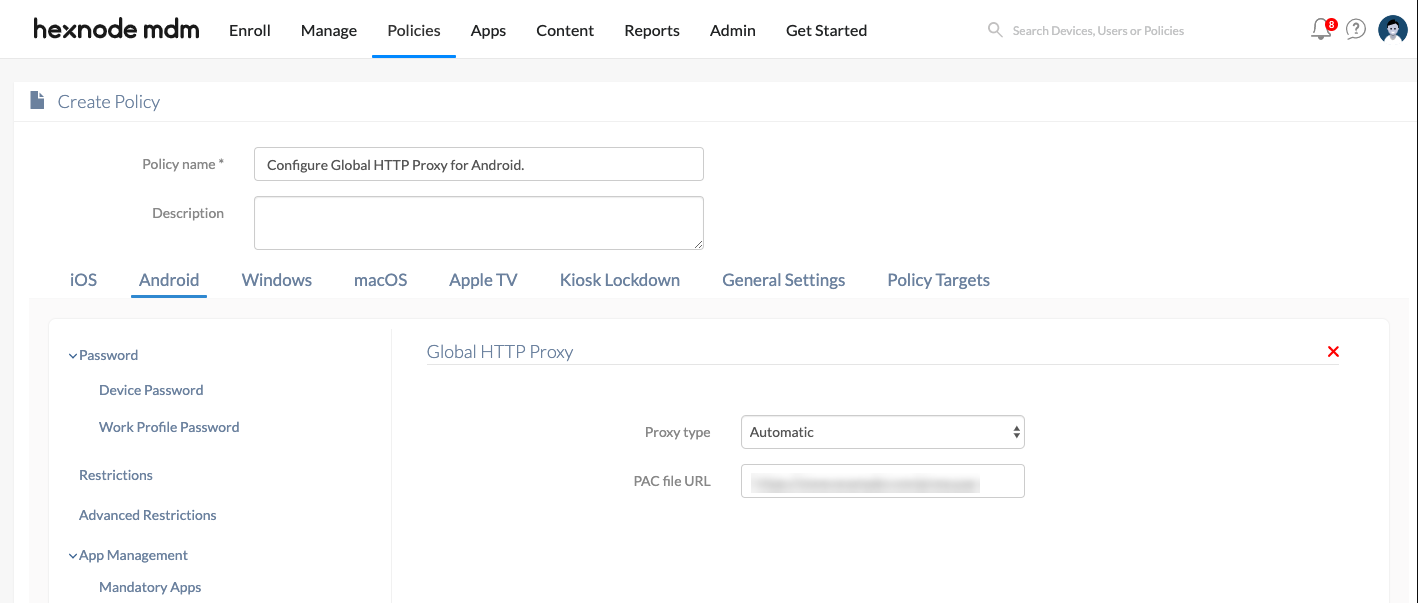
- Proxy Type – Choose the type of proxy to be set up on the device. You can choose either Manual/Automatic proxy settings.
If you have chosen the proxy type as manual,
| Manual Proxy Settings | Description |
|---|---|
| Server | Type the IP address or the hostname of the proxy server. This field is mandatory. |
| Port | Enter the port number of the proxy server used for connecting to the client. Default value is 8080. This field is mandatory. |
| Username | Private proxies require a username to use its services. |
| Password | Give the password associated with the username of the private proxy server. |
| Exclude URLs | Using this feature, it is possible to bypass proxy settings for some websites. Enter the domain names which require exemption. Eg: hexnode.com |
If you have chosen the proxy type as automatic,
| Automatic Proxy Settings | Description |
|---|---|
| Proxy PAC URL | PAC files are used to configure the proxy settings. They have JavaScript functions that configure necessary settings.
Eg: Provide the URL to the configuration script. Whenever a new URL is loaded, the given PAC URL is referenced. The URL is evaluated based on the functions in the PAC file. The functions decide if the proxy should be used or not. This is a mandatory field. |
Associate Policies with Devices
If the policy has not yet been saved.
- Navigate to Policy Targets. Select the target of the policy. They can be Devices, Device Groups, Users, User Groups and Domain.
- Click on +Add Devices.
- Select the devices and click OK.
- Click on Save to apply the policies to devices.
If the policy has been saved already:
- From Policies, select the policies to be associated.
- Click on Manage → Associate Targets and select the device.
- Click on Associate to apply the policy to the devices.
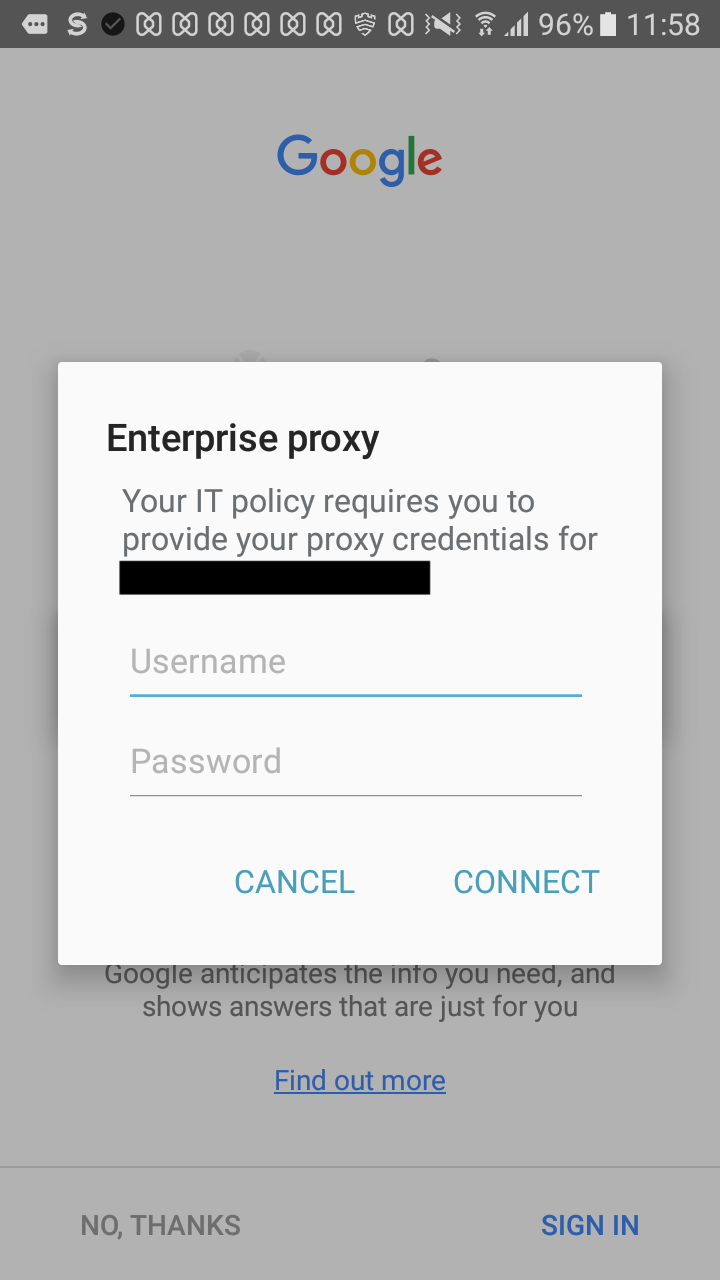
What happens at the Device End?
After the successful association of the policy, a prompt appears on the device. The user is asked to either sign in by entering the username and password or to cancel the prompt. The prompt can be canceled, but keeps reappearing till the user signs in. During this time access to the internet will be restricted even if the device is connected to the Web. The user needs to sign into the proxy to regain access to the internet.