Category filter
How to add admin account via Enrollment profiles on macOS devices
An administrator account has complete access to everything on the Mac, including installing software updates, installing/uninstalling applications, accessing and deleting system files, and performing other administrative tasks. An admin user in a macOS device can add and manage other users and change system settings. Hexnode lets your organization add an admin account for macOS devices enrolled via Apple Business Manager.
Add administrator user account on macOS devices
The macOS device enrolled via Apple Business Manager can be viewed in the Devices list. We can add admin users by configuring Enrollment Profiles.
- On your Hexnode portal, go to Enroll > Platform-Specific and under macOS, click on Apple Business/School Manager.
- Click on Enrollment Profiles.
- Click on Create Enrollment Profile to create a new enrollment profile. You can also edit the existing enrollment profiles by clicking on them. Give a suitable name for the enrollment profile under Display Name in General Settings.
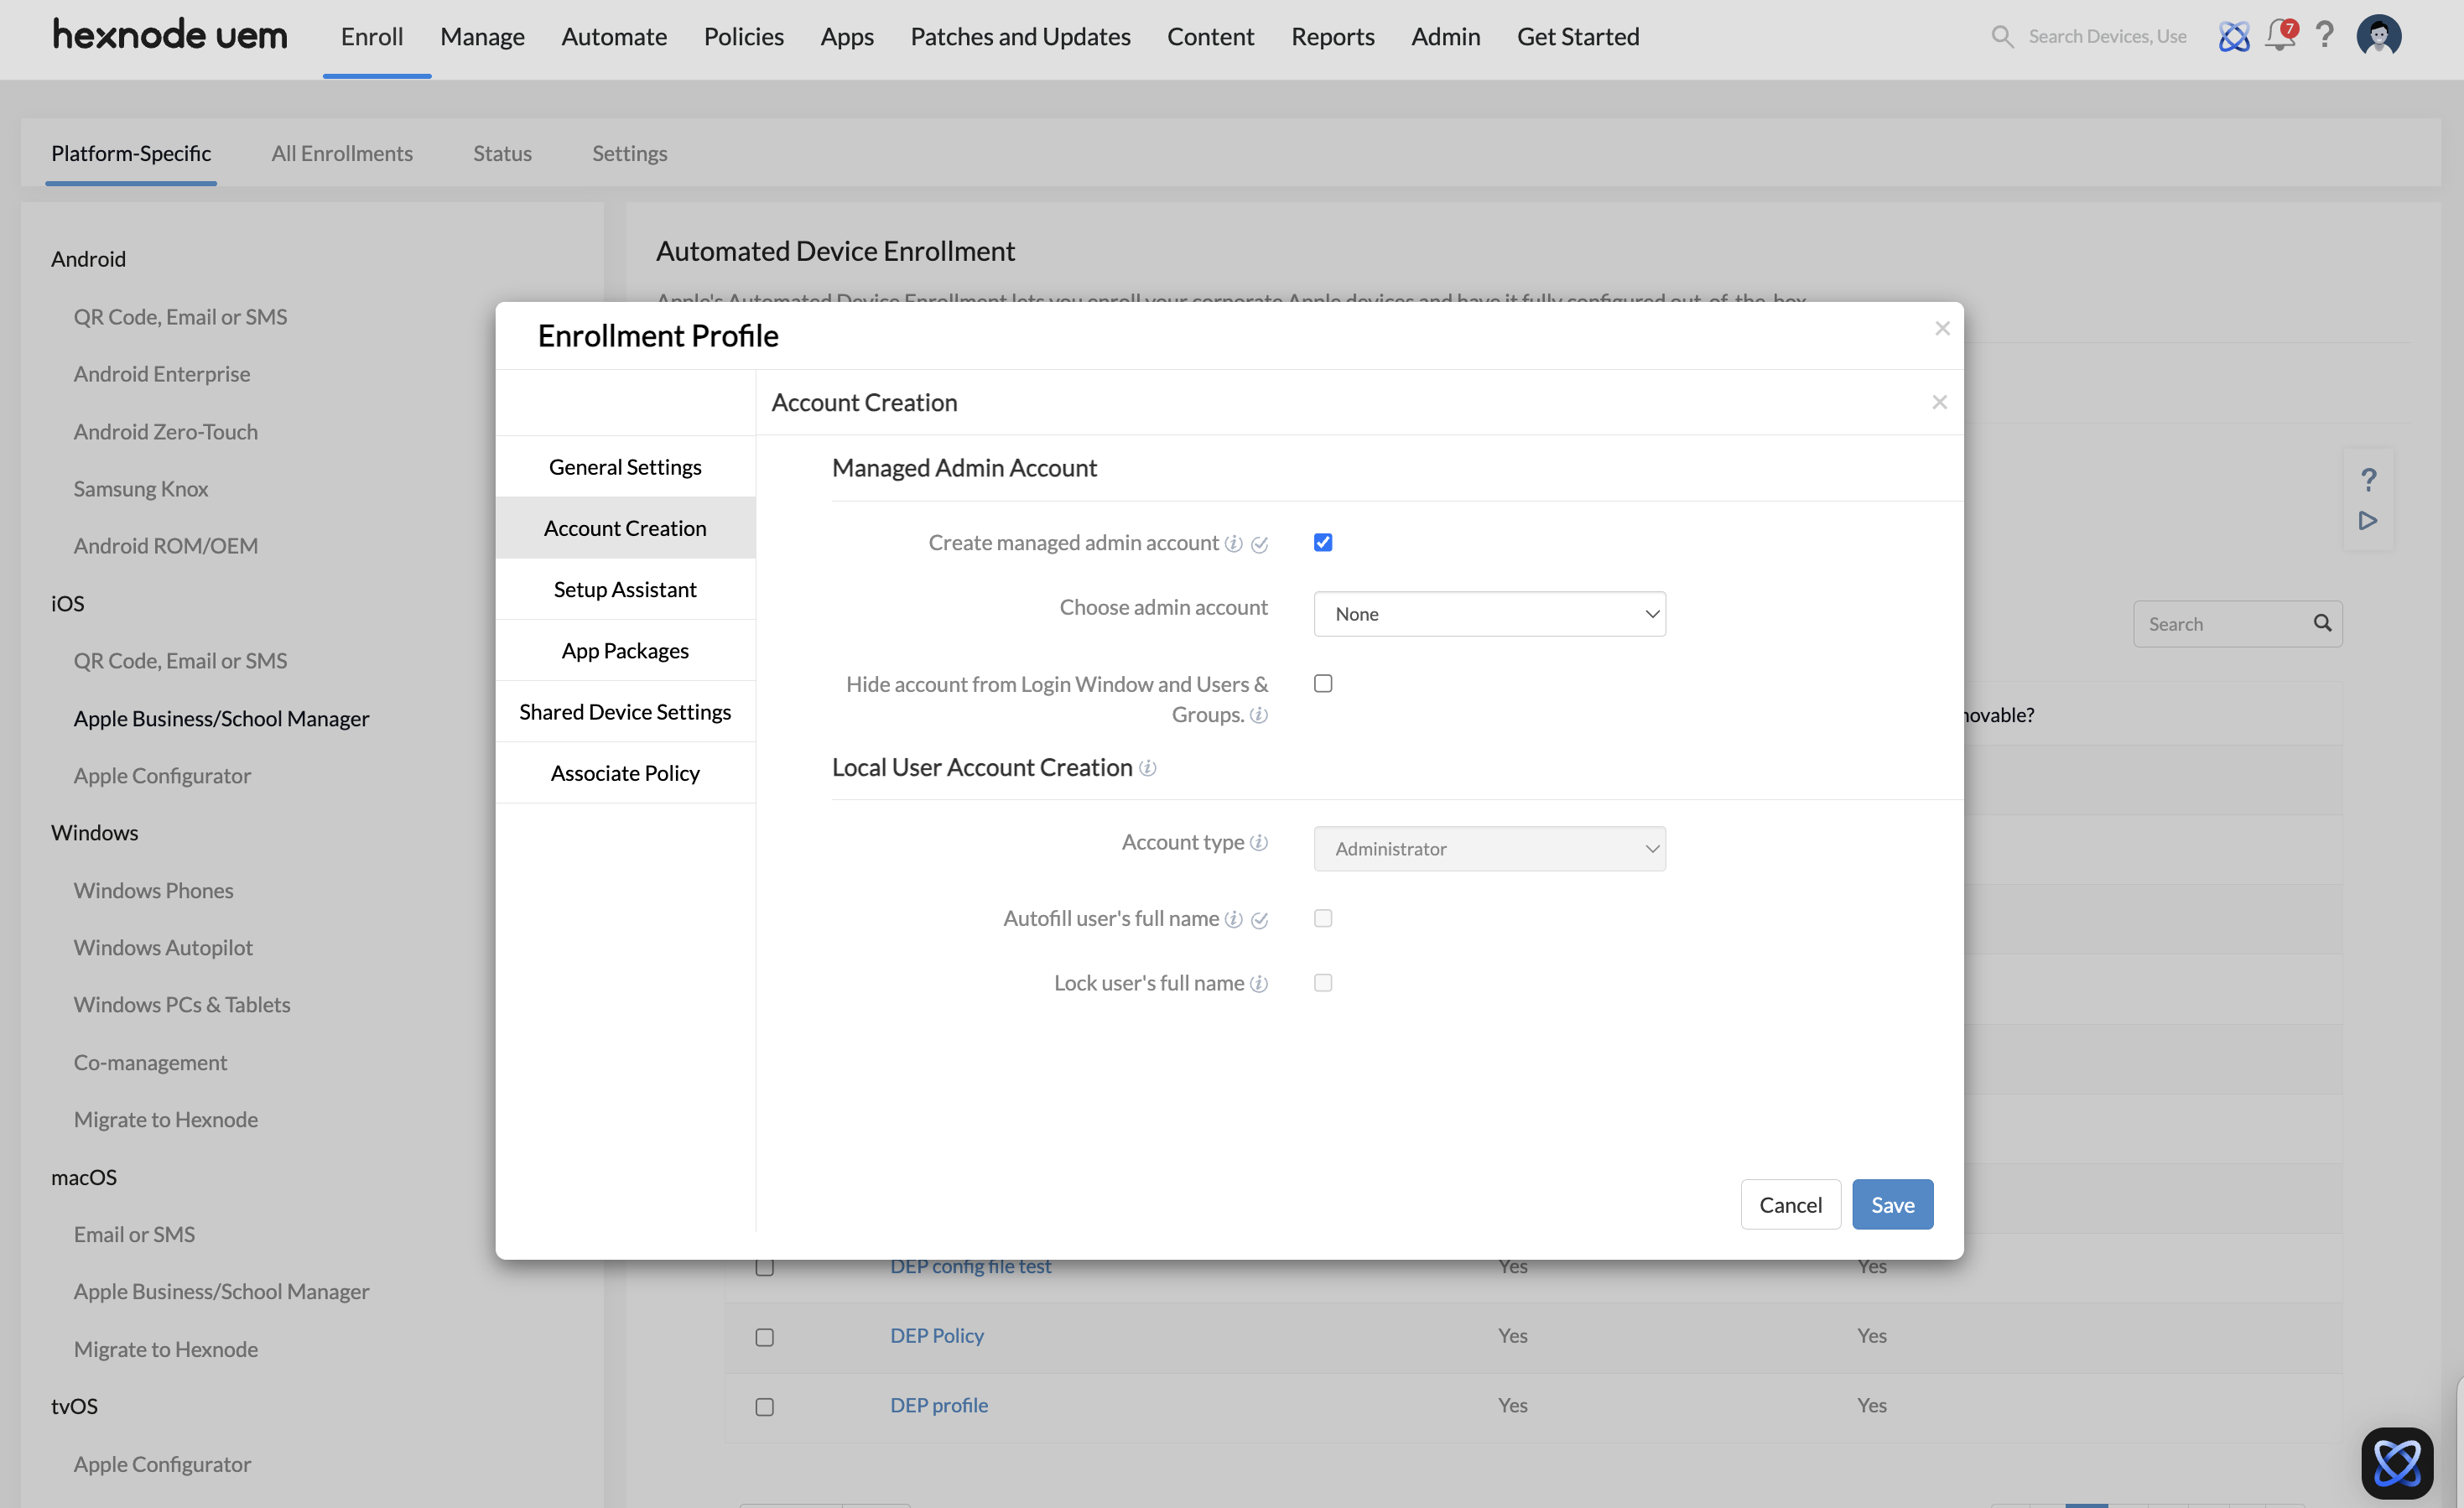
- Go to Account Creation and click on Configure.
- Under Managed Admin Account settings, enable Create managed admin account option.
- Then, under Choose admin account choose an existing admin account or click on +Create new Account to create a new admin account.
- If you have chosen +Create new Account, fill in the fields described below,
- Full name : Enter the full name of the admin account.
- Password : Enter the password for the admin account.
- Account name : Enter the account name for the admin account.
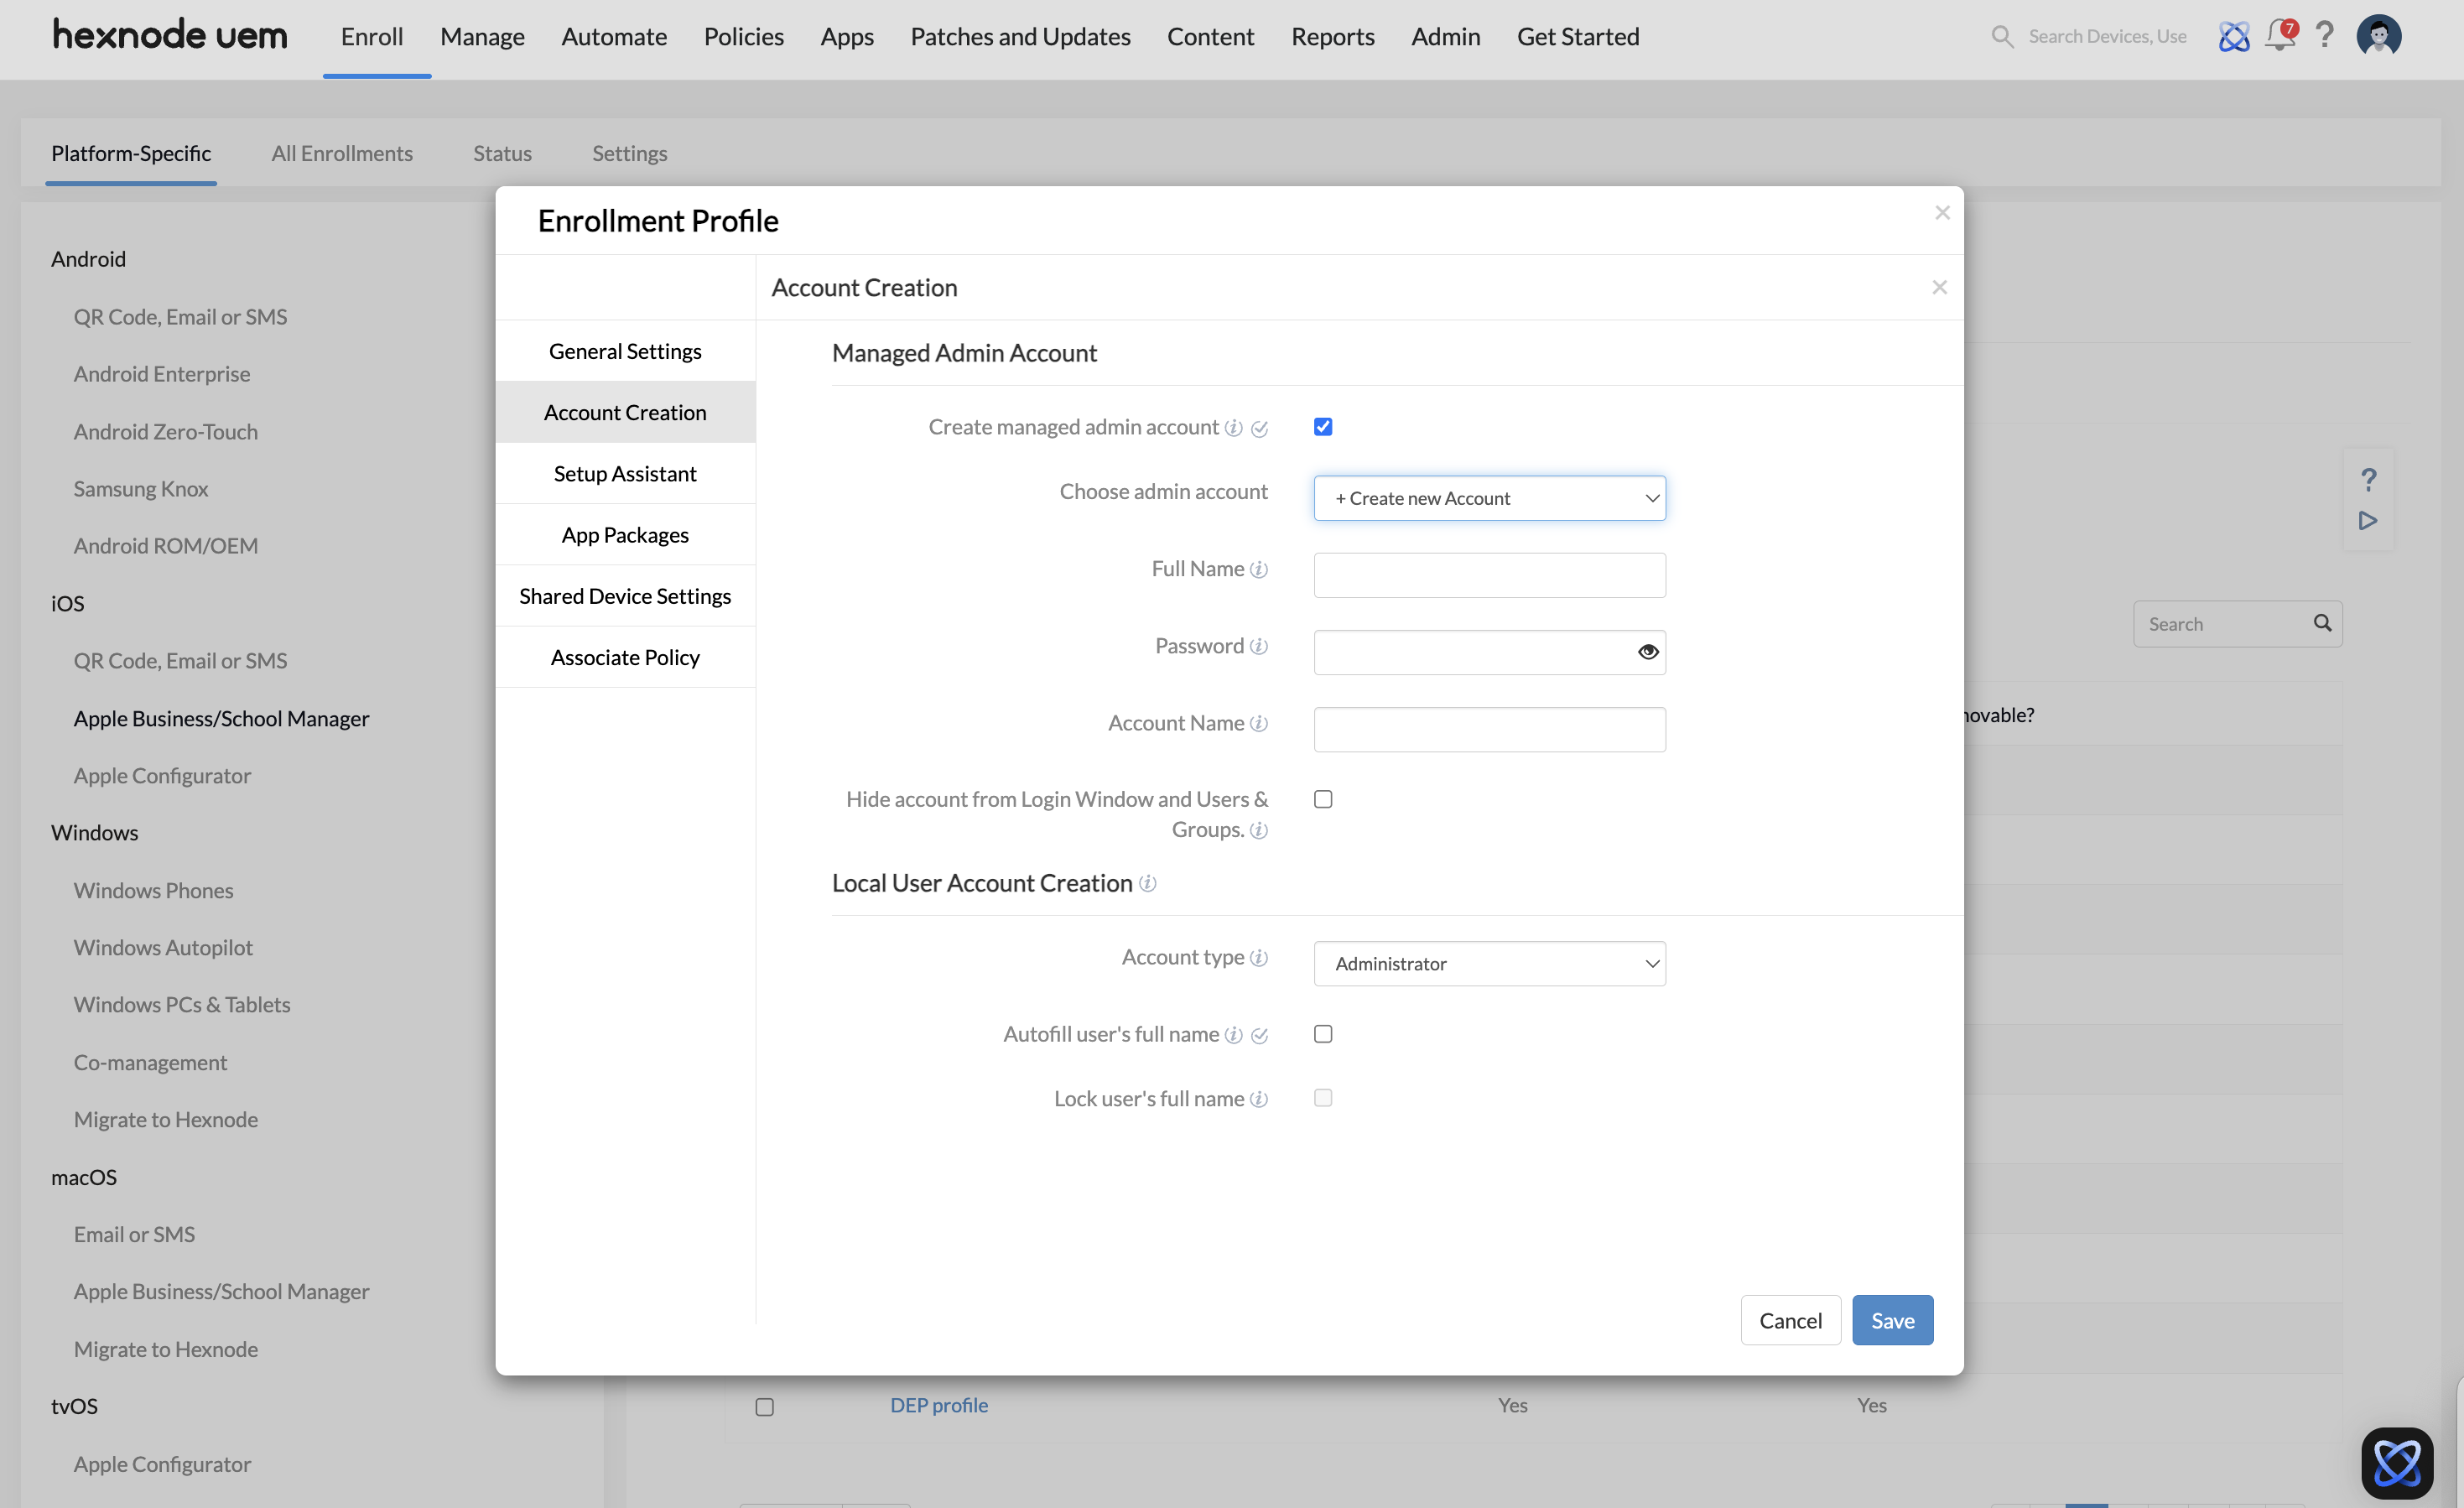
- Enable the option Hide account from Login Window and Users & Groups to hide the account from System Preferences > Users & Groups on the user’s Mac. Enabling this option will also hide the account name and only display the password prompt on the login window.
You can also require users to create a local account during the device setup process by configuring the Local User Account Creation settings. The following options are available to configure how account creation is handled on the device:
- Account Type: Choose the type of account to create. The available options are:
- Administrator : Requires the user to create an administrator account on the device.
- Standard : Requires the user to create a standard (non-administrator) account on the device.
- Skip Account Creation : If this option is selected, the local account creation step will be skipped entirely. The user will not be prompted to create a local user account during setup.
- Autofill user’s full name: If you enable this option, then the Full name and Account name fields will be automatically populated with a default value.
- Lock user’s full name: If this option is enabled, users will be unable to edit the auto-filled Full name and Account name fields.
- Account Type: Choose the type of account to create. The available options are:
- Click on Save to save the policy.
- Associate the Enrollment Profile with the macOS device to add the admin user.
What happens at the device end?
After this policy is associated, your managed devices will automatically have the managed admin account configured on the system. If a standard or administrator account is configured in the enrollment profile, the user will be enforced to set up the account. When the option Lock user’s full name is enabled, then the user will not be able to change the Full name field associated with the account as it will be auto filled with the managed admin account’s credentials. The policy gets applied when the device connects to the internet during the Setup Assistant steps.
The managed admin account will be shown or hidden on the Login window depending on your settings. If the account is hidden from the Login window, you can sign-in to the managed admin account from the Login window by clicking on any user account and pressing the option + return key combination. Then, on the same screen, you can type in the managed admin account name or full name followed by the corresponding password to login to the admin account.
