Category filter
Enforce password policy on ChromeOS devices enrolled in Hexnode
Keeping your organization’s data secure begins with strong password practices. With Hexnode UEM, you can easily configure and enforce password rules on ChromeOS devices. This ensures that all devices within the organization follow the defined security standards, strengthening overall compliance. This guide will walk you through the process of configuring and applying a password policy for ChromeOS devices.
Configuring password policy for ChromeOS
To configure password policy for ChromeOS devices:
- Login to your Hexnode UEM portal.
- Navigate to the Policies tab.
- Click New Policy to create a new one or select an existing policy to edit.
- Enter the Policy name and Description (optional) in the corresponding fields.
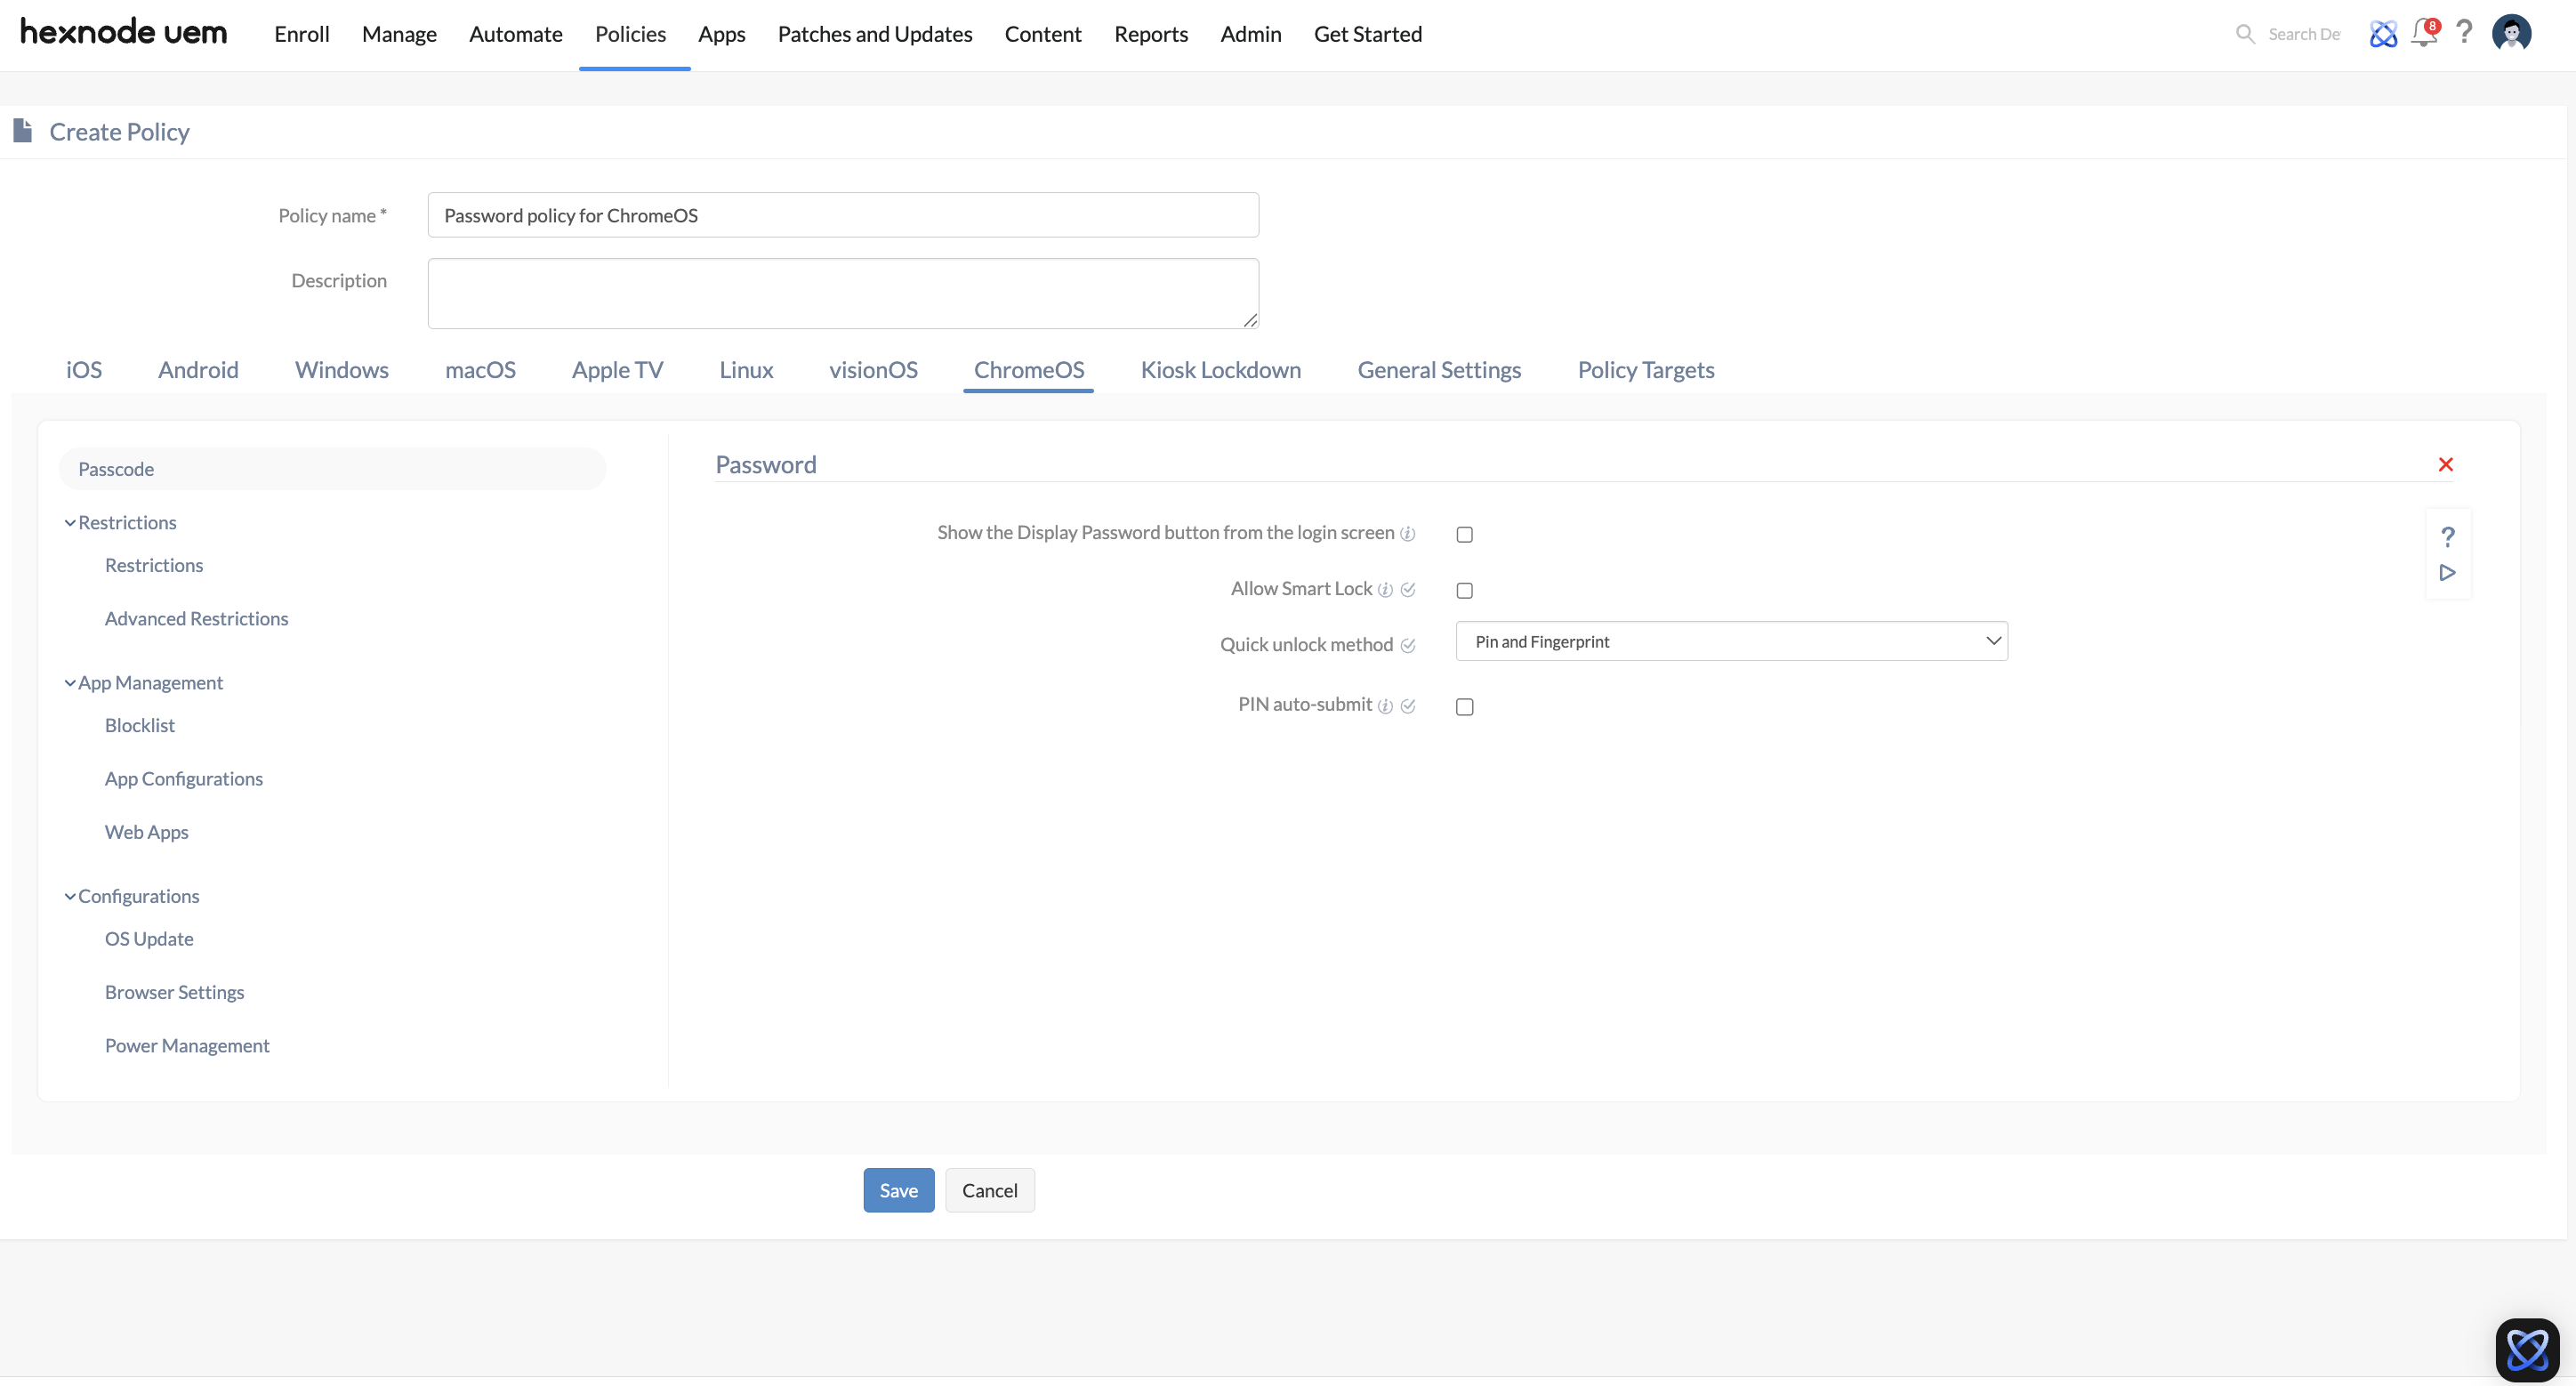
- Go to ChromeOS > Passcode and click Configure.
- Set the required password settings:
- Show the Display Password button from the login screen: Select this option to display an eye icon in the password field on the login screen. Clicking the icon reveals the entered password, helping users confirm they’ve typed it correctly.
- Allow Smart Lock (supported on ChromeOS 38+): When enabled, users can unlock their Chromebook using a nearby Android phone without needing to enter a password or PIN. The Android phone must be a trusted device and connected through the ChromeOS device settings.
- Quick unlock method (supported on ChromeOS 87+): Quick unlock lets users unlock their ChromeOS device faster using a PIN or fingerprint after they’ve signed in with their password. It doesn’t replace the main login method but makes it easier to unlock the device during an active session. The available options are:
- None: If set to None or left unset, only the main password can be used to unlock the device.
- Pin only: Allows users to unlock the device with a PIN after the initial sign-in.
- Fingerprint only: Allows users to unlock the device with fingerprint after the initial sign-in.
- PIN and Fingerprint: Enables both PIN and fingerprint as quick unlock options after the user has signed in.
- PIN auto-submit (supported on ChromeOS 86+): When this feature is enabled, the device automatically unlocks as soon as you enter the last digit of your PIN or authenticate with your fingerprint. There is no need to press the Enter button. It supports PINs between 6 and 12 digits and is available only when the Quick unlock method is set to either PIN only or PIN and Fingerprint.
Associating password policy with devices
Policies cannot be associated with ChromeOS devices directly; they can only be associated via Organizational Units (OUs).
You have two ways to apply the policy:
- Parent OU assignment: Applying a policy to a parent OU instantly enforces it on every device within that OU and all of its nested child OUs. This is ideal when you want every enrolled ChromeOS device to adhere to the same password settings.
- Child OU assignment: Assigning a policy directly to specific child OUs lets you target specific teams, departments, or functional groups without impacting unwanted devices.
Or
- If the policy is not yet saved:
- Navigate to Policy Targets > Domains/OUs.
- Click on +Add Domain/OUs.
- From the list, select the Google Workspace account integrated with your Hexnode UEM portal, which can be identified by the “(Google)” tag.
- Click the dropdown next to the parent OU (briefcase icon) to expand and view its child OUs.
- Select the required child OUs, or the parent OU itself depending on your requirement, and click OK.
- Then click Save.
- If the policy is already saved:
- Navigate to the Policies tab and select the desired policy.
- Click Manage > Associate Targets > Domain/OUs.
- From the list, select the Google Workspace account integrated with your Hexnode UEM portal, which can be identified by the “(Google)” tag.
- Click the dropdown next to the parent OU (briefcase icon) to expand and view its child OUs.
- Select the required child OUs, or the parent OU itself depending on your requirement, and click Associate.
What happens at the device end?
Once the policy is associated and saved, it will take effect on the device following a restart or user account sign-out.
