Category filter
Apple’s Automated Device Enrollment
Apple’s ADE, formerly known as the Device Enrollment Program (DEP), facilitates zero-touch deployment, allowing organizations to automate the enrollment of Apple devices into an MDM. ADE works with Apple Business Manager (ABM) or Apple School Manager (ASM), enabling IT admins assign devices to an MDM server and ensure that the pre-defined configurations are automatically applied when the devices are activated.
The following documentation shall explain how to use ADE with Hexnode.
Automated Device Enrollment Settings
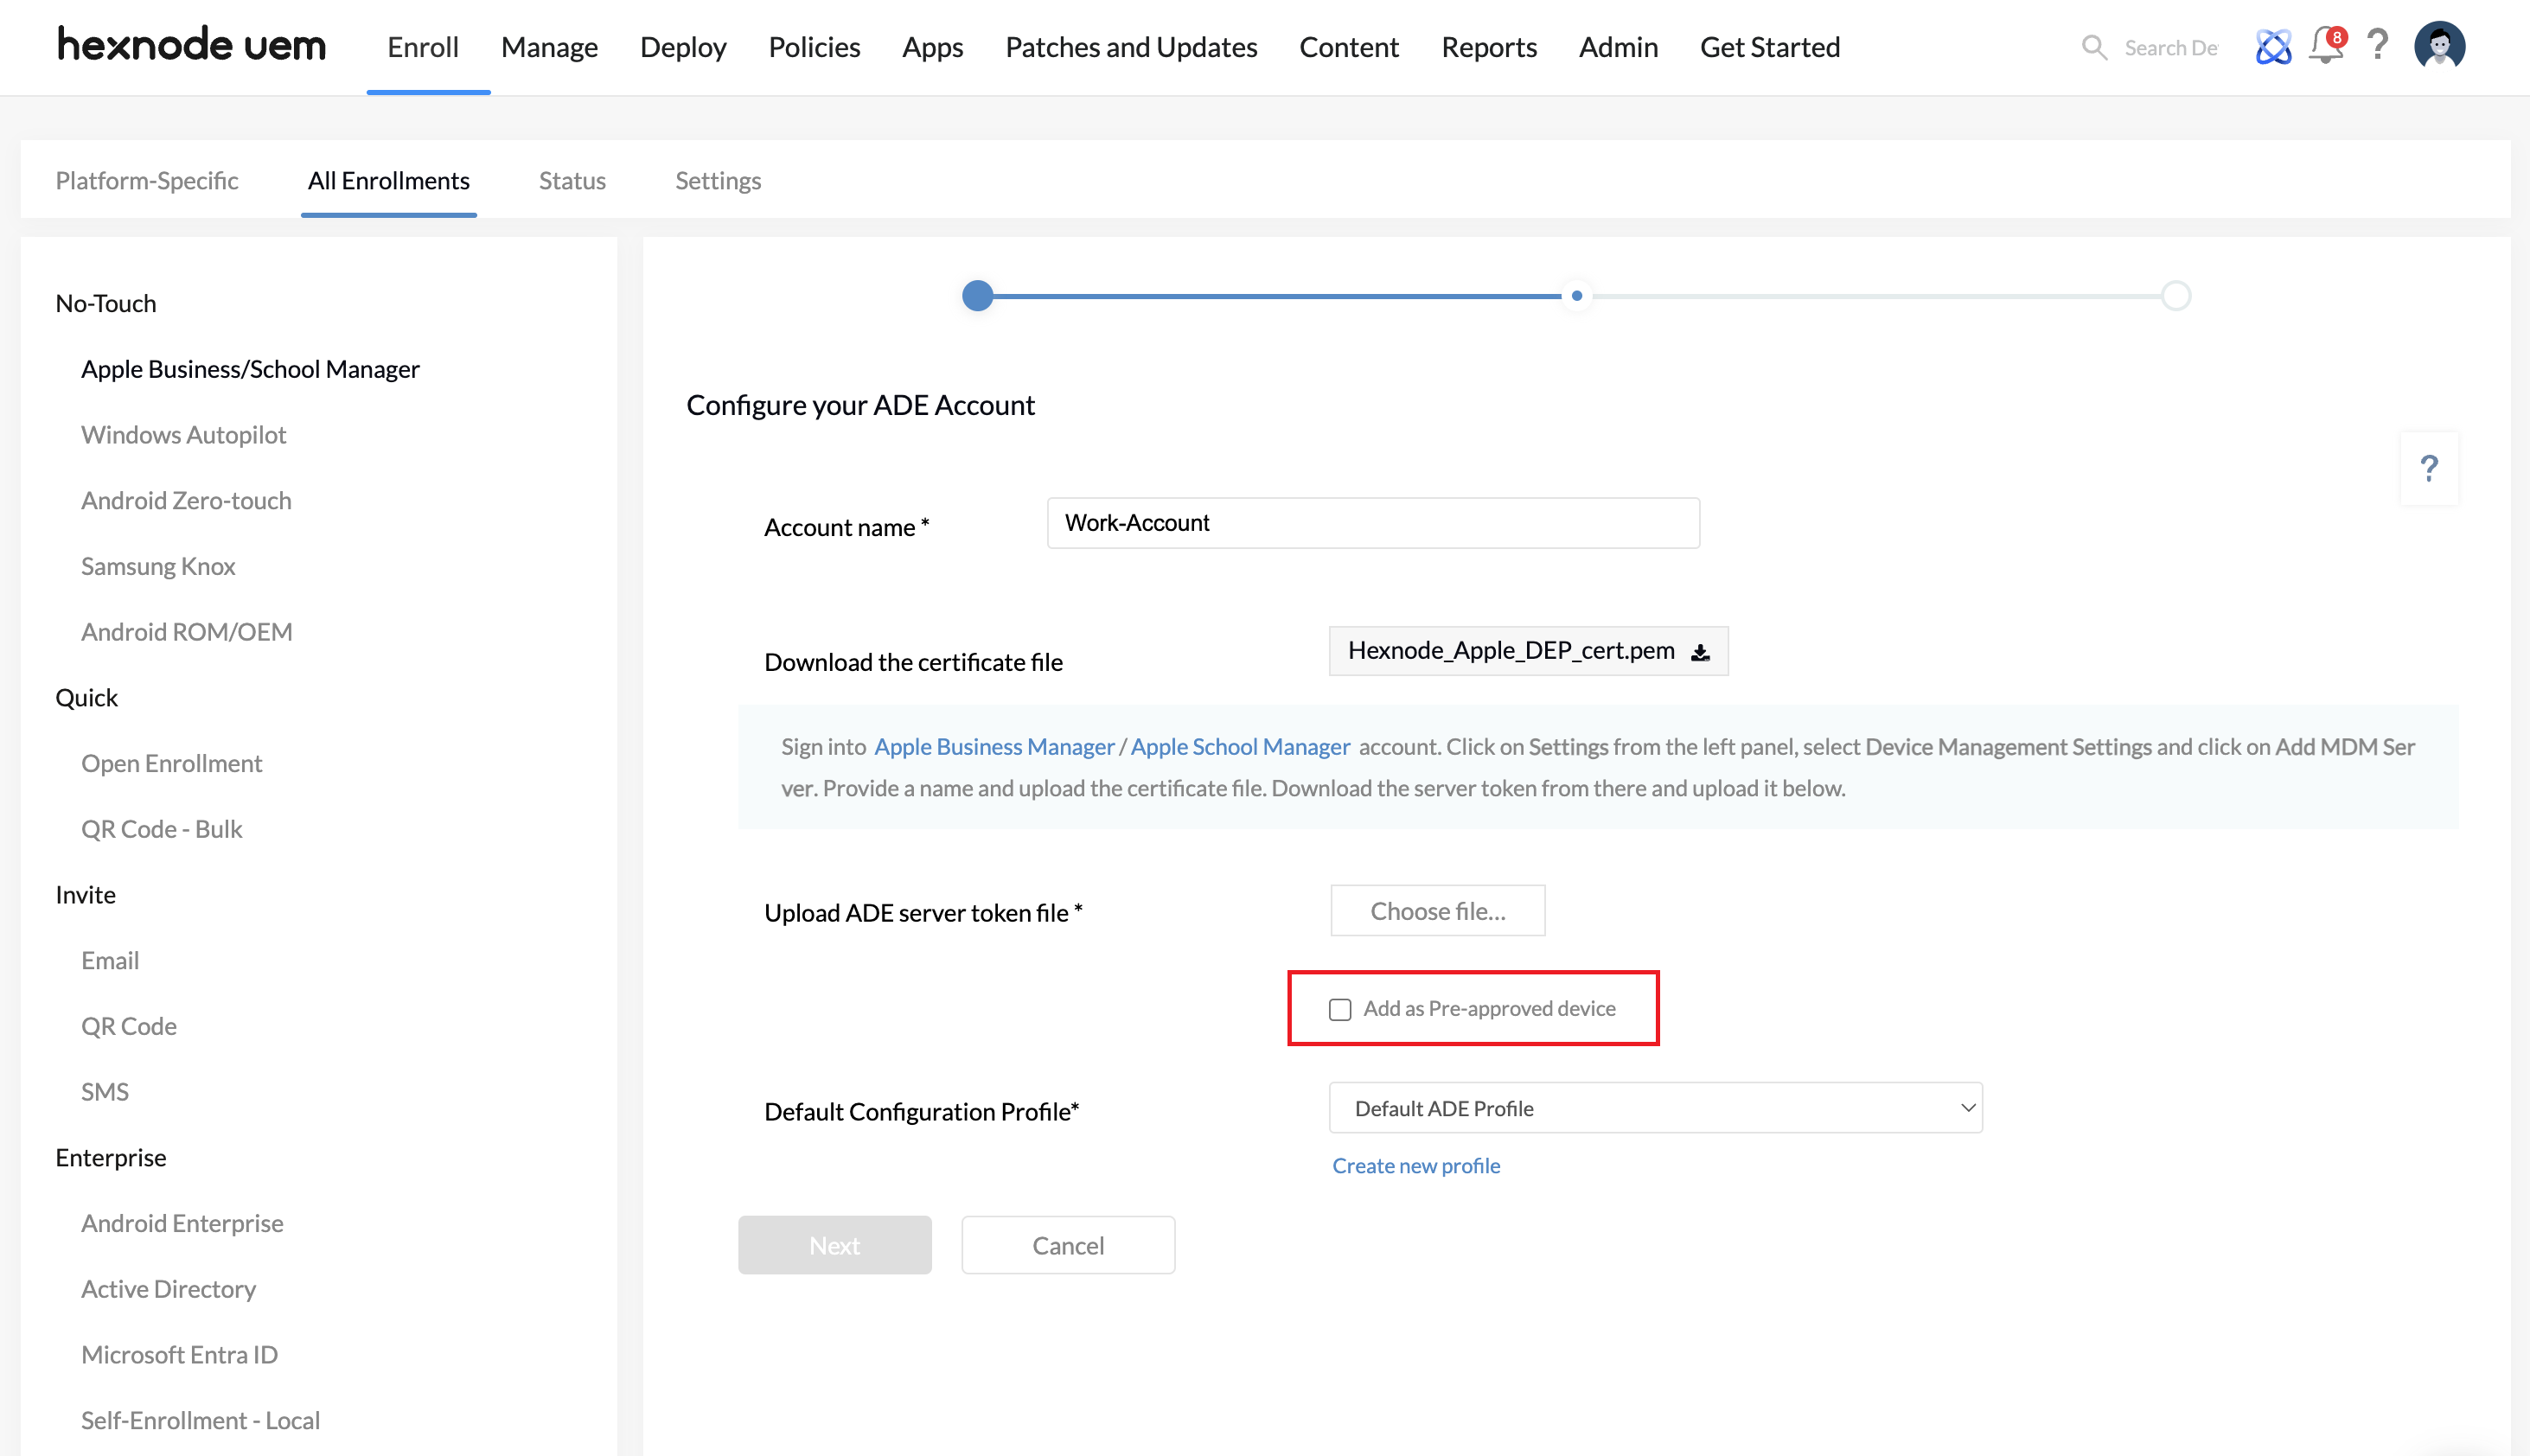
Following are the steps to integrate Hexnode with Apple Business Manager for device enrollment.
- Go to Enroll > All Enrollments > No-Touch > Apple Business / School Manager.
- Create an ADE Account and download the certificate file.
- Upload this certificate to the Apple Business Manager portal to generate an ADE server token, which must then be uploaded to the Hexnode portal to complete the integration.
- Choose a Default Configuration Profile.
Pre-approve ADE devices
To add ADE devices as Pre-approved devices, check the option Add as Pre-approved Device under ADE Settings.
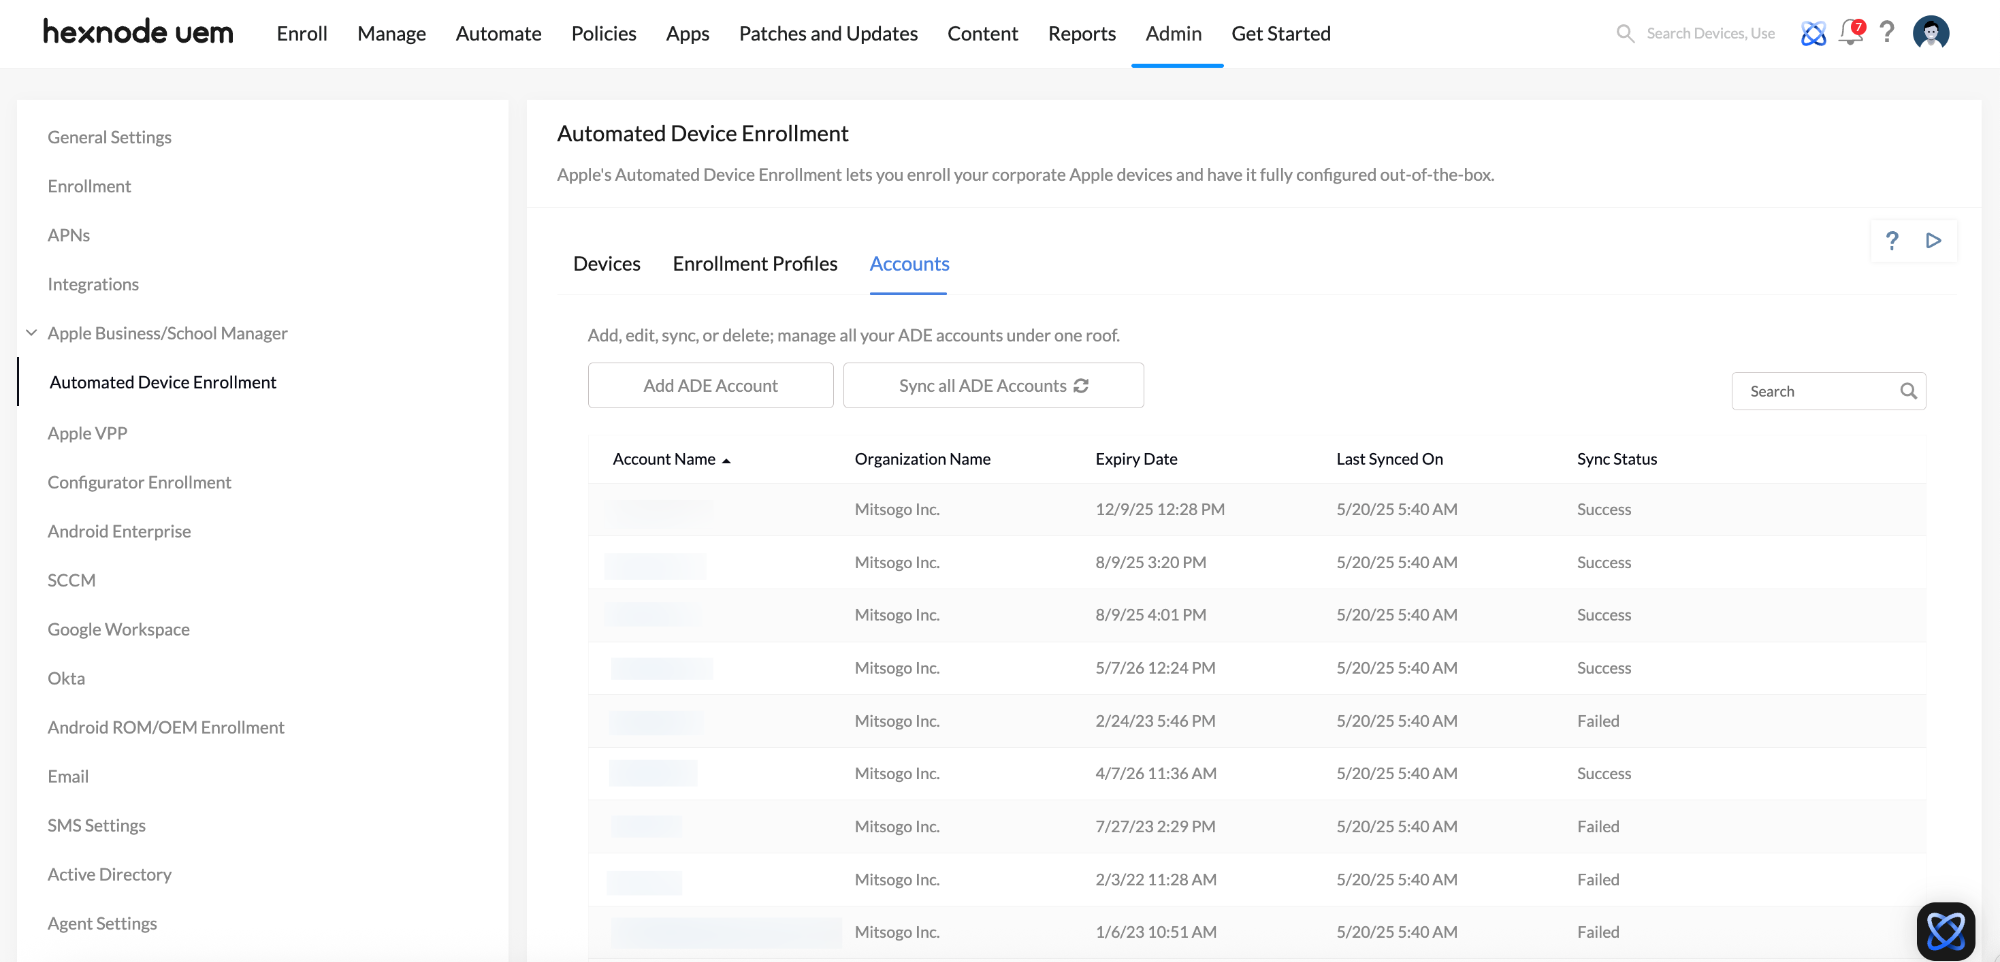
ADE Accounts
ADE accounts in Hexnode facilitate integration between the Hexnode and ABM/ASM portals. By configuring ADE accounts, you can prepare Apple devices added to ADE for enrollment into the MDM and assign enrollment profiles that are applied when the devices are activated. Under Admin > Apple Business/School Manager > Automated Device Enrollment > Accounts, you can easily add, edit, and manage all your ADE accounts in one place. Here, you can also find details for each ADE account, including the account name, organization name, expiration date, sync status, and the last time it was synced.
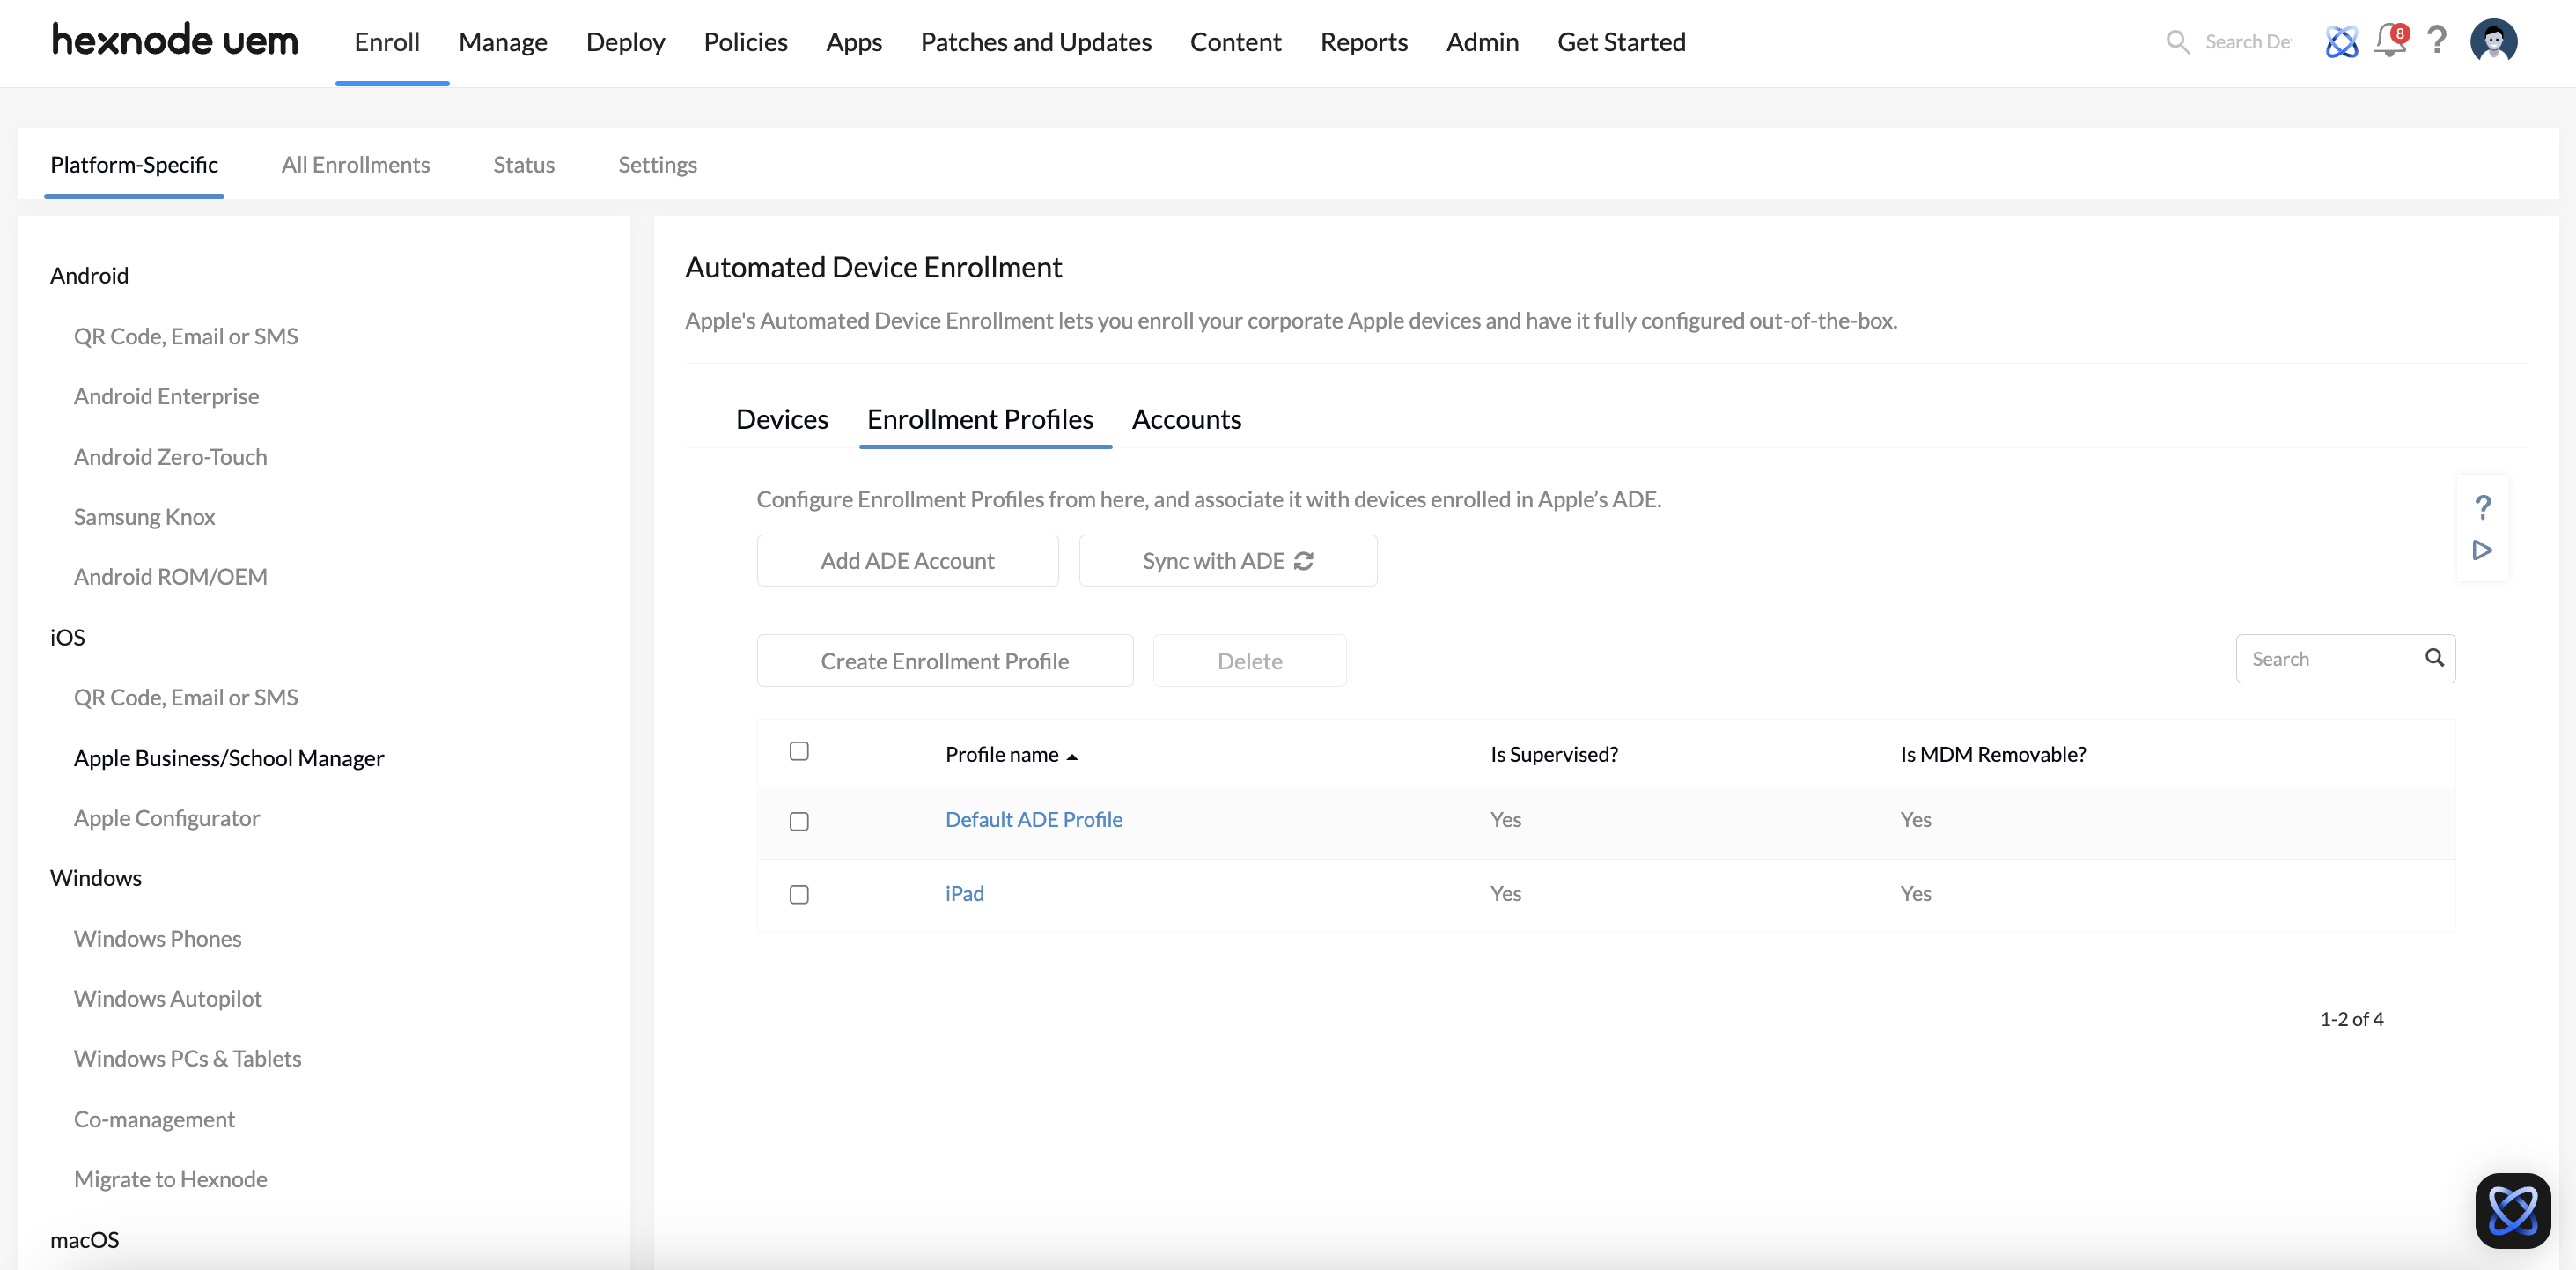
Enrollment Profile
Enrollment Profiles can dictate how the device will behave when it’s turned on for the first time or after being reset, as part of ADE. These profiles allow organizations to automate and customize the out-of-box experience.
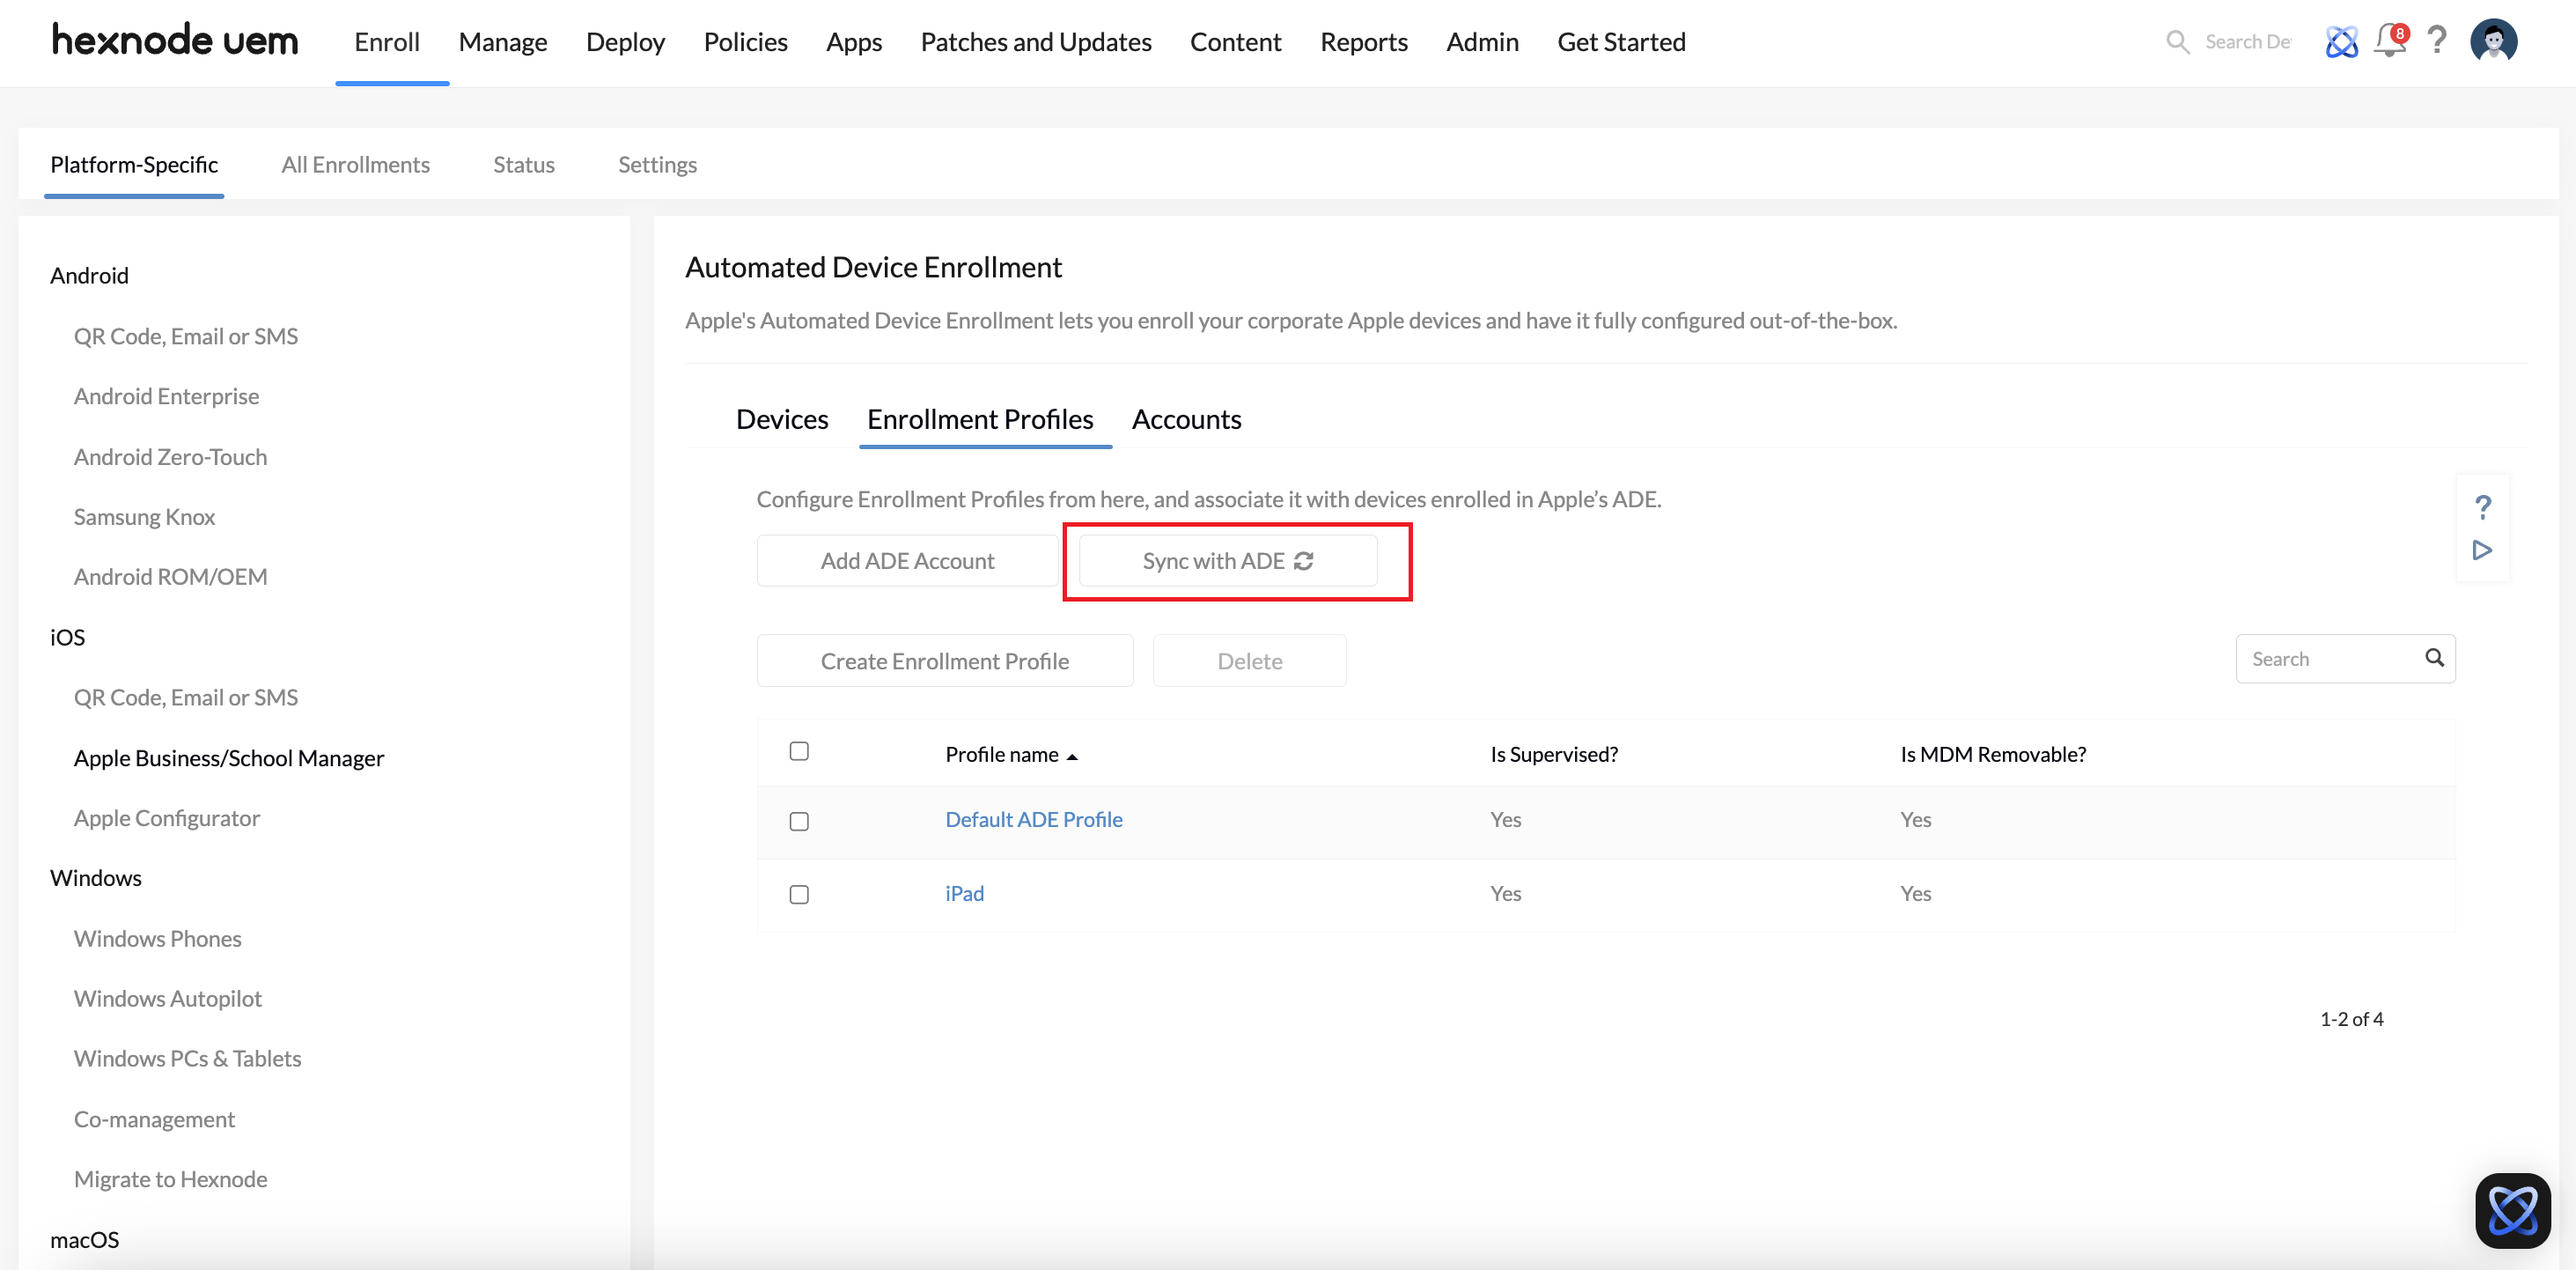
With Hexnode UEM, you can configure Enrollment Profiles and associate it with devices added to Apple’s ADE. By navigating to Enroll > Platform-Specific > iOS/macOS/tvOS/visionOS > Apple Business/School Manager > Enrollment Profiles, you can view, edit or create new enrollment profiles.
The options to configure include but are not limited to,
- Preventing users from unenrolling the device from MDM
- Skipping specific Setup Assistant panes
- Enforcing FileVault encryption on macOS devices
- Automatically advance through Setup Assistant
- Configuring Shared Device settings for iPadOS devices
- Adding application packages
- Setting default Language and Region
Apple ADE Devices
Under Enroll > All Enrollments > No-Touch > Apple Business/School Manager > Devices, you can view the list of enrolled devices with ADE. The list will include information such as the serial number, model along with the enrollment profiles applied to the device, if any.
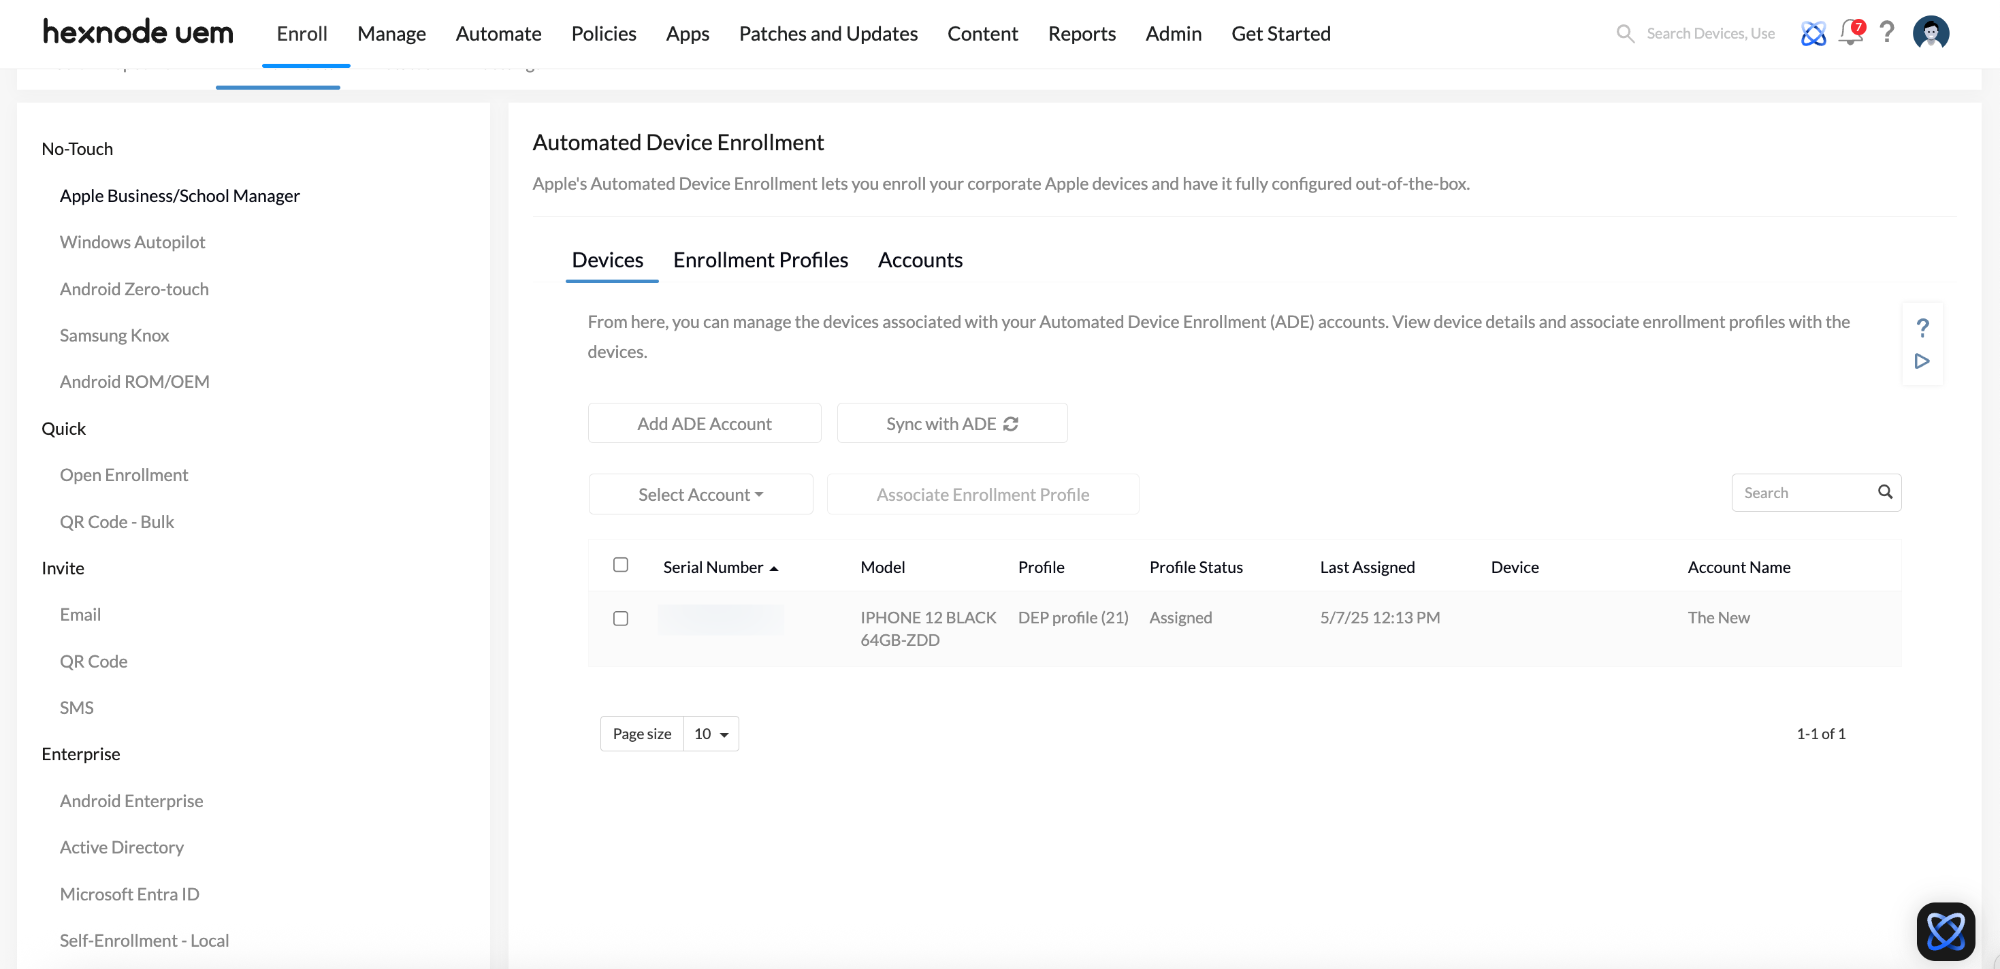
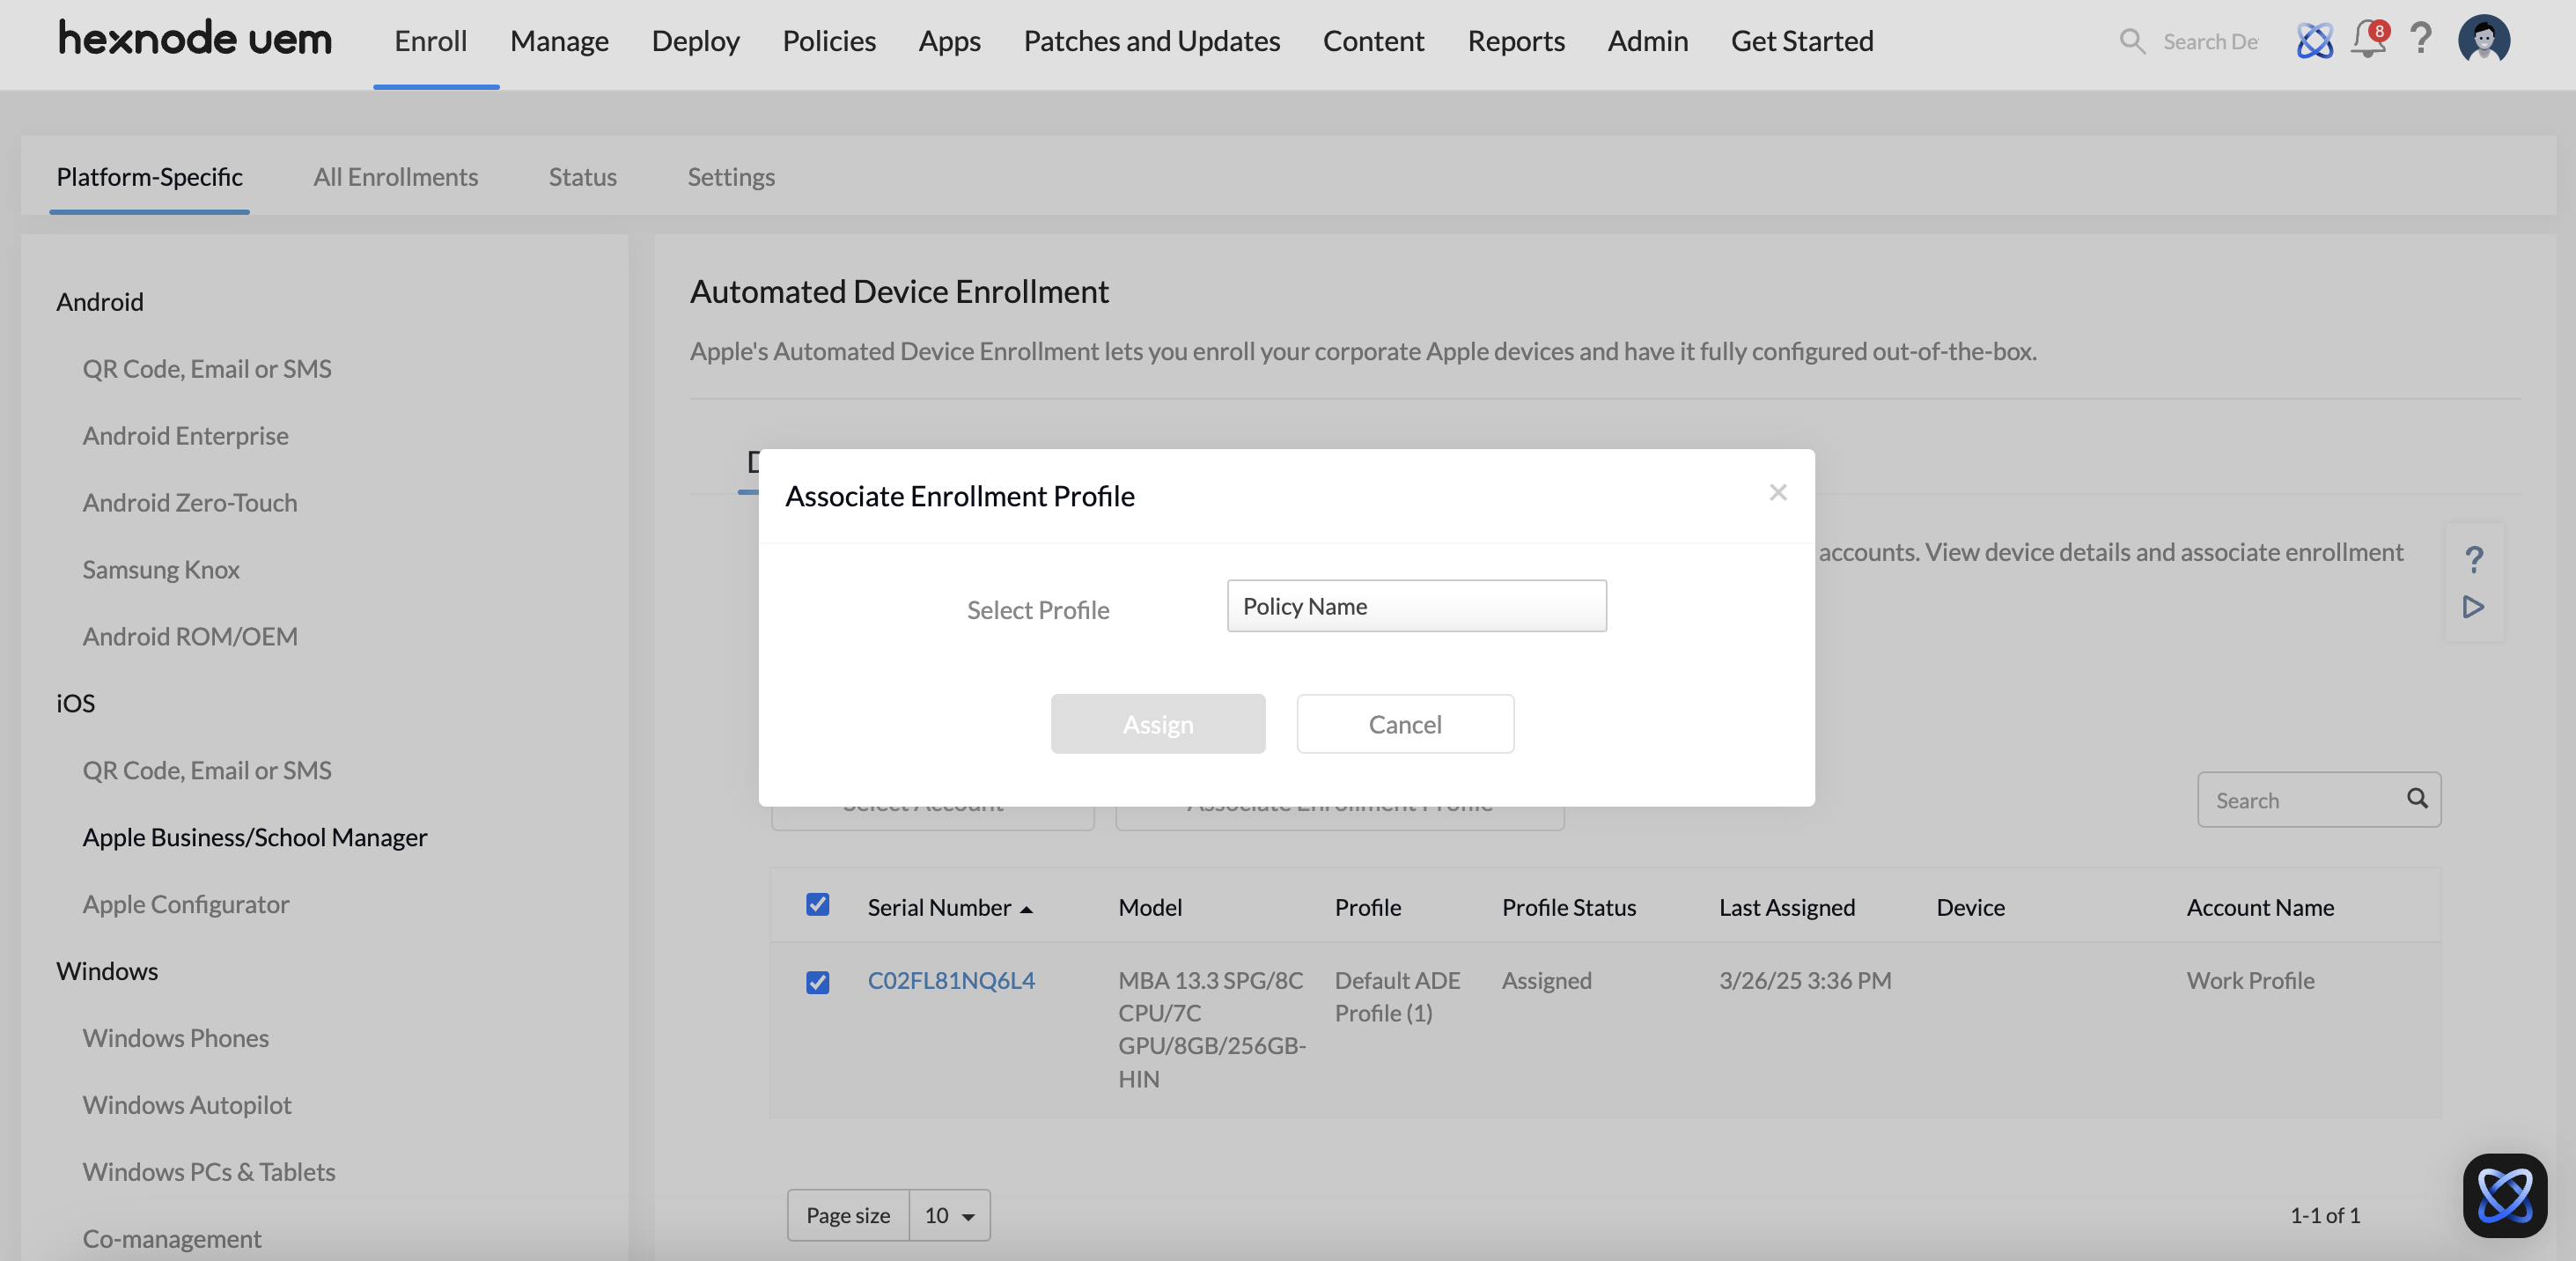
Associate profiles with devices
- Select the device.
- Click on the Associate Enrollment Profile button at the top. The following window pops up.
- Search for the profile you want to associate to the device and then click on Assign.
Sync with Apple Device Enrollment Program
To import the newly enrolled devices in the configured Apple ADE account to the Hexnode portal you can initiate an ADE sync.
Go to Enroll > All Enrollments > No-Touch > Apple Business/School Manager > ADE Devices > Sync with ADE.
Setting up the device
If you have a non-activated device, start setting it up and get it connected to the internet. If you have an already activated device, reset the device to its factory settings and then activate it. Once it is connected to the internet, the user will be prompted to enable remote management for the device. This will enable MDM administration on the device. The configurations set through the enrollment profiles will then be deployed to the device and applied automatically during setup. Note that the user can bypass this process if “Enroll Devices in MDM” is not enabled on the ADE Enrollment Profile.
