Category filter
Configuring Custom Technician Roles
Technicians are individuals who manage the Hexnode UEM console. A technician’s role determines their access control across various functionalities in the console. Hexnode UEM offers several predefined roles that can be assigned to the technicians based on their responsibilities. By default, there are four built-in technician roles on the Hexnode portal:
Super Admin: Super Admin is the first technician to sign-up for the Hexnode UEM portal. Super Admin is an all-time active technician and has complete control over the console.
Admin: Admins have full privileges and can access all the functionalities in the portal.
Apps and Reports Manager: Apps and Reports Manager has permissions only across the following features: Apps and Reports.
Reports Manager: A Reports Manager has permissions only for Reports and the Hexnode UEM Dashboard.
Custom Roles
The custom roles let you manage a technician’s accessibility over the Hexnode UEM portal. It defines the technician privileges at the granular level.
Configuring custom roles involves a step-by-step procedure. First, determine the permissions that should be available. The permissions specify various functionalities that they can view or modify. Next, create as many roles as required based on the needs and assign each technician a role. Further specifying the scope provides a proper authorization setting that ensures they have just the necessary permissions. With changes in requirements, you can also modify the privileges of a custom role.
Scope
The scope identifies the target endpoints – devices, device groups, users, user groups, or domains that the technicians can manage. The technician is permitted only to the defined scope while setting up configurations, associating policies, executing actions, or retrieving the reports. You can specify the scope of a technician while assigning a role. However, the scope can be redefined later.
Add Custom Role
To create new roles on the Hexnode console,
- Log in to the Hexnode portal.
- Navigate to Admin > Technicians and Roles.
- Click on Add Role.
- Provide a Name and Description.
- Next, specify the permissions.
Allow or disallow access to various features
- Dashboard
- Enroll
- Manage
- Remote Access
- Remote View
- Remote Control
- Live Terminal
- File Explorer
- Remote View
- Remote Access
- Policies
- Apps
- Content
- Reports
- Admin
- Actions
The Add option allows/disallows technicians to add apps to the Apps tab.
The Add option allows/disallows technicians to add content to the Content tab. When this option is disallowed, technicians can only use the files already available in the content repository while configuring policies and remote actions.
The Add option allows/disallows technicians to schedule reports to the Reports tab.
- Click Save.
Firstly, you can determine if the role should have complete access to all the remote actions by enabling/disabling the Actions option. In addition, you may also individually specify each action that should be permitted. Depending on a technician’s responsibility, any or all actions can be permitted, and the technician can execute them across its scope.
You can also permit technicians to create or edit dynamic groups. However, a technician can create/edit a dynamic group only if their scope includes all the devices. Hence, we suggest creating a dynamic group, including all the devices, and adding it to the technician’s scope.
Assign Role
To assign a role while creating a new technician,
- Log in to the Hexnode console.
- Navigate to Admin > Technicians and Roles.
- Click on Add Technician.
- Under the Details section, you can configure the following information and settings:
- Account Information
- Single Sign On
- CAPTCHA
- Two Factor Authentication
- Logout Automatically
- Click Next.
- The role-based settings for the given technician can be configured in the Role sub-section.
- Click on the Assign Role button.
- Choose the role and click Assign. You may select either the predefined roles or custom roles.
- For the custom roles, once the assigned role is listed, click the Define Scope button on its right.
- Finally, choose the scope for the given technician.
- Click Save.
Restricted features for a Custom Technician Role
Despite its privileges over the pre-determined functionalities, custom roles cannot perform any actions that might impact critical modules. It ensures that the permissions granted do not hinder the workflow of device management operations on the Hexnode UEM console.
For instance, custom roles cannot remove the Android Enterprise configurations integrated with the portal. Even if they have access to the Admin tab or Enroll tab, the Android Enterprise configurations that come within, like the Disenroll Organization action, remain restricted. It is because permitting the Disenroll Organization action enables them to disenroll the Android Enterprise from the portal, ultimately removing the devices enrolled in the program. Such important privileges are limited to predefined roles.
The custom roles are restricted from accessing the following functionalities in these tabs:
- Enroll tab
- Authenticated Enrollment: They cannot set up authenticated enrollment if their scope does not include any users or user groups.
- Android Enterprise: They are restricted from initiating the following actions under the Android Enterprise configurations: Sync Services and Disenroll Organization.
- Manage tab
- Dynamic Groups: Custom roles can create new dynamic groups only if their scope includes all the devices.
- Apps tab
- Actions that modify or remove the app, app groups, app catalogs or store layouts cannot be performed.
- Admin tab
- APNS: Custom roles are restricted from deleting the APNS certificate configured on the portal.
- Android Enterprise: They are restricted from initiating the following actions under the Android Enterprise configurations: Sync Services and Disenroll Organization.
- Google Workspace: Modification or editing of Google Workspace configurations are not permitted.
- Technicians and Roles: Custom roles cannot create, edit, or delete technicians and roles.
- API: Permission to the API functionality is entirely disabled.
- License: Though the custom roles may view the License page, they cannot edit it.
Change the assigned Role or Scope
While editing the technician info, you can also change its role or redefine its scope.
- Log in to the Hexnode console.
- Navigate to Admin > Technicians and Roles.
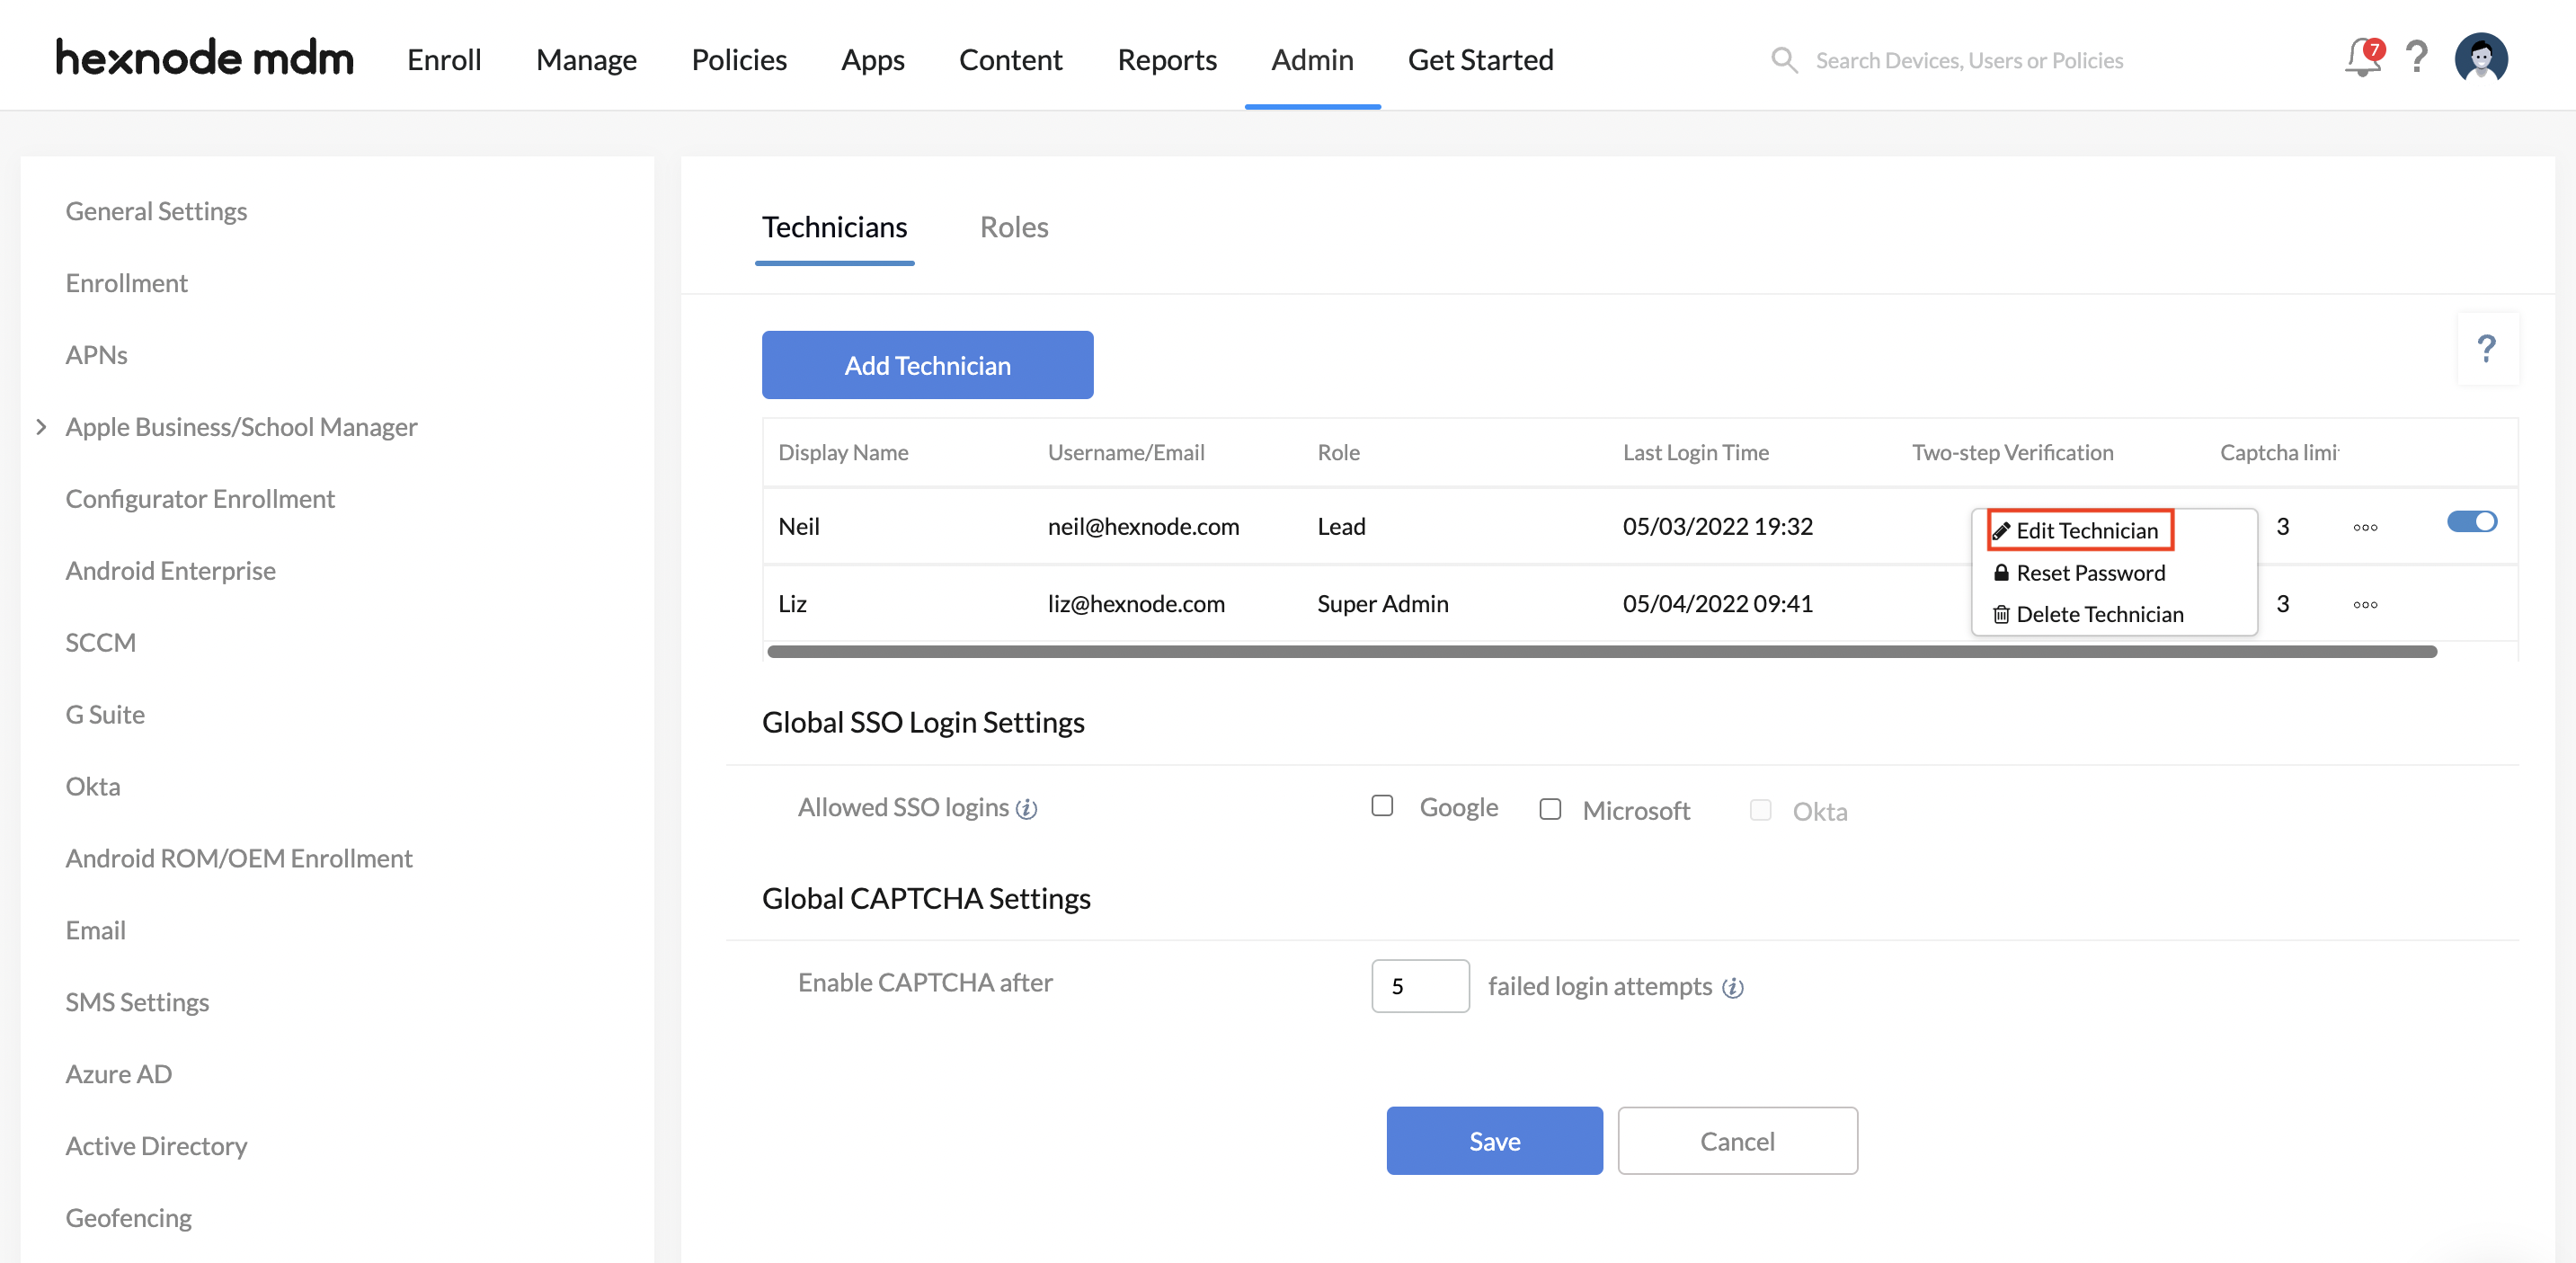
- Click on the More icon corresponding to the technician you want to edit.
- Choose Edit Technician.
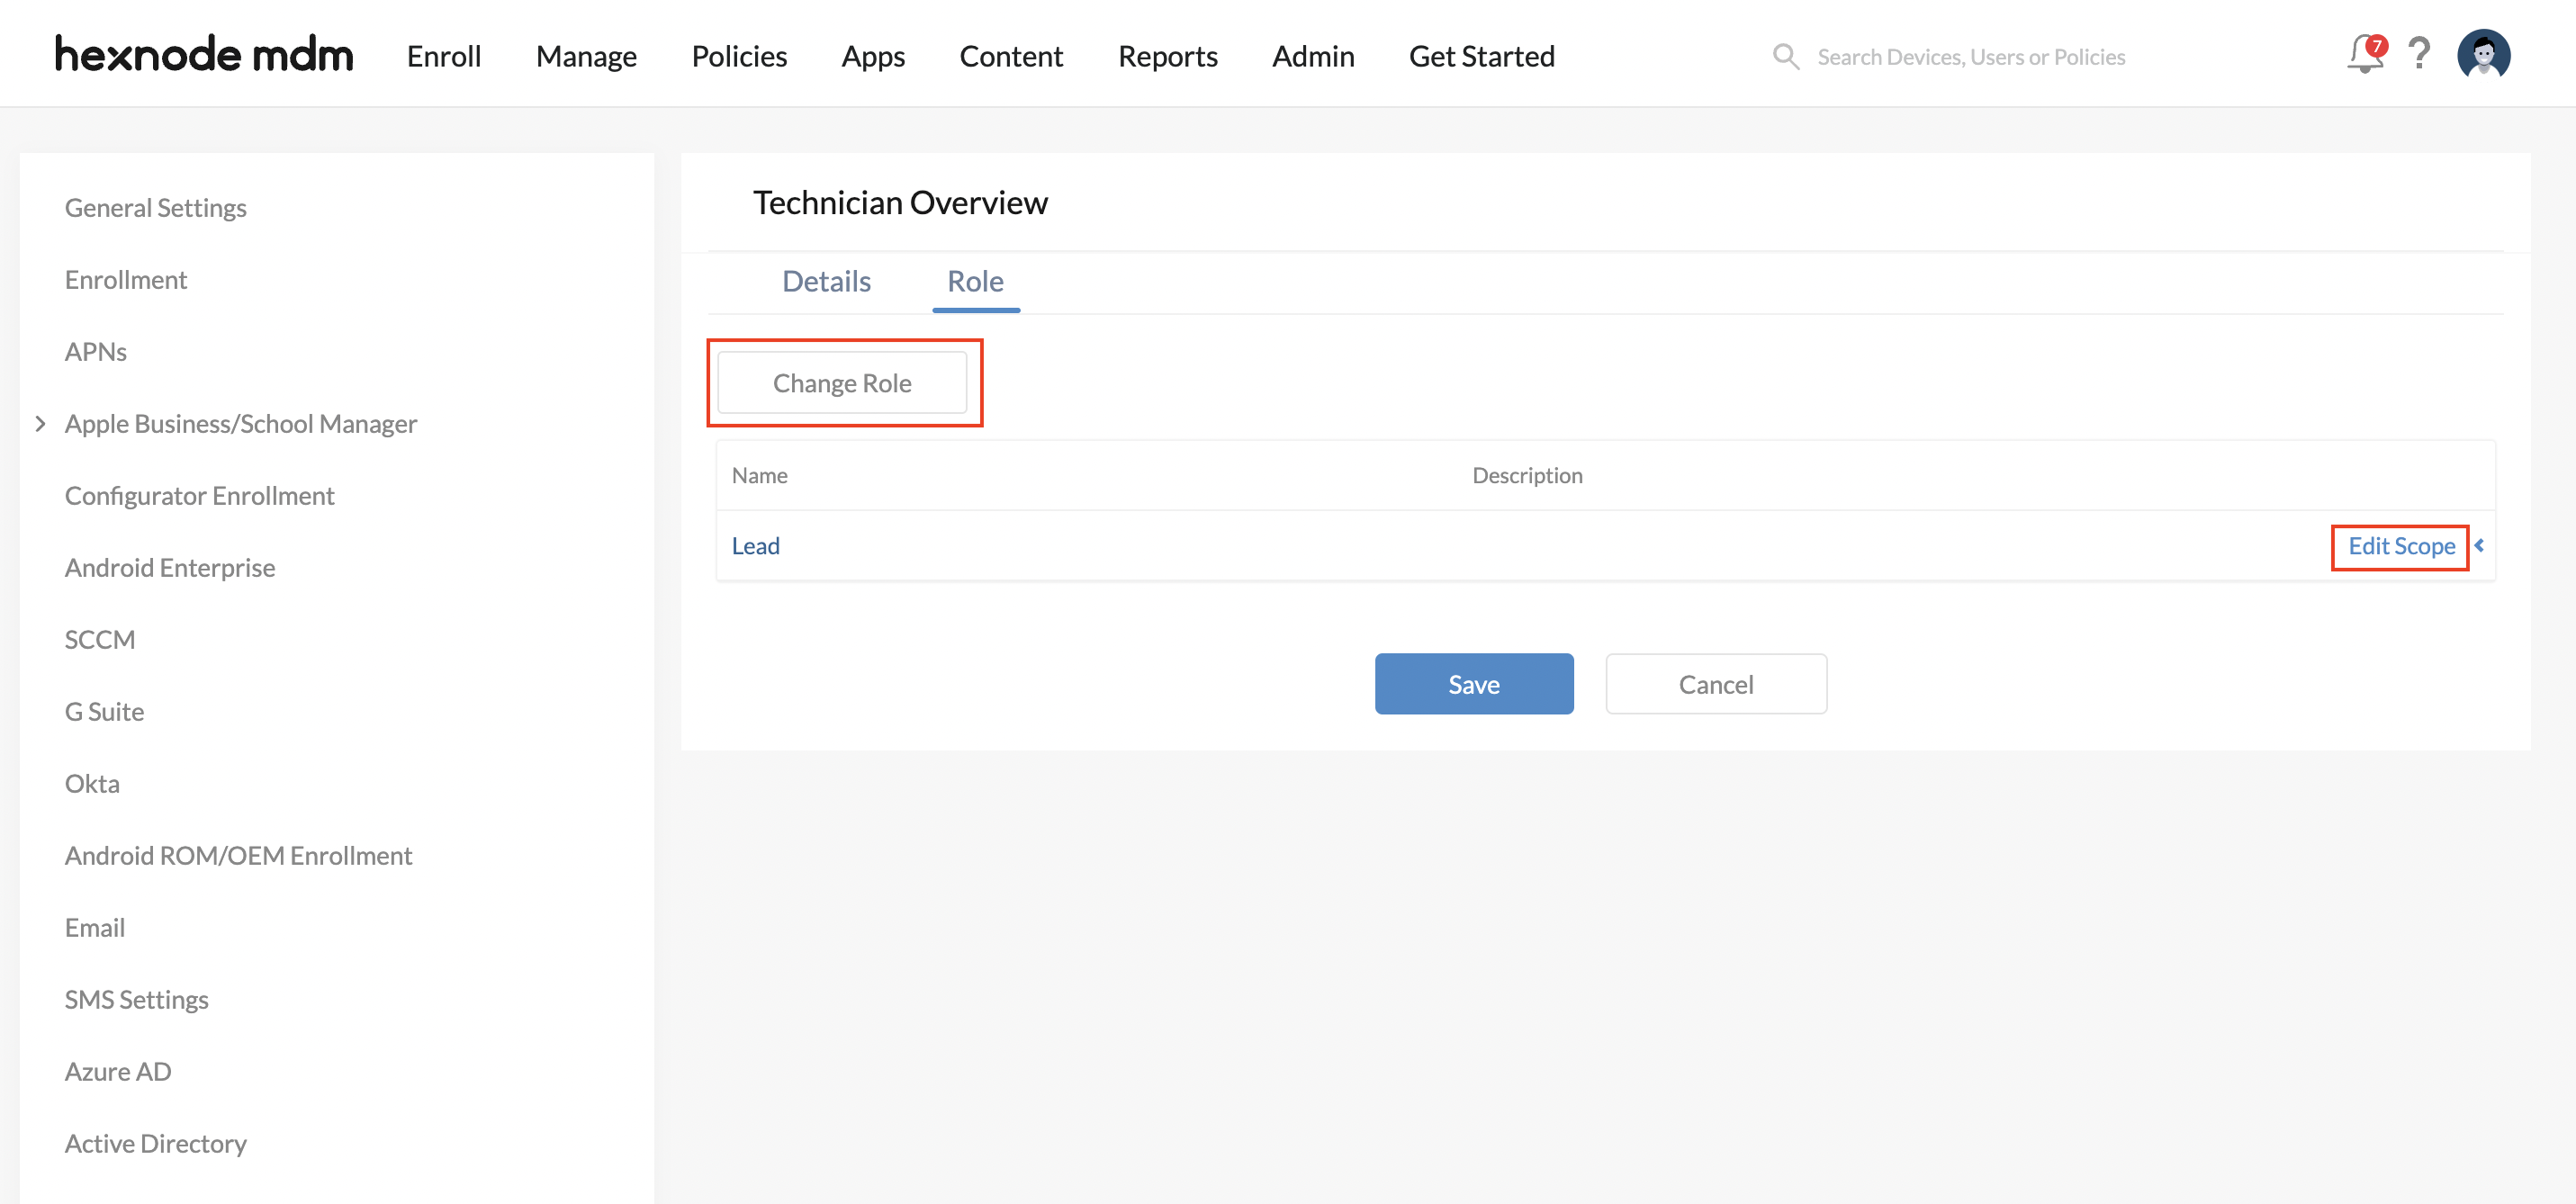
- It displays the information regarding the technician on the Details tab. To change the role, shift to the Role tab.
- Click on Edit Information displayed in the top-right corner.
- Either click on the Change Role button to re-assign a different role or click on Edit Scope to modify the scope.
- Click Save.
Modify permissions of a Role
The custom roles can be modified at any time to reconsider their permissions. The specified changes will be reflected among the technicians assigned to this role.
To modify a role that is created,
- Log in to the Hexnode console.
- Navigate to Admin > Technicians and Roles.
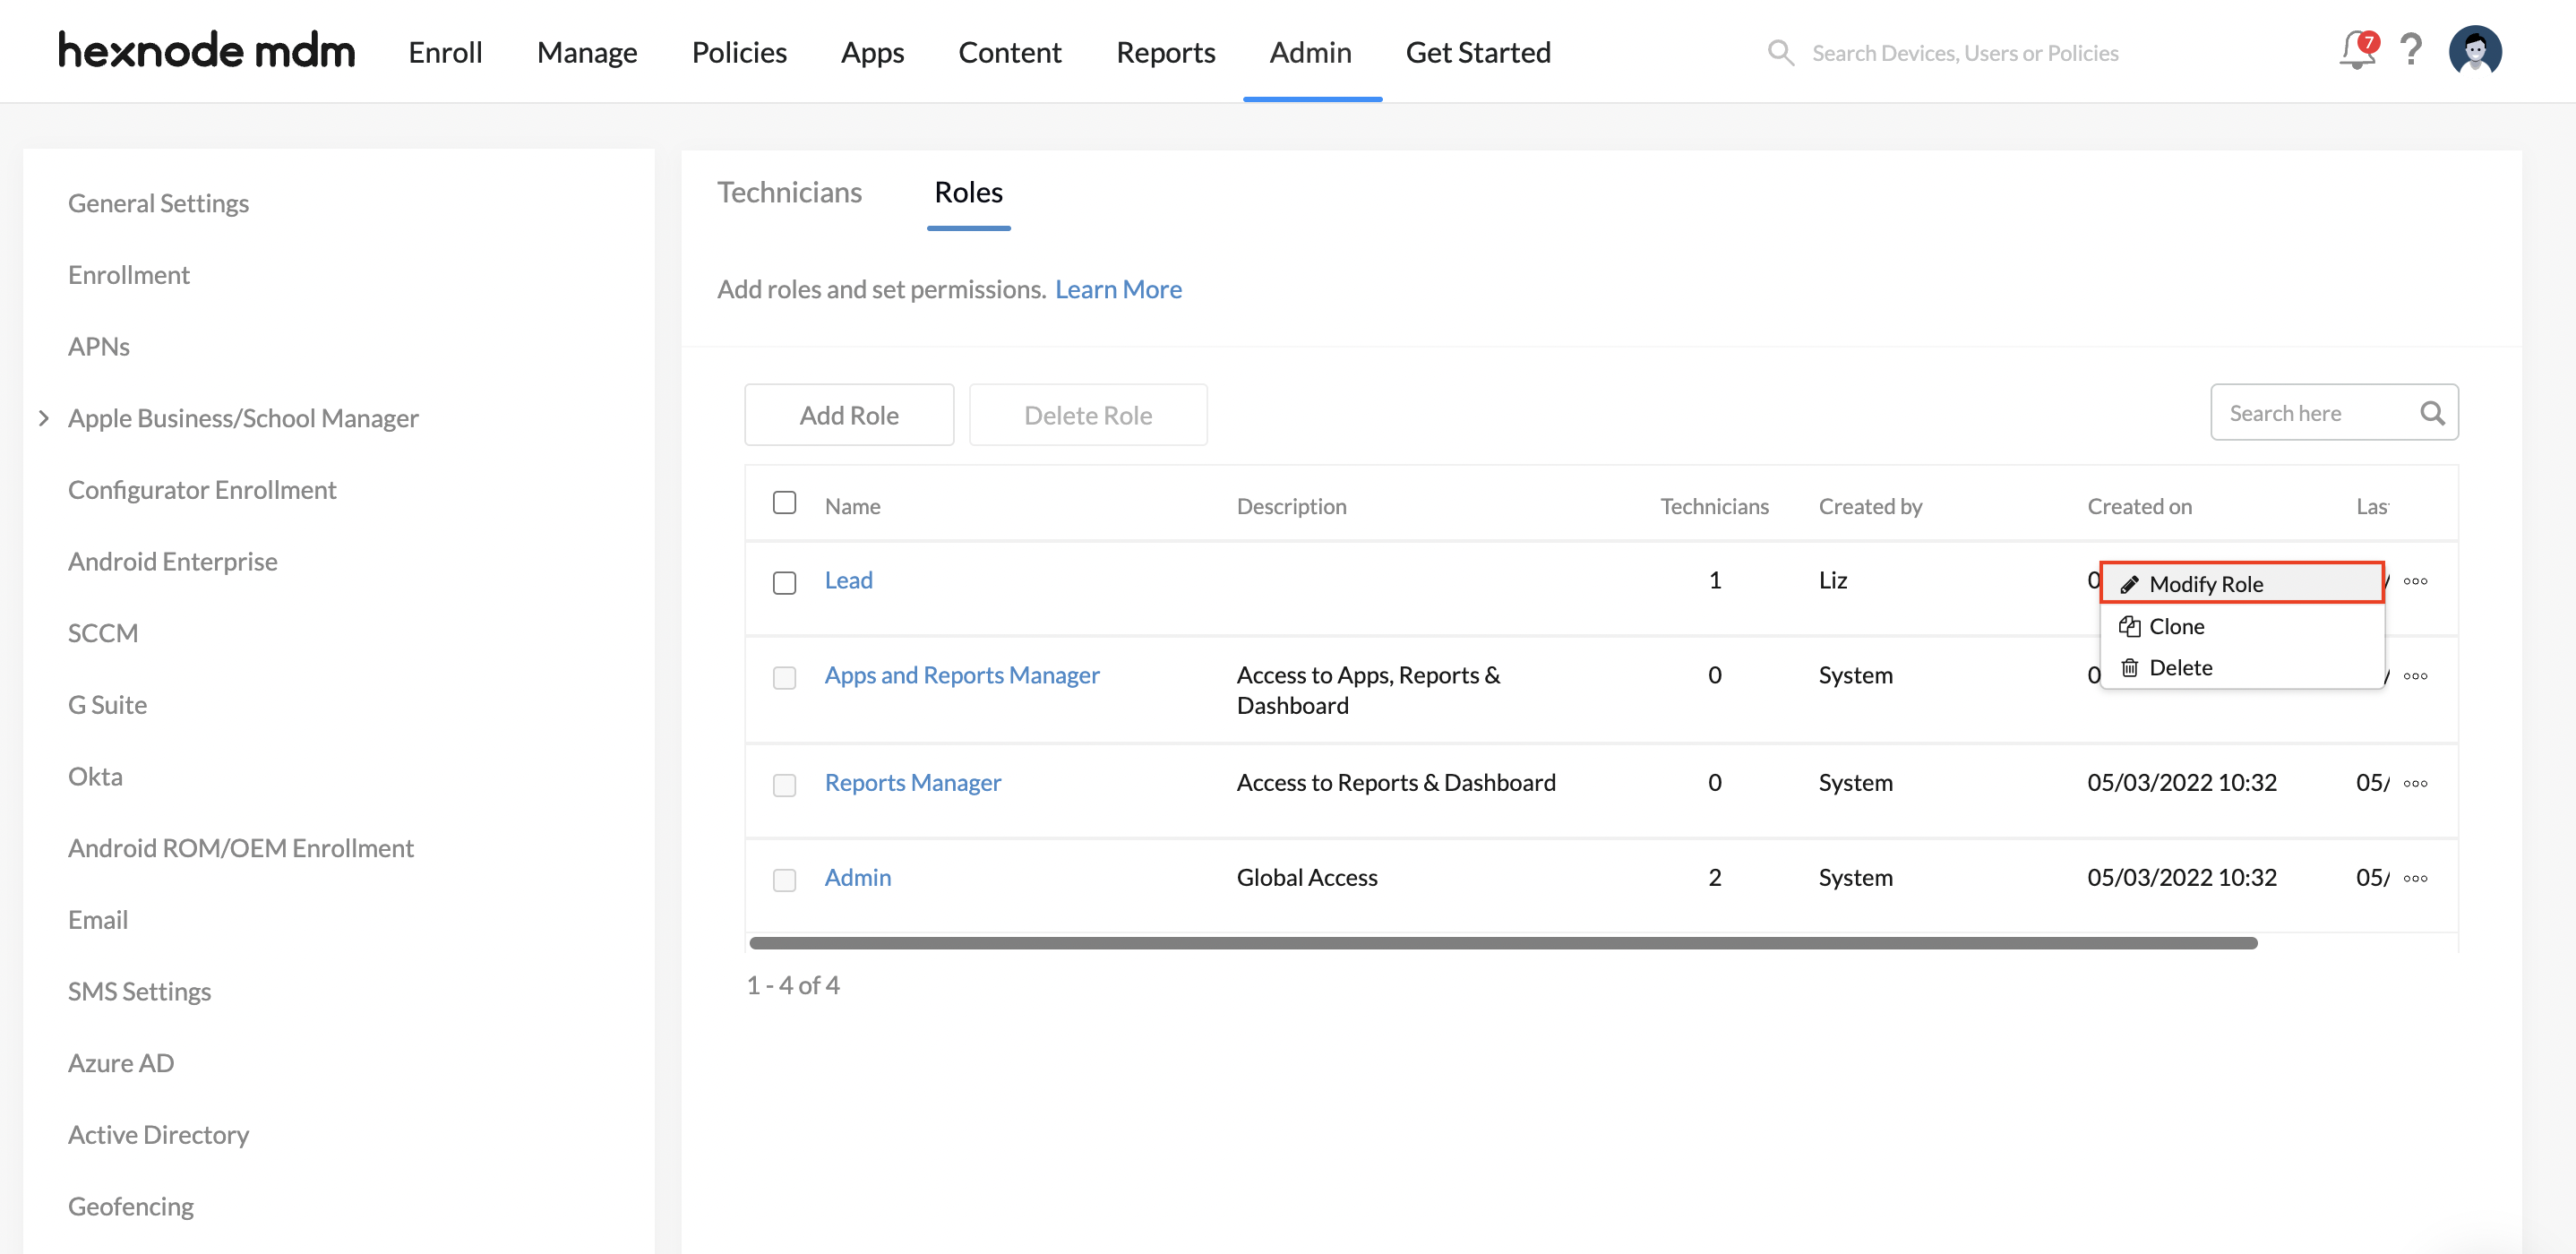
- Move to the Roles sub-tab.
- Click on the More icon corresponding to the role to be modified.
- Choose Modify Role.
- Make the necessary changes.
- Click Save.
Clone a Role
After creating a role, you can make an identical copy using the Clone option.
To clone a technician role,
- Log in to the Hexnode console.
- Navigate to Admin > Technicians and Roles.
- Move to the Roles sub-tab.
- Identify the role and click on the More icon.
- Choose Clone.
- It creates an exact copy of the role. You may then modify the role name and the permissions.
- Click Save.
Delete a Role
The role that you no longer require can be deleted from the portal.
- Log in to the Hexnode console.
- Navigate to Admin > Technicians and Roles.
- Move to the Roles sub-tab.
- Identify the role and click on the More icon. Or, check the role and click on the Delete Role button.
- Click on Delete.
Pricing plans to manage Custom Technician Roles
There is no limit on the number of custom roles created on the Hexnode portal. However, custom roles can be created only if you are subscribed to the Ultimate and Ultra pricing plans.
Ultimate
If you subscribe to the Ultimate pricing plan, you can manage access to the various tabs on the Hexnode portal. The tabs include:
- Dashboard
- Enroll
- Manage
- Policies
- Apps
- Content
- Reports
- Admin
Ultra
Subscribing to the Ultra pricing plan lets you set granular level permissions for roles. The tabs, sub-tabs and other actions within, can be selectively delegated based on the technician’s responsibilities.
Here, you can determine if the roles should be permitted the execution of remote actions. Also, you can specify permissions for each remote action available under the Manage tab.


