Category filter
How to configure Exchange ActiveSync on Android devices?
Configuring Exchange ActiveSync account synchronizes Mail, Calendar, Contacts, Reminder, and other accounts between the devices and the Exchange Server. It provides secure access to emails and attachments even when the device is not connected to the internet. Administrators can set up an ActiveSync account on Android devices from the UEM console for streamlining user access to the corporate mail account.
How to configure Exchange ActiveSync for Android?
To configure ActiveSync from the Hexnode MDM console,
- Login to your Hexnode portal.
- Navigate to Policies.
- Select an existing policy or create a new one by clicking on New Policy.
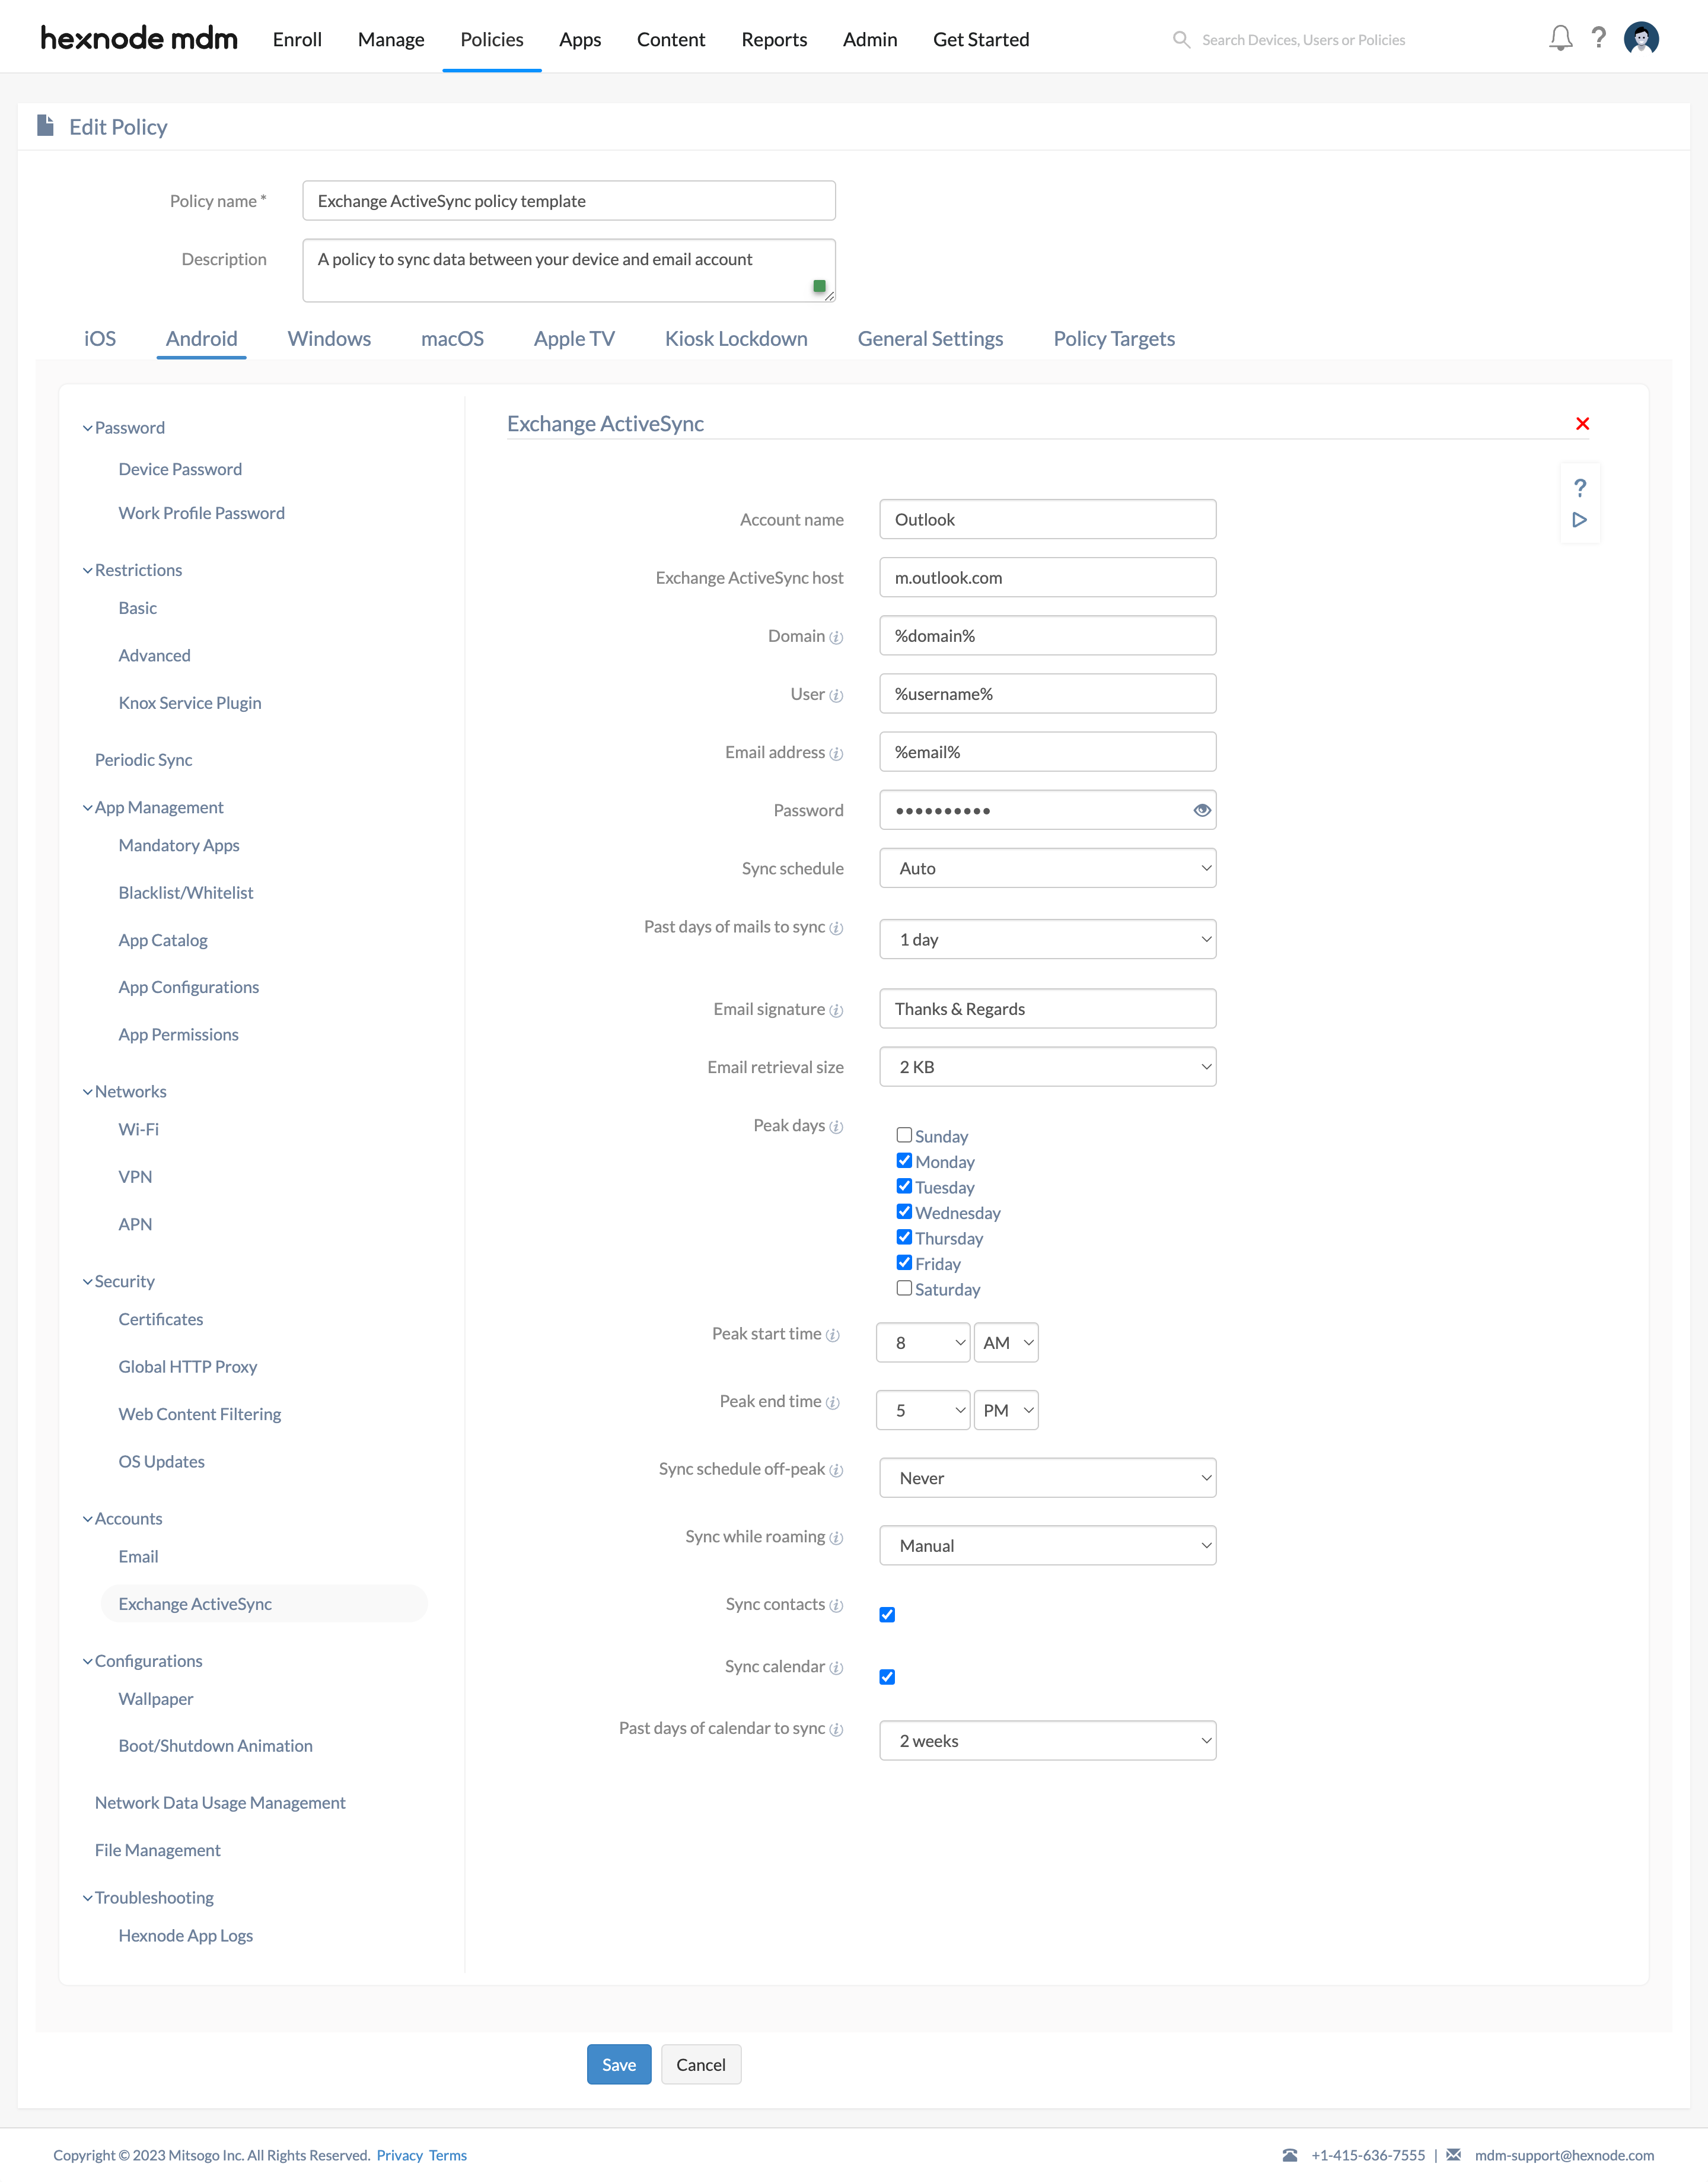
- From Android > Accounts, select Exchange ActiveSync and click on Configure.
You will have the following options to be configured.

| Settings | Description |
|---|---|
| Account name | Any name that’ll allow you identify an ActiveSync setting later. |
| Exchange ActiveSync host | The hostname of the ActiveSync server. |
| Domain | Provide the domain name (optional) or the NetBIOS name of the user in this field. You can also use wildcards to push the policy to a large number of devices. The supported wildcards are
|
| User | Add the email address of the user in this field. This field supports the use of wildcards. The wildcards supported are
|
| Email address | The email address of the user to sync the messages with their device. The field supports the use of wildcards. The supported wildcards are
|
| Password | The password associated with the email address in the User field. |
| Sync schedule | Schedule the frequency to sync emails during peak time. The available values are Auto (default), Manual, 15 minutes, 30 minutes, 1 hour, 2 hours and 4 hours. |
| Past days of mail to sync | Choose the number of past days of email to sync on the device. It can take the values 1 day (Default), 3 days, 1 week, 2 weeks or 1 month. |
| Email signature | Set the default email signature to be displayed in the outgoing emails. This field supports the use of wildcards. The wildcards that are supported are
|
| Email retrieval size | Choose the email size limit. For mails exceeding this limit, only the headers will be downloaded. Entire message will be downloaded only on opening the message. It can take values 1KB, 2KB (Default), 5KB, 10KB, 20KB, 50KB or 100KB. |
| Peak days | Schedule the peak days on which sync should happen. Sync can be scheduled to occur on any day in a week. |
| Peak start time | Set the peak start time. |
| Peak end time | Set the peak end time. |
| Sync schedule off-peak | Schedule the frequency to sync emails during off-peak time. It can take values Automatic push, Never (Default), 5 minutes, 10 minutes, 15 minutes, 30 minutes, 1 hour, 4 hours or 12 hours. |
| Sync while roaming | Schedule the frequency to sync email while roaming. It can take the following values.
|
| Sync contacts | Check this option to enable syncing contacts between the device and the email server. You can even sync the contacts from the Global Address List (GAL) and Google Workspace account. |
| Sync calendar | Check this option to enable syncing calendar between the device and the server. |
| Past days of calendar to sync | Choose the number of past days of calendar to sync on the device. It can take the values 2 weeks (Default), 1 month, 3 months, 6 months or All. |
How to associate ActiveSync account with the devices/groups?
If you haven’t saved the policy yet, to associate the policy with the device,
- Head on to Policy Targets tab.
- Click on + Add Devices and select the devices.
Apart from devices, you can associate any policies with the device groups, users, user groups and/or domains from the left pane under Policy Targets.
There’s another method for the policies to get associated with the device.
- From Policies, check the policies to get associated with a device.
- Select Associate Targets from Manage.
- Select the devices.


