Category filter
Automate app distribution on Windows devices
This document will help you automate App Distribution on Windows devices from Hexnode UEM.
The App Distribution feature helps IT administrators simplify large-scale deployment of store and enterprise applications on Windows devices, while offering granular control over every stage of the installation process. By automating application deployments, organizations can significantly reduce manual effort, improve installation reliability, and ensure devices are ready for use through pre/post-installation scripting, return code handling, and installation validation. This automation enables you to tailor installation settings to organizational requirements, schedule app deployments based on specific triggers, and streamline the entire distribution process.
Steps to configure app distribution on Windows devices
- Log in to Hexnode UEM.
- Navigate to the Automate tab, click New Automation, and select Windows as the platform.
- Name: Enter a name for the automation.
- Description: Add a brief description to clarify the automation’s intent or scope (optional).
- Click Next.
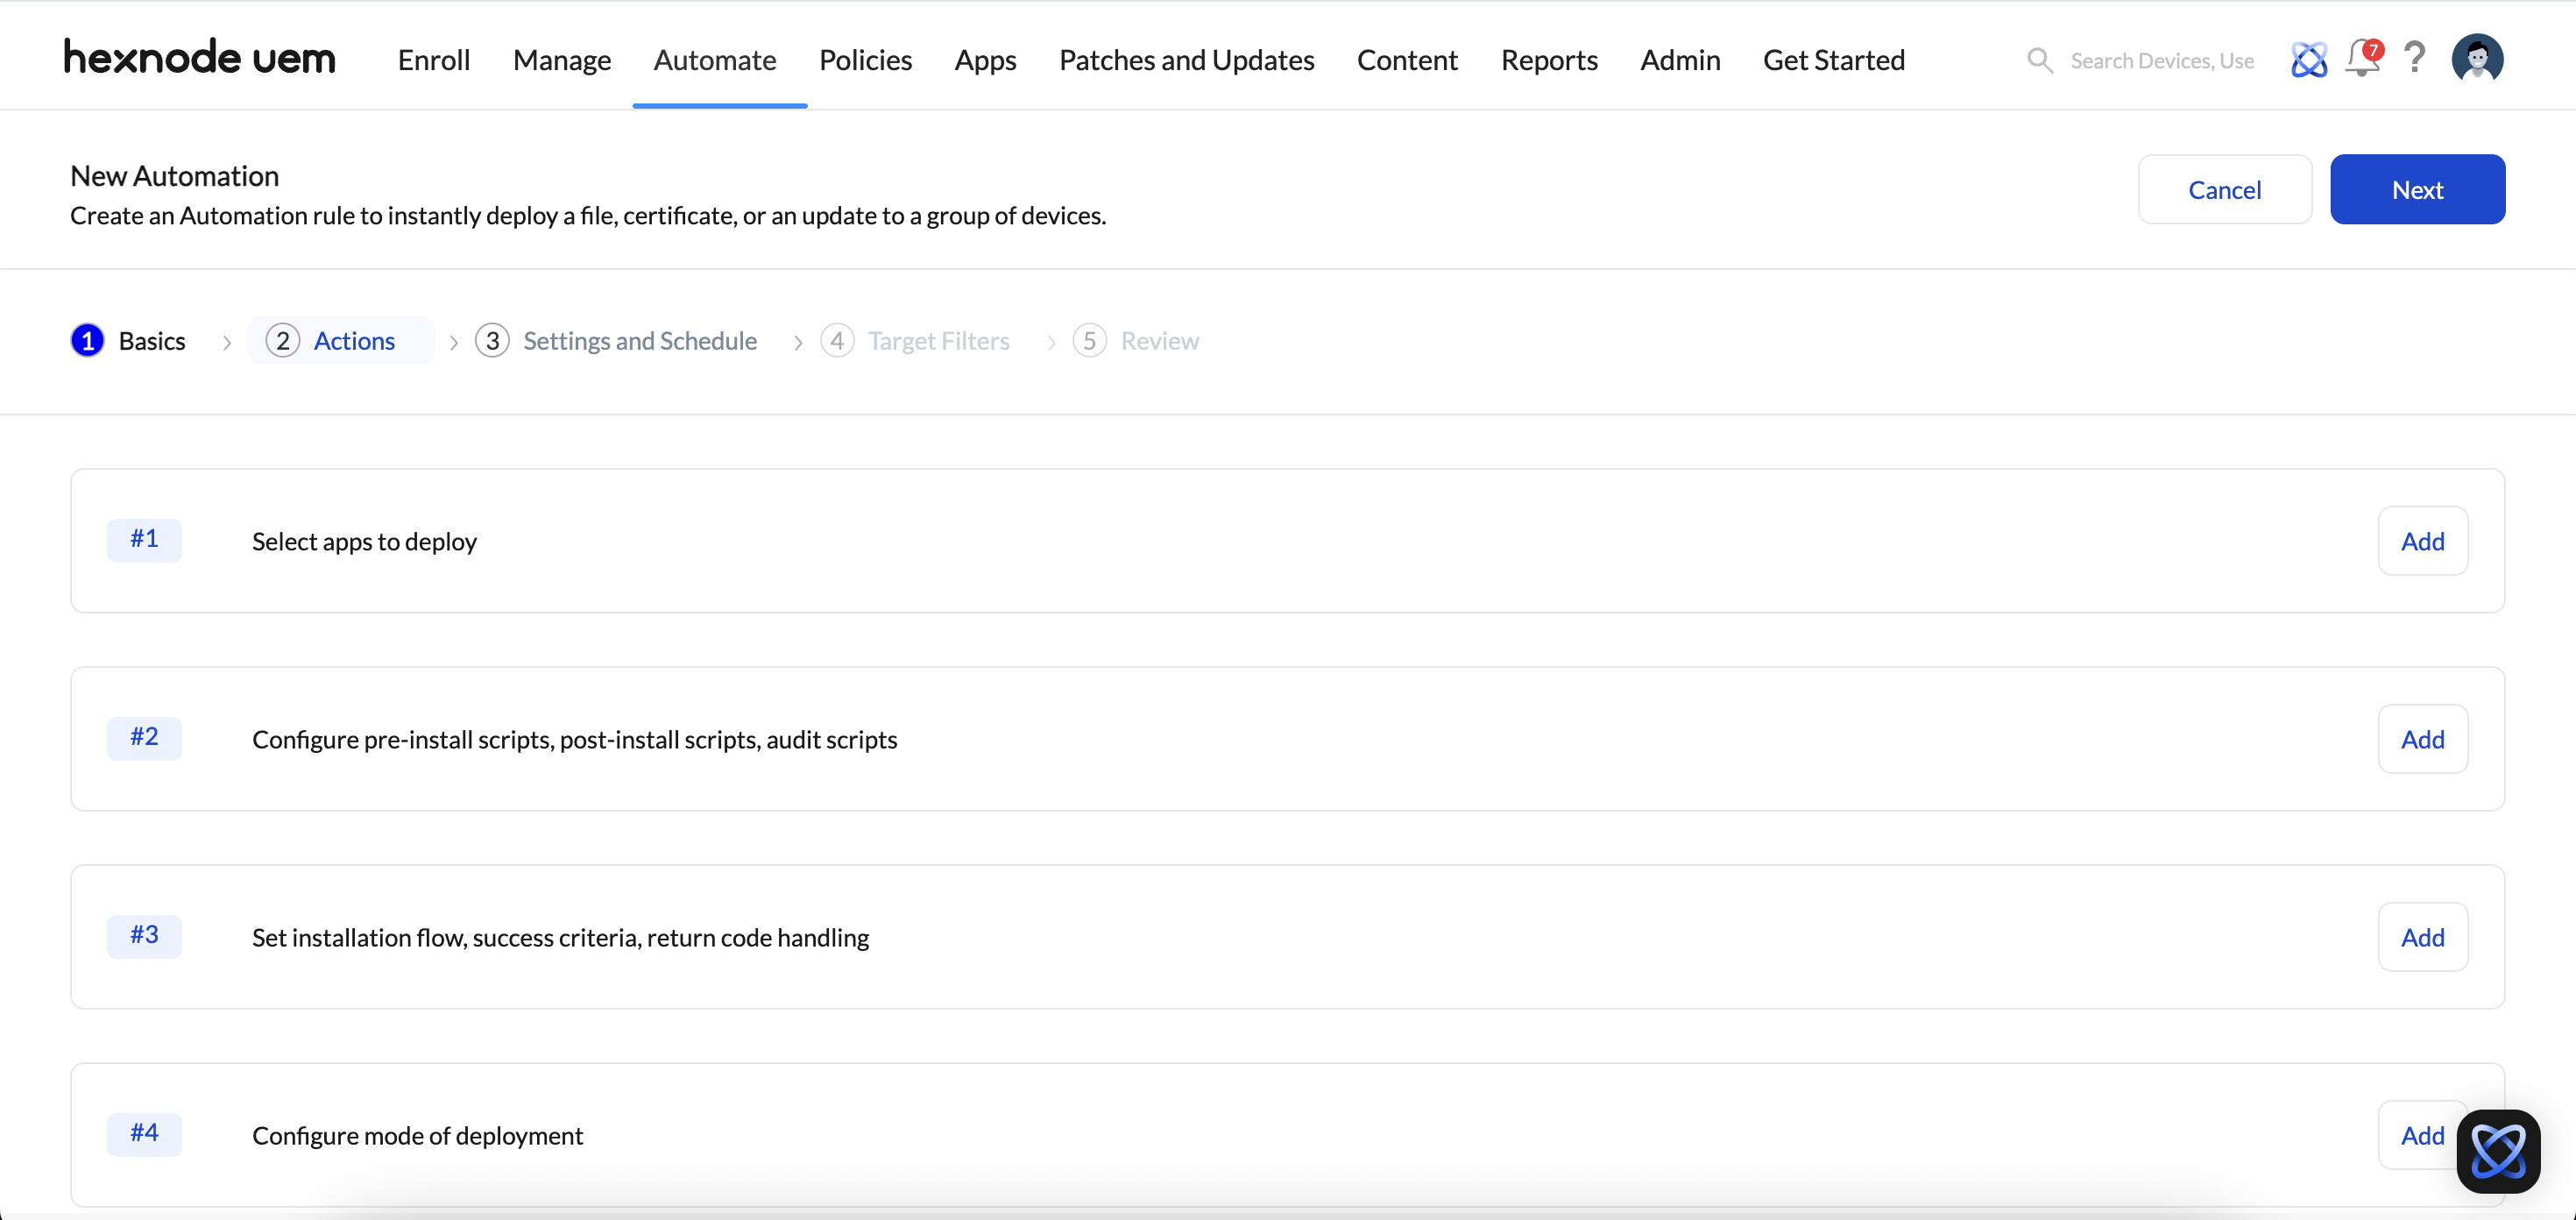
- Selecting the applications to deploy
- Configuring pre-install, post-install and audit scripts
- Defining installation flow, success criteria, and return code handling
- Setting the mode of deployment
-
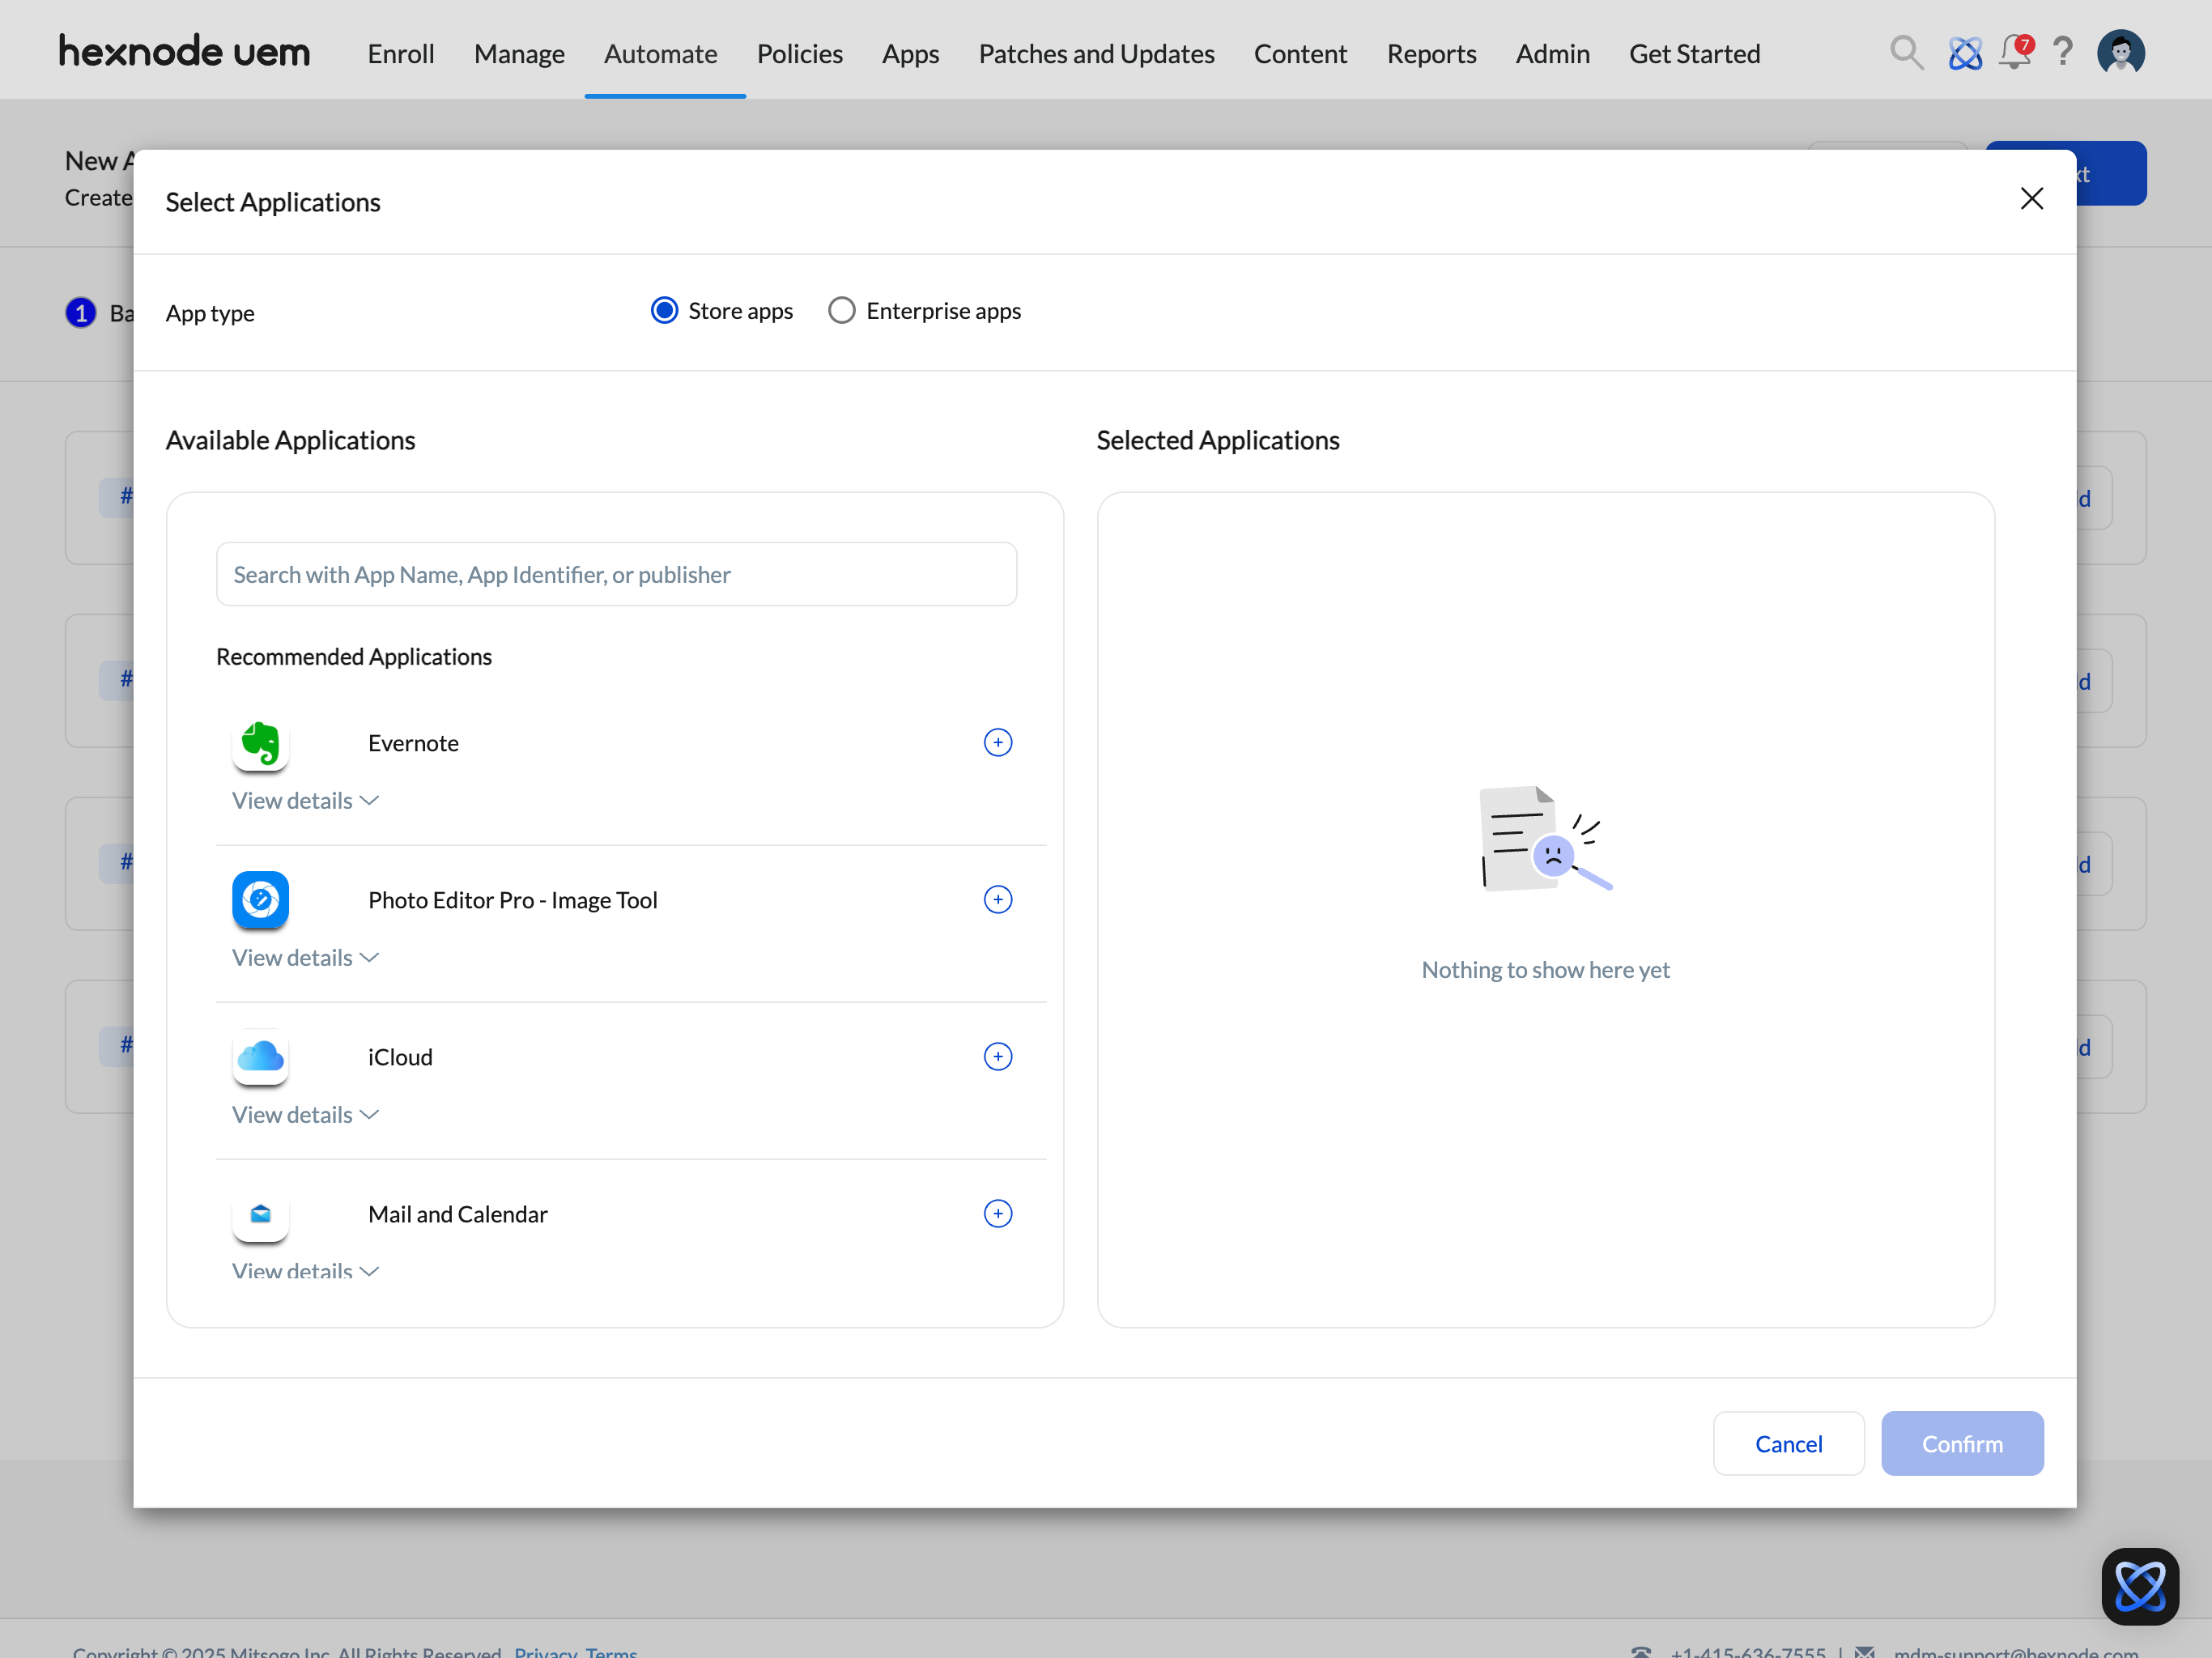
Select Applications
- Click the Add button adjacent to the Select apps to deploy option.
- A selection window will appear where you can specify the application type: Store App or Enterprise App.
-
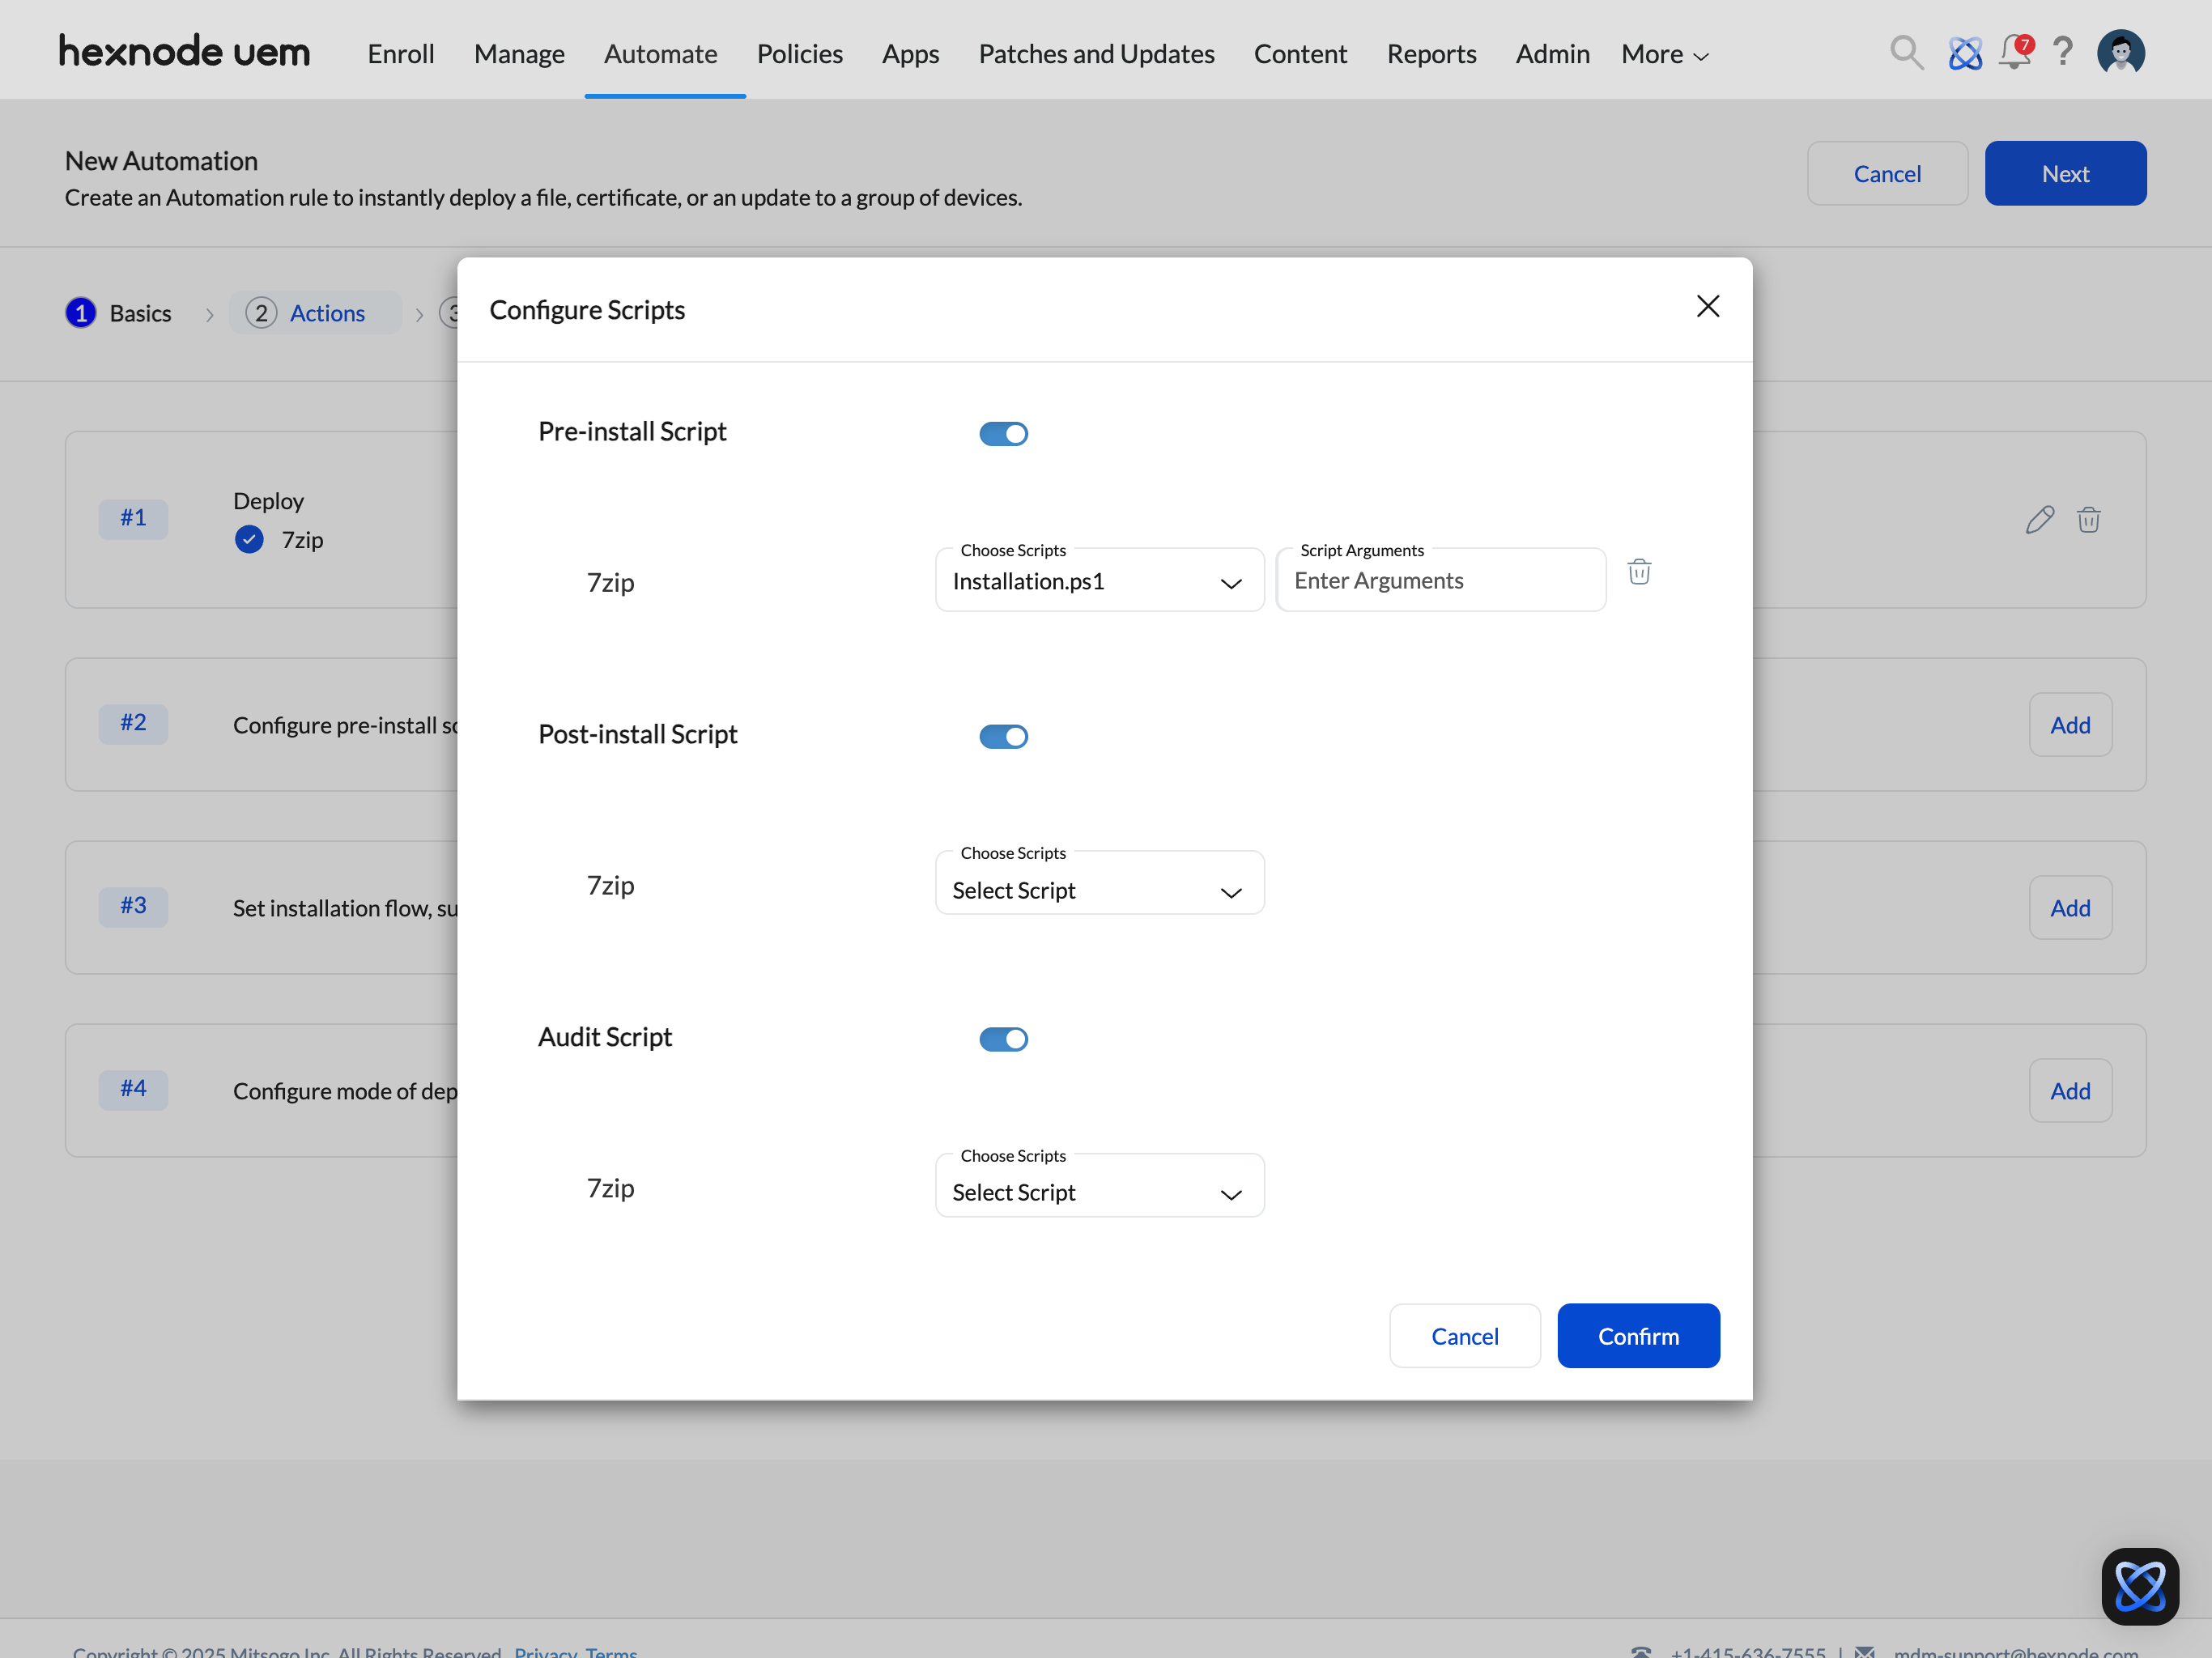
Configure Scripts to automate app distribution on Windows
- Click the Add button adjacent to the Configure pre-install scripts, post-install scripts, audit scripts option.
- You can configure the following script types:
- Pre-install script: Executes before the app installation begins. It can be used to verify whether the system meets the application requirements or to perform custom actions in preparation for installation.
- Post-install script: Executes after the app is successfully installed. This script can configure application settings, assign necessary permissions, or install additional components or plugins.
- Audit script: Executes after deployment to verify the application setup. It checks for specific files, folders, applications, or system settings to gather information and ensure that the application has been installed and configured.
- Enable the toggle switch next to each script type you want to configure.
- Select a script from the Hexnode repository for deployment. You can also add script arguments if needed.
-
Configure Installation Settings
- Click on the Add button adjacent to Set installation flow, success criteria, return code handling option.
- You can configure the following settings:
- Install Apps In
When deploying multiple applications, you can define the installation order using one of the following options:
- Parallel – All selected applications will be installed simultaneously.
- Sequence – Applications will be installed one after the other, in the order specified. Use the drag-and-drop option to arrange the installation sequence as needed.
- Additional Installation Parameters
- Configure Success Criteria (only for Enterprise apps)
You can validate the success of an application installation by configuring the success criteria. Choose any one of the following as the success criterion:
- App Identifier: The App Identifier uniquely identifies the installed application and is used to confirm whether the intended app is present on the device.
This field will be auto filled if it is defined under the success criteria while uploading the file (for MSIX/EXE) or from the Apps tab (for MSI). If the App Identifier is not defined yet, you will need to go to the Apps tab and define it there first.
The auto-filled app identifier is matched against the identifier of the installed application on the device to validate a successful installation.
- File Path: The File Path refers to the location of a specific file that should exist on the device after the app has been successfully installed. It verifies app installation by checking for the presence of the file on the target device.
This field will be auto filled if it is defined under the success criteria while uploading the file (for MSIX/EXE) or from the Apps tab (for MSI). If not auto filled, the file path can be specified here. The auto-filled file path is matched against the device to verify that the specified file exists, confirming a successful installation.
- Registry Path: The Registry Path is used to verify the creation of a specific registry key or entry that indicates the application has been successfully installed.
This field will be auto filled if it is defined under the success criteria while uploading the file (for MSIX/EXE) or from the Apps tab (for MSI). If the Registry Path is not defined yet, you will need to go to the Apps tab and define it there first.
The auto-filled registry path is matched against the device registry to confirm the presence of the specified key or entry, validating a successful installation.
- App Identifier: The App Identifier uniquely identifies the installed application and is used to confirm whether the intended app is present on the device.
- Configure Return Code Handling
Hexnode allows you to configure how the system responds to specific return codes during app installation by assigning predefined actions. This helps automate corrective measures, such as restarting the device or running a script, to improve installation success rates. You can select the relevant return code from the Return Code drop-down menu located below each selected app.
Return Codes for Store Apps
For store apps, the return code drop-down includes a list of commonly encountered error codes. These codes help identify the reason for installation failures, enabling you to assign suitable actions.
Examples of store app return codes:
Return Code Error -1978286079 The configuration file is invalid. -1978334716 The hash of the existing file did not match. -1978334955 Installation failed with installer custom error. -1978334956 The installer does not support upgrading an existing package. -1978334960 Failed to install package dependencies. -1978334961 Organization policies prevent installation. Contact the administrator. -1978334962 A higher version of the application is already installed. -1978334963 Another version of the application is already installed. -1978334965 System will restart to finish installation. -1978334966 Installation failed. Restart the system and retry. -1978334967 Restart is required to finish installation. -1978334970 Not enough memory is available to install. Close other applications and try again. -1978334971 There is no more space on the PC. Free up disk space and retry. -1978334972 This package has a dependency missing from the system. -1978334973 One or more file is being used. Exit the application then try again. -1978334975 Application is currently running. Exit the application then try again. -1978335114 Authentication failed. Interactive authentication required. -1978335123 A required service is busy or unavailable. Try again later. -1978335124 Failed to download package. Download for offline installation is prohibited. -1978335125 Failed to download package dependencies. -1978335130 One or more applications failed to uninstall. -1978335131 One or more applications failed to install. -1978335156 Failed to validate dependencies. -1978335158 Arguments for msiexec are invalid. -1978335159 Running MSI install failed. -1978335163 Failed to open the source. -1978335174 Operation is blocked by Group Policy. -1978335179 Could not find one or more requested packages. -1978335180 Failed to install one or more imported packages. -1978335184 Running uninstall command failed. -1978335186 Download size does not match expected content length. -1978335187 Installer failed security check. -1978335188 winget upgrade –all completed with failures. -1978335190 Manifest is invalid. 1978335191 Manifest validation failed. -1978335192 Manifest validation succeeded with warning. -1978335204 The Microsoft Store app is blocked by policy. -1978335205 The Microsoft Store client is blocked by policy. -1978335207 Command requires administrator privileges to run. -1978335215 The installer file’s hash does not match the manifest. -1978335216 None of the installers are applicable for the current system. -1978335224 Downloading installer failed. -1978335229 Executing command failed. -1978335230 Invalid command line arguments. -1978335231 Internal Error. Return Codes for Enterprise Apps
For enterprise apps, the drop-down includes standard Windows Installer return codes that reflect the result of an MSI installation.
Examples of enterprise app return codes:
Return Code Error 0 Action completed successfully. 120 Called function is not implemented. 1259 Blocked due to compatibility; user declined override. 13 The data is invalid. 1601 Windows Installer service not accessible. 1602 User canceled installation. 1603 Fatal error during installation. 1604 Installation suspended, incomplete. 1605 Action valid only for installed products. 1606 Feature identifier not registered. 1607 Component identifier not registered. 1608 Unknown property. 1609 Invalid handle state. 1610 Product configuration data is corrupt. 1612 Installation source not available. 1613 Requires newer Windows Installer version. 1614 Product is already uninstalled. 1618 Another installation is already in progress. 1619 Installation package couldn’t be opened. 1620 Invalid installer package. 1621 Error starting installer UI. 1622 Error opening log file. 1623 Language of the package not supported. 1624 Error applying transform. 1625 Blocked by system policy. 1626 Function not called. 1627 Function failed during execution. 1629 Data type mismatch. 1630 Unsupported data type. 1631 Installer service failed to start. 1632 Temp folder inaccessible or full. 1633 Package not supported on this platform. 1635 Patch package couldn’t be opened. 1636 Invalid patch package. 1637 Patch unsupported by Windows Installer. 1638 Another version of product already installed. 1639 Invalid command line argument. 1640 Installations not permitted from client session. 1641 Restart initiated by installer (success). 1642 Upgrade patch target not found. 1643 Patch blocked by system policy. 1644 Customization blocked by system policy. 1645 Installation from RDP session not permitted. 1646 Patch is not removable. 1647 Patch not applied to product. 1648 No valid patch sequence found. 1649 Patch removal disallowed by policy. 1650 Invalid XML in patch data. 1652 Installer not accessible in Safe Mode. 1653 Rollback disabled; multi-package install failed. 1654 App not supported on this Windows version. 3010 Restart required to complete installation. 87 One of the parameters was invalid. Custom Return Codes
If the return code you want to handle isn’t listed, you can define your own custom return code:
- Select Custom from the return code drop-down.
- Enter the return code value in the field.
- Assign the appropriate action to handle the return scenario.
Actions for Return Codes
For each return code, predefined or custom, you can assign one of the following actions:
- Execute Script: Run a selected script from the Hexnode repository. You can also add script arguments if required.
- Restart Device: Restart the device when the specified return code is encountered.
- Wait: Introduce a delay of 1 to 60 seconds before proceeding.
Retry Installation
To attempt installation again after the selected actions are executed:
- Enable the Retry installation after executing actions checkbox.
- Choose the number of retry attempts (1, 2, or 3).

Specify any custom installation parameters here to tailor the installation process according to your application’s requirements.
- Install Apps In
-
Configure mode of deployment
You can configure the deployment mode to control how and for which user the application installation is performed.
To automate app distribution on Windows, you should configure the mode of deployment,
- Click on the Add button adjacent to the Configure mode of deployment option.
- You can configure the installation type, and installation scope of the application here.
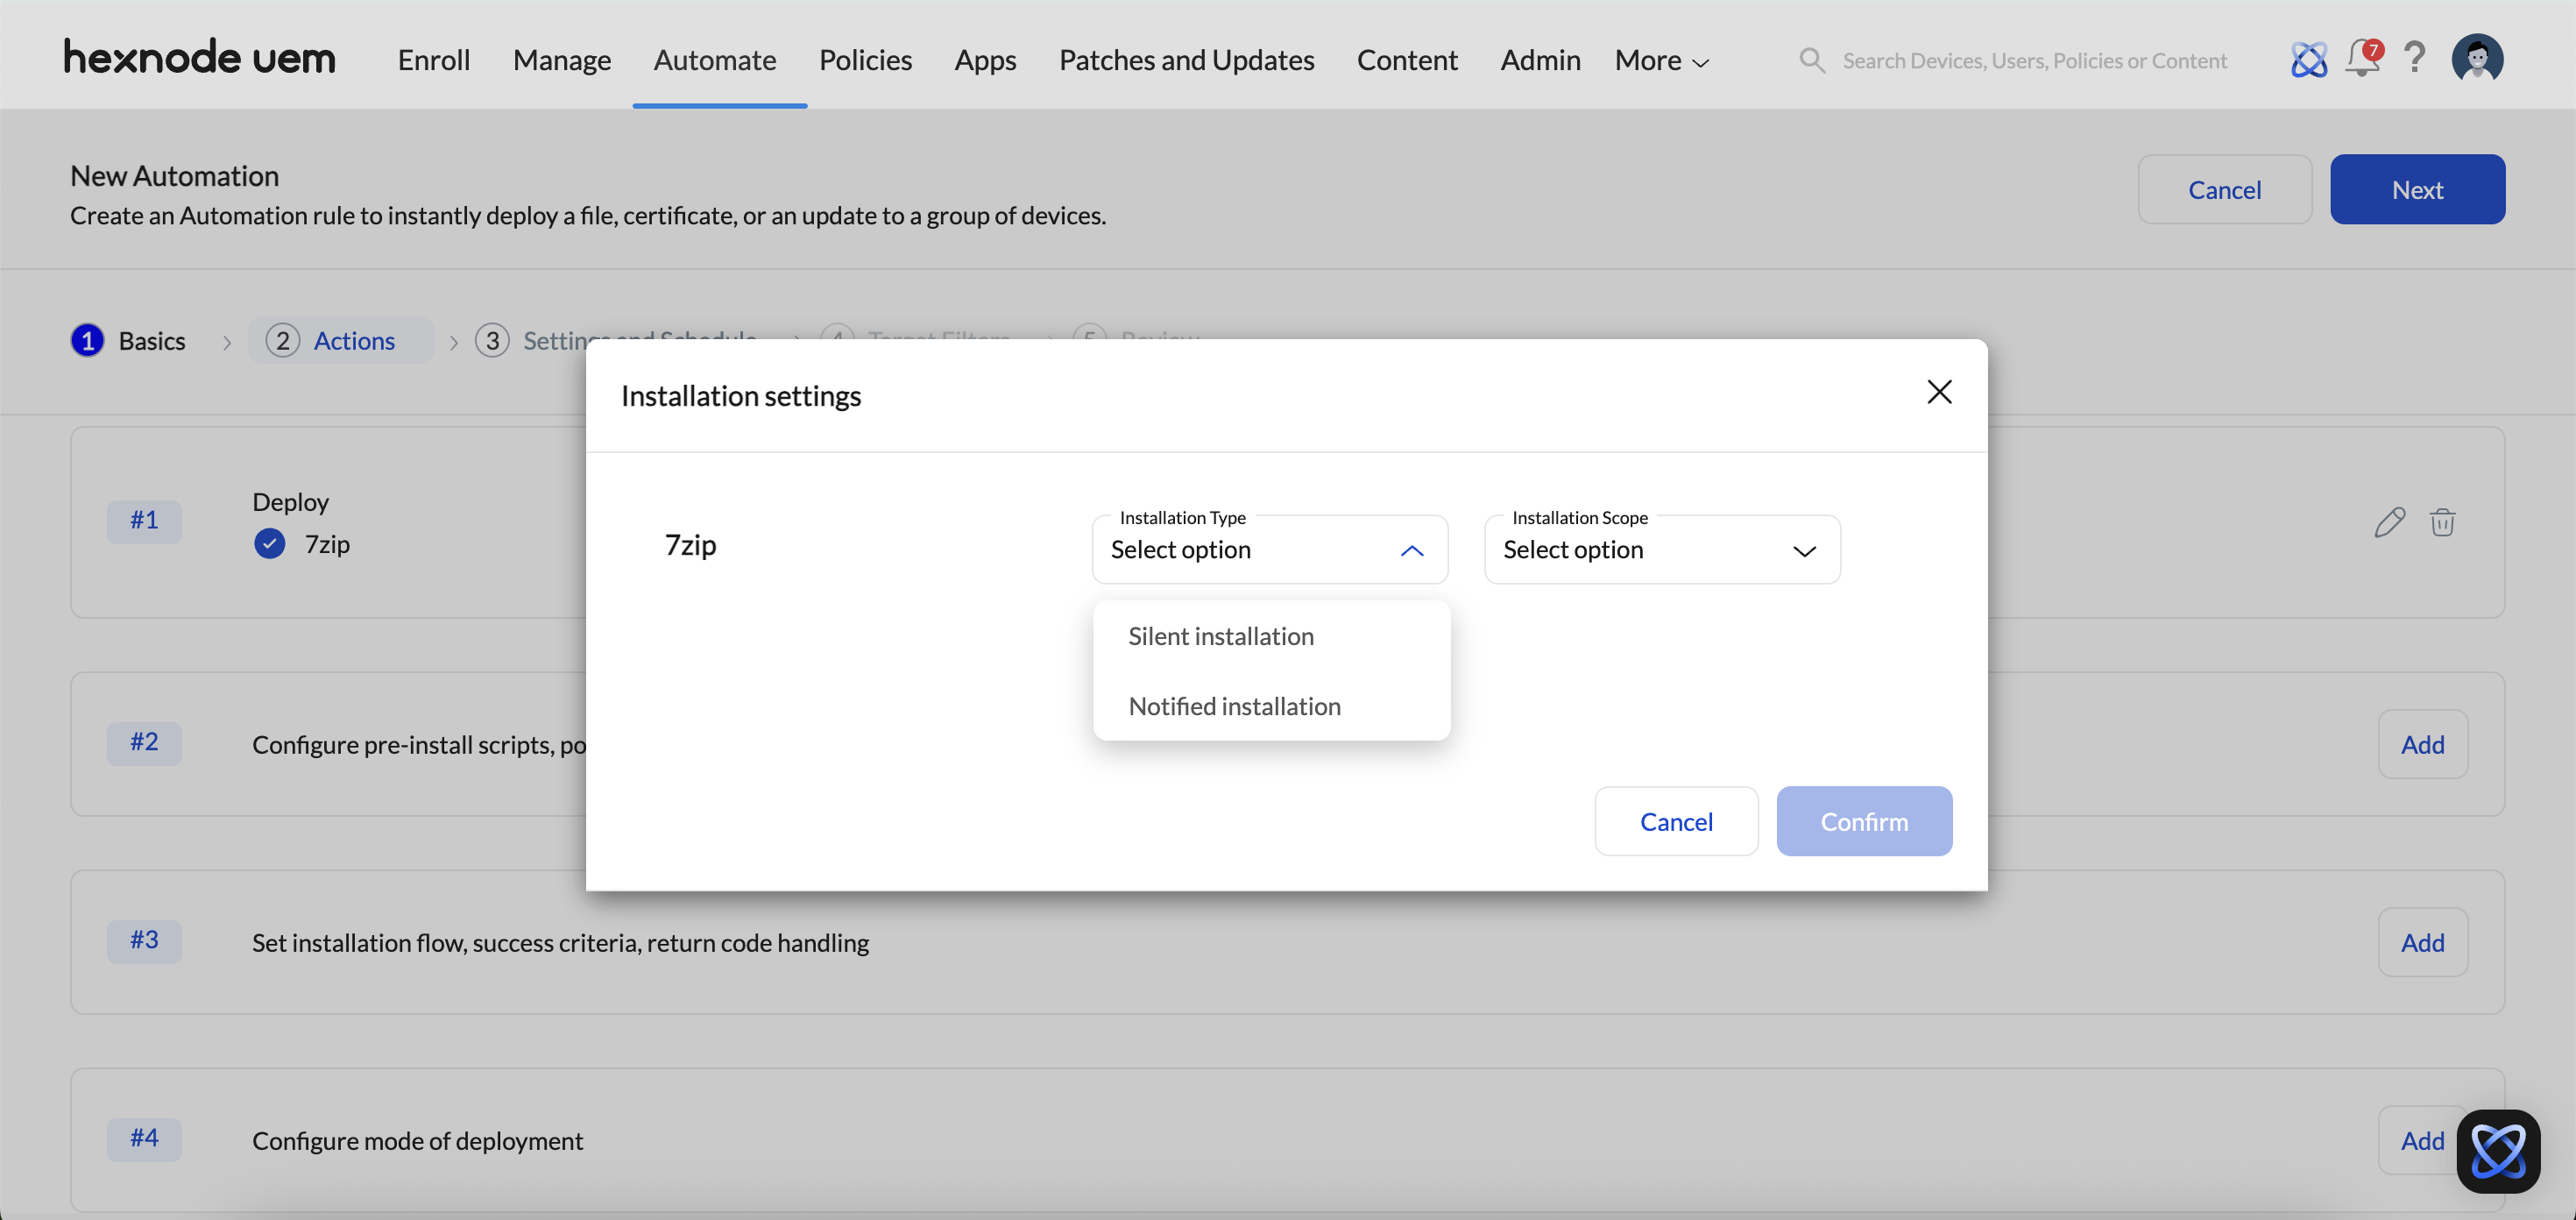
Installation Type
To automate app distribution on Windows, choose how the application will be installed on the device:
- Silent Installation – The app installs quietly without user interaction.
- Notified Installation – The user is notified of the installation and can choose to defer it.
- Allow user to defer installation – Enable this option to let users postpone installation.
- Defer duration – Set the deferral time between 1 and 1440 minutes.
- Maximum number of deferrals – Specify how many times a user can defer the installation (1, 2, or 3 times).
- Allow user to defer installation – Enable this option to let users postpone installation.
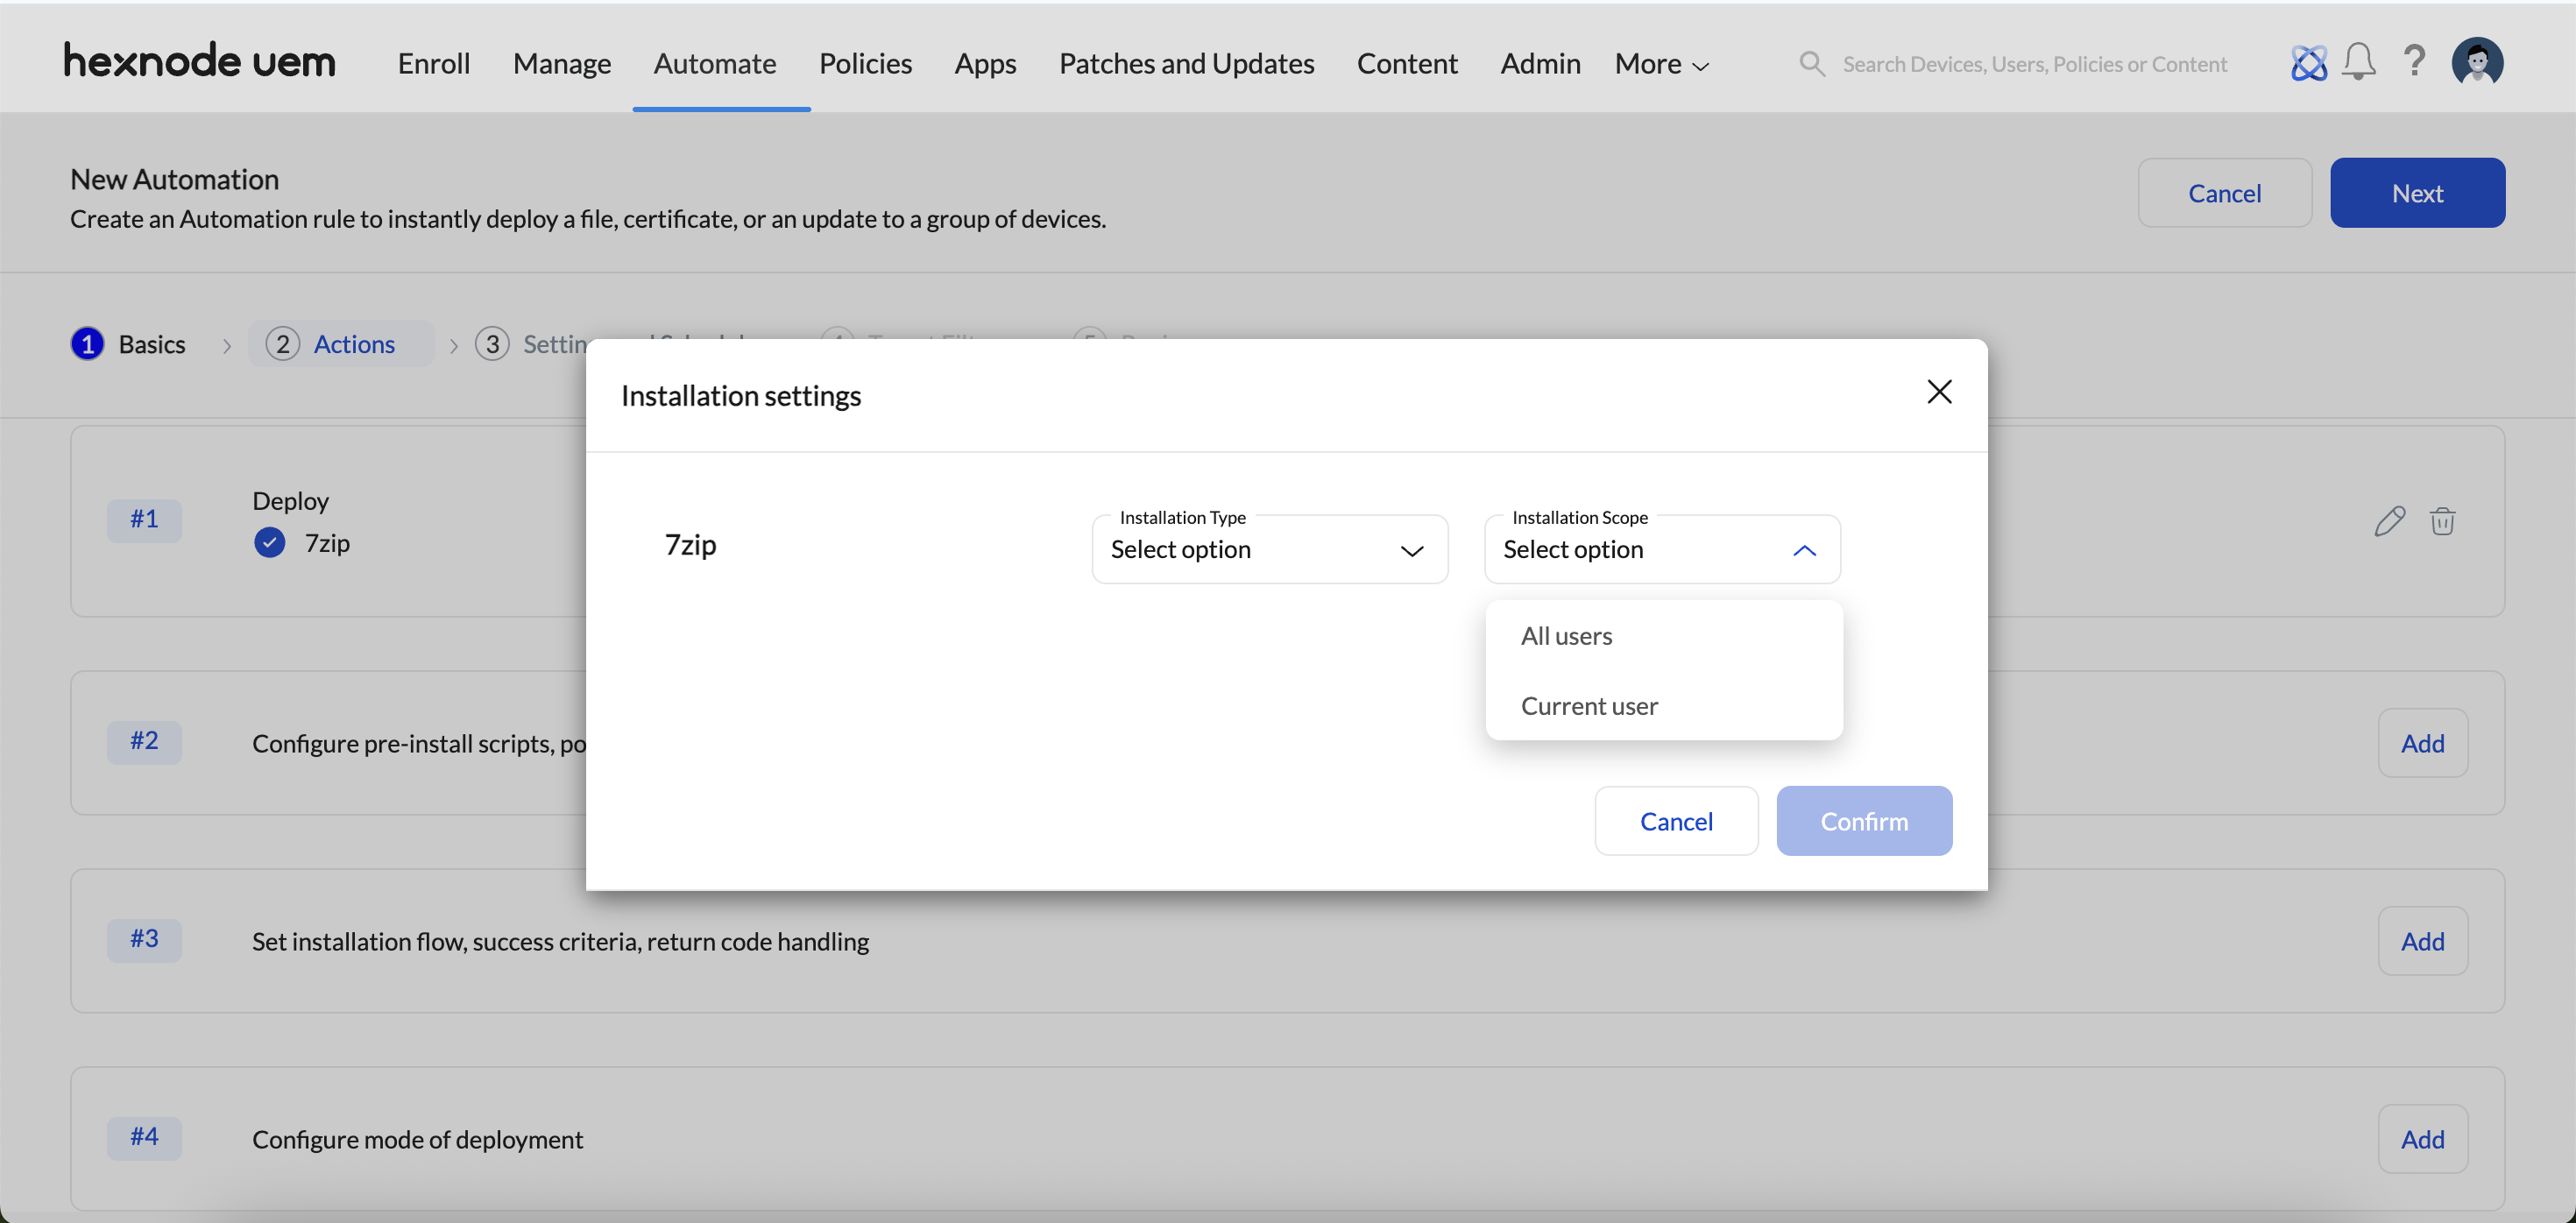
Installation Scope
Specify which users on the device the installation will apply to:
- All users – The app is installed on every user profile on the device.
- Current user – The app is installed only for the currently logged-in user.
- Once the actions are selected, click Next.
- Trigger: The Trigger defines the condition that initiates the automation and can be based on either Time or Activity.
- Initiate: Set the automation initiation frequency.
If Time is selected as the trigger, choose from:
- Once, ASAP
- Once
- Repeat at a set schedule
If Activity is selected as the trigger, choose from the following options to automate app distribution on Windows:
- On Device Enrollment
- On Device Compliance
- On Device Non-Compliance
- On Location Compliance
- On Location Non-Compliance
- Once you have configured the Settings and Schedule, click Next. On the following page, you can define the target filters.
Target Filters
Configure target filters in this section. Specify options for Included groups, Excluded groups, and custom filters by selecting the Filters option.
- After setting the filters, click Next.
- Review the configured automation settings. Click Edit to modify any section if needed.
- Once you have reviewed the automation, click Save.
Provide the following details:
Select App Distribution to deploy applications to Windows devices, while allowing you to customize and configure installation settings.
The app distribution process involves four key stages:
You can choose the applications to be deployed to Windows devices. To select applications,
You can configure scripts to run at different stages of app deployment, before installation, after installation, or post-deployment.
To configure the scripts,
You can configure additional installation parameters, define success criteria, and manage return code handling to customize how application installations are executed and monitored.
To configure the installation settings,
Configure scheduling and related settings here to automate app distribution on Windows.
