Category filter
Install CrowdStrike Falcon Sensor for Linux
This guide outlines the process to deploy the CrowdStrike Falcon sensor on Linux devices using the Hexnode UEM platform. This deployment utilizes custom scripting to automate the installation and activation of the Falcon agent on supported Linux distributions.
What is CrowdStrike Falcon?
CrowdStrike Falcon is a cloud-native endpoint protection platform (EPP) designed to secure devices against malware, ransomware, and sophisticated cyber threats. It functions via a lightweight software agent (sensor) that monitors system activity in real-time.Core Functions:
- Malware Prevention: Stops both known and zero-day exploit-based attacks.
- Behavioral Detection: Identifies malicious indicators of attack (IOAs).
- Response & Visibility: Provides continuous monitoring and rapid response capabilities via the cloud.
Key Capabilities on Linux:
| Feature | Description |
|---|---|
| Next-Generation Antivirus (NGAV) | Uses machine learning and behavioural analysis to block known and unknown malware. |
| Endpoint Detection & Response (EDR) | Captures process and system activity to support deep forensic investigations. |
| Lightweight Architecture | Operates with minimal system overhead, ensuring no impact on production workloads. |
| Cloud-Based Management | Centralized control of all Linux endpoints via the Falcon console. |
How to Deploy CrowdStrike Falcon on Linux Devices?
The deployment process is broken down into three primary stages:
- Download the installer.
- Executing the deployment script via Hexnode UEM.
- Verify the installation.
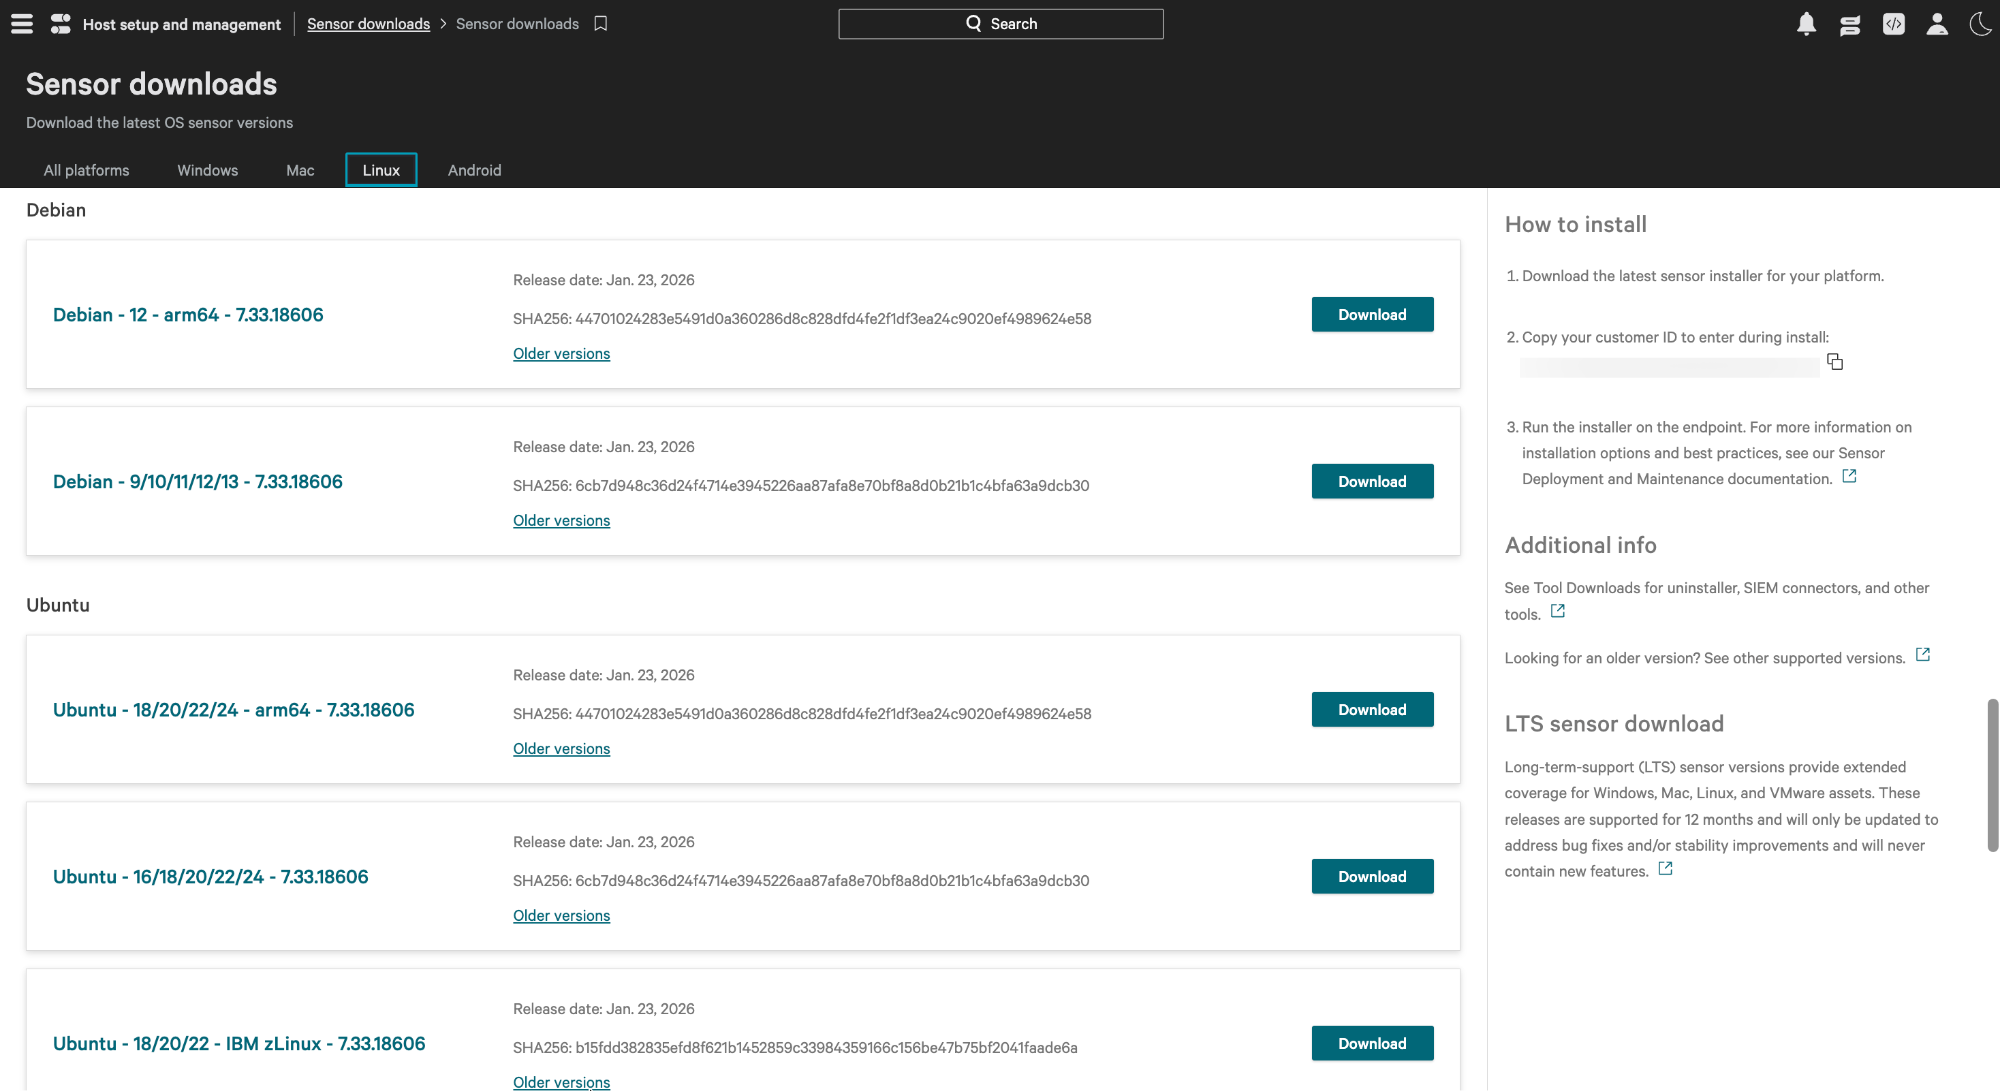
Step 1: Download the Falcon Sensor installer
- Log in to your CrowdStrike Falcon portal.
- Open the menu and navigate to Host setup and management > Deploy > Sensor downloads.
- Locate the Linux (Ubuntu/Debian) sensor and click Download to get the .deb file.
- Copy the Customer ID (CID) provided on the download page; you will need this for activation.
- Upload the .deb file to a secure cloud storage or file-sharing service and generate a direct Download URL.
Step 2: Deploy via Hexnode UEM
The deployment is executed using a Bash script through the Hexnode “Execute Custom Script” action.
Execution Steps:
- Log in to the Hexnode UEM portal.
- Go to the Manage tab and select your target Linux devices.
- Select Actions > Execute Custom Script.
- Set the platform to Linux and choose Upload file/Hexnode Repository as the script source.
- Upload a .sh file containing the following code:
1234567891011121314151617181920212223242526272829303132333435363738#!/bin/shset -euoDOWNLOAD_URL="${1:-}"CID="${2:-}"# Exit if arguments are missingif [ -z "$DOWNLOAD_URL" ] || [ -z "$CID" ]; thenecho "Usage: $0 <download_url> <cid>"exit 1fiecho "Running pre-flight package repair..."# Finishes configuring partially installed packagessudo DEBIAN_FRONTEND=noninteractive dpkg --configure -a || echo "No interrupted packages to fix."echo "Downloading installer..."curl -L -o crowdstrike.deb "$DOWNLOAD_URL"echo "Installing crowd strike..."sudo DEBIAN_FRONTEND=noninteractive apt-get install -y ./crowdstrike.debecho "Configuring CID..."if [ -f "/opt/CrowdStrike/falconctl" ]; thensudo /opt/CrowdStrike/falconctl -s -f --cid="$CID"elseecho "Error: falconctl not found!" && exit 1fiecho "Starting falcon service..."sudo systemctl enable falcon-sensorsudo systemctl start falcon-sensorecho "Verifying service status..."sudo systemctl is-active falcon-sensorecho "Successfully installed crowdstrike"
Script Arguments:
In the Arguments field in Hexnode, enter the following (separated by a space):
- The Download URL for your .deb file.
- The Customer ID (CID) copied from CrowdStrike.
- Click Execute to begin the rollout.
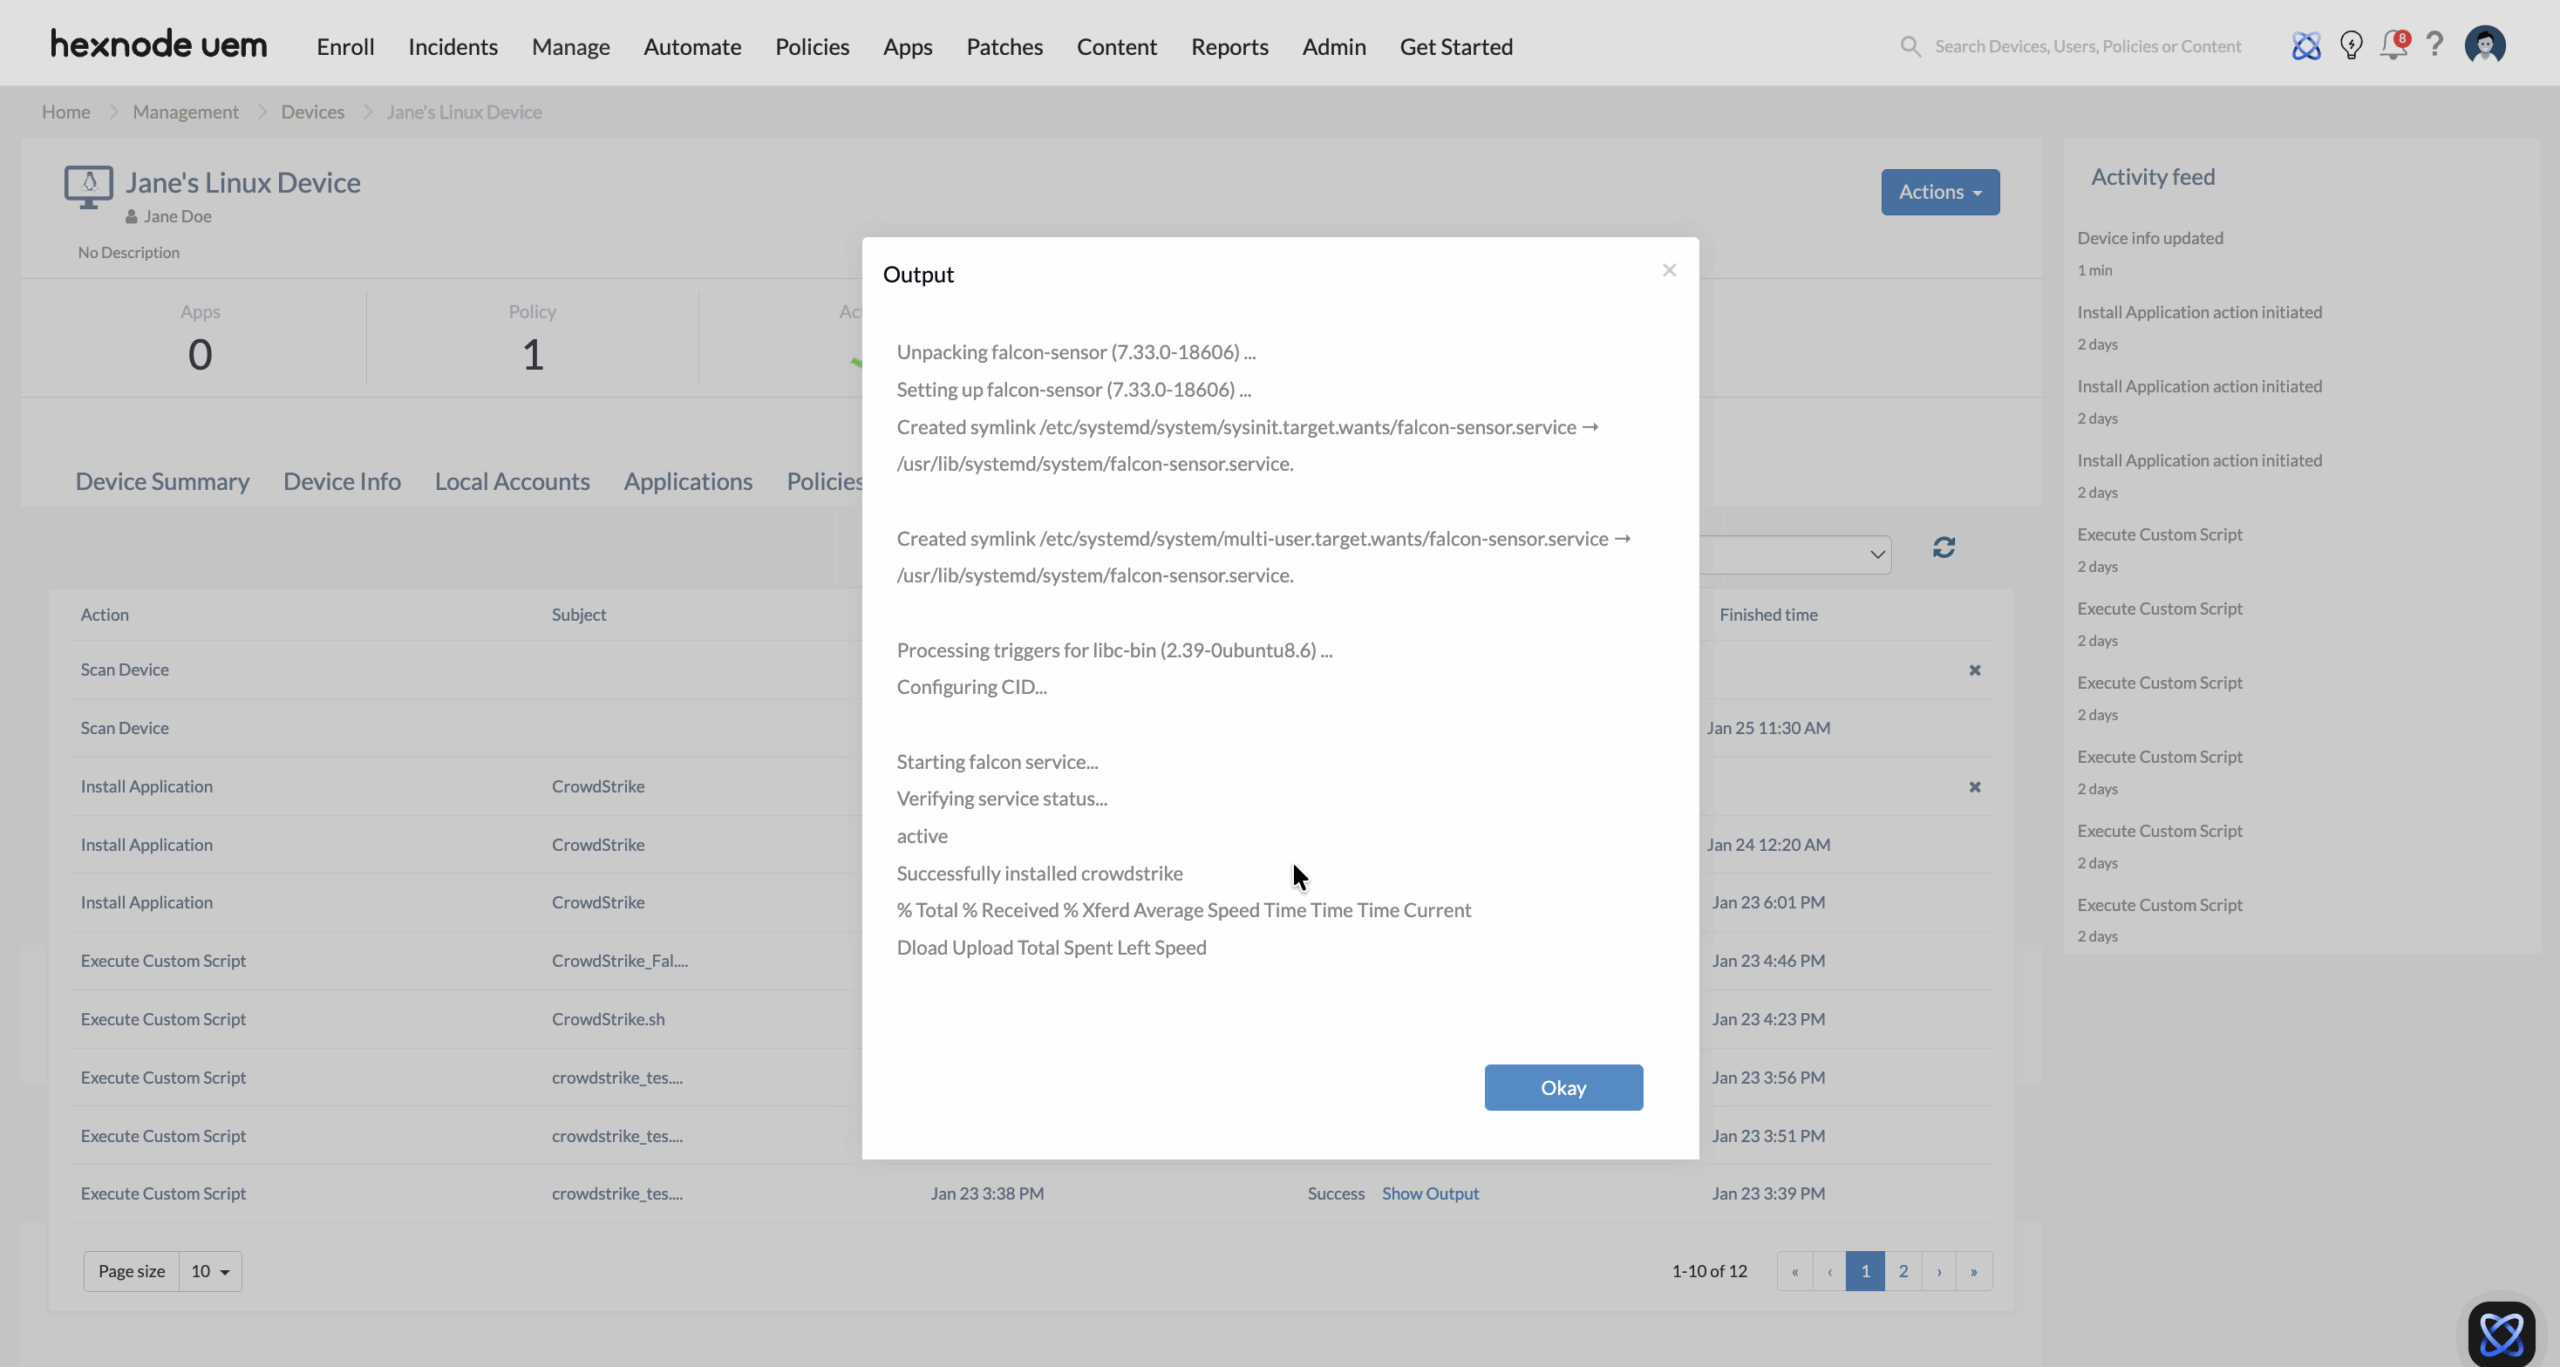
Step 3: Verification
Once the script has finished running, verify the installation through both platforms:
In Hexnode UEM:
Check the Action History tab for the specific devices. A status of “Success” indicates the script was executed without errors.
In CrowdStrike Falcon Portal:
Navigate to Host setup and management > Manage endpoints > Host management. The newly deployed Linux devices should appear in the list with an Active status.
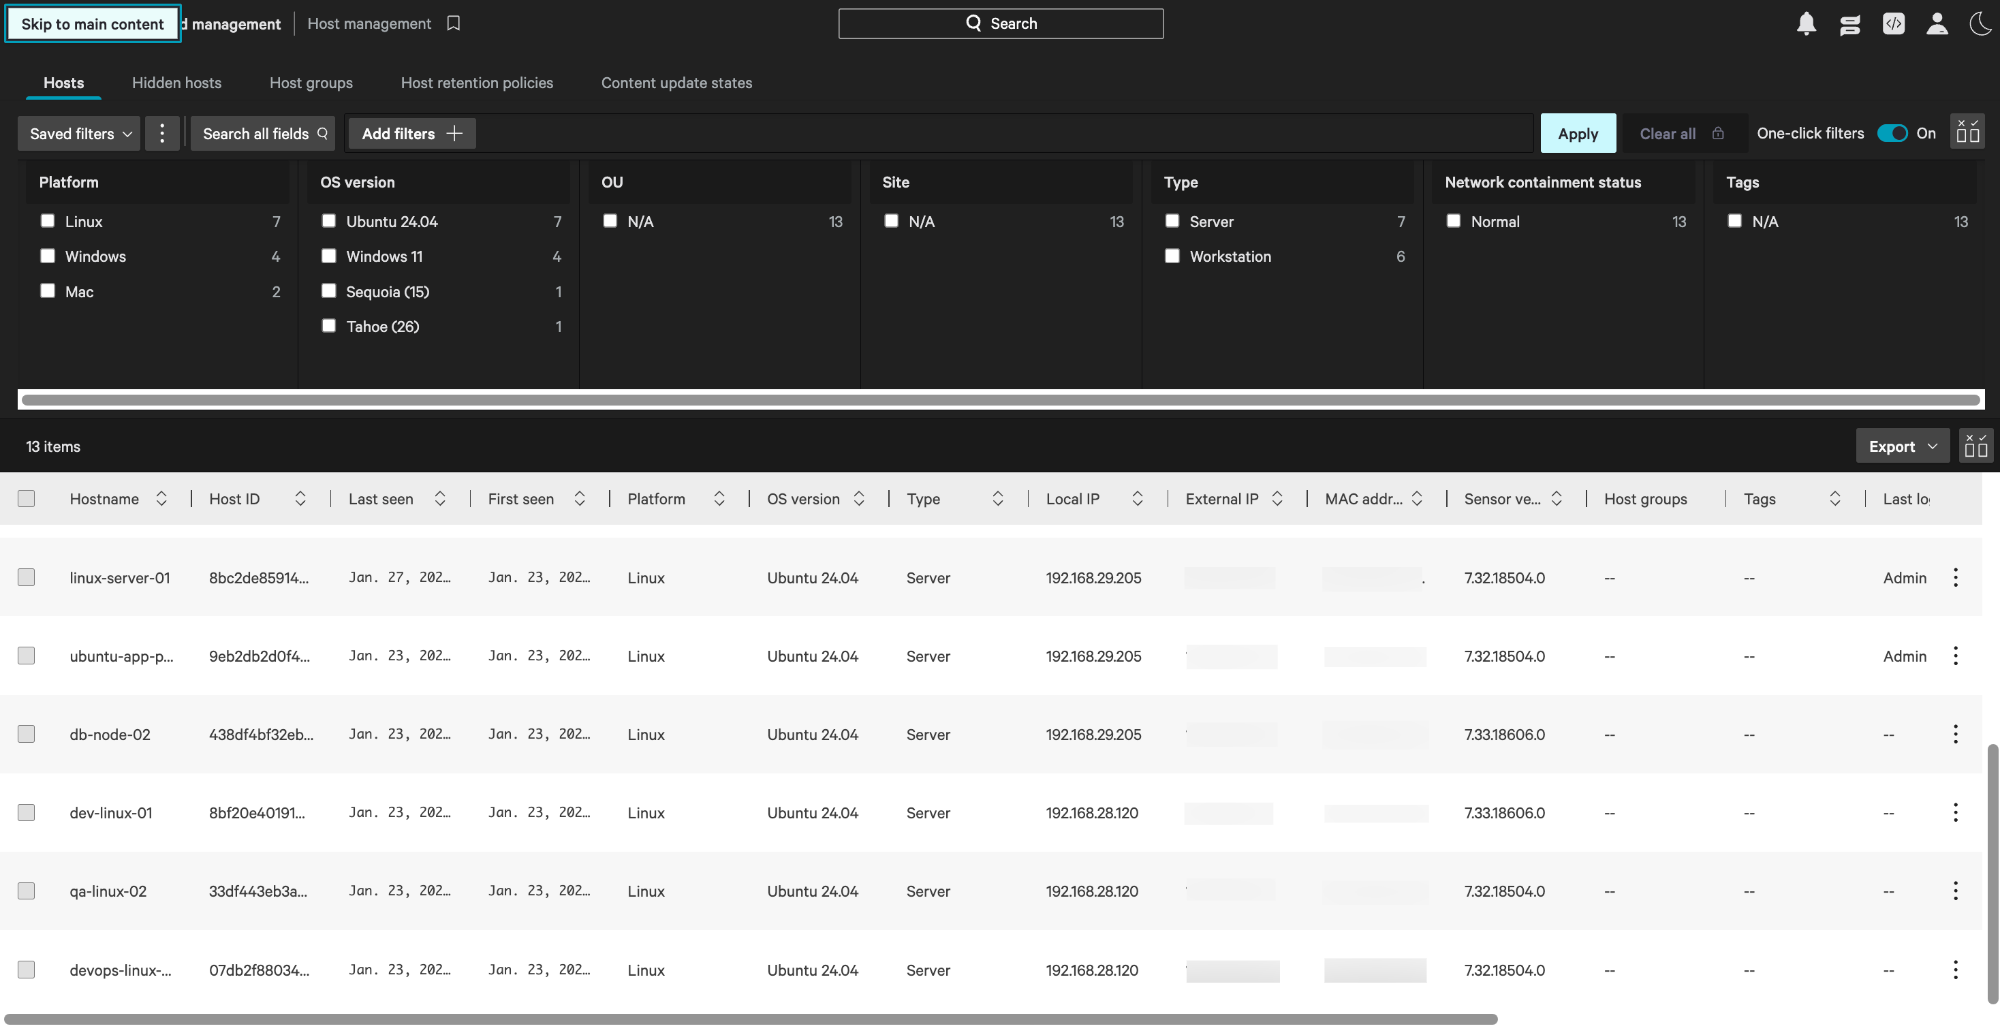
Once verified, the sensor will begin reporting telemetry, and the device will be ready to receive security policies from the CrowdStrike cloud.
