Category filter
Automate configuring registry settings for Windows
This document explains how to create automations to configure registry settings on Windows devices in Hexnode.
The Windows Registry is a central database that stores configuration data for the operating system, installed applications, user preferences, and hardware components. While the registry provides powerful control over system behaviour, manual edits are risky, time-consuming, and difficult to scale across an enterprise.
Hexnode UEM enables administrators to automate registry configurations on Windows devices. They can specify the registry keys and values to be added, modified, or removed, and pair them with time schedules or activity-driven triggers. This ensures that edits are precise but also delivered to the right devices at the right time.
How to create an automation to configure registry settings?
- Log in to Hexnode UEM.
- Navigate to the Automate tab, click New Automation, and select Windows as the platform.
- Automation Name: Enter a name for the automation.
- Description: Provide a brief description to clarify the automation intent or scope (optional).
- Manual configuration
- Action: Start by selecting the type of operation you want to perform. There are 4 actions in manual registry configuration.
- Write Value – Add or update a registry value.
- Delete Value – Remove an existing registry value.
- Add Key – Create a new registry key.
- Delete Key – Remove an existing registry key.
- Registry Path: After choosing the action, specify where in the registry the change should occur. Begin by selecting the root key for system-wide settings and then select the subkey path. Enter the remaining part of the path manually.
Root key:
- HKEY_LOCAL_MACHINE
- HKEY_CURRENT_USER
- HKEY_CURRENT_CONFIG
- HKEY_USERS
Sub key:
- \
- \HARDWARE
- \SAM\
- \SECURITY\
- \SOFTWARE\
- \SYSTEM\
- Value Name: Once the location is defined, provide the exact value to configure. The value name identifies the specific setting you want to modify under the chosen registry path.
- Data Type: Next, assign the type of data the value should hold. Supported types include:
- REG_BINARY – Stores binary data in any form. For example, 0001A4F2.
- REG_DWORD – Stores 32-bit numeric values. For example, 1(decimal) or 0x00000001(hexadecimal).
- REG_EXPAND_SZ – Stores a variable-length string that can contain environment variables, which are expanded at runtime. For example %USERNAME%, expands to current username.
- REG_MULTI_SZ – Stores multiple strings in a list. For example, 00, 01, F2.
- REG_SZ – Stores plain text strings. For example, C:\Program Files\AppName.
- REG_NONE – Stores values with no defined data type.
- REG_QWORD – Stores 64-bit numeric values. For example, 9223372036854775807 (decimal) or 0x7FFFFFFFFFFFFFFF (hexadecimal).
- Value Type: For numeric data types of REG_DWORD and REG_QWORD, specify whether the number will be entered in Hexadecimal or Decimal format.
- Data: Finally, provide the actual data to be applied.
- Import configuration
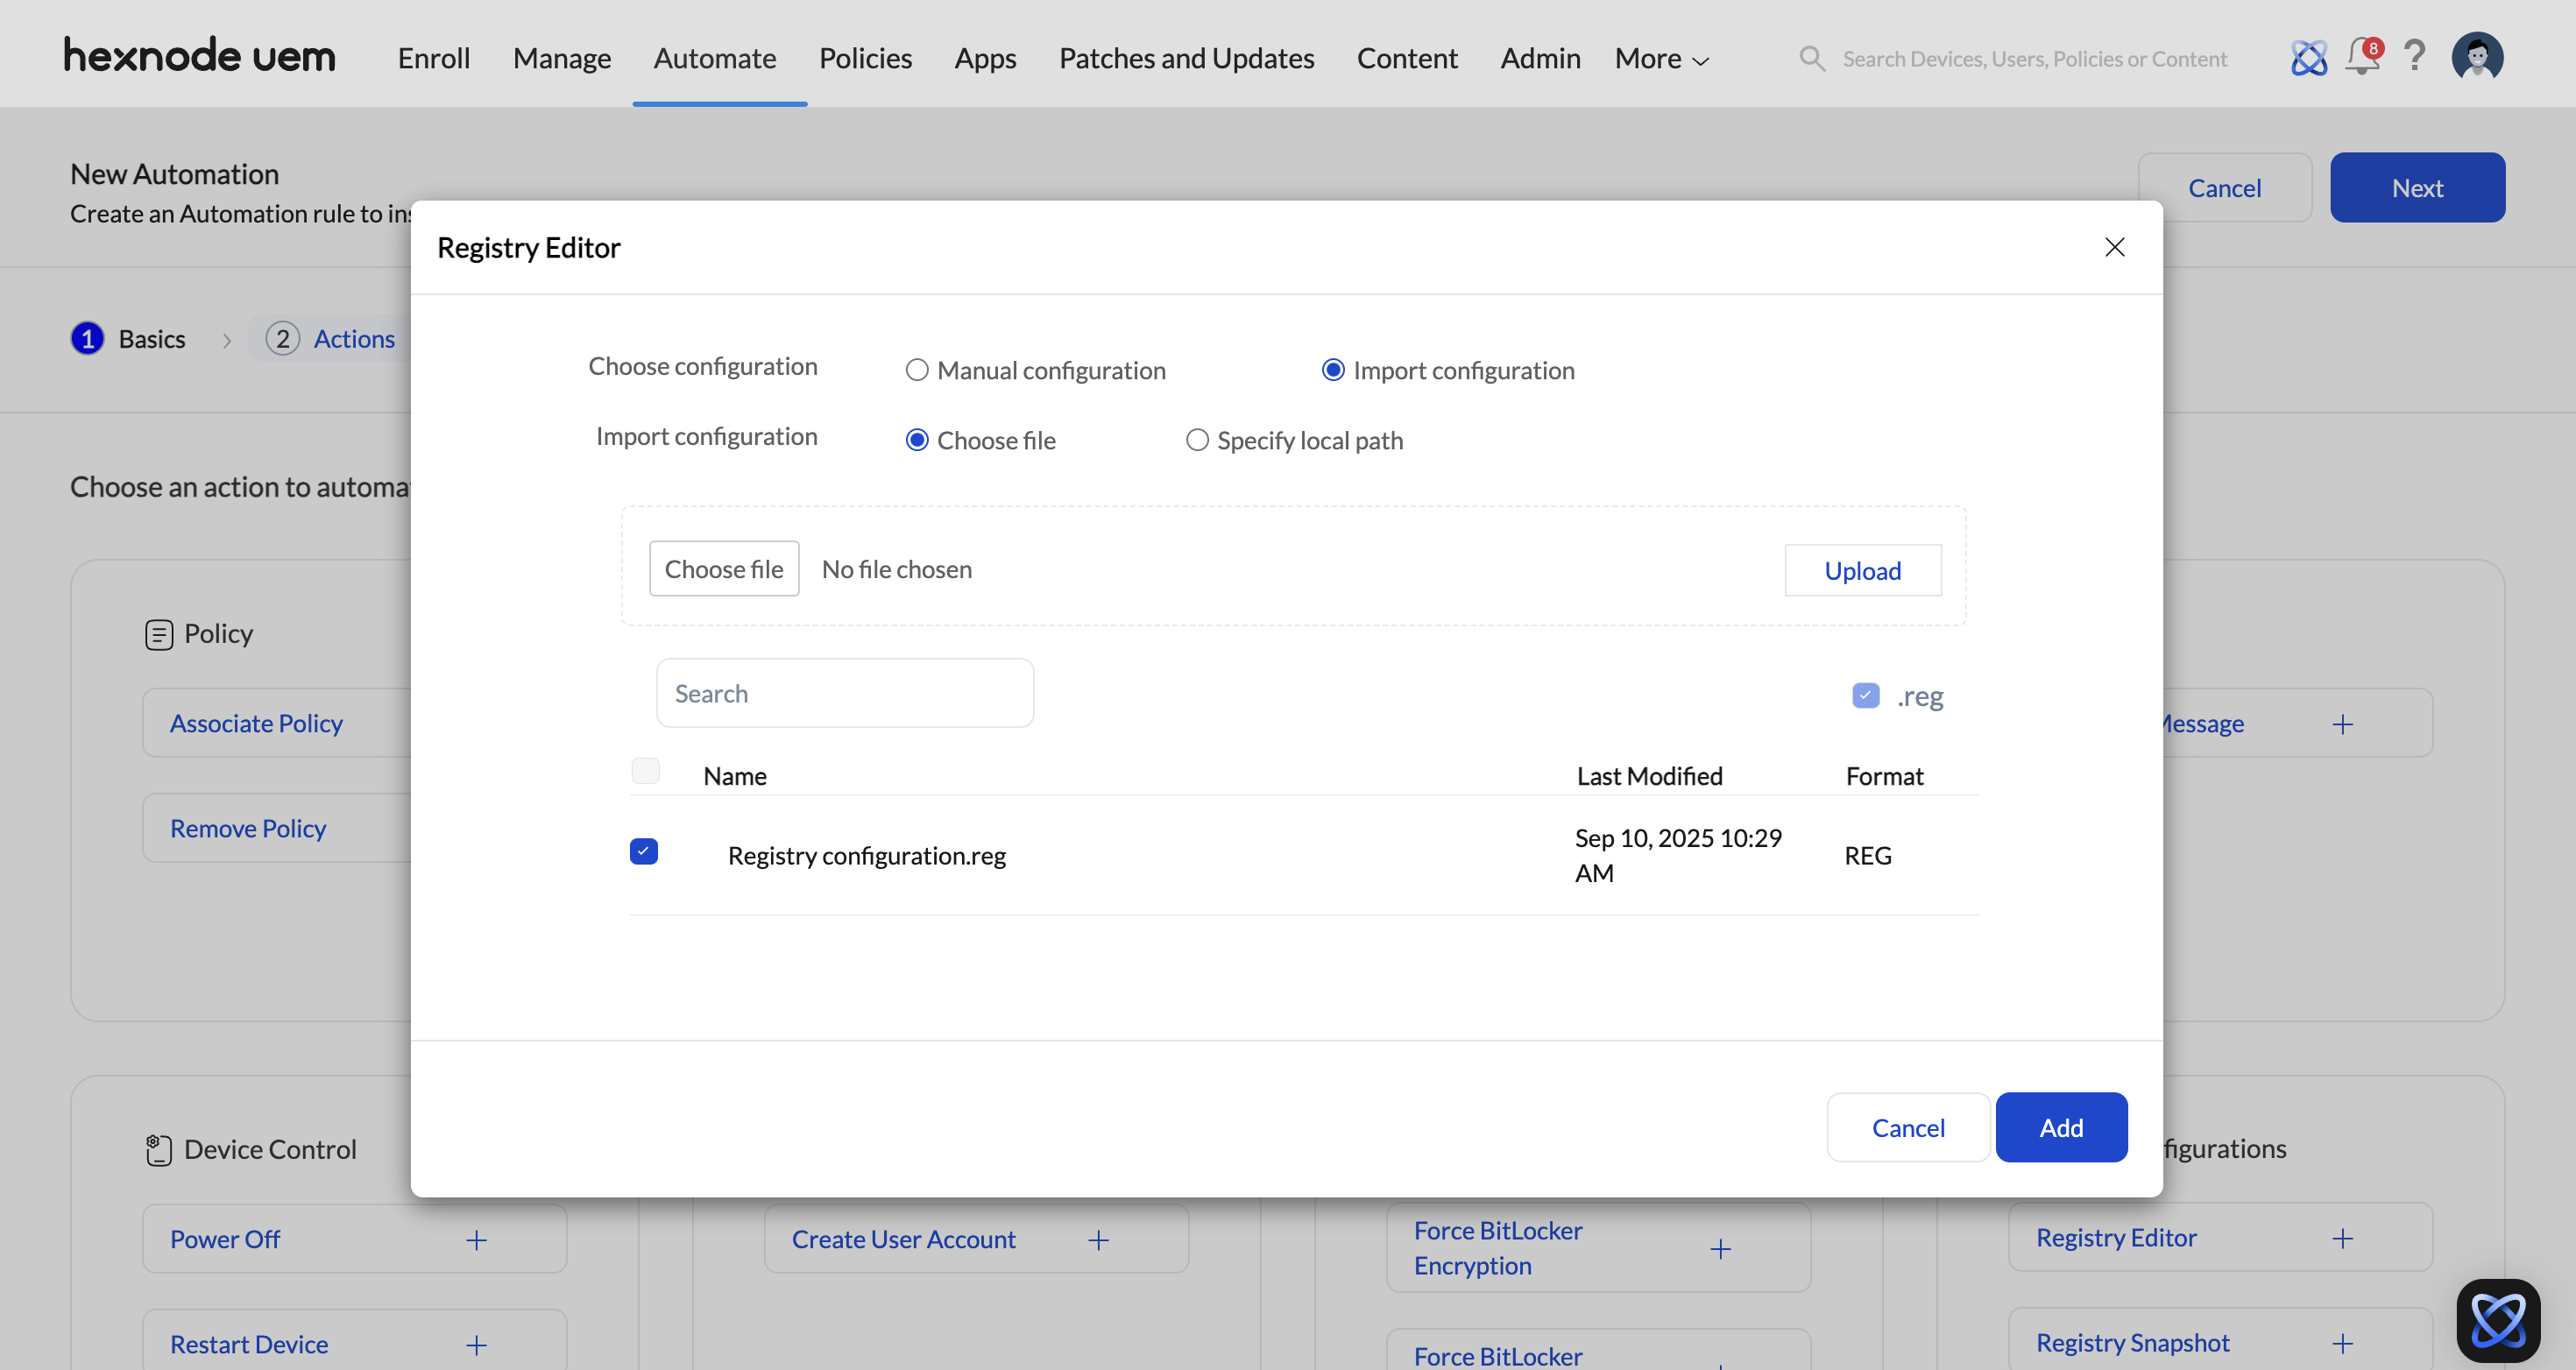
- Select the file from the Hexnode repository. Or,
- Enter the local file path from which the .reg file will be fetched.
- Once the actions are selected and configured, click Next.
- Trigger: The Trigger defines the condition that initiates the automation. Hexnode offers two types of triggers: Time and Activity.
- Initiate: Set the automation initiation frequency.
- Once, ASAP – Executes the automation immediately or as soon as possible.
- Once – Executes the automation at a specific scheduled time.
- Repeat at a set schedule – Executes the automation repeatedly according to a defined schedule (e.g., Everday, Selected days, or Monthly).
- On Device Enrollment – Triggers the automation action when a device is newly enrolled and completes its initial device scan. Devices that are already enrolled are unaffected, even if they meet the filter conditions.
- On Device Compliance – Triggers the automation action when a device becomes compliant with the defined policies. Devices that are already compliant remain unaffected.
- On Device Non-Compliance – Triggers the automation action when a device becomes non-compliant. Devices that are already non-compliant remain unaffected.
- On Location Compliance – Triggers the automation when a Windows device becomes location compliant. A device is considered location compliant when it is located within a geofence defined in Hexnode. Devices that are already location compliant remain unaffected.
- On Location Non-Compliance – Triggers the automation when a Windows device becomes location non-compliant. Devices that are already location non-compliant remain unaffected.
- Once you have configured the Settings and Schedule, click Next. On the following page, you can define the target filters.
- After setting the filters, click Next.
- Review the configured automation settings. Click Edit to modify any section if needed.
- Once you have reviewed the automation, click Save.
After selecting the platform, click on the Edit icon next to the Untitled Automation and provide the following information to rename the automation profile.
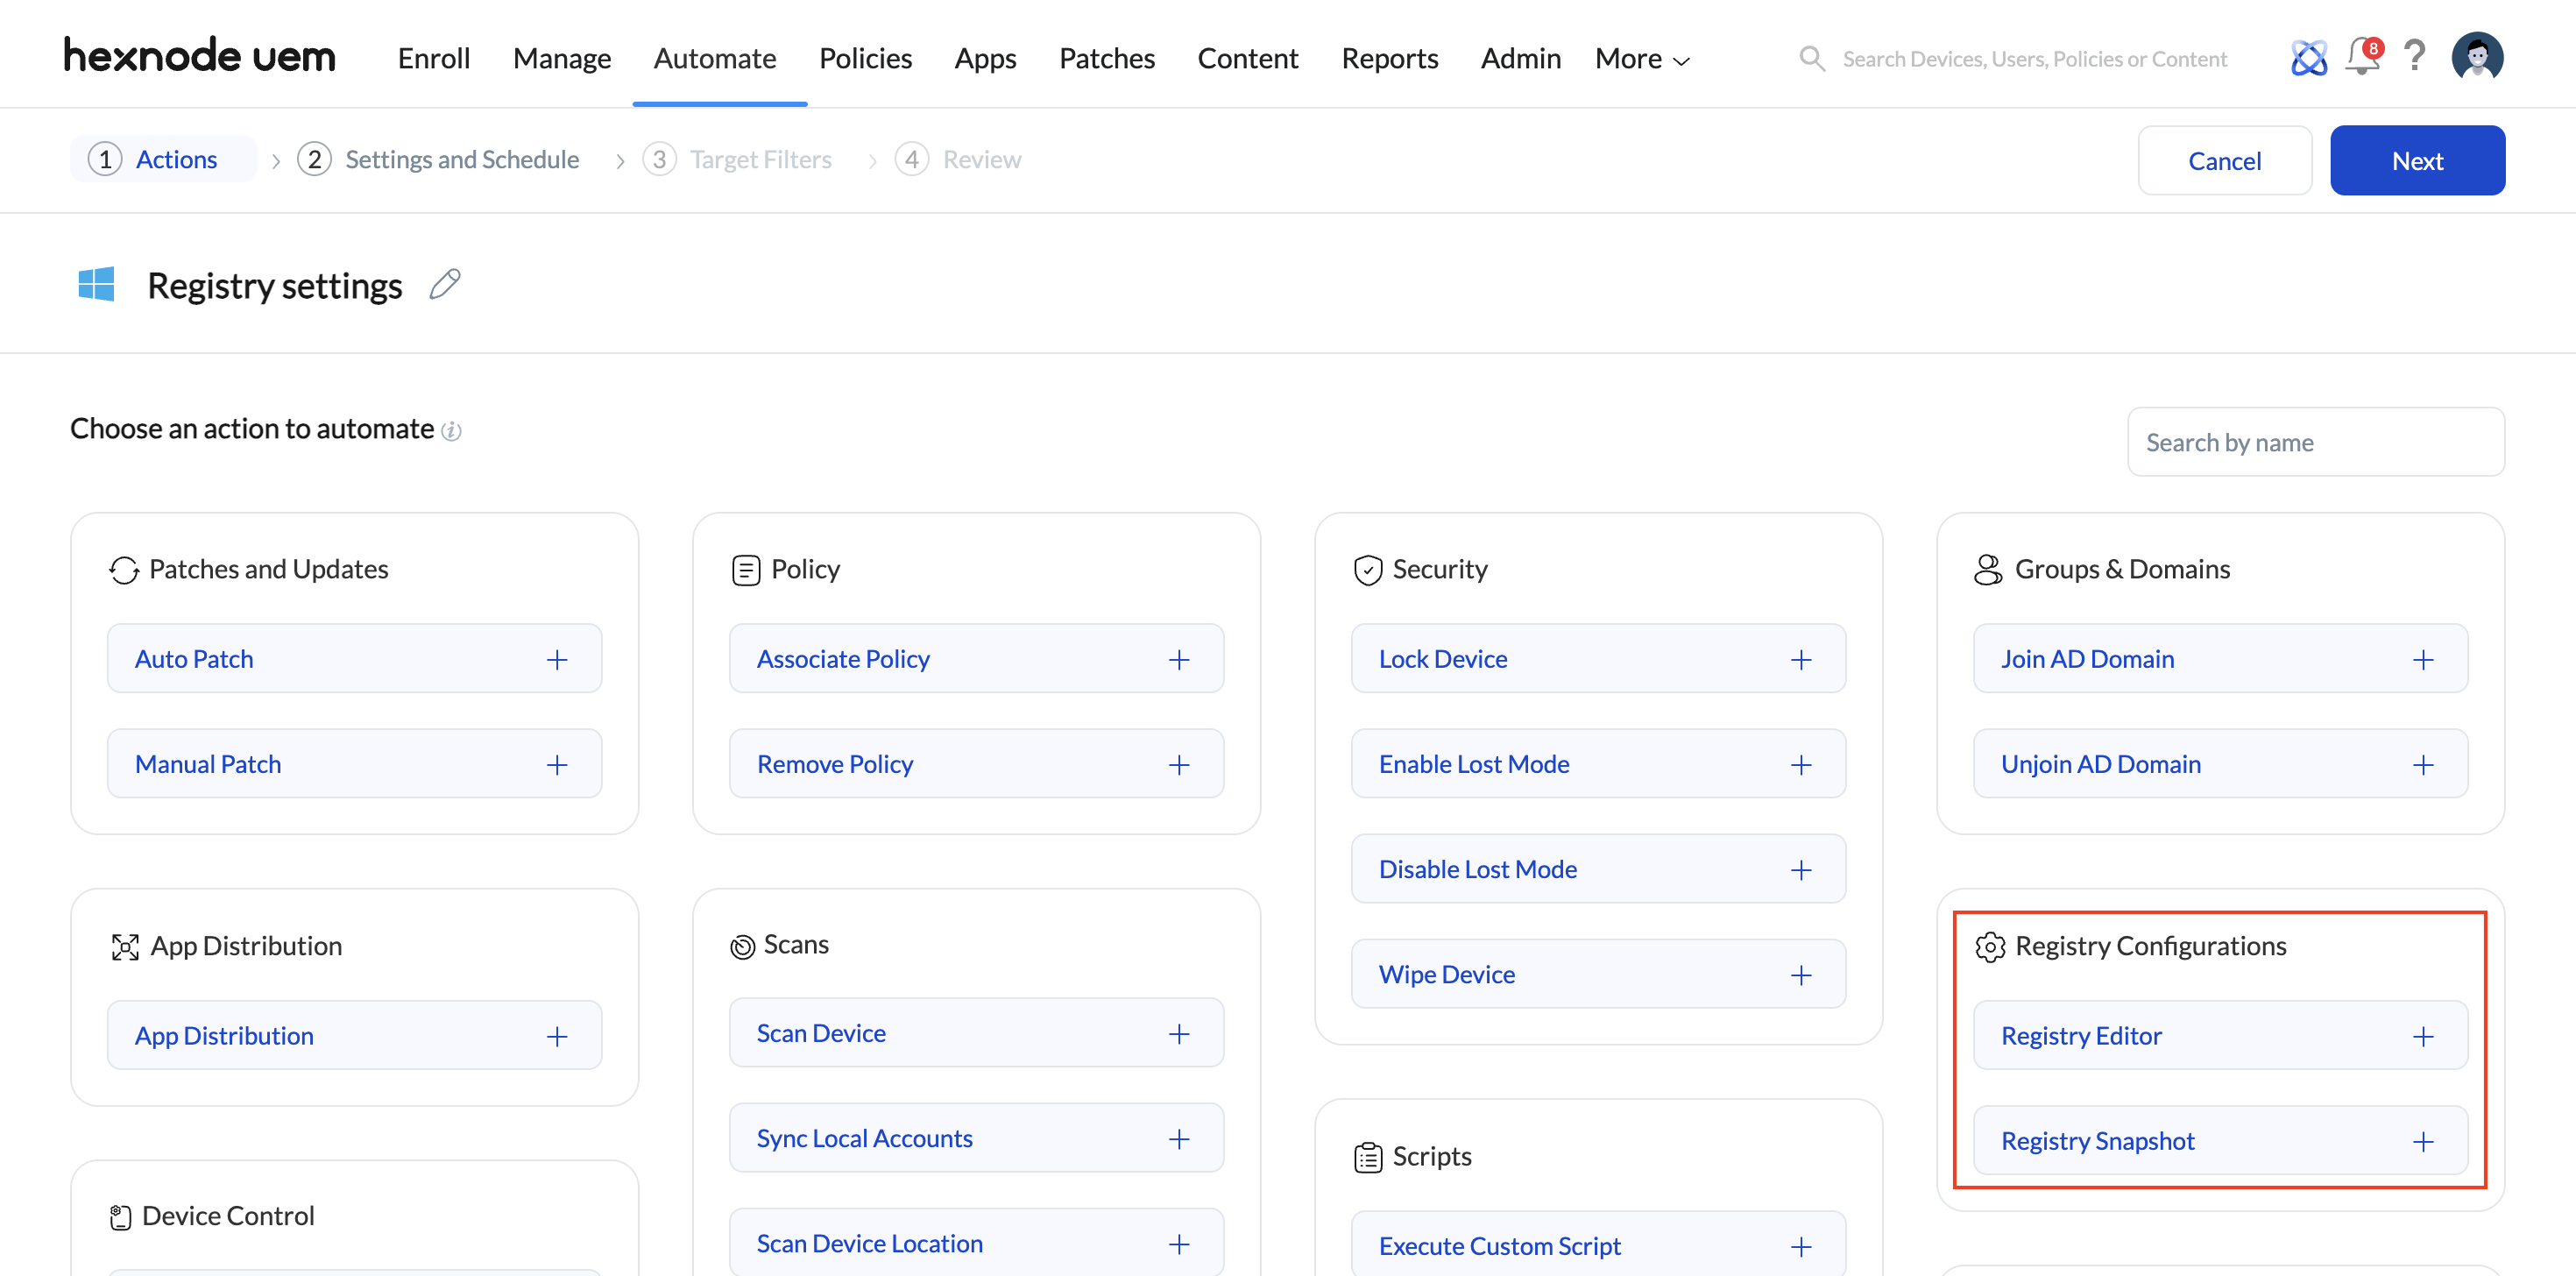
Once the details are provided, click Save. Under Registry Configurations there are 2 actions, Registry Editor and Registry Snapshot.

Registry Editor
The Registry Editor allows you to define and deploy registry settings to your Windows devices. There are two ways to configure: Manual configuration and Import configuration.
Use this option when you want to customize registry entries manually. You can select actions and enter the details for each action.
Use this option when you already have a registry configuration file (.reg) containing predefined settings. Upload the file to apply multiple registry changes in bulk without manually entering details.
You can either:

Registry Snapshot
This option takes a snapshot of the current device registry before making any changes. The snapshot will be stored under Manage > Device > Device Info > Registry. Creating a snapshot before applying edits is recommended, as it provides a backup that can later be referenced or restored to fix unwanted or faulty registry changes.
Configure automation scheduling and related settings here.
If Time is selected as the trigger, choose from:
If Activity is selected as the trigger, choose from:
Configure target filters in this section. Specify options for Included groups, Excluded groups, and custom filters by selecting the Filters option.
An automation runs only when both the trigger condition and the selected filters are satisfied.
How to keep track of the automation?
To view specific automation details, select the desired automation and navigate to the Reports section. Here, you can see device-specific details related to the automation, such as the device name, platform, action, version, initiation time, completion time, and the automation status. You can also export and download the report in either PDF or CSV format from this section.
What happens at the device after you configure registry settings?
When a registry automation is applied, the specified changes are made directly to the Windows Registry on the target device.
- Write Value: The value is added or updated at the specified registry path.
- Delete Value: The value is removed from the specified registry path.
- Add Key: A new registry key is created at the selected location.
- Delete Key: The specified registry key and all its values are removed.
All changes take effect on the device according to the operating system or application behaviour.
The Registry Snapshot will be available as a .zip file under Manage > Device > Device Info > Registry. This can be used to refer and thereby restore the registry during any system failure.