Kiosk mode for Android devices confines the device usage to a limited number of useful applications. The devices in kiosk mode run only the specified applications with finite device functionalities. A web app is nothing but a URL added as an app. The URL appears on the device home screen with the chosen app icon. Web apps can be configured to run either in single-app or multi-app kiosk mode. Converting a device into perfect kiosk, configures it to function as a dedicated device performing a specific task.
Step 1: Add the web app to the Hexnode App Inventory
Before adding a web app to the kiosk, you need to add the app to the app inventory.
- Log in to your Hexnode MDM portal.
- Go to Apps tab and click on +Add Apps.
- Select Web App from the drop-down list.
- In the Add Web App window, give the name, URL, app icon and category of the app. To ensure that your app icons are clearly visible on the device and the Hexnode portal, use square-shaped images with device-specific dimensions.
- Click Add. Now the web app is added to the App list.
Note:
For specific websites, certain device information can be passed along with the URL on to the target device with the help of wildcards. Such URLs would display the device information. Web apps opened with Hexnode Browser Lite (Hexnode’s default browser) allow the users to pass device information.
While adding the web app to the app list, enter the URL in the format “myURL/wildcard” to include wildcards. The following device information can be passed:
- Device name (%devicename%)
- Device ID (%deviceid%)
- Wi-Fi Mac Address (%wifimacaddress%)
- Name (%name%)
- Domain (%domain%)
- NetBIOS name(%netbiosname%)
- UDID (%udid%)
- Model (%model%)
- Phone number (%phonenumber%)
- ICCID (%iccid%)
- Email (%email%)
- IMEI (%imei%)
- Serial number (%serial%)
- Department (%department%)
- Asset tag (%assettag%)
- Device notes (%devicenotes%)
For example, http://example.com/%devicename%/%udid%/%phonenumber%/%imei%/%netbiosname%.
Step 2: Create web app kiosk policy for Android device
- Go to Policies.
- Select an existing policy or create a new one by clicking on New Policy.
- From Kiosk Lockdown, select Multi app or Single app as per your requirement.
- Click Configure and click on the + icon on the mobile screen shown.
- Click on Add App.
- Select the web app from the list and click Done.
- You may also configure
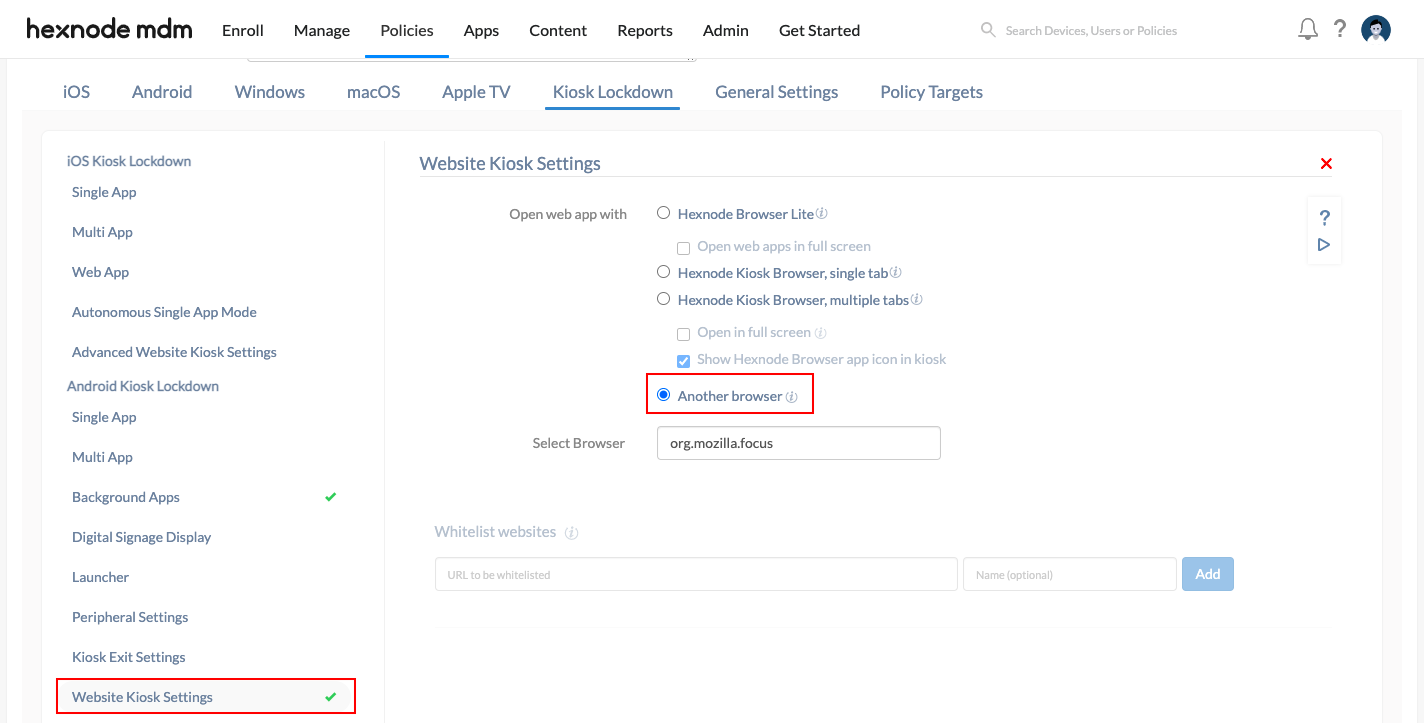
website kiosk settings and
advanced website kiosk settings from the policy. These features help you customize the website kiosk experience to the users.
- Go to Policy Targets and select the Devices/Device Groups/Users/User Groups/Domains.
- Click OK.
- Save the policy by clicking Save.
Exception:
While adding web apps in kiosk mode, make sure you use the web apps mobile-specific subdomains. For example, the URL for the Wikipedia’s website is www.wikipedia.org/. But on some devices, the URL for the same website supported is m.wikipedia.org/.
So, if you add the first website in the kiosk policy, web app containing this website URL could only be accessed. And the other website will act as a restricted one and thus remains inaccessible from the device.
Notes:
- By default, the whitelisted web pages can be viewed on Hexnode Browser Lite (single-tabbed browser). This browser provides access to only a single tab; the address bar is disabled by default.
- Choose Hexnode Browser to browse whitelisted web apps and websites in single or multiple tabs.
- The users can also choose to browse the webpages on other browsers like Chrome, Firefox, etc. via the Another browser option, on any Android device.

However, you can choose to open the web app using another browser only if the browser app is added as either
Background Apps or Multi App in the kiosk lockdown policy associated with the device.


