
Category filter
Kiosk mode for iOS – Complete Guide
Kiosk mode in iOS devices lets you restrict your publicly placed devices to run either a single application or a set of predefined apps in the foreground. It limits the user from accessing any other feature or application in the device. iOS devices provide additional security benefits in the setup, configuration and management of these devices.
System requirements
To activate kiosk mode on your iOS device, it should satisfy the following requirements:
- Device must be supervised.
- iOS version 9.3+ to activate multi-app kiosk mode and iOS version 6.0+ to activate single-app kiosk mode.
Setting up the device
If you have a new device, the following steps must be performed to enable kiosk mode in your device.
- Enroll the device with Hexnode UEM.
- Associate kiosk mode to the enrolled device.
Enrolling the device with Hexnode UEM
The following section explains all the general methods of enrollment:
Open enrollment is the easiest and the fastest method of enrollment. You can enroll your device using your server-name alone. The user will only have to open the browser and enter the enrollment URL and the configuration profile will get downloaded. The user can install the profile in the device with a single touch. All the devices that are enrolled using Open Enrollment get assigned to a default user predefined in the Enroll tab.
In open enrollment, anyone who knows the enrollment URL can enroll their devices into the Hexnode portal without having to enter any enrollment credentials for authentication.
To set-up open enrollment:
- Navigate to Enroll > Settings on your Hexnode portal.
- Set the Request Modes as either Email or Text/SMS or both.
- Under Authentication Modes, enable No Authentication, choose a default user and set a default password (only for Windows devices).
- Under Enrollment Restrictions, choose the device models allowed for enrollment and enable/disable pre-approved enrollment and enforce assigned user.
- Choose the Enrollment Ownership.
- Re-enrollment options can be set either to Enroll as a new device or to Retain configurations and change owner.
- Click Save.
To create a new user:
- Head on to Manage > Users on your Hexnode portal.
- Click on New User.
- Enter the display name and Email address. Enable Send enrollment request to send the enrollment request immediately to the user.
- Click on Save to save the user details in the Hexnode portal and send the enrollment request to the user.
An enrollment request will be sent via email/SMS to the user, consisting of the Server name and QR code. The devices can now be enrolled using Open Enrollment.
Authenticated enrollment requires the server’s name and the authentication credentials. The password is randomly generated and can be used only once.
Authenticated enrollment makes sure that only the right users can enroll their devices to the Hexnode portal. This is the better enrollment method in case you want to set up kiosk and make it available only to the required users.
To set-up authenticated enrollment:
- Navigate to Enroll > Settings on your Hexnode portal.
- Set the Request Modes as either Email or Text/SMS or both.
- Under Authentication Modes, enable Enforce Authentication and choose to send the enrollment request to AD/Microsoft Entra ID/Local/Google/Okta User or allow users to enroll with their dedicated credentials using Self Enrollment.
- Under Enrollment Restrictions, choose the device models allowed for enrollment and enable/disable pre-approved enrollment and enforce assigned user.
- Choose the Enrollment Ownership.
- Re-enrollment options can be set either to Enroll as a new device or to Retain configurations and change owner.
- Click Save.
To create a new user:
- Head on to Manage > Users on your Hexnode portal.
- Click on New User.
- Enter the display name and Email address. Enable Send enrollment request to send the enrollment request immediately to the user.
- Click on Save to save the user details in the Hexnode portal and send the enrollment request to the user.
An enrollment request will be sent via email/SMS to the user, consisting of the Server name, Password and QR code. The devices can now be enrolled using Authenticated Enrollment.
Self Enrollment allows users to enroll their devices manually in the Hexnode portal. If an organization needs to set up kiosk only for the users in their directory services, they can make use of Self Enrollment.
Self Enrollment using AD User: This method allows the user to directly enroll in Hexnode UEM if they already have their dedicated Active Directory credentials.
To configure Active Directory:
- Go to the Admin tab and select Active Directory settings.
- Configure Active Directory settings and enable Allow Self-Enroll.
- Click Save.
Once the AD users are imported to the Hexnode portal,
- Go to Manage > Directory Services.
- Select the domain or OUs in groups.
- Click on Actions and select New Enrollment.
- Click on Send to send the enrollment request to the AD users.
Self Enrollment using Local User: The admin creates a default user and a dedicated password manually or assigns a common password or individual passwords for the users and sends it to them as bulk mail. The devices can be enrolled with these credentials.
To configure a local user:
- Go to Enroll > All Enrollments > Enterprise > Self-Enrollment > Local.
- Create a new user by clicking on the Create a new user button. Click on the Change Password button to change the passwords of existing users.
Self Enrollment using Google User: This enrollment method allows the user to directly enroll in Hexnode UEM if they already have their dedicated Google Workspace (G Suite) credentials.
To configure Google Workspace (G Suite):
- Go to the Admin tab and select Google Workspace (G Suite).
- Configure Google Workspace (G Suite).
Once the Google Workspace (G Suite) users are imported to the UEM portal,
- Go to Manage > Directory Services.
- Select the domain or OUs or groups.
- Click on Actions and select New Enrollment.
- Click on Send to send the enrollment request to the Google Workspace (G Suite) users.
Self Enrollment using Okta User: This method allows the users to enroll their devices in Hexnode UEM if they already have their dedicated Okta credentials. Before configuring Okta enrollment, you have to configure the Okta domain in Hexnode.
To configure Okta with Hexnode:
- Go to Admin > Okta.
- Configure Okta and enable Allow self-enroll.
- Click Save.
Once the Okta users and groups are imported to the Hexnode console,
- Navigate to Manage > Directory Services.
- Select the domain or OUs or groups.
- Click on Actions and select New Enrollment.
- Click on Send to send the enrollment request to the Okta users or groups.
The devices can now be Self Enrolled.
Hexnode UEM allows you to enroll devices in bulk. To do this,
- Go to Enroll > All Enrollments > Invite > Email.
- Choose the required domain.
- Under Send enrollment request to, toggle the button to Bulk User.
- Upload the CSV file containing the fields name, email and ownership. All other fields – mobile, devicename, SerialNumber and platform – are optional. The ownership field can have the values personal, corporate or selectuser. ‘selectuser’ allows the user to select ownership details while enrolling.
- Click Next and verify the details of the CSV uploaded.
- Click Next and then choose the method to send the enrollment request via Email/SMS.
- Click on Send, and the enrollment email/SMS will be sent to all the users.
Pre-approved enrollment lets the administrator set up policies for devices even before the devices are enrolled in Hexnode UEM. The configurations/restrictions are automatically applied once the device is enrolled. Pre-approved Enrollment is set up by adding a CSV file with all the device details. You can also add DEP devices as pre-approved devices in the portal.
Hexnode provides users with platform specific methods of enrollment as well. The following section gives you a brief explanation on Apple-specific methods of enrollment:
The Device Enrollment Program is a legacy deployment program by Apple for enrolling Apple devices in bulk. Apple has combined DEP and VPP (Volume Purchase Program) to a single portal under the name of Apple Business Manager (ABM) for business organizations and Apple School Manager (ASM) for educational institutions. DEP helps in deploying devices in bulk by automatically applying settings and configurations upon the initial device start-up, making it ready for use right out of the box.
Apple Configurator allows users to create configuration profiles for Apple devices including iPad, iPhone, Apple TV and iPod Touch for easily deploying in business or school.
Follow the steps given below to enroll devices in the Hexnode portal with Apple Configurator:
Step 1: Create a Wi-Fi profile.
Step 2: Create a Blueprint and add Wi-Fi profile.
Step 3: Prepare the device.
Step 4: Apply Blueprint.
Step 5: Assign a user for the enrolled device.
When the device restarts, follow the on-screen procedures to set up the device. Once the device is set-up, the MDM configuration will get automatically applied to the device and the device gets enrolled in the Hexnode portal.
Apple Configurator (2.5 or later) can be used to enroll Apple devices running on iOS 11 or later to your DEP account and therefore, take advantage of Apple Business/School Manager enrollment. Over-the-air supervision of iOS devices is possible only on devices enrolled via DEP. Visit the link given for a detailed explanation on how to Add iOS devices to DEP using Apple Configurator 2.5.
Hexnode allows you to assign iOS devices to Google Workspace (G Suite) users. Initially you will have to configure Google Workspace (G Suite) with the UEM portal, followed by enrollment of the devices. The enrolled iOS devices will get assigned to the respective Google Workspace (G Suite) users. Policies and actions can be associated with the devices, users, or whole domain from the Hexnode UEM console to manage and monitor the utilization of these devices.
To assign devices to Google Workspace (G Suite) users:
Step 1: Configure Google Workspace (G Suite).
Step 2: Enroll iOS devices via Google Workspace (G Suite) Authentication.
Once you are done enrolling your device using one of the above-mentioned methods, you can proceed to enabling and activating kiosk mode in your device.
Setting up Hexnode MDM app
Once the Hexnode app is successfully installed on your device you have to launch the app and grant all the required permissions for the kiosk mode to be enabled on the device. The permissions to be granted from inside the app are:
- Location
- Allow Once
- Allow Always while using the App (Recommended)
- Don’t Allow
- Microphone
- Don’t Allow
- Ok (Recommended)
- Camera
- Don’t Allow
- Ok (Recommended)
- Photos
- Select Photos – Only the selected photos can be accessed by the Hexnode App.
- Allow Access to all Photos (Recommended)
- Notifications
- Don’t Allow
- OK (Recommended)
After giving access to all the permissions requested by the Hexnode app, click on Agree and Continue to finish setting up the Hexnode app.
Associating kiosk policy and enabling kiosk mode
Follow the steps given below to associate a kiosk policy with your devices:
- Go to the Policies tab.
- Click on New Policy and provide a name.
- Proceed to Kiosk Lockdown > Android Kiosk Lockdown.
- Select either Single App/Multi App kiosk mode.
- Click on the Configure button and select the required app(s) to run in kiosk mode.
- Go to the Policy Targets sub-tab.
- Select the required Devices/Device Groups/Users/User Groups/Domains to which the policy is to be associated.
- Click on Save.
The policy will be automatically associated with your devices. Once the policy is associated, the devices will automatically go into kiosk mode.
Apps can be installed into the devices in two ways:
- App installation via Install Application action.
- Method 1(for a single device)
Go to Manage > select device > Actions > Install Application > select apps from the list > Done.
- Method 2(for multiple devices)
Go to Manage > check devices > Actions > Install Application > select apps from the list > Done.
- Method 1(for a single device)
- App installation via Policies
- Head to Policies > New Policy > New Blank Policy. Name the policy and add a description(optional).
- Go to iOS > App Management > Mandatory Apps > Configure.
- Click on +Add > Apps or App Groups.
- Select the apps/app groups and click on Done.
Major kiosk features
Hexnode has a feature rich kiosk mode for iOS devices. Given below is a list of all the features for iOS kiosk mode:
- Single App kiosk
Single App kiosk locks down the iOS device to a single application. Once kiosk mode is enabled, the kiosk-enabled application launches automatically as the only foreground app restricting the user from accessing any other features or apps on the device.
- Multi App kiosk
Multi App kiosk is a lockdown mechanism which restricts your device to a set of applications which are pre-approved by the admin. It ensures that the device is not used for anything other than to access the applications approved by the organization.
- Autonomous Single App Mode
Autonomous Single App Mode (ASAM) on an iOS device allows an app to lock itself down and release from the single app kiosk mode on its own when the user logs out of the app or when the task is completed. This kiosk mode can be configured to put an iOS app in the foreground and ensure that no other application or notification interrupts it’s functioning.
- Web App Kiosk
Web App Kiosk restricts the device from running websites that are not approved by the organization. Web apps reside on the device like an app. Websites which are added as web apps in the device can be opened either on Safari or Hexnode Browser Lite. Hexnode Browser Lite ensures unrestricted access to the approved external links within the web apps.
- Advanced Website Kiosk Settings
Advanced Website Kiosk Settings helps us to configure advanced settings for iOS devices operating in Web App Kiosk mode. It delivers additional configurations and helps you customize the website kiosk browsing experience with Hexnode Browser Lite. - Hexnode Browser Lite
Hexnode Browser lite is a single-tabbed browser that opens the web apps added in either single-app/multi-app kiosk mode. It can also be used to access external web URLs given that they are whitelisted in the kiosk policy.
- Update Enterprise apps
Hexnode UEM makes it possible to update Enterprise apps set up in kiosk, without taking them out of the kiosk mode.
To update enterprise apps in kiosk mode:
Step 1: Replace the old IPA file with the new one in the Hexnode inventory.
Step 2: Push the updated app to the device.
- Update Store apps
Store apps can be updated from Hexnode if the app to be updated was installed as a mandatory app via policy. Click here to get a detailed explanation on updating Store Apps.
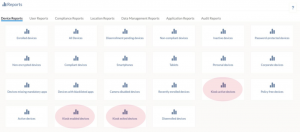
- Reporting
Hexnode UEM stores the device, user, compliance, location, data management, application and audit data securely which can be accessed from the Reports tab.
- Exporting reports: Choose any report -> click on Export > Select file format between PDF and CSV.
- Scheduling reports: Choose any report > click on Schedule Report and fill in the required details.
It allows you to generate the following kiosk reports:
- Kiosk active devices: It lists all the devices that are currently locked down into kiosk mode.
- Kiosk enabled devices: It lists all the devices to which a kiosk policy has been associated but not currently in kiosk mode.
- Kiosk exited devices: It lists all the devices that have exited from the kiosk mode.
For a detailed explanation on exporting and scheduling reports, check out Managing Reports in Hexnode.
How to disable kiosk mode
Kiosk mode can be disabled temporarily or permanently from the Hexnode portal. Depending on whether the kiosk mode is enabled/disabled, the devices can be classified as:
- Kiosk active devices: It lists all the devices that are currently locked down into kiosk mode.
- Kiosk enabled devices: It lists all the devices in which kiosk mode has been temporarily disabled. The kiosk policy is still associated but the device has exited from kiosk lockdown.
- Kiosk exited devices: It lists all the devices in which kiosk mode has been permanently disabled.
Permanently disabling kiosk mode
When device is online
Kiosk mode can be permanently disabled when the device is online (active) by:
- Removing policy from the device
- Go to the Manage tab and choose the device.
- Proceed to the Policies sub-tab.
- Click on the trash icon besides the respective policy name.
- Removing the device from policy targets
- Head to the Policies tab and select the kiosk policy.
- Continue to Policy Targets.
- Click on Remove option near the required device name.
- Archiving/Deleting the policy
- Go to the Policies tab.
- Select the required policy and click on Manage > Move to Archive.
- After archiving the policy, go to Policies > Archived Policies.
- Select the policy/policies you want to delete and click on Manage > Delete.
(Steps 3 and 4 are optional to delete the policy permanently)
- Disenroll the device
- Go to the Manage tab.
- Choose the required devices and click on Actions.
- Select Disenroll Device.
Performing one of the above-mentioned methods results in the device exiting the kiosk mode.
When device is offline
Kiosk mode can be permanently disabled when the device is offline (inactive) by using Apple Configurator:
- Connect the device to a Mac with Apple Configurator 2 installed in it.
- Open the Apple Configurator and the connected iOS device will be displayed.
- Right click on the device, click on Remove and select Profiles.
- Select the profile from the list of all profiles installed in the device and click on Remove Profiles.
- In the confirmation box, click Remove.
The device exits kiosk mode without having to connect to the internet.


