Category filter
How to configure Per-App VPN in iOS devices
This article will guide you in configuring Per App VPN for iOS devices via Hexnode.
A Virtual Private Network (VPN) employs a safe and secure private network (tunnel) to improve data security and privacy. It ensures that any communications between the devices and the internet will happen only through this tunnel. Many corporate environments use VPN to enable their staff to access their resources and networks securely from anywhere in the world. In addition, it adds an extra layer of security when employees try to access corporate resources using public networks.
However, setting up a device-wide VPN will route the entire data from the device through the private network. Sometimes, an organization may prefer a VPN to be established only for its corporate apps. Apple allows to set up VPN connections on a per-app basis for iOS and iPadOS devices. Here, administrators can exercise granular control over which data flows through the VPN. Configuring a per-app VPN will help businesses separate traffic at the app level, allowing the segregation of personal data from corporate data. Therefore, Per App VPN secures network communications for internal–use apps while maintaining the privacy of personal data.
Per App VPN for Managed Apps
A Per App VPN can be rolled out directly via a remote management solution like Hexnode. It will work only for apps that are installed and managed by Hexnode on the devices. The apps must also be built with the Cocao framework and use standard networking APIs. An administrator can further safeguard data by configuring managed apps with different VPN connections. For instance, a marketing app could use an entirely different data centre than a finance-related app. In a nutshell, the per-app VPN framework limits VPN access to explicit apps only. Admins can also configure per-app VPN On Demand to automatically establish VPN connections for specified domains. It works on devices running i0S 7+.
Hexnode supports the following connection types for establishing a per-app VPN connection on iOS devices:
- IPSec (Cisco)
- Cisco AnyConnect
- Juniper SSL
- F5 SSL
- SonicWALL Mobile Connect
- Aruba VIA
- Check Point Mobile VPN
- Open VPN
Configure iOS Per-app VPN connection
To configure Per App VPN for any connection type,
- Log in to your Hexnode console.
- Navigate to Policies. Create a new policy with the New Policy button or choose an existing policy to edit it. Assign a suitable name and description (optional) for the policy.
- Head on to iOS > Network > Per-App VPN > Configure.
- Use the +Add button to add the required apps or app groups with which you want to associate the per-app VPN connection.
- Next, select the Provider Type to tunnel the network traffic. You can choose either of the following:
- App-proxy: Choose this option to tunnel the traffic at the application layer.
- Packet-tunnel: Choose this option to tunnel the traffic at the IP layer.
- Next, configure the VPN parameters for the required connection type. Here are the general settings available for all connection types:
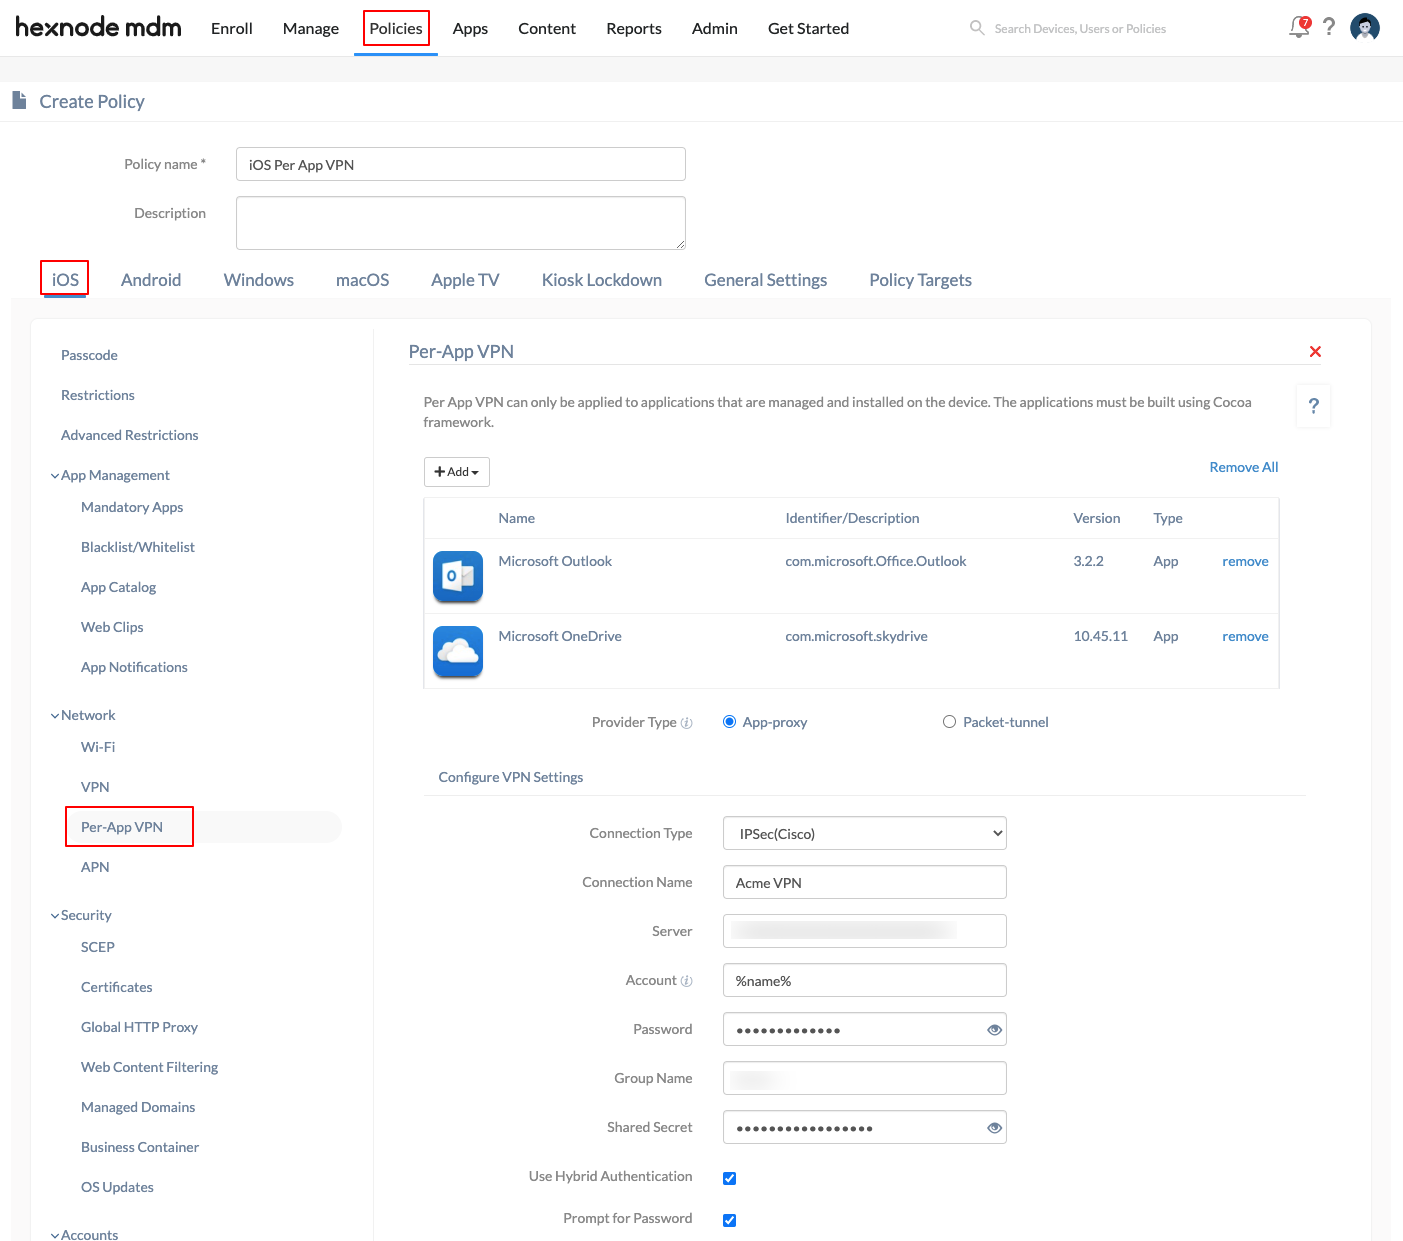
VPN Settings Description Connection Type Choose the connection type required to establish the per-app VPN connection. The available connection types are IPSec (Cisco), Cisco AnyConnect, Juniper SSL, F5 SSL, SonicWALL Mobile Connect, Aruba VIA, Check Point Mobile VPN, and Open VPN. Connection Name Enter the display name of the per-app VPN connection. Server Enter the IP address or fully qualified domain name (FQDN) of the VPN server. Account Provide the username for authenticating the VPN connection. This field supports the use of wildcards. The supported wildcards are - %name%
- %email%
Also, provide the connection type-specific parameters to configure the VPN settings.
- Set up Per-App VPN On Demand to automatically establish VPN connections for the specified domains.
Per-App VPN On Demand
On Demand VPN enables administrators to choose specific domains to automatically trigger the VPN connection whenever Safari or other apps try to access them. It requires an authentication method, such as certificate-based authentication, that will not involve any interaction from the end-users. Note that each domain entry should be in the format www.domainname.com.
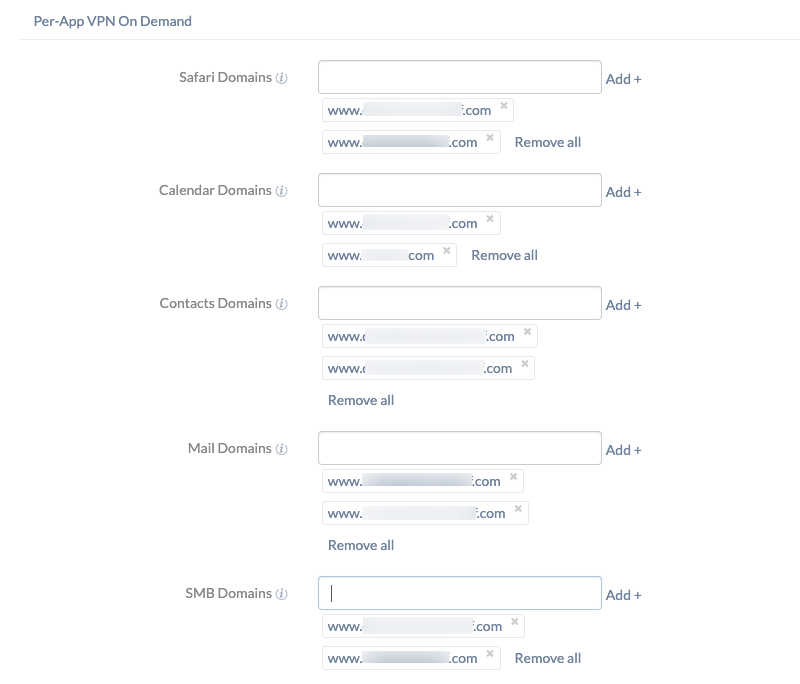
Domains Description Safari Domains Enter the domain(s) to automatically activate the VPN connection while accessing them on the Safari browser. Calendar Domains Enter the Calendar domain(s) that will automatically trigger the VPN connection. Contacts Domains The per-app VPN connection starts automatically when the Contacts app initiates network communication to the domain(s) specified here. Mail Domains Specify the domains that will automatically trigger the VPN connection when the Mail app starts communicating with the specified domains. SMB Domains Enter the Server Message Block (SMB) domains that are accessible through this VPN.
- Finally, configure the proxy settings.
Proxy Settings
A proxy is an intermediary mechanism to route the network traffic through a specified proxy server. The proxy server has its own IP address on the internet and hides the actual IP address of the device. Hexnode allows you to either skip setting up a proxy server or set up a manual or automatic proxy connection.
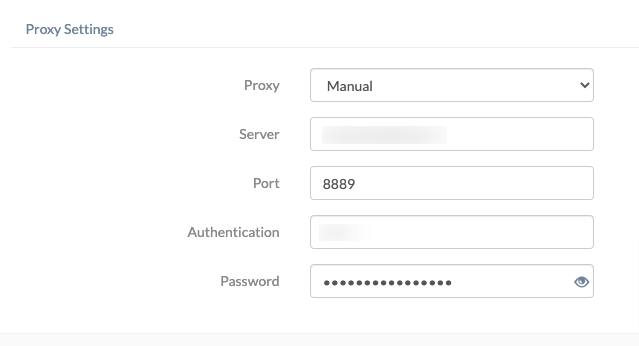
- None – Select this option to skip setting up a proxy server.
- Manual – To establish a manual proxy server connection, prove the below details:
- Server – Enter the IP address or hostname of the proxy server.
- Port – Specify the port the proxy requires in this field.
- Authentication – Provide the username needed to connect with the proxy server.
- Password – Enter the password associated with the given username.
- Automatic – Selecting the proxy type as automatic requires the administrator to enter the Proxy Server URL to connect to the proxy server.
- Navigate to Policy Targets to associate the configured policy with target entitles. Select the required Devices/Users/Device Groups/User Groups/Domains with which the policy is to be associated.
- Click Save.
Connection type-specific parameters
The parameters specific to different connection types are listed below:
| IPSec (Cisco) Settings | Description |
|---|---|
| Password | Provide the password for server authentication. |
| Group name | Provide the group identifier of the connection. |
| Shared secret | Enter the shared secret for establishing the VPN connection. |
| Use hybrid authentication | Enable this option to use hybrid authentication using the group name, secret, and a server-side certificate. Hybrid authentication is disabled by default. |
| Prompt for password | Check this option to display prompts to the users to enter their passwords. By default, the device will not prompt for passwords. |
| AnyConnect Settings | Description |
|---|---|
| Group | Enter the group name of the AnyConnect VPN connection. |
| User Authentication | Select either Password or Certificate to authenticate with the VPN server. |
| Password
(Available if User Authentication is set to Password) |
Enter the password required to authenticate with the VPN server. |
| Certificate
(Available if User Authentication is set to Certificate) |
Select the credential certificate added under iOS > Security > Certificates of the same policy. |
| Juniper SSL Settings | Description |
|---|---|
| Realm | Specify the realm which identifies the server to which the device authenticates. |
| Role | Specifying a role to the user determines the resources which the user can access. |
| User Authentication | Select the user authentication method as either Password (default) or Certificate to connect to the VPN server. |
| Password
(Available if User Authentication is set to Password) |
Specify the password to authenticate to the VPN server. |
| Certificate
(Available if User Authentication is set to Certificate) |
Select the credential certificate added under iOS > Security > Certificates of the same policy. |
| Settings | Description |
|---|---|
| User authentication | Select an authentication method, which is used to authenticate to the VPN server. The available options are Password (default) and Certificate. |
| Password
(Available if User Authentication is set to Password) |
Enter the password which is used to authenticate to the VPN server. |
| Certificate
(Available if User Authentication is set to Certificate) |
To select a certificate, go to iOS > Security > Certificates and upload one there. After adding a certificate, it’ll be available for selection within the same policy. |
| Mobile Connect Settings | Description |
|---|---|
| Login Group or Domain | Specify the login group name or the domain name to establish a Mobile Connect VPN session. It specifies which login group on the SonicWall security appliance the device must connect. |
| User Authentication | Select how to authenticate with the VPN server. You can either select Password (default) or Certificate. |
| Password
(Available if User Authentication is set to Password) |
Specify a password that can provide you access to the VPN server. |
| Certificate
(Available if User Authentication is set to Certificate) |
The certificates added to iOS > Security > Certificates will be available for selection in this field. Ensure to add the certificate via the same policy. |
What happens at the device end?
Once the policy is successfully associated with the device, the configured VPN will activate automatically when –
- The added application is launched.
- The application sends traffic in the background.
- An added domain is visited by any app or with the Safari browser.


