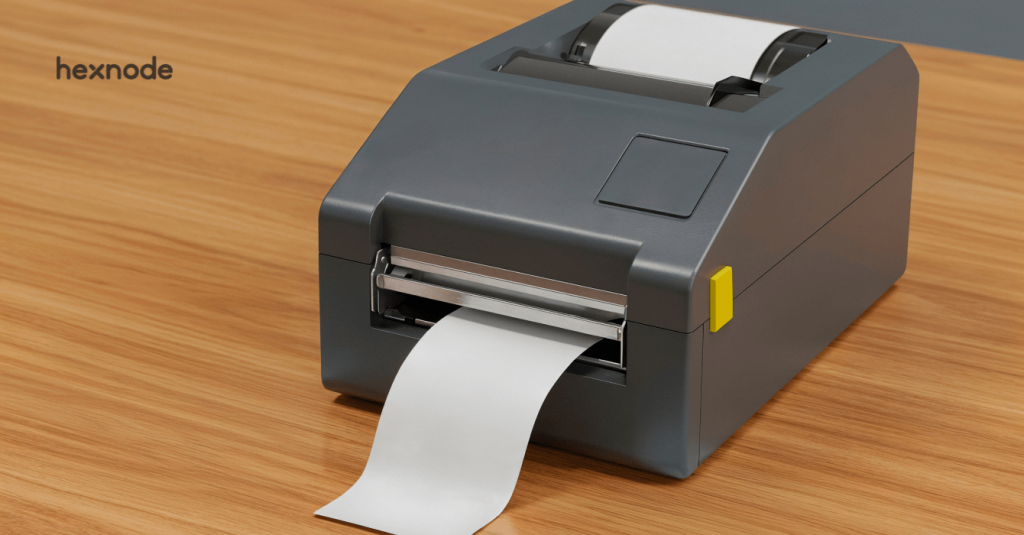
Successful Zebra printer enrollment requires more than local connectivity—it depends on choosing the right staging method and verifying management registration.
Choose the right setup route: Use Android/iOS Bluetooth staging for compatible printers or Windows USB setup for workstation-based provisioning.
Verify every stage: Confirm printer compatibility, configuration transfer, network connectivity, and management registration before deployment.
Enroll with Hexnode: Open Enrollment supports both routes, while Authenticated Enrollment requires Windows. Validate device registration, user assignment, and reporting before scaling deployment.
Why does Zebra printer enrollment stall during setup?
A warehouse technician prints a test label, but the printer never appears in the organization’s management platform. Enrollment can stall when local connectivity, network configuration, or management onboarding remains incomplete. A successful test print confirms printing functionality; management enrollment requires separate verification.
The practical choice is how to establish the initial setup connection: use a nearby Android or iOS device over Bluetooth, or connect the printer to a Windows workstation through USB. That choice depends on printer compatibility, available provisioning devices, and enrollment requirements.
Effective Zebra printer deployment planning separates local setup from network access and management registration. Each stage needs a clear validation check before IT marks the printer ready for deployment or hands it over to site operations.
What happens when printer staging is inconsistent?
Inconsistent staging creates repeat site visits, troubleshooting tickets, and unreliable readiness records. When technicians use different completion criteria, a printer marked ready at the provisioning bench may arrive on-site without verified network access or management registration.
Incomplete onboarding leaves IT without expected management visibility and delays configuration work. Administrators must determine which setup stage failed before continuing deployment. These issues are separate from print-quality defects or application printing failures: a printer can produce readable labels while remaining absent from the management platform.
IT needs a repeatable acceptance checklist before shipping printers or handing them over to operations. Record the printer’s identity, confirm its intended network connection, and verify management registration and reporting against the same criteria for every deployed device.
How do Bluetooth staging and Windows USB setup differ?
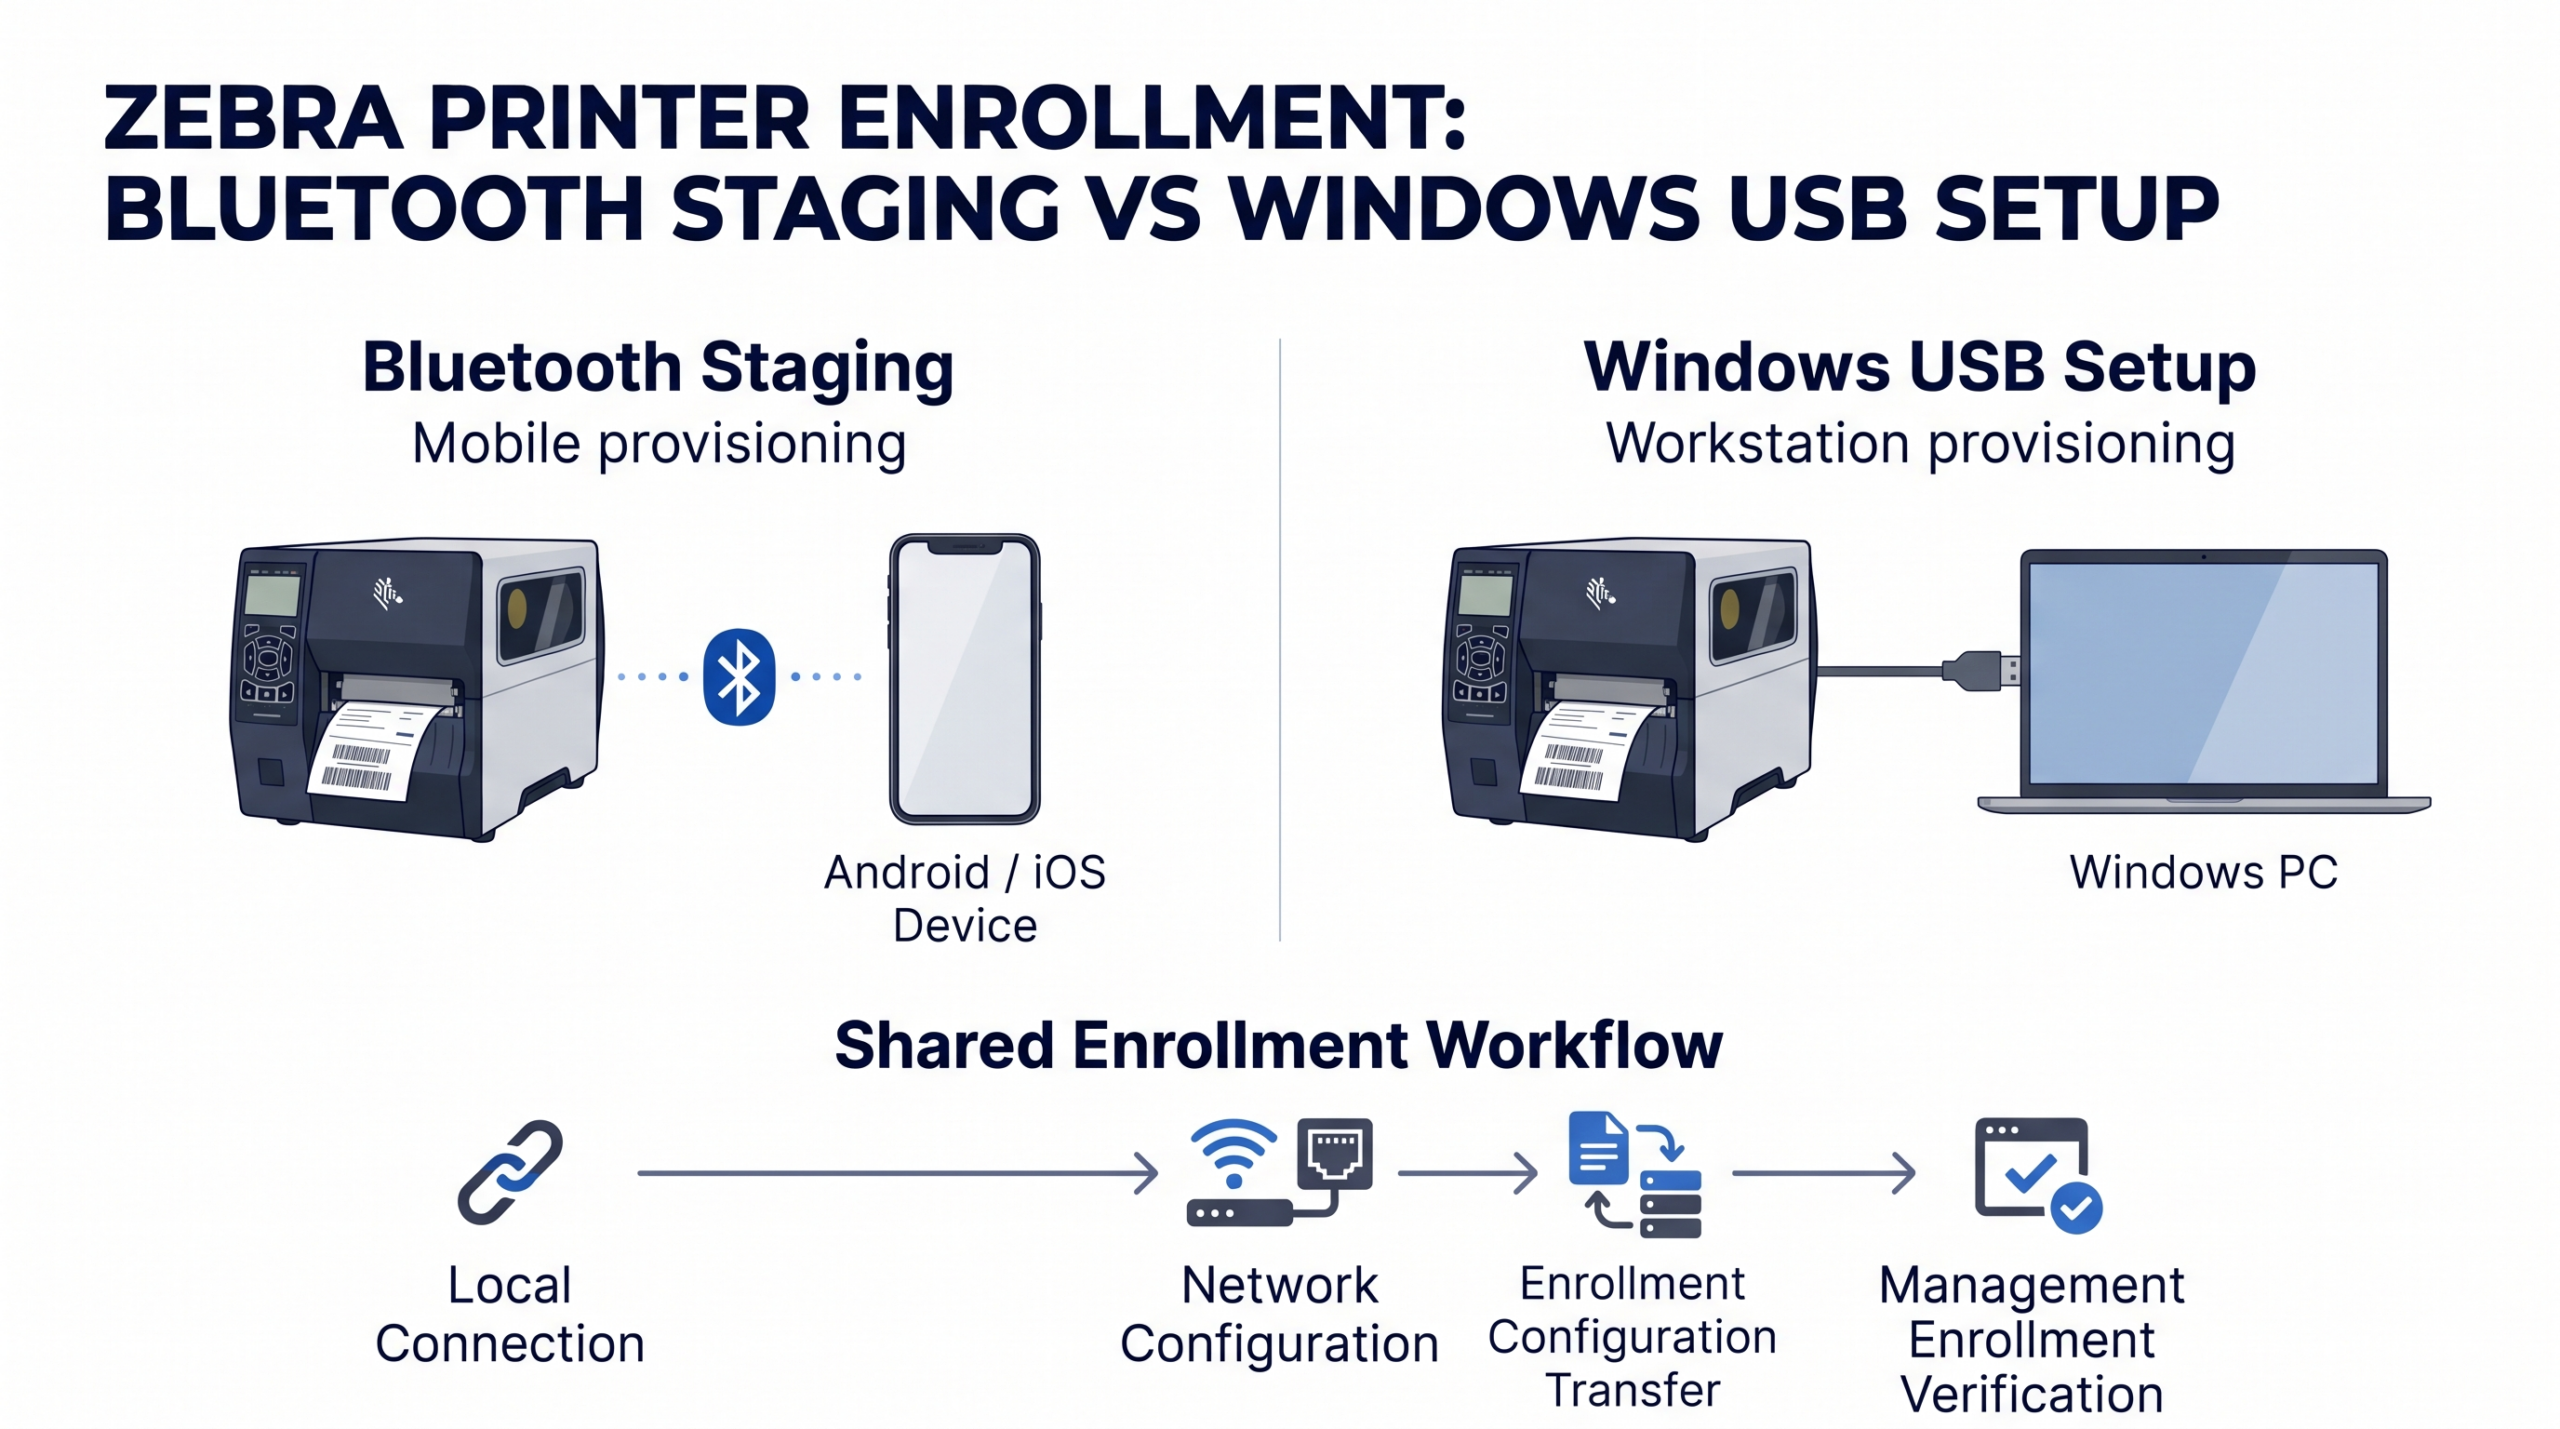
Bluetooth staging uses a mobile device to configure a nearby compatible printer. Windows USB setup uses a physically connected PC running Zebra Setup Utilities. The difference is the provisioning device and local connection used to prepare the printer.
Both workflows involve three distinct stages:
Establish the local setup connection. Connect through supported Bluetooth functionality on Android or iOS, or through USB on Windows with the appropriate printer drivers.
Configure the operational network. Apply the intended Wi-Fi or Ethernet settings, where supported, so the printer can reach the systems required for ongoing operation.
Complete management enrollment. Transfer the required enrollment configuration, then confirm that the printer registers and reports to the management platform.
Bluetooth pairing or USB detection alone does not confirm enrollment. Each establishes local communication without proving that the remaining stages have succeeded.
Interface availability depends on the printer model and configuration. Zebra utilities provide connectivity configuration and command-file tools, but supported transports and functions vary. Check the relevant printer and utility documentation before choosing either workflow, including whether the selected connection supports the required file transfer.
Zebra Printer Enrollment
When should IT choose Bluetooth staging or Windows USB setup?
Consider Bluetooth staging when technicians need mobile access to compatible printers at their installation locations. Consider Windows USB setup when provisioning happens at a workstation or mobile connectivity is unsuitable. These operational recommendations depend on the available equipment, printer compatibility, and enrollment requirements.
Decision factor
Bluetooth staging
Windows USB setup
Provisioning device
Compatible Android or iOS device
Windows PC
Physical access
Proximity to the printer and access for pairing where required
Access to the USB port and a suitable cable
Printer interface requirements
Bluetooth hardware and configuration compatible with the mobile workflow
Supported USB interface
Utility and driver preparation
Zebra mobile setup utility and required permissions
Install Zebra Setup Utilities, connect USB when prompted by the System Prepare Wizard, and install drivers manually if automatic detection fails.
File-transfer compatibility
Confirm the selected Bluetooth connection supports the required file transfer
Confirm printer detection and file transfer through the utility
Troubleshooting dependencies
Pairing, discoverability, permissions, and connection compatibility
Cable, USB connection, drivers, and printer detection
A warehouse technician may choose Bluetooth to configure printers already positioned across work areas, after confirming mobile file-transfer compatibility.
An IT team at a deployment bench may choose Windows USB to prepare and verify each printer before dispatch.
Before selecting either route, check the management platform’s enrollment and authentication requirements. A required authentication workflow may dictate the provisioning device, even when both local connections are available.
What should you check before staging a Zebra printer?
Before staging, confirm these prerequisites against the intended workflow:
Printer: exact model, firmware version, and installed connectivity options.
Provisioning device: compatible Android/iOS device or Windows PC.
Software: appropriate Zebra utility and required drivers.
Network: access to approved settings for the printer’s operational connection.
Confirm that the printer, mobile device, and Zebra utility support transferring the required configuration file over Bluetooth. Validate the transfer on a pilot printer before repeating the workflow across the site. Zebra’s iOS Printer Setup Utility documentation permits settings-file transfers over BLE with a 1 MB file-size limit.
Prepare the management platform’s enrollment requirements and configuration artifacts before starting. Confirm that the files match the selected enrollment method and intended environment. Restrict access to artifacts containing credentials, and remove temporary copies from shared provisioning devices after use. Test the complete sequence on a pilot printer, including management registration and reporting, before repeating it across the site with the same acceptance criteria.
Featured Resource
Explore Hexnode Unified Endpoint Management
Learn how Hexnode supports endpoint enrollment, configuration, monitoring, and management across device types.
Verify compatibility, establish the supported Bluetooth connection, select the correct printer in the mobile utility, and configure its operational network before transferring enrollment commands.
Verify compatibility. Confirm that the printer model, firmware, Bluetooth interface, and Android/iOS device support the intended Zebra mobile utility workflow. Hexnode’s enrollment instructions specify Bluetooth pairing without identifying Classic or BLE, so verify enrollment-file compatibility for your setup.
Establish the Bluetooth connection. Follow the printer model’s pairing instructions and complete any required confirmation. Button sequences and discoverability controls vary, so use the relevant printer guide rather than applying one sequence universally.
Select and identify the printer. Discover available printers in the utility, then verify the selected device against its physical identifier before changing settings. This matters when several nearby printers appear in the list.
Configure operational connectivity. Apply the approved Wi-Fi or wired Ethernet settings where supported. Allow any required restart, then reconnect the utility if the setup connection drops.
Transfer the approved file. Use Available Files and the supported send function to deliver the configuration or enrollment commands.
Successful file transfer confirms delivery, not completed management enrollment. Next, follow the validation checklist to check operational network access, correct device registration, and reporting in the management platform.
How do you prepare a Zebra printer through Windows USB?
Install Zebra Setup Utilities and follow the installer’s prompts. Connect the printer to the Windows PC by USB when prompted by the System Prepare Wizard. If the required drivers are not detected automatically, install them manually.
Connect and select the printer. When prompted, connect the printer through USB and complete installation. Select it from the utility’s printer list, checking its identity against the physical device before applying changes.
Configure the intended network. Select Configure Printer Connectivity to launch the connectivity wizard. Choose the supported connection type and enter the approved network settings for the deployment location.
Apply the settings. Complete the wizard and allow any required restart. Confirm that the printer remains accessible, refreshing the printer list or reconnecting when necessary.
Send the configuration file. In Zebra Nucleus Connector (formerly Zebra Printer Setup Utility), open Available Files, select the downloaded enrollment commands file, and choose Send to Printer.
Repeat for additional printers. Connect the next printer, use Refresh Printer List or Install New Printer as needed, and repeat configuration. Check each printer’s identity and record its outcome individually.
This technician-led process requires separate verification of network connectivity and management enrollment for every printer.
How do you verify setup and troubleshoot enrollment failures?
Setup is complete when the intended printer receives its configuration, connects to the operational network, and appears in the management platform with the expected identity and reporting state. Verify printing separately where the deployment requires it.
If verification fails, identify the affected stage before repeating enrollment:
Failure
Checks
Bluetooth discovery fails
Confirm interface compatibility, discoverability, pairing state, and required mobile permissions.
Windows USB detection fails
Check the cable and USB connection, appropriate driver installation, and the utility’s printer list.
Management registration is missing
Verify network connectivity, the configuration file’s contents and delivery, and any required enrollment credentials.
Printer appears but stops reporting
Check operational network access and the platform’s latest reported status.
Work through local connection → configuration delivery → network access → management registration in sequence. A restart or successful file transfer alone does not establish enrollment.
Record the printer identifier, chosen staging route, network configuration outcome, and management verification result. Use these records to identify the failed stage and guide the next troubleshooting action.
How does Hexnode support both Zebra printer enrollment routes?
Hexnode Zebra Printer Enrollment supports printers running Link-OS 5.0 or later, with Android/iOS Bluetooth staging and Windows USB setup available through Open Enrollment. Authenticated Enrollment requires Windows. The choice therefore depends on both the provisioning equipment and the required authentication workflow.
For Open Enrollment, select a domain and a default user from that domain. This workflow does not require authentication credentials during printer enrollment.
For Authenticated Enrollment, select Local User or Self Enrollment as Local User as the enrollment request type, then complete provisioning through Windows.
Provisioning route
Open Enrollment
Authenticated Enrollment
Android/iOS through Bluetooth
Supported
Not supported
Windows through USB
Supported
Supported
Choose the authentication mode before preparing the enrollment commands file so that the file matches the intended workflow.
Important: Choose the correct enrollment mode
Hexnode supports Open Enrollment through Android/iOS Bluetooth staging or Windows USB setup. However, Authenticated Enrollment requires Windows USB provisioning. Confirm your authentication requirements before selecting a staging method.
Deliver the enrollment commands
The setup utilities are Zebra applications used to configure connectivity and deliver the enrollment commands to the printer.
For mobile provisioning, pair the compatible printer with the Android or iOS device and configure its operational network. In Zebra Nucleus Connector (formerly Zebra Printer Setup Utility), open Available Files, select the downloaded enrollment commands file, and choose Send to Printer.
For Windows provisioning, connect and detect the printer through USB, then configure its network. In Zebra Setup Utilities, select Open Printer Tools > Action > Send File, choose the enrollment commands file, and send it.
When pre-shared-key authentication is selected, edit the commands file before delivery. Populate Username with the required username and Password with the organization’s pre-shared key configured under Enrollment Settings > Security > Zebra Printer enrollment authentication password.
Verify registration after restart
After the printer receives its configuration and restarts, confirm network connectivity and check Manage > Devices for the expected printer record and reporting state.
Wi-Fi or Ethernet carries subsequent communication with Hexnode. It does not replace the initial Bluetooth pairing or Windows USB connection required by the documented setup route. Verify registration before repeating the process for additional printers or releasing them to operations.
Zebra Link-OS Printer Management: Full Guide
Explore how to manage Zebra Link-OS printers through enrollment, policies, firmware updates, and remote actions.
FAQs
Does a Zebra printer need Bluetooth after enrollment?
Bluetooth is used for initial staging in the mobile provisioning workflow. After enrollment, the printer communicates with Hexnode over its configured Wi-Fi or Ethernet connection.
Can I use a Mac instead of Windows to enroll Zebra printers in Hexnode?
Hexnode’s documented workflows use Android/iOS devices for Bluetooth staging or Windows computers for USB provisioning. macOS is not listed as a supported provisioning platform.
What should I do if my Zebra printer stops reporting after enrollment?
Verify its Wi-Fi or Ethernet connection, then check the printer’s latest reported status and device record in the management platform. Troubleshoot network connectivity before repeating enrollment.
How can I protect Zebra printer enrollment credentials?
Restrict access to enrollment files containing usernames, passwords, or pre-shared keys. Store them securely during provisioning and remove temporary copies from shared technician devices after use.
Ready to test the right enrollment route for your printers?
Start by confirming printer compatibility, checking authentication requirements, and selecting the appropriate Bluetooth or Windows USB provisioning route. Validate management connectivity on a pilot printer before repeating the workflow across your deployment.
Test your chosen process with Hexnode and define success through three checks: correct device registration, expected user assignment, and confirmed reporting. Record the outcome so technicians can apply the same acceptance criteria to subsequent printers.
Use the pilot to resolve setup dependencies before shipping devices or handing them over to operations.
Ready to Enroll Your Zebra Printers?
Test Bluetooth or Windows USB provisioning and verify printer registration and reporting with Hexnode UEM.
Associate Product Marketer at Hexnode focused on SaaS content marketing. I craft blogs that translate complex device management concepts into content rooted in real IT workflows and product realities.