macOS’s built-in Accessory Security blocks rogue devices, but coverage varies by macOS version (SD cards only protected from 13.3+) and relies on individual users choosing the right setting.
Locked Macs keep approved accessories trusted for up to three days, balancing convenience with risk.
Hexnode lets IT enforce and lock this setting fleet-wide, turning inconsistent user behavior into consistent policy.
A man in a black hoodie enters the bank. He approaches the front desk and starts talking to the staff member.
Staff member : Can I help you?
Hacker (man in the black hoodie) : Yeah, I just need to check my account balance real quick.
Staff member : Sure, just let me know if you need help.
The staff member turns to their computer, and the hacker takes advantage of the moment and quickly plugs the USB drive into the staff’s computer while still pretending to be typing something on another computer next to the staff.
Cut to the next scene in the hacker’s lair, where the hacker is sitting in front of a computer with multiple screens, and a stream of confidential information from the bank is being transferred to his computer.
You might have seen similar hacking scenes a dozen times in different movies. The moment you realize that all it takes is one rogue USB drive or accessory plugged into your system for your data to be compromised might have hit you hard. Apple has introduced the accessory security feature as a means of retaliation against the evolving range of such threats. In this blog, we will be looking at how this feature can help you keep your Macs safe from malicious accessories and how you can configure its settings in your Mac.
The new accessory security feature, also known as USB restricted mode, is a security feature that helps protect your Mac against any potentially malicious external Thunderbolt and USB devices. Accessory security puts up a gate whenever you connect an external device to the system. Hence, the device will require the end-user’s permission for communicating with the operating system.
On portable Mac computers with Apple silicon, new USB and Thunderbolt accessories require user approval before the accessory can communicate with macOS for connections wired directly to the USB-C port.
Previously, you could simply attach an external device to your Mac to transfer data or charge it. Mac automatically detects the accessories and gives them access to your computer’s data upon requirement. However, this also paves the way for malicious USB and Thunderbolt devices to damage your system quickly. The latest security addition is guaranteed to provide valuable protection against such hardware exploits.
Accessory Security Now Covers SD Cards Too
USB and Thunderbolt aren’t the only physical entry points anymore.
Starting with macOS 13.3, accessory security was extended to cover SD Extended Capacity (SDXC) cards as well. Insert an SDXC card into a Mac’s card slot, and it now triggers the same approval flow as a USB or Thunderbolt device.
This closes a gap that was easy to overlook. Card readers and camera-adjacent workflows, common in creative and field teams, were previously outside the scope of this protection.
If your organization is still running an older point release of Ventura, it’s worth checking your update status. Macs on versions earlier than 13.3 won’t extend this protection to SD cards, even if accessory security itself is enabled.
For IT teams managing a mixed fleet of older and newer macOS builds, this is a good reminder that “accessory security is on” doesn’t automatically mean every physical port and slot is covered. The specific macOS version in use still determines exactly which connection types are protected.
Be mindful of your tech terrain
No matter how secure you think your tech environment is, there will always be vulnerabilities that a cyber-terrorist might take advantage of. According to recent studies, executives of military, aerospace, journalism, energy, and political sectors are the ones who majorly fall victim to these crimes. Although cyberterrorists aim for high-value targets, that might not always be the case. Another side of this that even security professionals fail to notice is commercial espionage. Administrative personnel, engineers, and even frontline workers can be possible targets for obtaining valuable company information.
O.MG cable and remote attacks: Here’s how UEM can help you stay safe
An O.MG cable contains a small network access point which is a powerful tool for cyber attackers.
Attackers often look for the weakest link to enter a private network. Let’s look at some scenarios where this can happen;
Globetrotter executives who leave their laptops in the hotel room when they go out for dinner.
Interactive kiosks in airports, hotels and stores.
Desktop computers at the front desk of offices with exposed ports.
Computers used for billing in retail stores and supermarkets.
Situations like these are more than enough for someone with malicious intent to exploit the hardware. Even if the device is locked or in sleep mode, hackers can use methods like cold boot attacks and DMA attacks to boot up the computer and carry out the attack.
Attackers even come up with techniques such as USB drop and Juice jacking, which tempt the end-user themselves to plug the malicious drive into their systems. An interesting study conducted in 2016 showed that 45% of people plugged in a USB stick that they found lying around in the street. Although the study is a few years old, one can claim that the numbers may not have changed a lot.
Juice jacking
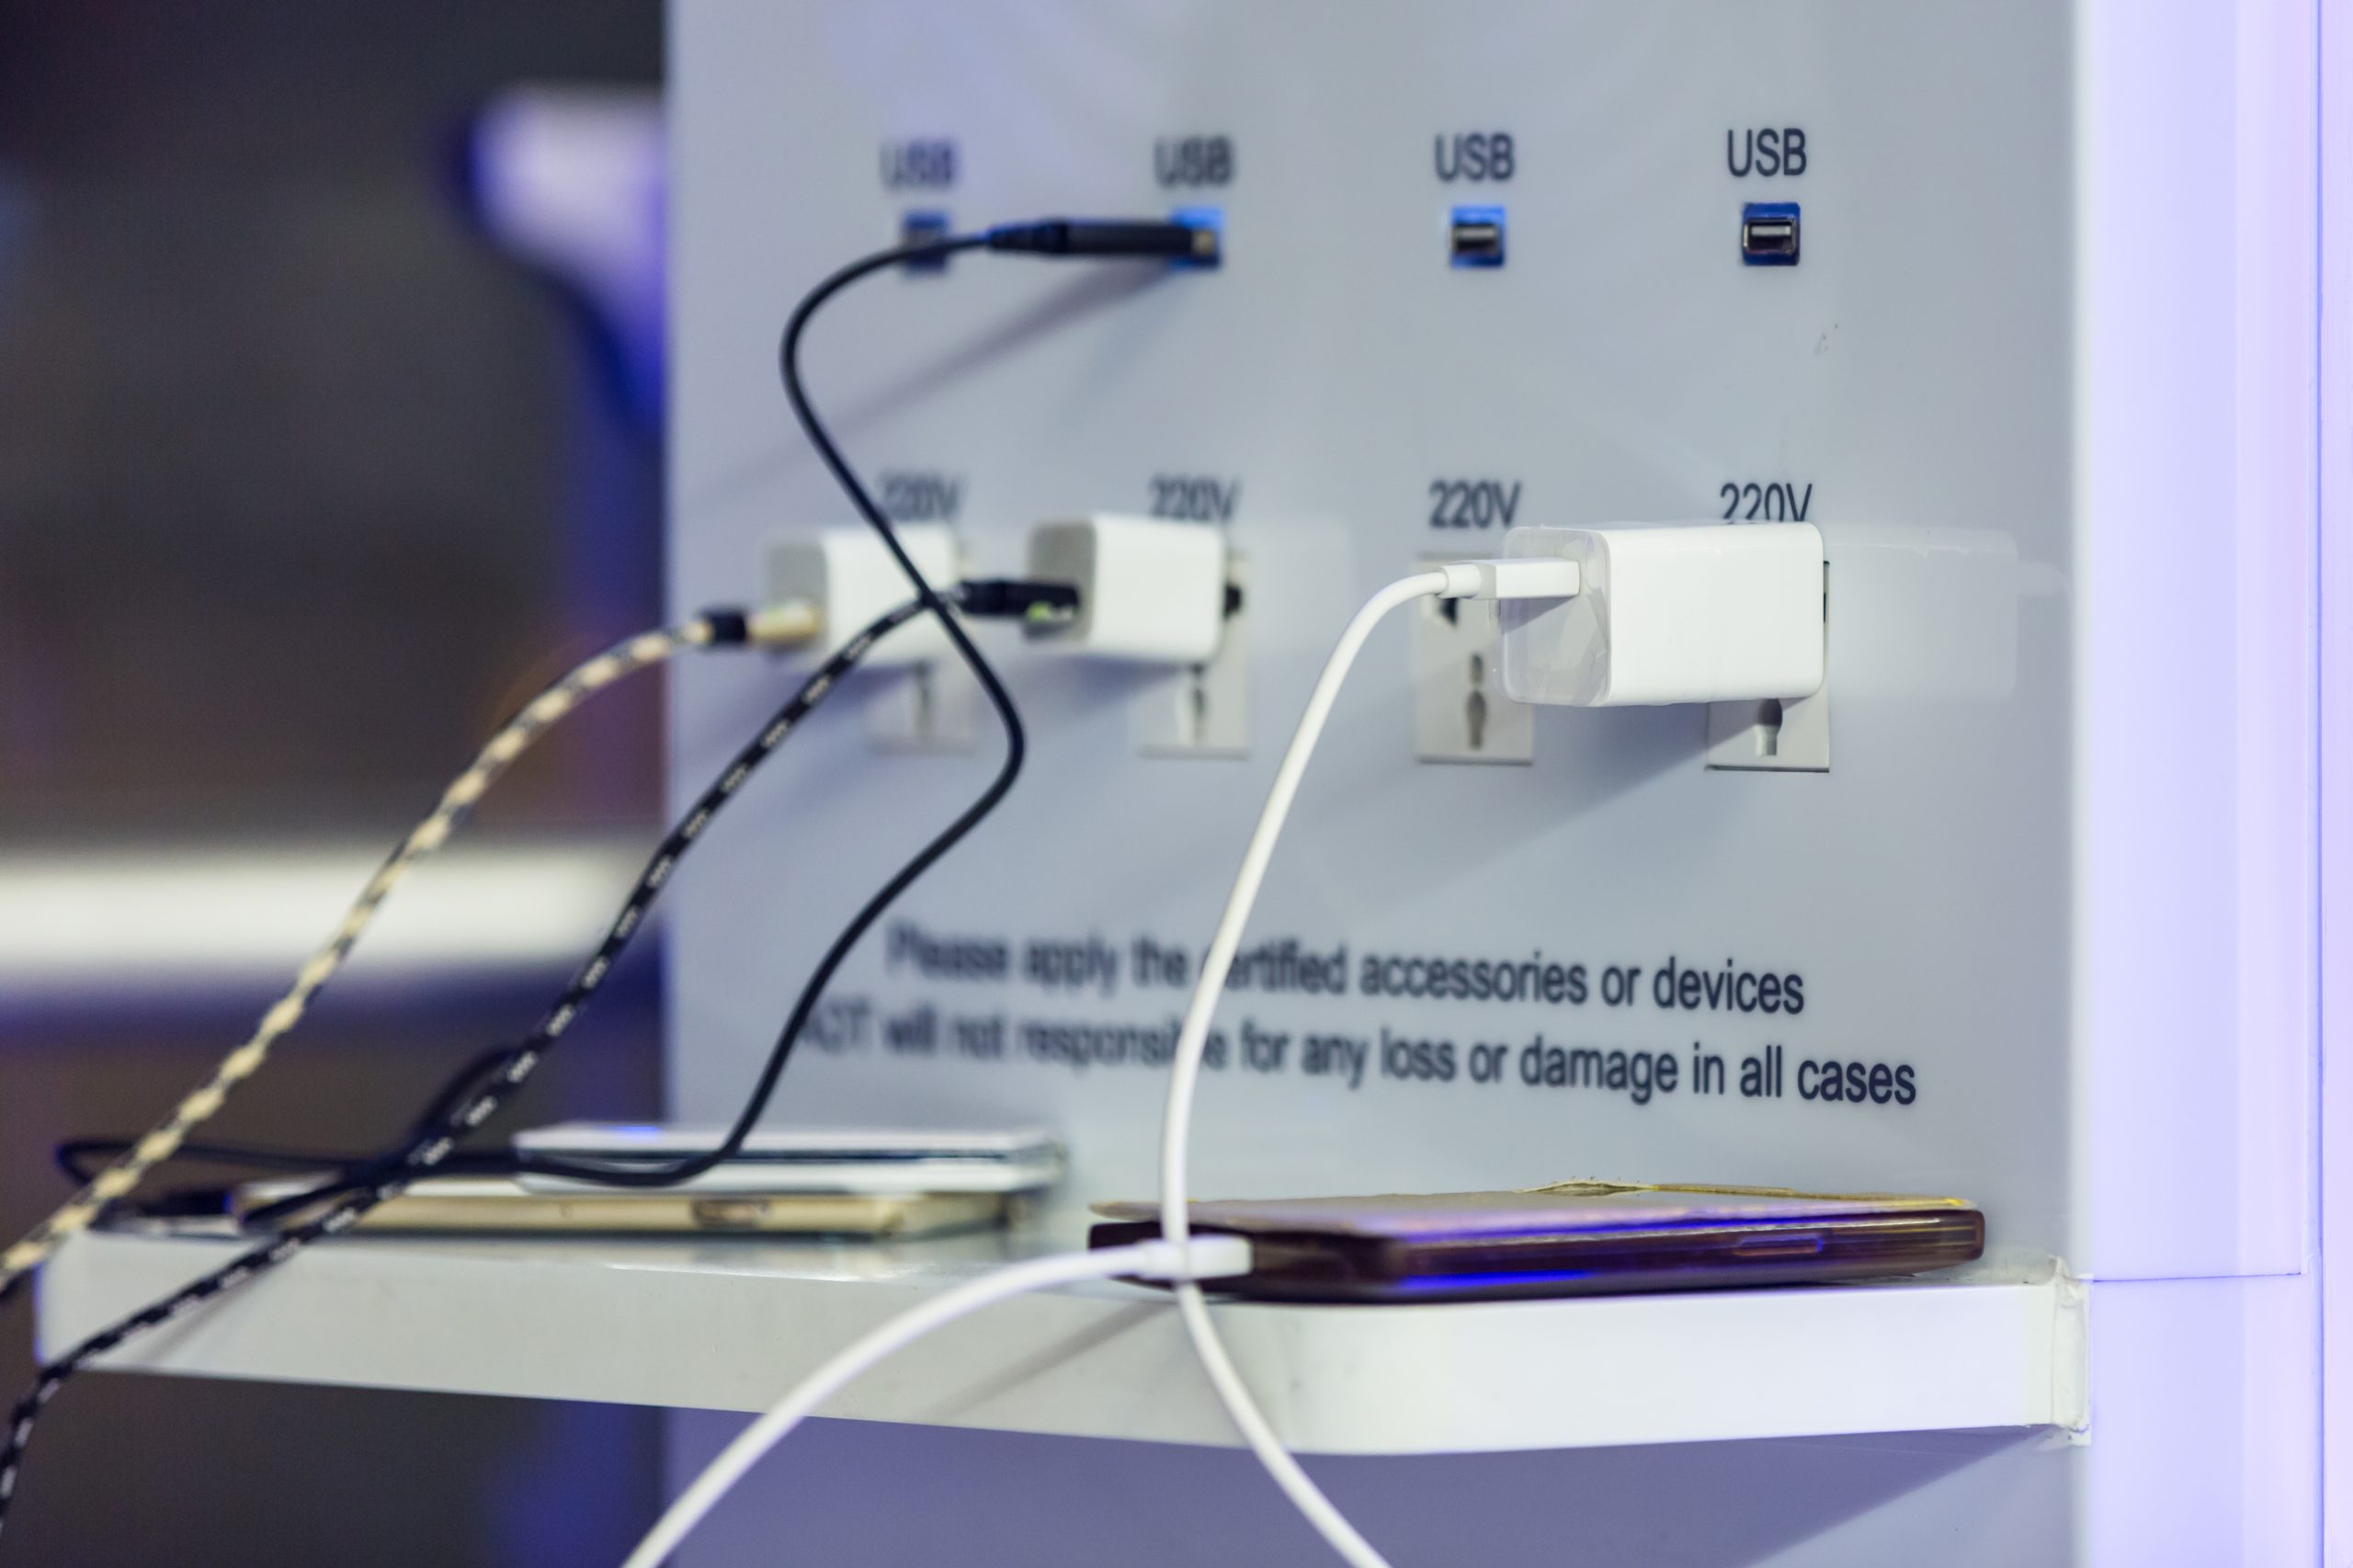
Smartphone charging board at the airport
Juice jacking is a cyber-attack in which attackers use an infected USB charging station to exploit the connected devices. This attack is mainly seen in public places such as airports, shopping malls, etc., where free charging stations exist. The attacker might use an infected connecting cable in the charging station and leave it plugged in, hoping that an unsuspecting person would plug their device into the ‘forgotten’ cable. Devices running on macOS are particularly vulnerable to this type of attack, as it used to automatically grant permission to transfer data from the Mac once it is plugged in.
Accessory security – how does it work?
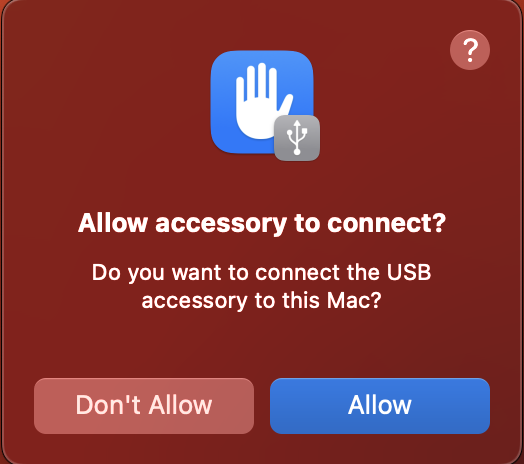
The working of the accessory security feature is rather straight-forward. When you connect an accessory to your Mac, it will ask for permission to connect the USB accessory. The device can only communicate with your Mac if you click Allow. However, accessories plugged in but not approved can still be charged.
Accessory security pop-up
If your Mac is locked when you plug in the accessory, you must unlock it first and grant permission. All accessories connected are automatically allowed while upgrading macOS to Ventura. However, it might not be remembered once you restart your device. Therefore, you might have to grant permission again after unlocking.
What Actually Happens When Your Mac Is Locked
It helps to know the exact mechanics here, since the behavior isn’t as simple as “locked means blocked.”
Once you approve an accessory, that approval doesn’t disappear the second your Mac locks. Approved accessories can stay connected to a locked Mac for up to three days from the last time it was locked.
After those three days pass, the accessory is no longer trusted automatically. You’ll see a prompt to unlock the Mac before it can communicate again.
New, unapproved accessories are treated differently. If you plug one in while the Mac is locked, you’ll need to unlock the device first before you can even grant permission.
There are a few exceptions worth knowing. Power adapters, non-Thunderbolt displays, and already-approved hubs don’t trigger this approval flow at all.
This three-day window is a deliberate balance. It’s tight enough to limit how long a stolen or unattended Mac stays vulnerable, but loose enough that you’re not re-approving your own keyboard or trackpad every single day.
OS and device requirements
Operating system : macOS Ventura version 13.0 and above.
Device model : Available on Apple Silicon Macs such as MacBook Air M1, MacBook Pro M1, MacBook Air M2, and so on.
How to configure accessory security settings?
The accessory security feature is turned on by default in Macs running macOS Ventura. However, some users might feel their environment is safe and find it annoying to have accessories asking permission whenever they connect an accessory. In such cases, you can disable or change the security settings to suit your preference.
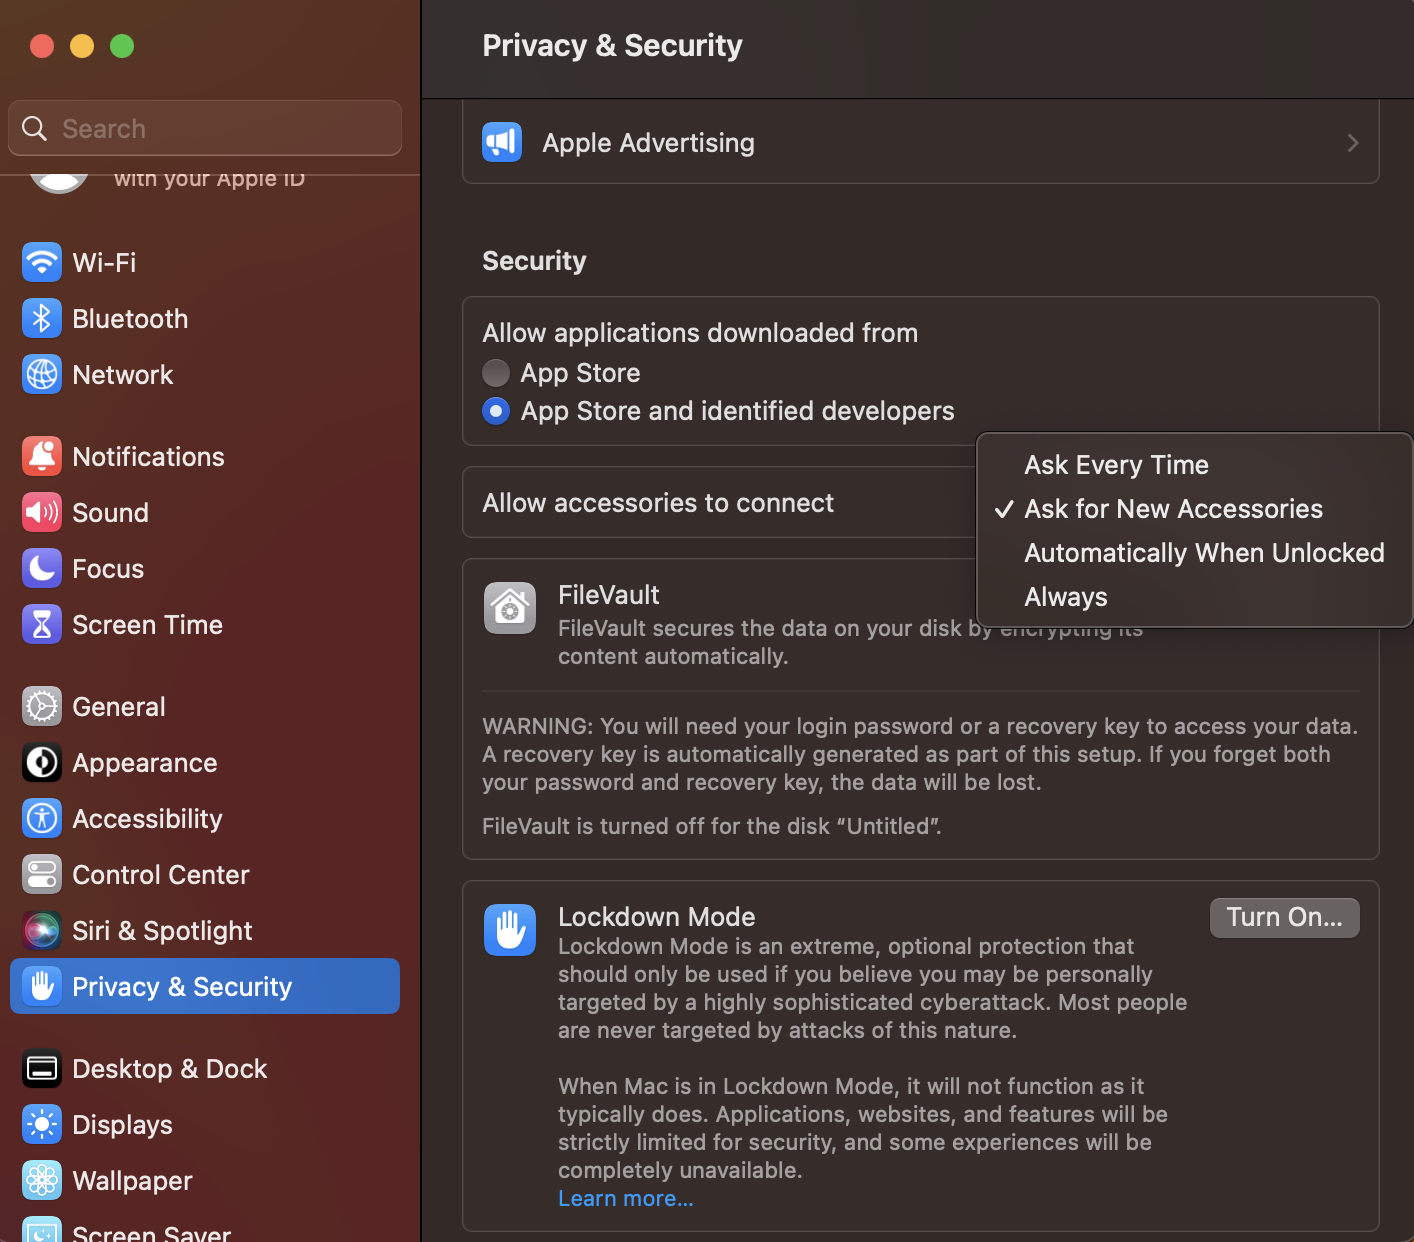
To configure the accessory security settings, follow these steps;
Open System Settings from the Apple Menu.
Open Privacy & Security tab from the left sidebar.
Now scroll down to the Security section.
Click on the dropdown box next to the Allow accessories to connect section and choose your preferred option.
Accessory security window
There are four options available for you to manage your accessory connections;
Ask Every Time (most secure): You must grant permission each time you connect an accessory, whether a new one or an already approved one.
Ask for New Accessories (default): It asks for approval every time you connect a new accessory. Already approved accessories will be connected automatically.
Automatically When Unlocked: All accessories are allowed without extra approval when the device is unlocked.
Always (least secure): All USB and Thunderbolt accessories are allowed even when the device is locked.
You must provide the Administrator username and password to change the accessory security settings.
Enforcing Accessory Security Across Your Mac Fleet with Hexnode
Manually walking into System Settings on every Mac isn’t realistic once you’re managing dozens, or thousands, of devices.
That’s where enterprise MDM comes in. Apple exposes accessory security as a manageable restriction, meaning IT admins don’t have to rely on individual employees making the right call.
With Hexnode, admins can push a fleet-wide policy that enforces USB restricted mode, blocking new USB, Thunderbolt, and SD card accessories from connecting to managed Macs without authorization, without ever touching each device physically.
This also removes the temptation for end-users to turn off USB restricted mode entirely just to avoid the approval prompts.
For organizations handling regulated or sensitive data, this consistency matters more than convenience. A single unmanaged Mac with the setting turned off is enough to undo the protection across an entire network.
In short: accessory security is a great built-in feature, but it only works as intended when it’s enforced consistently. That’s a policy problem, not just a settings problem, and it’s exactly the kind of thing UEM platforms are built to solve.
FAQs
Does accessory security work on Intel Macs, or only Apple Silicon?
Accessory security is only available on Apple Silicon Macs, such as MacBook Air M1 and MacBook Pro M1 models, running macOS Ventura 13.0 or later. Intel-based Macs do not support this feature. Organizations with mixed Intel and Apple Silicon fleets should confirm hardware compatibility before setting a uniform policy.
Can end users bypass or turn off accessory security on their own?
Yes, any local admin account can change the “Allow accessories to connect” setting through System Settings without needing separate approval. This means the protection is only as strong as individual user discipline unless it’s centrally enforced. An MDM policy is required to lock the setting and prevent users from weakening it.
Does accessory security stop a malicious USB drive from charging a device?
No, accessory security only blocks data communication between an unapproved accessory and the Mac. Power delivery still passes through, so plugged-in but unapproved devices can charge normally. This separation exists because charging poses no direct data-exfiltration risk on its own.
What’s the difference between accessory security on Mac and USB Restricted Mode on iPhone/iPad?
Both features serve the same purpose: requiring user approval before an external accessory can communicate with the device. The Mac version covers USB, Thunderbolt, and (since macOS 13.3) SDXC cards, while the iOS/iPadOS version applies to Lightning and USB-C accessory connections. The underlying goal on both platforms is preventing unauthorized data access through a physical port.
How can IT admins check which Macs in their fleet are missing SD card protection?
IT teams need to audit the macOS version installed on each device, since SDXC card protection only applies to macOS 13.3 and later. Devices running earlier Ventura point releases will have accessory security enabled but without SD card coverage. A UEM platform’s OS version reporting and update enforcement can help identify and remediate these gaps at scale.
Building your digital fortress
In conclusion, the accessory security feature is a game-changer in protecting your Macs from unauthorized data transfer. It gives you control over what data is being transferred and by whom. However, it is always better to fortify your defenses than be exposed to unwanted threats. You can take advantage of third-party antivirus software and devices such as USB data blockers to ensure the accessories you use are safe.
Another way to safeguard your macOS devices is to couple them with a UEM solution such as Hexnode. As the saying goes, a chain is only as strong as its weakest link. Hexnode can help you ensure you have complete control over your devices in terms of both security and management. Hexnode follows a zero-trust approach encompassing multi-level threat monitoring, detection and protection.
Featured resource
Hexnode Mac management
Get started with Hexnode’s Mac Management solution to save your time and the associated IT operational costs of managing your Mac devices.
You can enhance the security of your Macs by enforcing passwords, user access control, and web-content filtering policies. You can even manage FileVault with Hexnode, which lets you easily encrypt and decrypt your device data. This is just the tip of the iceberg. There are still plenty of features available to build a multi-faceted security infrastructure around your device fleet. So, get started and upgrade your security framework right away with Hexnode.
The one-stop solution to secure your endpoints
Sign up for a 14-day free trial to secure your digital environment with the power of Hexnode.



 Aiden Ramirez