

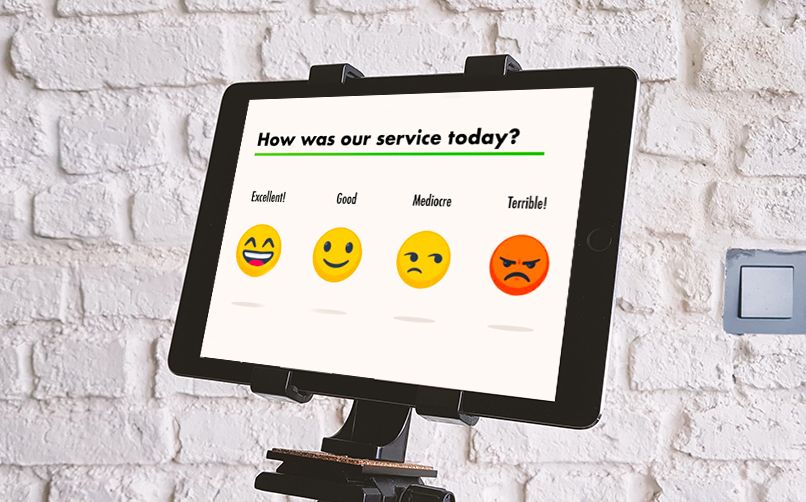
Restricting your iOS devices to run only a single app or a bunch of custom apps (created for specific business purposes) is a great way to improve customer engagement. iOS kiosk mode is feature offered by Apple to help you achieve just this.
Majorly helpful for locking down customer-facing devices, iOS kiosk mode takes the human element out of functioning these public terminal devices, and acts as the simplest way to offer customers a focused and streamlined experience.
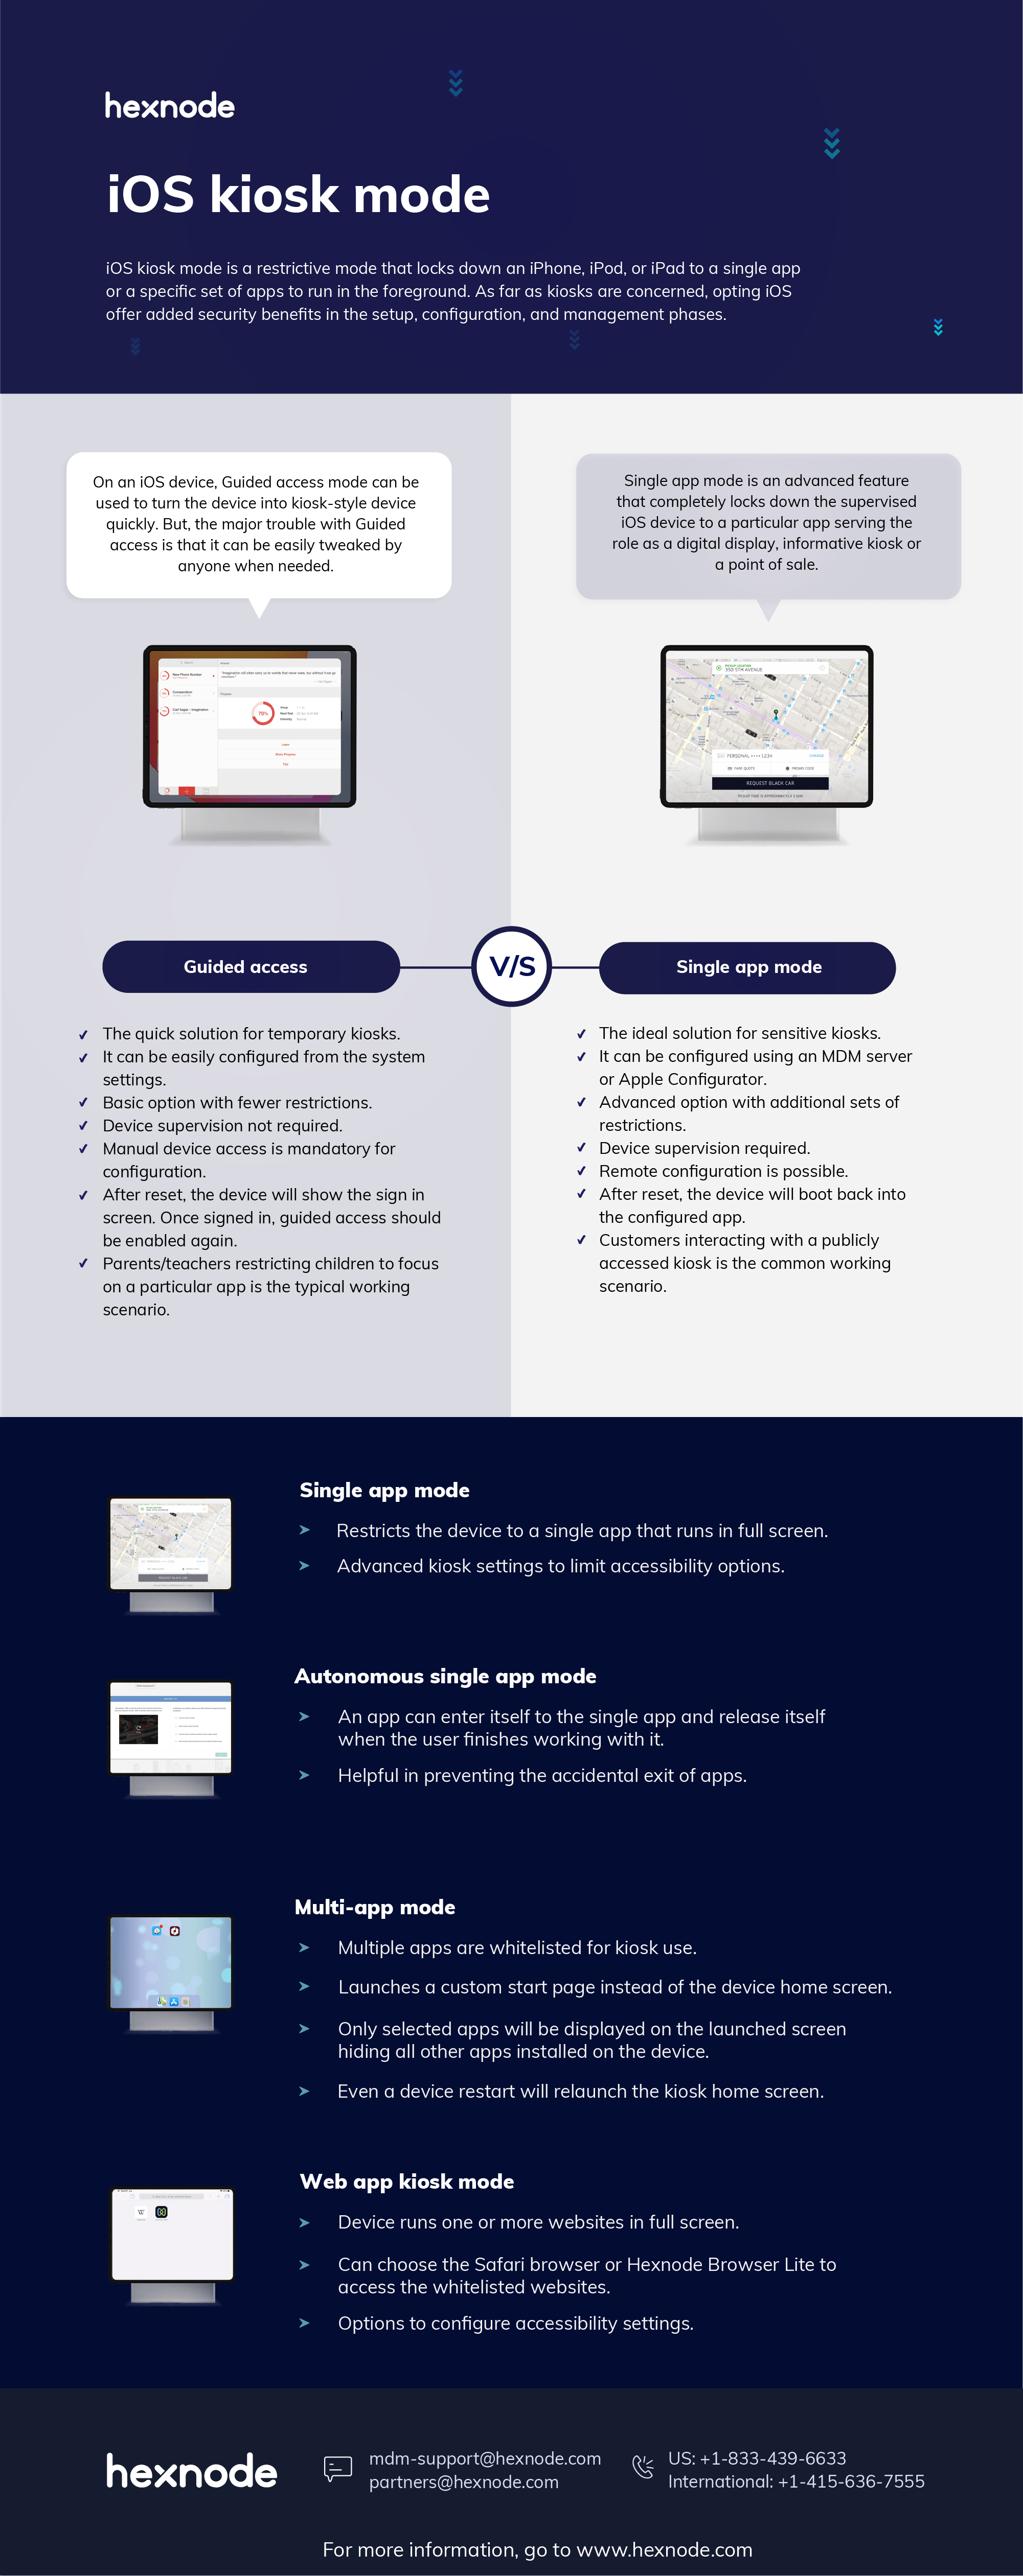
What is iOS kiosk mode?
Having the ability to restrict iOS devices to use only selected applications is quite a useful feature for businesses. And since these devices may be left unattended, they should be properly maintained and appropriately secured. As far as kiosks are concerned, choosing iOS devices (which offer added security benefits in the setup, configuration, and management phases) is not a bad idea. Moreover, for a small/medium business owner, an iOS device can be a cost-effective workaround for a kiosk due to its flexibility, quick integration features, and ease of use.
Let’s take a look a the methods you can use to lock down iOS and iPadOS devices into kiosk mode.
Method 1: Guided Access
On an iPhone, iPad, or iPod touch device, there exists an accessibility feature called Guided access mode, which turns the device into a quick and simple kiosk. Guided access is a universal feature found in iOS 6 and above, which restricts the device to a specific application.
What is guided access mode?

Guided access is the simplest way to put your iPhone, iPad, or, iPod touch devices into a single-purpose mode. Guided access is an inbuilt option in Apple’s iOS and can be configured right away from the system settings. This accessibility feature decides what all functionalities your users can interact with on an iOS device.
The feature was originally introduced in iOS 6 as a parental control measure. The primary intent was to temporarily prevent children from interfering with some device settings which might cause system-level changes on the device. The feature was mostly targeted to school children and hence often referred to as a learning feature. However, later on, it was further improved to accomplish lockdown mechanisms on iOS devices.
How to enable Guided Access mode?
- Go to Settings > Accessibility > Turn on “Guided Access”.
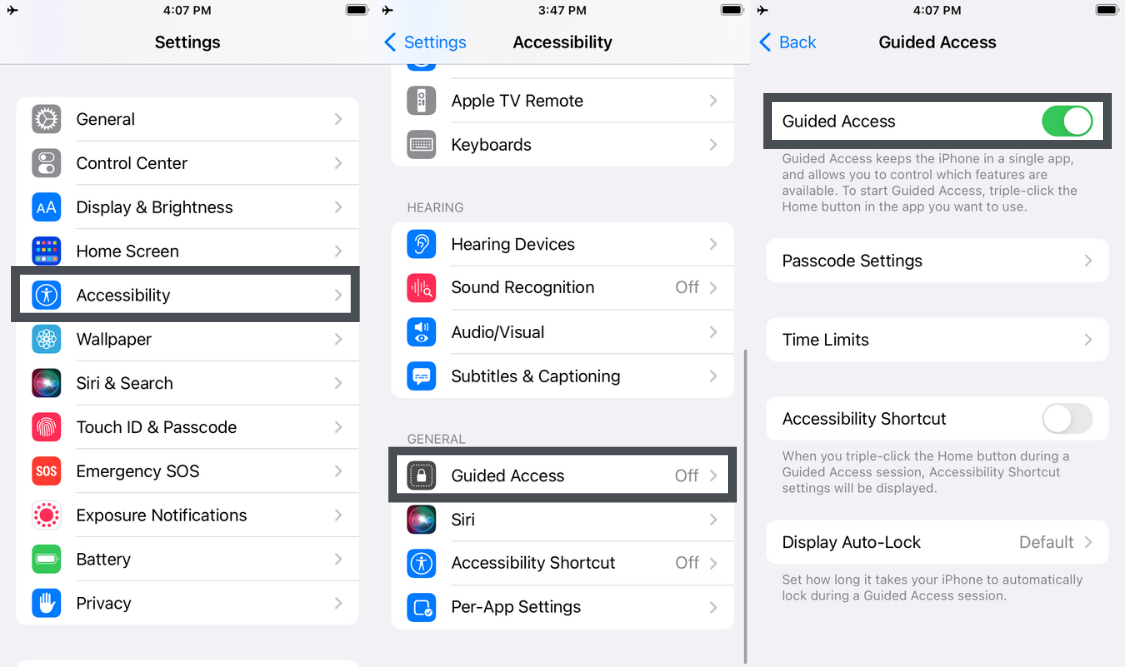
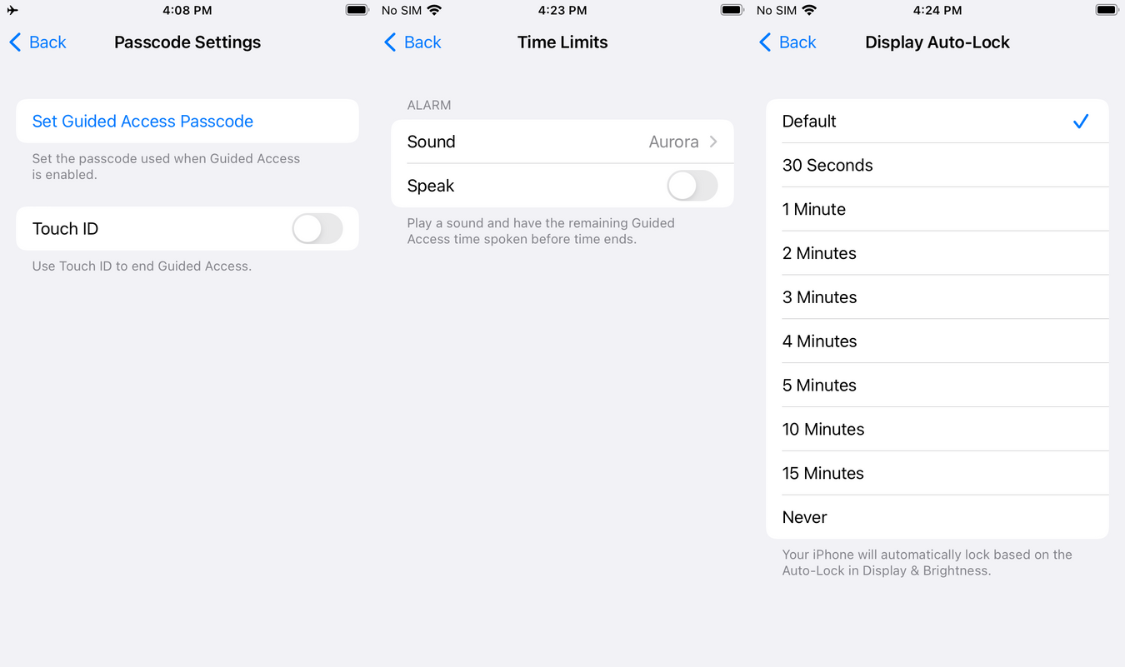
- Now, you must set-up a Guided Access Passcode. This passcode is used to exit from Guided Access mode.
- Click on Password Settings > Tap “Set Guided Access Passcode”.
- Enter and confirm the passcode.
- You can also choose to set up a Face ID and/or Touch ID as a means to end the Guide Access Session.
- Next, you can choose to set up a notification when the configured Time Limits are about to expire.
- Choose to approve the use of the Accessibility Button while in kiosk mode.
- Finally, choose to customize the Auto-lock time in Guided Access mode.
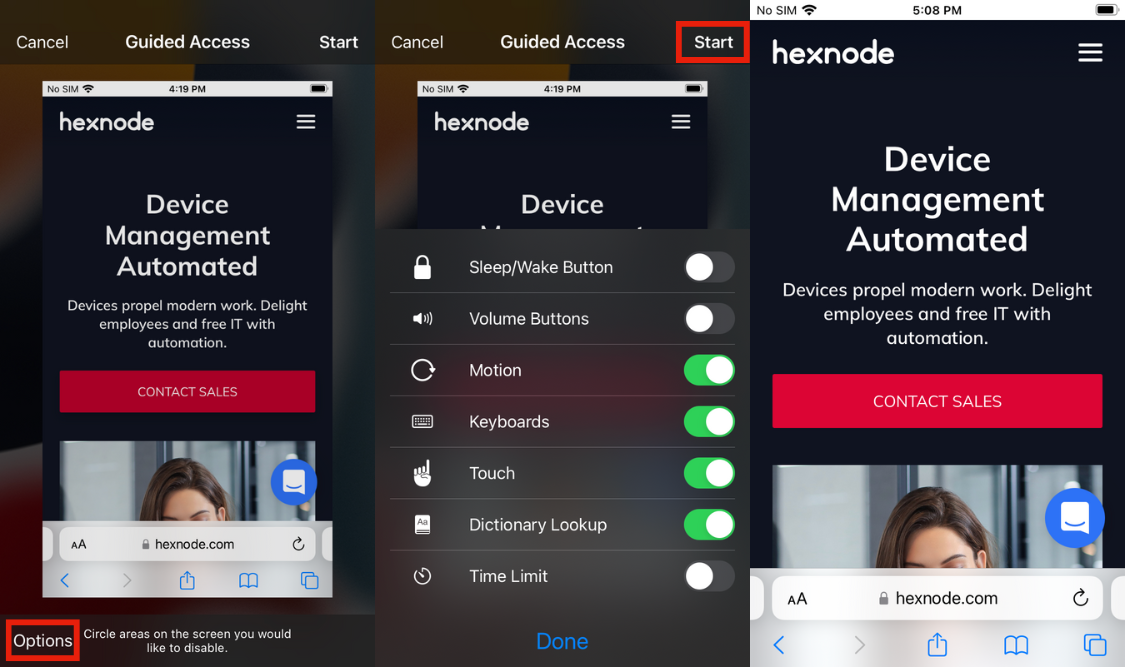
How to start a Guided Access Session?
- Open the specified application.
- Triple tap the side button if it’s iPhone X or later. Triple tap the Home button for iPhone 8 or later. The Guided Access menu pops-up.
- Click on ‘Options‘ to configure the Accessibility settings.
- Once you’ve configured the Accessibility settings, click on Guided Access > Tap Start.
Or simply
- Open the specified application.
- Ask Siri to “Turn on Guided Access”.
How to stop a guided Access session
- Triple tap the side button if it’s iPhone X or later. Triple tap the Home button for iPhone 8 or later. The Guided Access menu pops-up.
- Click on Guided Access > Tap Stop.
What are the drawbacks with Guided Access?
The major trouble with Guided access is that it can be easily tweaked by anyone when needed. By triple tapping on the home/side button, the password prompt will be easily brought up and the user could guess the guided access PIN to quit the app. That is, whenever the home button or side button is exposed to the users there’s a chance that your system might be easily compromised. A correctly guessed PIN means complete access to the entire system. A workaround is to use an enclosure which covers such hardware for the device, but this is just a temporary fix.
Moreover, enabling Guided Access requires you to physically interact with the device. Hence, remote management options are completely out of the question.
A much more reliable alternative to Guided access is the Single app mode for kiosk lockdown.
Method 2: Single app mode
Single app mode is an advanced feature that completely locks down your supervised iOS device to a particular application, thereby enabling it to serve the role as a digital signage display, informative kiosk or a point of sale (POS) device. This method is considered as the ideal solution for locking down devices into kiosks, as there is no way for a user to exit from kiosk mode.
An Apple Configurator or a UEM solution is used to enable Single app mode, and the same tool is required to disable it. You can make use of Single app mode in scenarios where Guided Access mode is found inadequate to meet your requirements.
Guided access vs Single app mode
Apple provides the following two options to activate kiosk mode on iOS devices. Choosing the best method is up to you, but we can gladly provide some pointers to help you out.
Guided access can help create a makeshift kiosk but for an absolute lockdown experience, the Single app mode feature is to be more appropriate. You can choose the one which is right for you by evaluating your requirements. Let’s have a quick glance at the key features and differences among these two kiosk options.
| GUIDED ACCESS | SINGLE APP MODE |
| The quick solution for temporary kiosks. | The ideal solution for sensitive kiosks. |
| It can be easily configured from the system settings. | It can be configured with the help of an MDM/UEM server or Apple Configurator. |
| It’s a basic feature with a few restrictions that limit accessibility. | It’s an advanced option with additional restrictions as compared to the guided access mode. |
| Device supervision is not required. | Device supervision is required. |
| Remote configuration is not possible. Manual access to the device is mandatory for the configuration. | Remote configuration is possible with a UEM solution. |
| On a reset using the combination of hardware buttons, the device will show the sign in screen. Once signed in, guided access should be enabled again. | On a reset using the combination of hardware buttons, the device will boot back into the configured kiosk app. |
| Kiosk mode can be easily bypassed accessing the hardware keys and guessing the PIN. | Kiosk mode can be bypassed only with the help of a UEM solution or Apple Configurator. |
| Typical scenario: Parents and teachers restricting children to focus on a particular app. | Typical scenario: Customers interacting with a publicly accessible kiosk device. |
Both methods work over all compatible iPhone, iPad, or, iPod touch devices, but the highly recommended option is the Single app mode as it is more secure.
Guided Access is a straightforward method to configure a quick and basic kiosk.
On the other hand, if you are looking for a completely locked down environment, where you don’t want your users to intentionally/accidentally be directed away from what is meant for them, Single app mode will be the right option for you.
How to configure iOS kiosk mode?
There are two methods which admins can adopt to configure iOS kiosk mode, each feasible for a specific use case.
- Method 1: Using Apple Configurator
- Method 2: Using a UEM solution
How to configure iOS kiosk mode using Apple Configurator

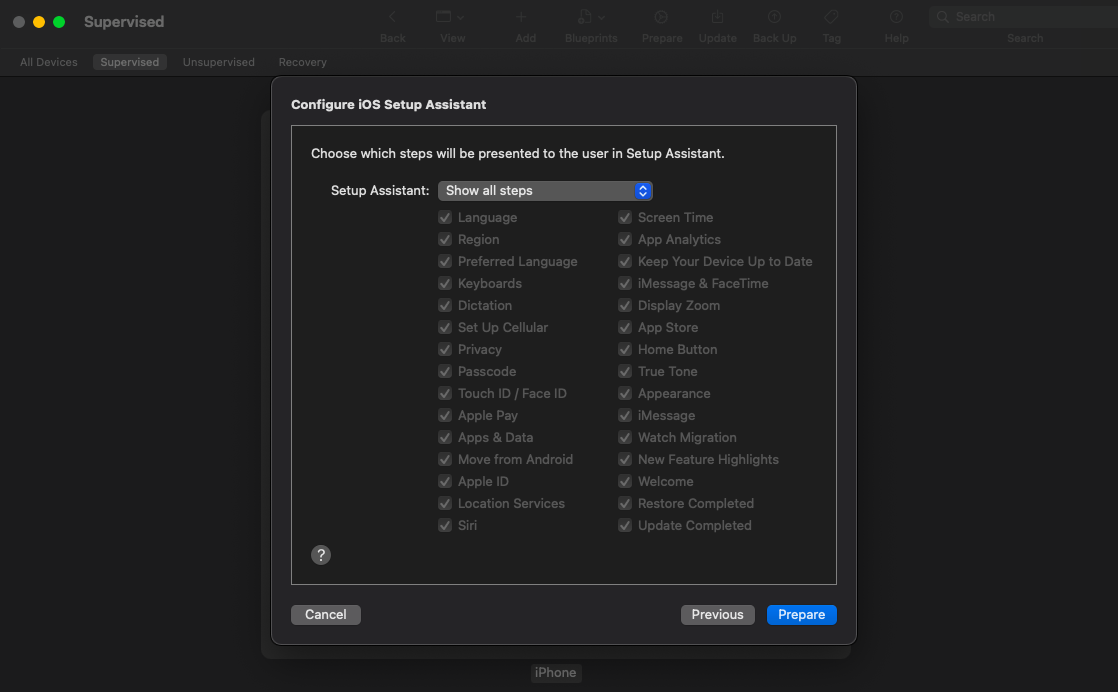
Apple Configurator is a Mac tool that helps IT admins supervise iOS devices and push Configuration Profiles to the device. Setting up iOS kiosks with Apple Configuration enables admins to push additional restrictions and Blueprints to further limit the device functionalities exposed to the users.
Set-up steps
- Connect the iOS device to the Mac running Apple Configurator using a USB.
- Supervise the iOS device.
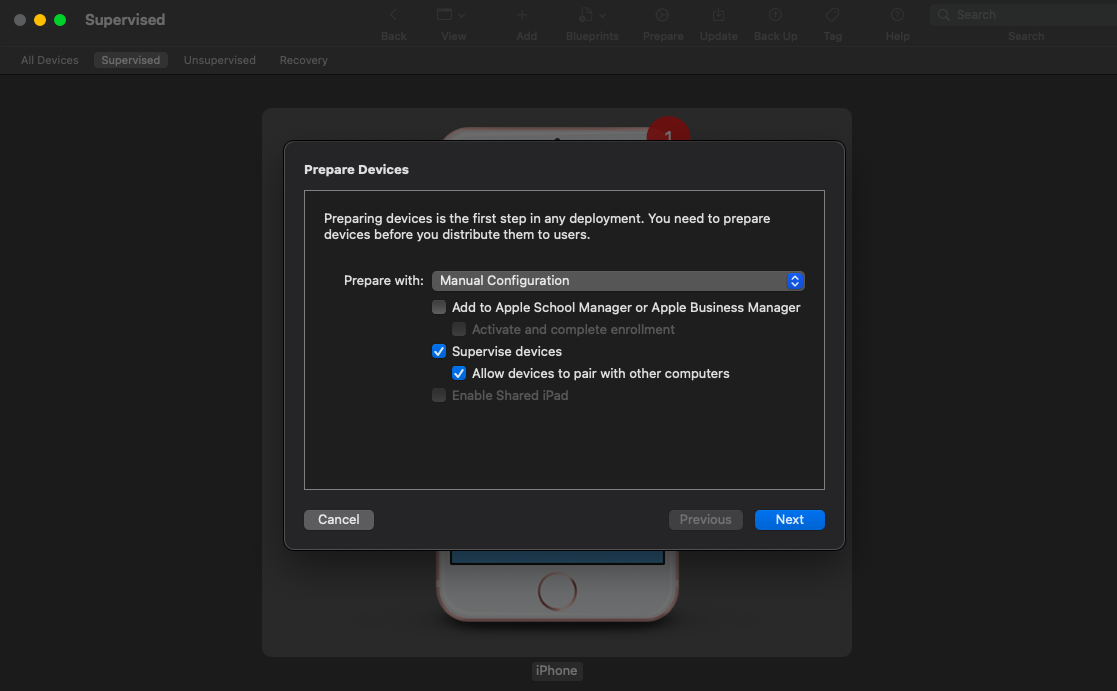
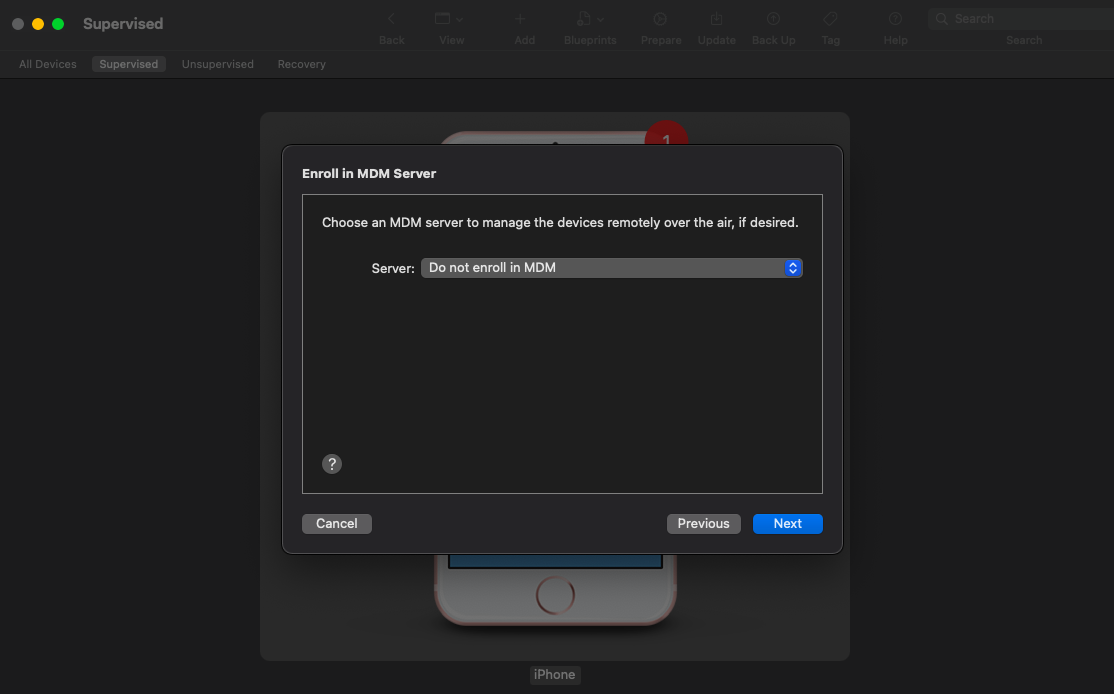
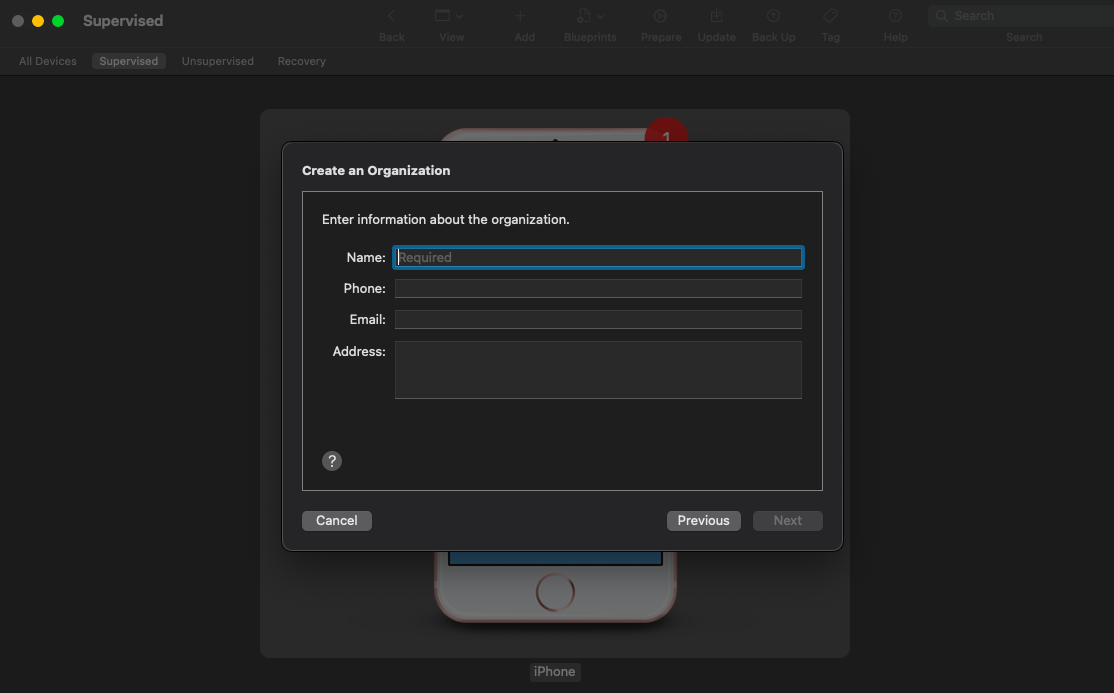
- Once the iOS device is supervised, go to the Apple Configurator menu, right click on the iOS device and navigate to Advanced > Start Single app mode.
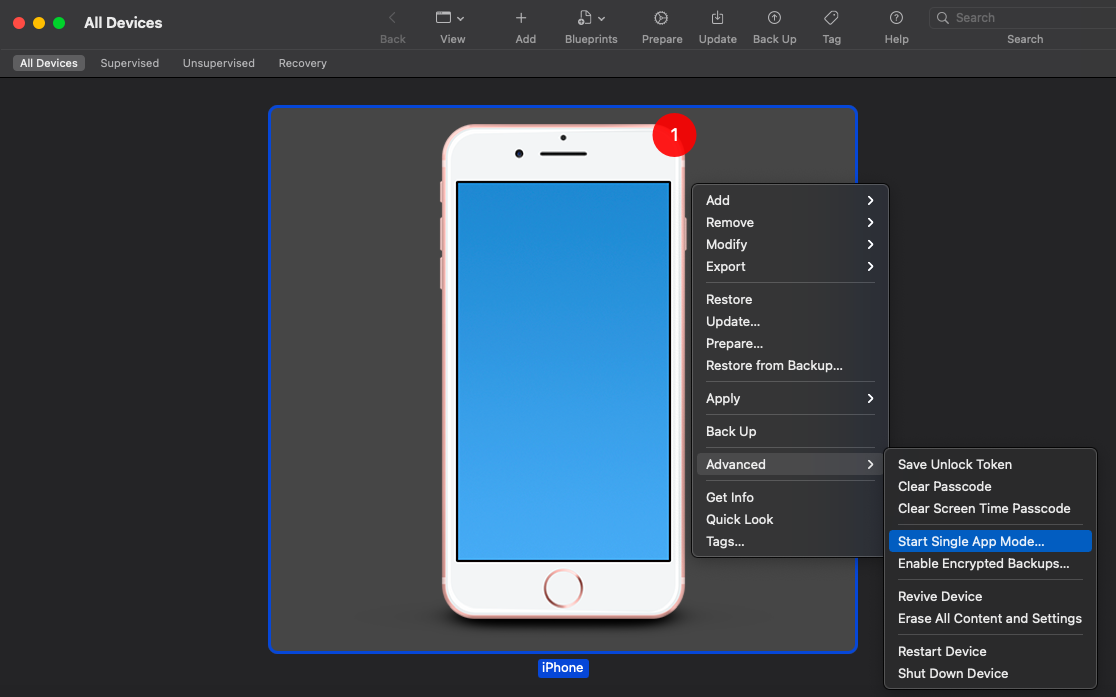
- Now, find and select the app from the list, and click on ‘Select App‘.

Your iOS device is now locked down to the selected application. To exit from kiosk mode,
- Connect the iOS device to a Mac running Apple Configurator using a USB.
- In the Apple Configurator menu, right click on the iOS device and navigate to Advanced > Stop Single app mode.
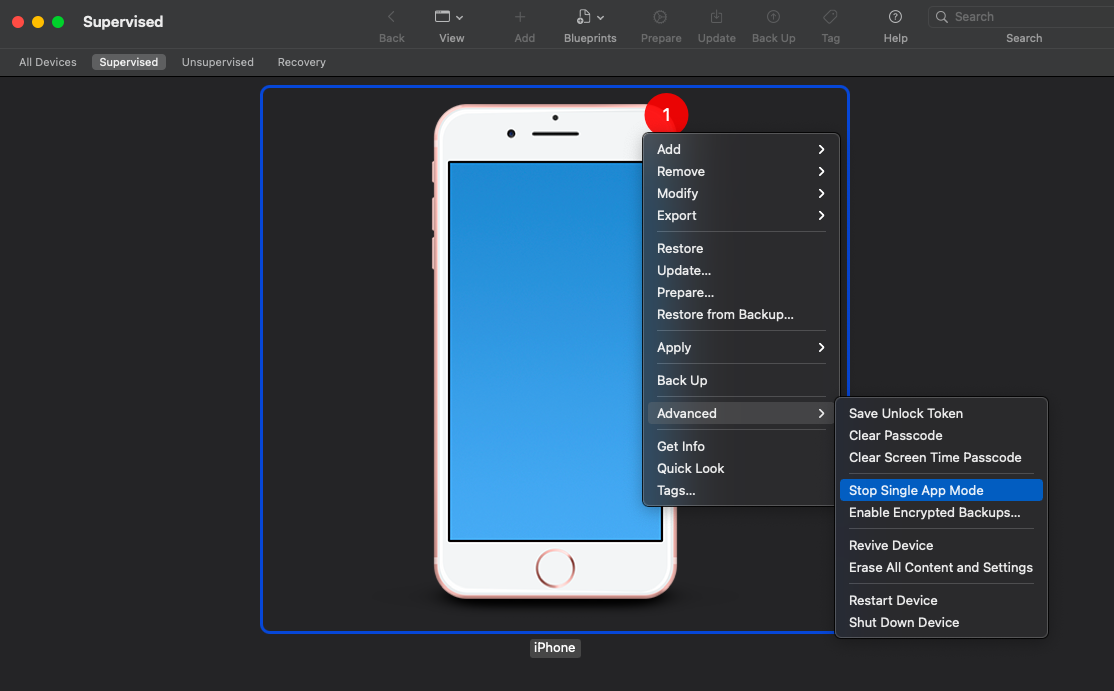
Your iOS device has now exited from Single app mode.
What are the drawbacks of enabling iOS kiosk mode via Apple Configurator?
Although Apple Configurator enables you to lock down iOS devices to a fully functional Single app mode, admins must physically connect each of the devices to a Mac and manually deploy the configurations. Hence, this cannot be considered as a scalable option. Moreover, you cannot lock down iOS devices to a multi-app kiosk mode using Apple Configurator. For this, you will require a UEM solution.
How to configure iOS kiosk mode using a UEM solution
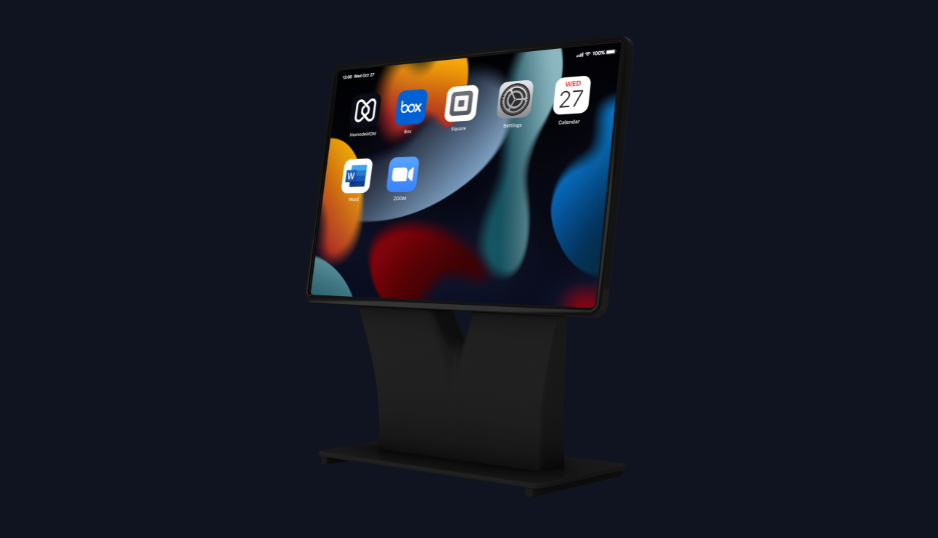
UEM solutions like Hexnode can remotely set up, manage and monitor iOS kiosk devices from a single console. The full-fledged kiosk solution from Hexnode for iOS is built around a scalable security framework specifically built for special-purpose devices. The standard device home screen gets replaced by a customizable interface which gives access only to the whitelisted apps/websites. iOS kiosk mode can be combined with other security features from Hexnode for added protection. With Hexnode you can:
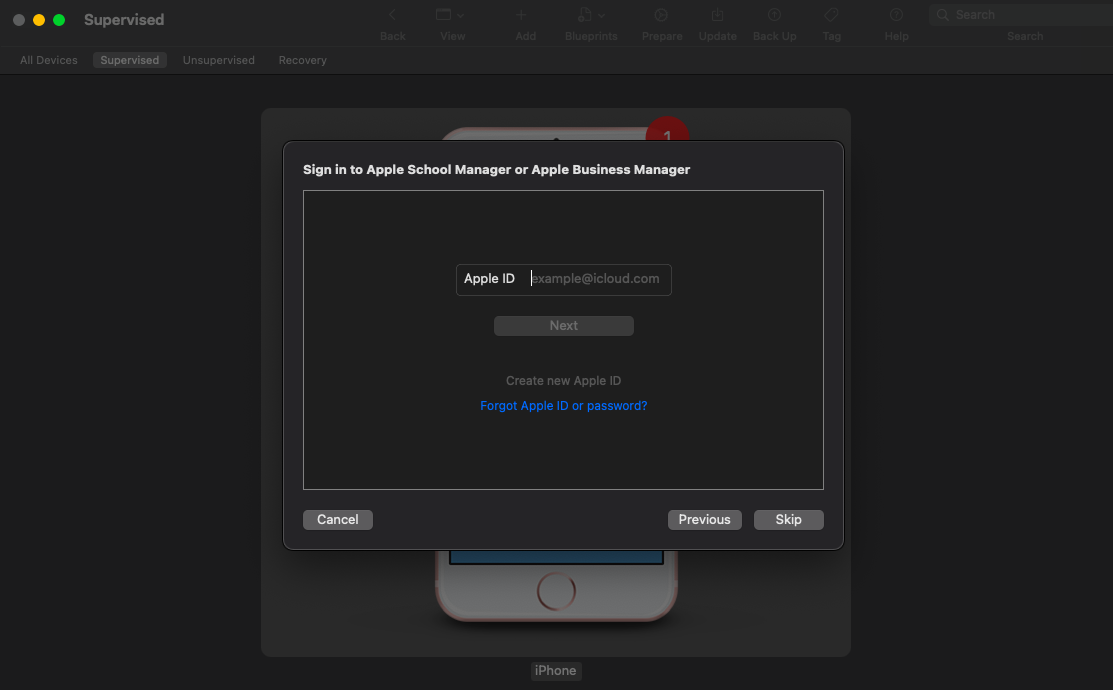
- Seamlessly onboard the device using the over-the-air enrollment option with Apple Business Manager/Apple School Manager.
- Enable location tracking to collect the location details of the device.
- Configure the remote view and remote control to provide real-time assistance.
- Add a custom lock screen message and wallpaper for personalization.
- Broadcast messages through Hexnode messenger for quick communication.
- Check for device inactivity and compliance violations.
Hexnode iOS kiosk solution features:
1: Single app mode
-
- Restricts the device to a single app that runs in full screen.
- Advanced kiosk settings to limit accessibility options.
2: Autonomous single app mode
-
- An app can enter itself to the single app and release itself when the user finishes working with it.
- Only specific apps can support Autonomous single app mode and the developer controls when the app will be entering the single app mode.
- Helpful in preventing the accidental exit of apps.
3: Multi-app mode
-
- Multiple apps are whitelisted for kiosk use.
- Launches a custom start page instead of the device home screen.
- Only the selected app will be displayed on the launched screen hiding all other apps installed on the device.
- Even a device restart will relaunch the kiosk home screen.
-
- Device runs one or more websites in full screen.
- Can choose the Safari browser or Hexnode Browser Lite to access the whitelisted websites.
- Options to configure accessibility settings.
- Advanced options to customize the kiosk experience.
With all these capabilities, Hexnode UEM helps streamline the way how iOS kiosk mode works in a public environment. Admins can easily push/update configurations over-the-air and make sure that the kiosks are always working as intended. In brief, with Hexnode iOS kiosk mode, admins can ensure that user experience and device security are never compromised.
INFOGRAPHIC
The final note
For companies, being able to limit the usage of iOS devices to only one or a few apps is a valuable feature.
Although Guided access helps admins lockdown iOS devices to a single application, kiosk lockdown via UEM is the answer for businesses looking for a completely locked down kiosk environment.


![[Infographic] How to reinforce your business with self-service kiosks](https://cdn.hexnode.com/blogs/wp-content/uploads/2021/03/How-to-reinforce-your-business-with-Hexnode-1024x550.png)