

Ask any Windows system administrator, and they will tell you that understanding how to operate and work with PowerShell is a crucial skill that firmly puts you on the path to becoming a great sysadmin.
One who is held in great esteem by their peers and admired for comprehending the language of the gods.
Yes, that might have been a slight exaggeration, but in all seriousness, Windows PowerShell can be a powerful tool that helps system admins, IT professionals and Windows users streamline and automate a wide variety of tasks.
In this beginner-friendly guide,
- We’re going to walk you through the building blocks of Windows PowerShell scripting, including how to launch, create, and run a PowerShell script.
- We’ll explore some of the common PowerShell scripting commands and examples.
- We shall review some of the applications, use-cases, and best practices when it comes to PowerShell scripting.
Table of Contents
- What is Windows PowerShell scripting?
- How is PowerShell used?
- What are the applications and use cases of PowerShell scripting?
- Getting started with Windows PowerShell scripting
- PowerShell vs PowerShell ISE – What’s the difference?
- Elevated vs normal PowerShell – What’s the difference?
- How do I launch PowerShell?
- What are PowerShell cmdlets?
- What are the 3 core cmdlets in PowerShell?
- What is the Get-Command cmdlet?
- What is the Get-Help cmdlet?
- What is the Get-Member cmdlet?
- What is the PowerShell execution policy?
- How to run a PowerShell script
- Some useful PowerShell commands
- Best practices for PowerShell scripting
- Final note
What is Windows PowerShell scripting?
Windows PowerShell is an object-oriented, command-line interface with scripting language functionalities, that is native to the Windows platform (However, PowerShell can also be installed manually on macOS and Linux platforms). It is part of the .NET framework and uses small pieces of code called cmdlets to offer several features and functionalities, including the ability to automate actions and configurations, and simplify administration and management within a Windows environment.
How is PowerShell used?
PowerShell is designed to act as a multi-functional tool that can be used both as an interactive language that helps with one-to-one administration and management, and as a scripting language that can be saved as an executable and run to help automate tasks on one-to-one or one-to-many environments. That being said, the core PowerShell cmdlets, objects, and properties you must get familiar with remain mostly common for both use-cases.
Get started with Hexnode’s Windows Management solution to improve security, increase productivity, save time and overhead costs of managing your corporate devices.
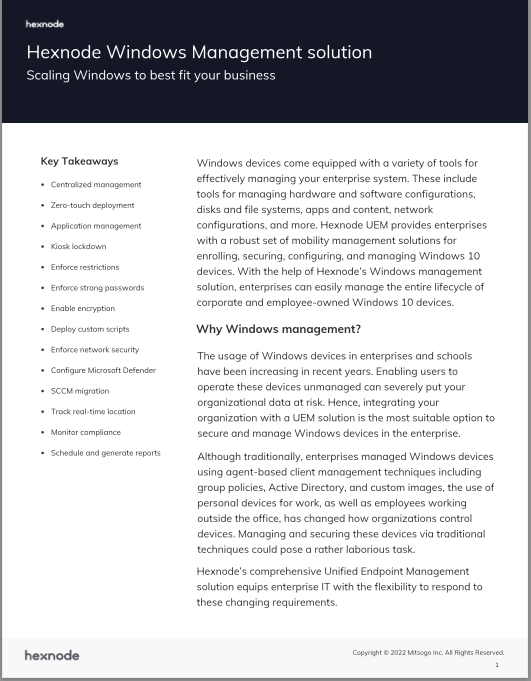
Featured resource
Hexnode Windows Management Solution
What are the applications and use cases of PowerShell scripting?
With PowerShell scripting, IT admins are equipped with the ability to perform almost any administrative function on a Windows device. A few of the key applications and use cases of PowerShell scripting include the ability to:
Automate management tasks
IT admins can automate key administrative tasks with the help of PowerShell cmdlets. They can use PowerShell cmdlets to execute multiple commands in a row or pipe output commands to automate routine administrative tasks.
The PowerShell tool can be used to automate operations like user administration, cloud resource management, and much more.
Track key monitoring metrics (remote troubleshooting)
Monitoring server performance is a critical duty for IT administrators. While businesses can utilize third-party software to track critical performance data, IT admins who are used to the PowerShell scripting language can utilize the tool to perform the work instead. Moreover, PowerShell enables IT admins to perform efficient Windows event log searches with the help of the Get-WinEvent cmdlet.
Manage Active Directory
PowerShell includes a number of cmdlets that can help make life easier for IT admins who regularly need to carry out tasks in Active Directory, such as creating and maintaining users and groups, troubleshooting the AD environment, and more. In addition, PowerShell may be used to efficiently manage domains and infrastructure in Active Directory. Overall, PowerShell is an efficient tool that complements Active Directory’s administrative capabilities.
Getting started with Windows PowerShell scripting

Pre-requisites
Here are the system requirements to run the latest version of Windows PowerShell (PowerShell 5.1). This includes features such as Windows PowerShell Integrated Scripting Environment (ISE), Common Information Model (CIM) commands, workflows, and more.
- For Windows Server 2008 R2 (with Service Pack 1) and up, until Windows Server 2016, you must install the Windows Management Framework 5.1
- For Windows 7 (with Service Pack 1) and up, until Windows 10, you must install the Windows Management Framework 5.1
- PowerShell comes pre-installed on Windows Server versions 2016 and up
- PowerShell comes pre-installed on Windows 10 versions 1607 and up
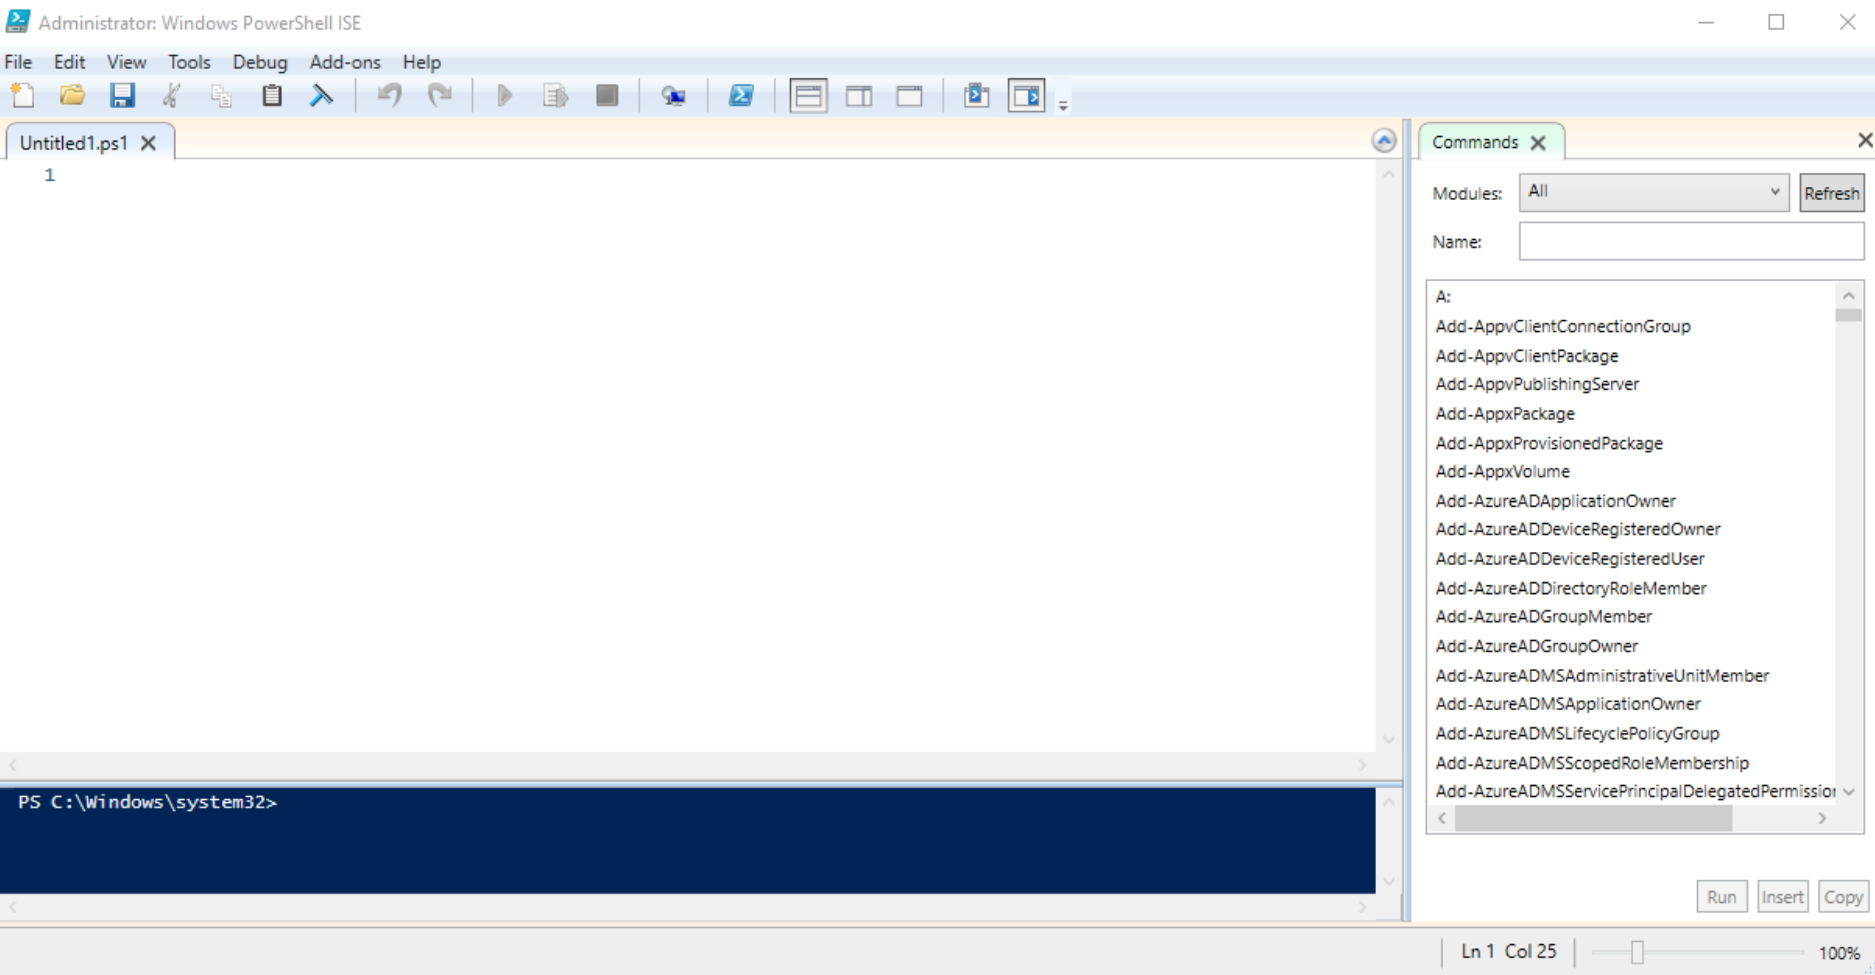
PowerShell vs PowerShell ISE – What’s the difference?
The primary difference between PowerShell and PowerShell ISE (Integrated Scripting Environment) is the difference between convenience and functionality. PowerShell ISE provides users with advanced features and functionalities to help create, run, and debug commands and scripts on Windows environments, whereas PowerShell is a simpler and more straightforward scripting tool.
While PowerShell uses a command-line interface (CLI), PowerShell ISE uses a graphical user interface (GUI) that comes with a toolbar, menu bar, script pane, console pane, and more. Apart from this, additional features and functionalities in PowerShell ISE include,
- The ability to multitask by opening multiple tabs and running multiple commands and scripts.
- The ability to streamline the process of editing commands and scripts with the help of the ‘Edit’ menu (which provides options including ‘Find in script,’ ‘Replace in script,’ and more).
- The ability to filter, search, and find a particular command using the command add-ons panel and insert it into the console.
Overall, PowerShell can be a viable platform for simple tasks where the actions are pretty clear and straightforward, whereas PowerShell ISE is preferable when scripting tasks are longer, more complex and interrelated.
Elevated vs normal PowerShell – What’s the difference?
When running PowerShell in normal mode, you are only provided with the authority to run commands and scripts that do not alter the core system settings and configurations. In a nutshell, PowerShell cannot participate in User Access Control (UAC). A non-elevated normal PowerShell generally do not have rights to alter drivers, read the system’s security log file, or even change the computer’s time. To make changes to such system settings, you must run PowerShell in the elevated mode.
To run PowerShell in elevated mode, right click on the option ‘Run as administrator’ during launch. You can see that the title bar of the PowerShell console says “Windows PowerShell” when run in normal more, and ‘Administrator – Windows PowerShell’ when run in elevated mode.
Keep in mind though that running PowerShell in elevated mode may have the ability to potentially alter and ultimately damage the system. It is better to first run such commands in a test environment before deploying to your actual environment.
How do I launch PowerShell?
There are multiple ways to launch PowerShell on Windows devices. Here, we’ll take a look at some of the most common methods to launch the PowerShell tool.
From the ‘Run’ dialog box
- Press Windows+R to open the Run dialog box.
- Type “powershell” in the text box.
- Click OK, or press Enter.
- OR, you can press Ctrl+Shift+Enter to open an elevated PowerShell window.
From the search bar/start menu
One of the easiest ways to open PowerShell is via a Start Menu Search.
- Click on the Start menu or Search icon, and type “powershell” in the search box.
- Click “Open” or “Run as Administrator” to open PowerShell either normally or in elevated mode.
You can also find the PowerShell app by scrolling through ‘All Apps’ in the Start menu.
- Click on the Start menu and click on “All Apps” to expand the list.
- Click the “Windows PowerShell” folder. Select “Windows PowerShell” to run in normal mode, or right click the icon, and click “Run as Administrator” To run in elevated mode.
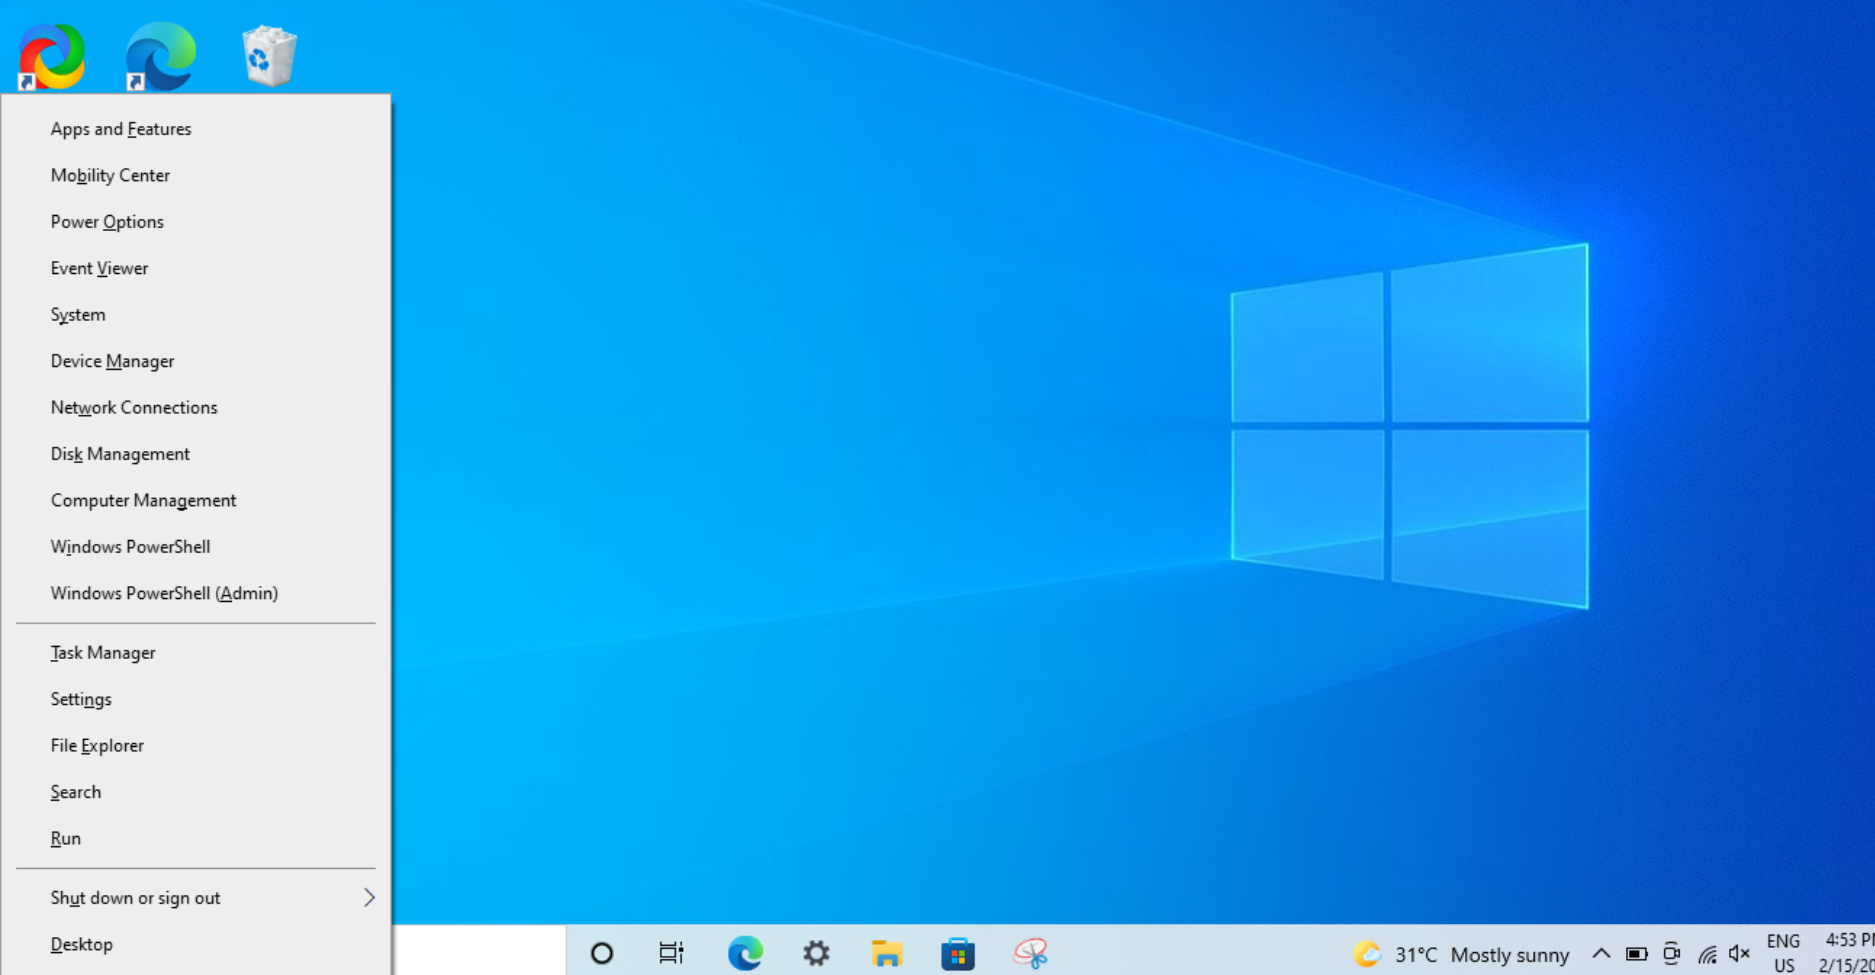
From the Power Users menu
- The Power Users menu pops up in the taskbar when you press Windows+X.
- Once the pop-up has appeared, click “Windows PowerShell” or “Windows PowerShell (Admin)” to open it in normal or elevated mode.
Using command prompt
- Open the Command Prompt and run ‘powershell’ as a command. This turns the command prompt into an instance of PowerShell.
- To run an elevated version of PowerShell, type the following command, and press enter.
|
1 |
start-process PowerShell -verb runas |
What are PowerShell cmdlets?
Cmdlets are native lightweight PowerShell commands, that can be used within the PowerShell environment. Over 200 cmdlets are used in PowerShell. Cmdlet names have the form of singular “Verb-Noun” commands to make them easily discoverable. The syntax is as follows.
|
1 |
Cmdlet("verbName", "nounName") |
The cmdlets may also include optional parameters. In such cases, the syntax becomes,
|
1 |
Cmdlet("verbName", "nounName", Named Parameters...) |
Here, the verb specifies the action taken by the cmdlet, the noun specifies the resource that the cmdlet acts upon, and the cmdlet parameters provide the mechanism that allows a cmdlet to accept input.
For example, Get-Process is a cmdlet that is used to determine what processes are currently running on the device, and the Get-Service cmdlet is used to retrieve a list of services and their status. Here, Get is the cmdlet verb, and Process and Service are the cmdlet nouns.
It is important to note that the term PowerShell command is a generic term that can also be used to refer to any type of command in PowerShell. There are many other types of commands in PowerShell besides cmdlets, such as aliases and functions, which may possess different formats/syntaxes.
What are the 3 core cmdlets in PowerShell?
What if we told you that you can become an expert at PowerShell by being familiar with just three PowerShell cmdlets? Well, it turns out you can.
How? To start, we’ll let you in on a little secret. The only difference between a beginner and an expert at PowerShell is that, the expert doesn’t always know the answers, but they know how to figure out the answers.
You see, there are hundreds of cmdlets in PowerShell and it is impossible for anyone, however experienced they may be, to memorize all of them. The only difference that sets the experts apart from the beginners is,
“Experts don’t memorize how to use hundreds of commands in PowerShell. Instead, they learn how to use the help system within PowerShell extremely well.”
How? By learning how to work with the three core cmdlets in PowerShell.
- Get-Command
- Get-Help
- Get-Member
With these three cmdlets, you can find, explore, and leverage all the other available PowerShell cmdlets to their full extent.
What is the Get-Command cmdlet?
Get-Command is a cmdlet that is designed to help you locate and display all available commands associated with your specific requirement. In fact, running the Get-Command cmdlet without any parameters returns a list of all the commands installed on your system. However, it will be difficult for you to identify your required commands from this vast list; as, in most cases, you’ll be after a specific set of commands. Hence, it is advised to include parameters to the Get-Command cmdlet.
Let’s analyze an example.
|
1 |
Get-Command -Noun Process |
By specifying a parameter (Noun Process) with the Get-Command cmdlet, the output returns all cmdlets that deal with the noun ‘process’.
| CommandType | Name | Version | Source |
| Cmdlet | Debug-Process | 3.1.0.0 | Microsoft.PowerShell.Management |
| Cmdlet | Get-Process | 3.1.0.0 | Microsoft.PowerShell.Management |
| Cmdlet | Start-Process | 3.1.0.0 | Microsoft.PowerShell.Management |
| Cmdlet | Stop-Process | 3.1.0.0 | Microsoft.PowerShell.Management |
| Cmdlet | Wait-Process | 3.1.0.0 | Microsoft.PowerShell.Management |
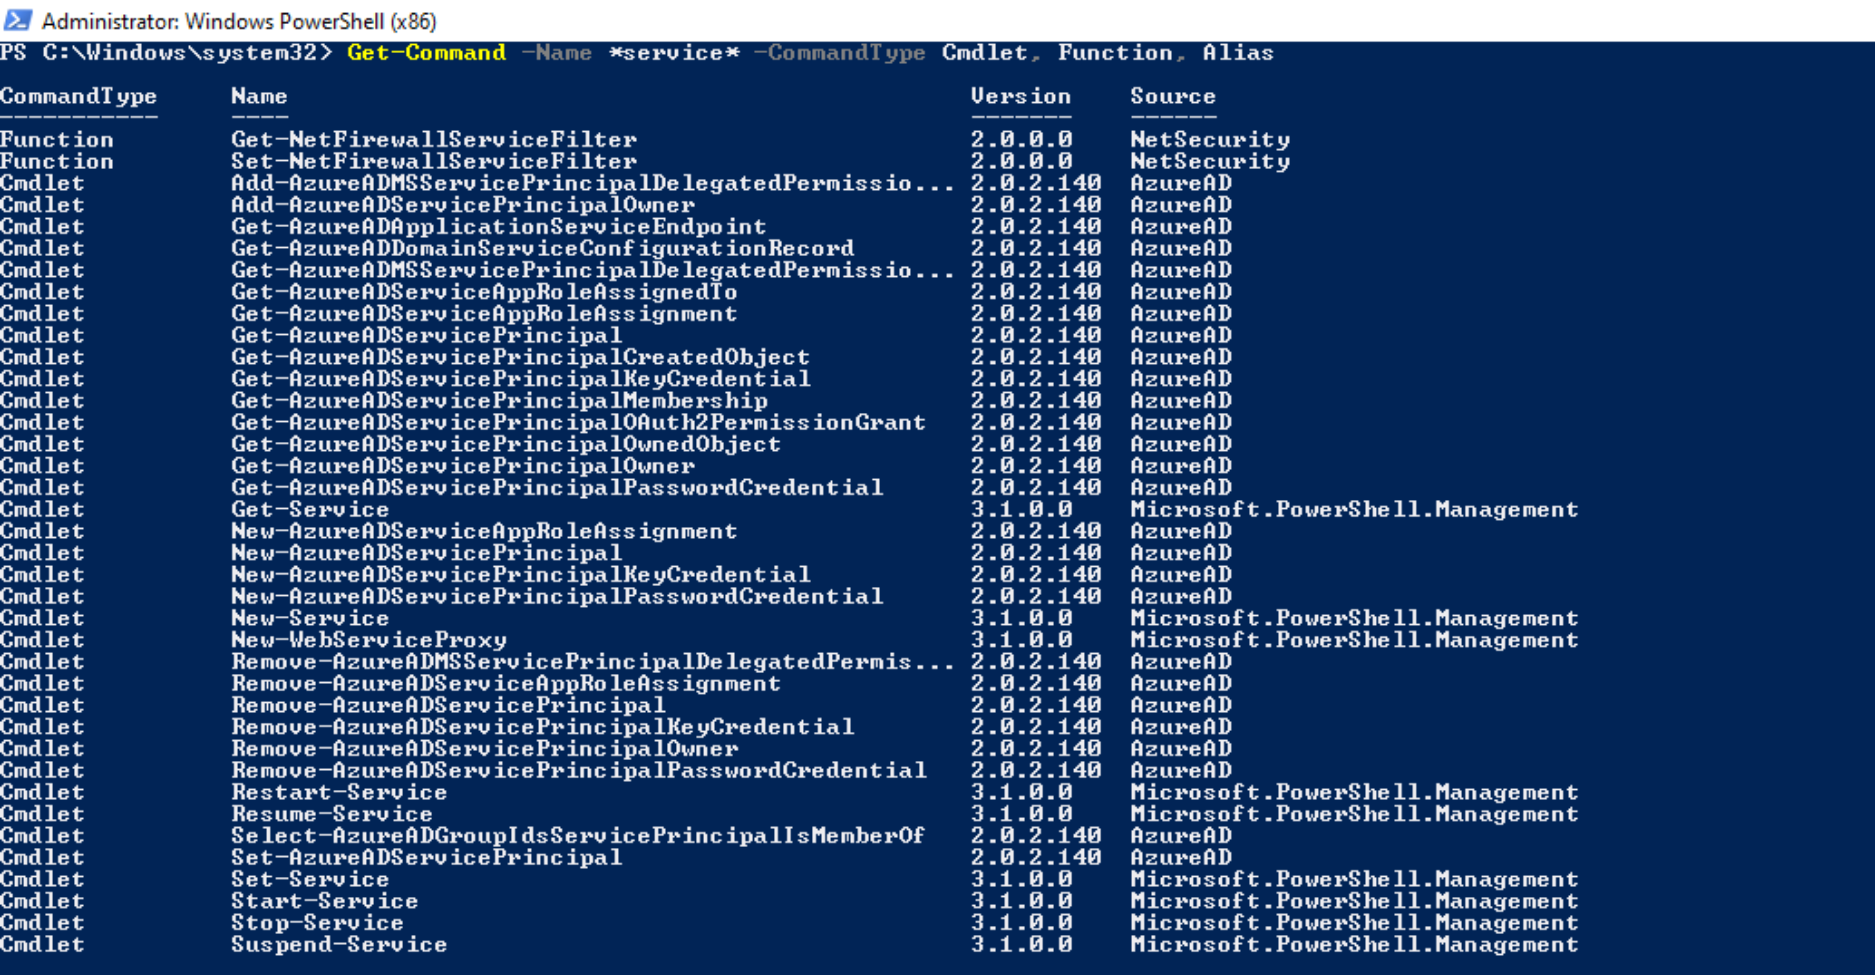
You can also include wildcards when specifying parameters. For example,
|
1 |
Get-Command -Name *service* |
Returns all commands that include the word ‘service’ in their name. Go ahead and try this command out, and you will realize there is still an issue.
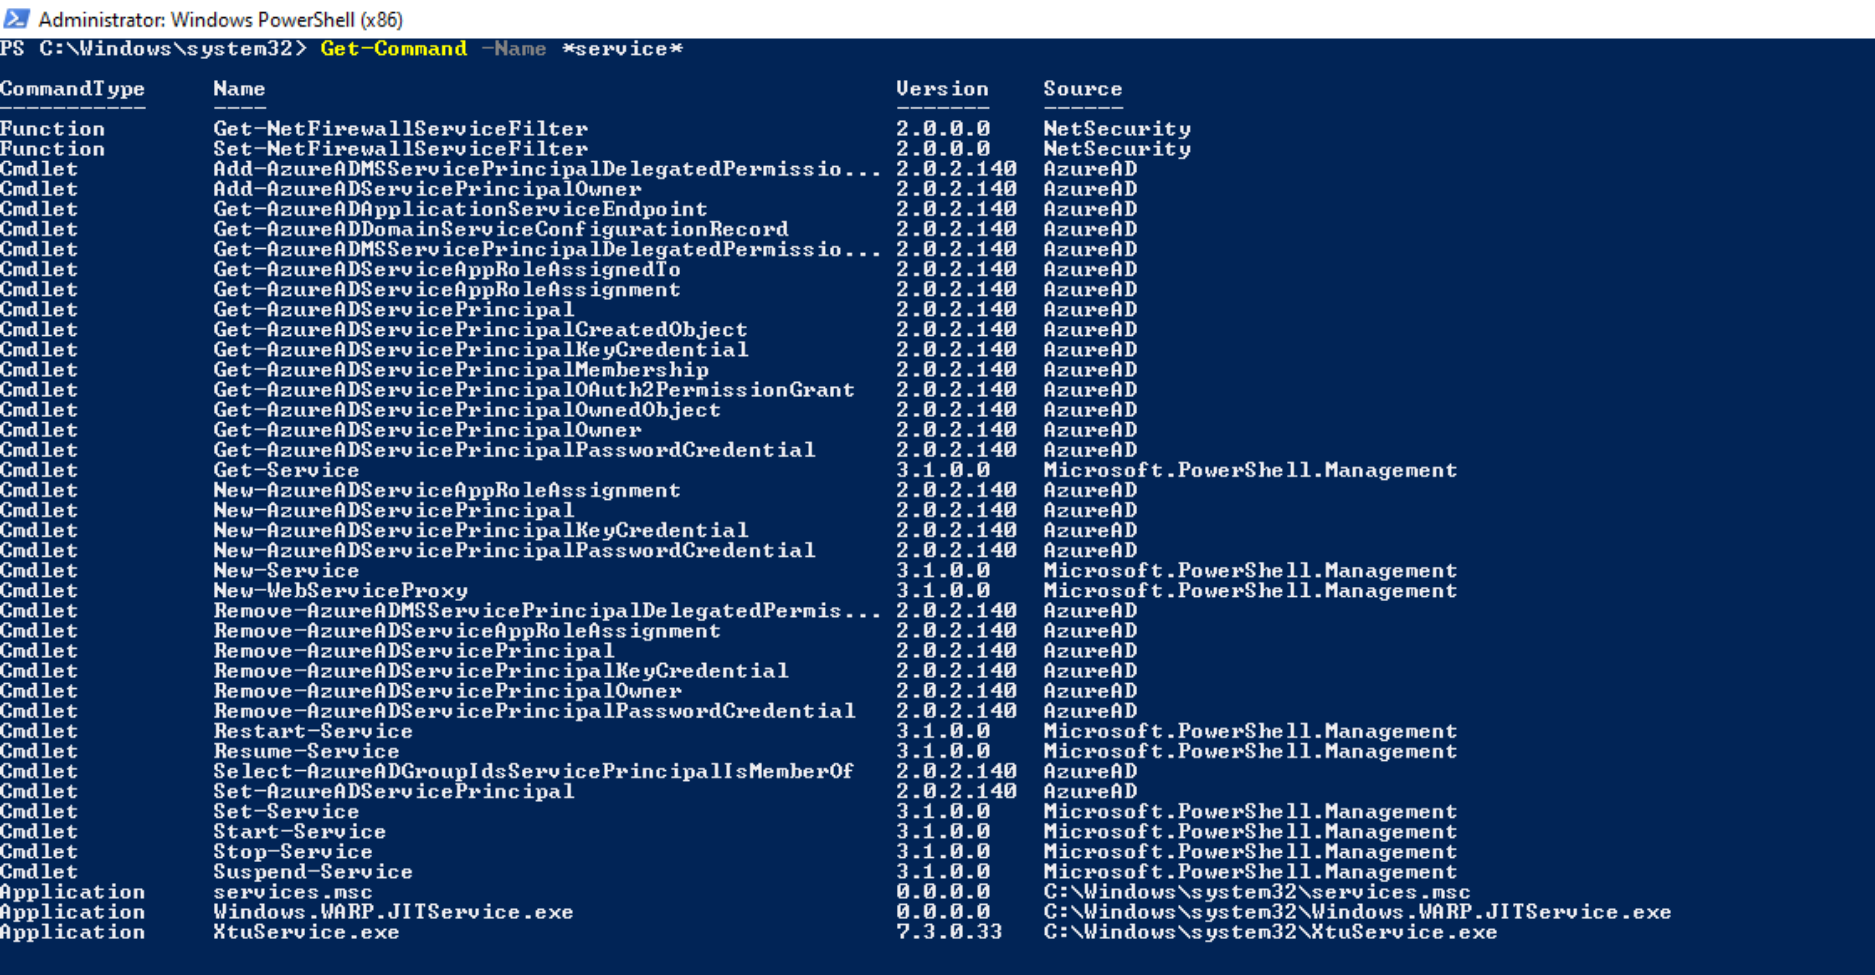
This command returns outputs that are not native PowerShell commands (for example, command types that include function and application).
Hence, to further narrow down the results, you can limit the output by specifying the ‘CommandType‘ parameter. For example,
|
1 |
Get-Command -Name *service* -CommandType Cmdlet, Function, Alias |
Returns only the native PowerShell cmdlets (and excludes other command types), that have the word ‘service’ in their name.
Once you have mastered how to work with all the parameters that can be included with the Get-Command cmdlet, you can easily find the necessary commands required to create your own PowerShell scripts.
To learn the full list of parameters you can specify with the Get-Command cmdlet, visit the Microsoft Get-Command help reference.
Alright, so now that you’ve got your list of required commands, what if you didn’t know exactly how to use a specific cmdlet?
This is where the Get-Help cmdlet comes into action.
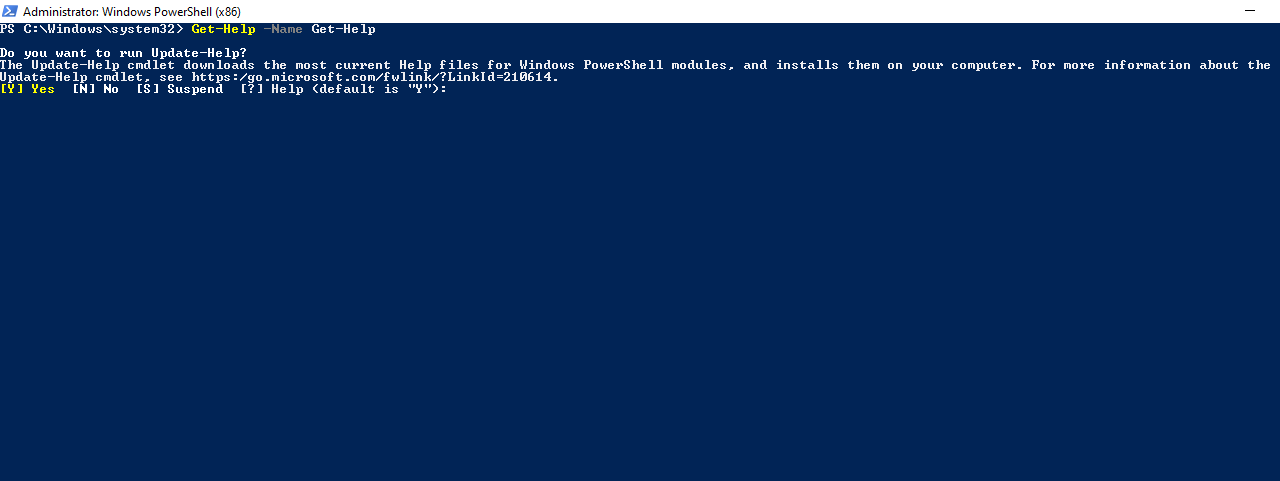
What is the Get-Help cmdlet?
The Get-Help cmdlet helps you learn how to use PowerShell commands once you find them. It displays information about PowerShell concepts and commands, including their name, syntax, description, examples, and more. To learn how to use the Get-Help cmdlet, let’s consider the following example.
|
1 |
Get-Help Get-Process |
This command provides all the help information available on the cmdlet ‘Get-Process.’
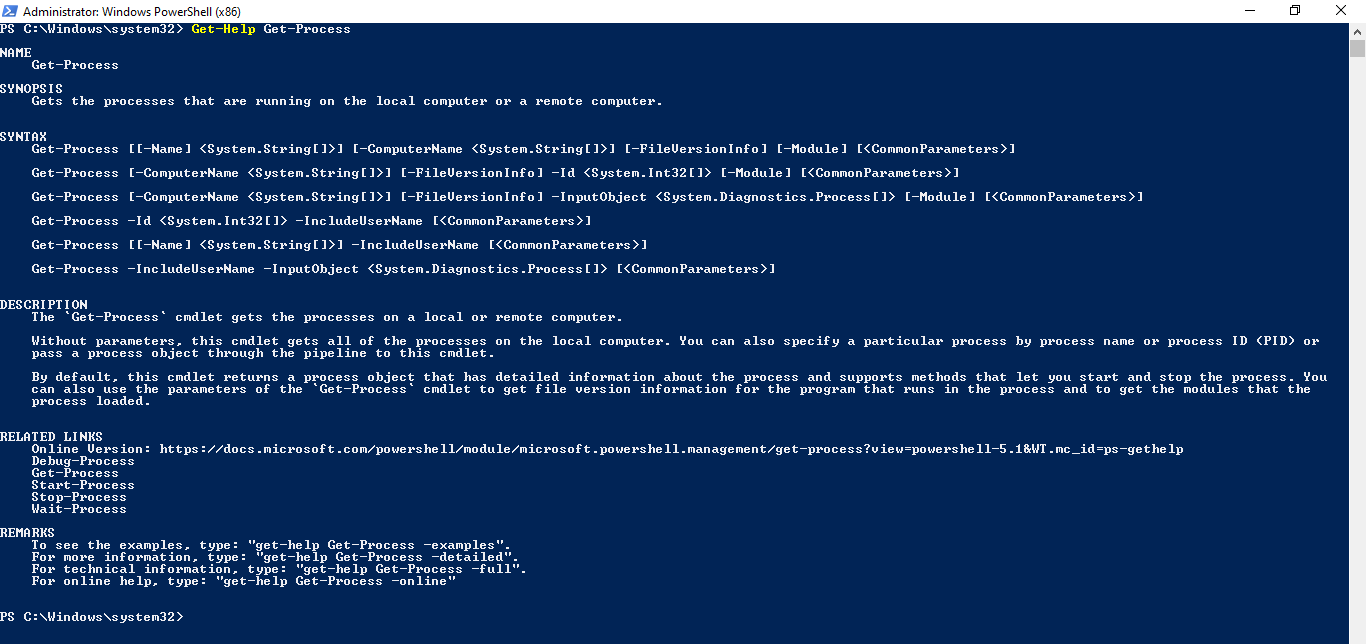
On reviewing the output of this command, you can take note of how the help information is grouped in the output. By default, there are six distinct sections for the output, as follows.
- NAME
- SYNOPSIS
- SYNTAX
- DESCRIPTION
- RELATED LINKS
- REMARKS
However, this is not the entire help topic that’s available. To view the entire help topic available, you must include the parameter ‘Full.’ For example,
|
1 |
Get-Help Get-Process -Full |
The output for this command provides the following sections.
- NAME
- SYNOPSIS
- SYNTAX
- DESCRIPTION
- PARAMETERS
- INPUTS
- OUTPUTS
- NOTES
- EXAMPLES
- RELATED LINKS
Help topics contain an enormous amount of information. Sometimes, it may be easier to narrow down and limit this information to just the required details. You can do this by specifying additional parameters.
For example, to get help for a specific section for Get-Process, say, Examples, the command would be,
|
1 |
Get-Help Get-Process -Examples |
You can also type ‘help’ or its alias ‘man,’ which is similar to ‘Get-Help,’ albeit it displays one screen of text at a time.
To learn the full list of parameters you can specify with the Get-Help cmdlet, visit the Microsoft Get-Help help reference.
What is the Get-Member cmdlet?
The Get-Member cmdlet helps you discover what objects, properties, and methods are available for a specific command. It helps you identify what type of objects you are dealing with, and what properties and methods are available to that object. To learn how to use the Get-Member cmdlet, let’s consider the following example.
|
1 |
Get-Service | Get-Member |
Here, the Get-Service cmdlet, when run without any parameters, returns objects for all the services (both running and stopped) on the computer. Now, by piping down the result of the Get-Service command to the Get-Member cmdlet, the properties and methods of the objects generated by the Get-Service cmdlet are displayed.
The output is of the format,
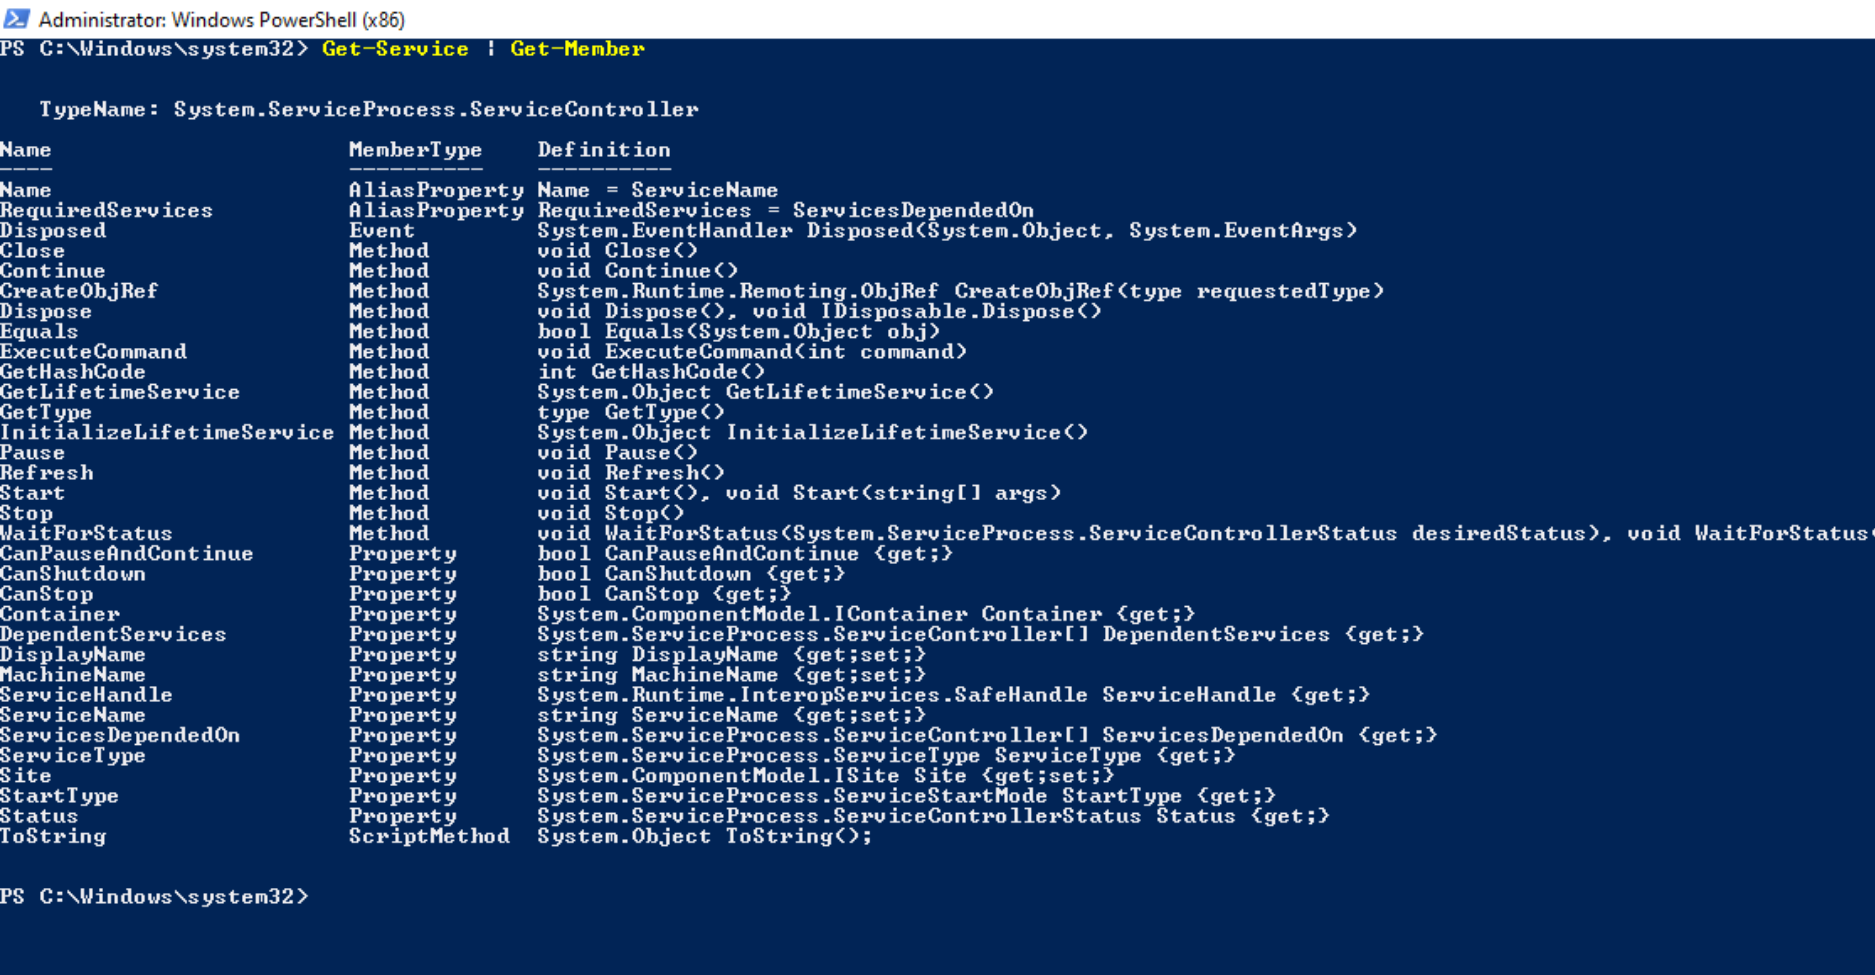
Here, you can see that all the properties and methods that are related to the object returned by Get-Service are displayed in the output. However, you can also see that the list appears to be quite expansive. To narrow down the output, you can include parameters such as MemberType (Specifies the member type that this cmdlet gets), Name (Specifies the names of one or more properties or methods of the object), and more.
An example command would be,
|
1 |
Get-Service | Get-Member -MemberType Property |
The output for this command will return only the property elements that are related to the object returned by Get-Service (The method elements are excluded).

To learn the full list of parameters you can specify with the Get-Member cmdlet, visit the Microsoft Get-Member help reference.
What is the PowerShell execution policy?
Before you can run a PowerShell script, you must set the PowerShell execution policy to the correct configuration. By default, the execution policy is set to ‘restricted,’ which means Windows does not allow any PowerShell scripts to run. This setting exists to prevent the accidental execution of a PowerShell script, which may ultimately harm the system.
The execution policy in PowerShell can be set to the following configurations.
- Restricted – This is the default option. Enabling this option does not allow any PowerShell script to run.
- Unrestricted – When this option is set, users can run any script. However, Windows shows a warning when trying to run downloaded scripts.
- RemoteSigned – When this option is set, downloaded scripts require a digital signature. However, you can run locally written scripts. And although it’s not recommended, you can even unblock downloaded scripts to run them without a digital signature.
- ByPass – When this option is set, you can run all scripts with no warnings being displayed.
- AllSigned – When this option is set, you can only run signed scripts from trusted publishers.
Setting the execution policy to RemoteSigned is a good option for organizations looking to remotely deploy PowerShell scripts to Windows devices.
To view the current status of your execution policy, run the command,
|
1 |
Get-ExecutionPolicy -List |
To change the execution policy, open an elevated instance of PowerShell and run the following command.
|
1 |
Set-ExecutionPolicy RemoteSigned |
You should now be able to run PowerShell Scripts on your Windows device.
How to run a PowerShell script
There are a couple of ways to run a PowerShell script on Windows.
Right click and open the .ps1 file
The easiest way is to simply right-click the file and select ‘Run with PowerShell.’ However, unless specified, most PowerShell scripts will close the PowerShell window automatically when the script is done. Hence, you won’t be able to read any errors or output. To solve this, add the following line to the end of the PowerShell script.
|
1 |
Read-Host -Prompt "Press Enter to exit" |
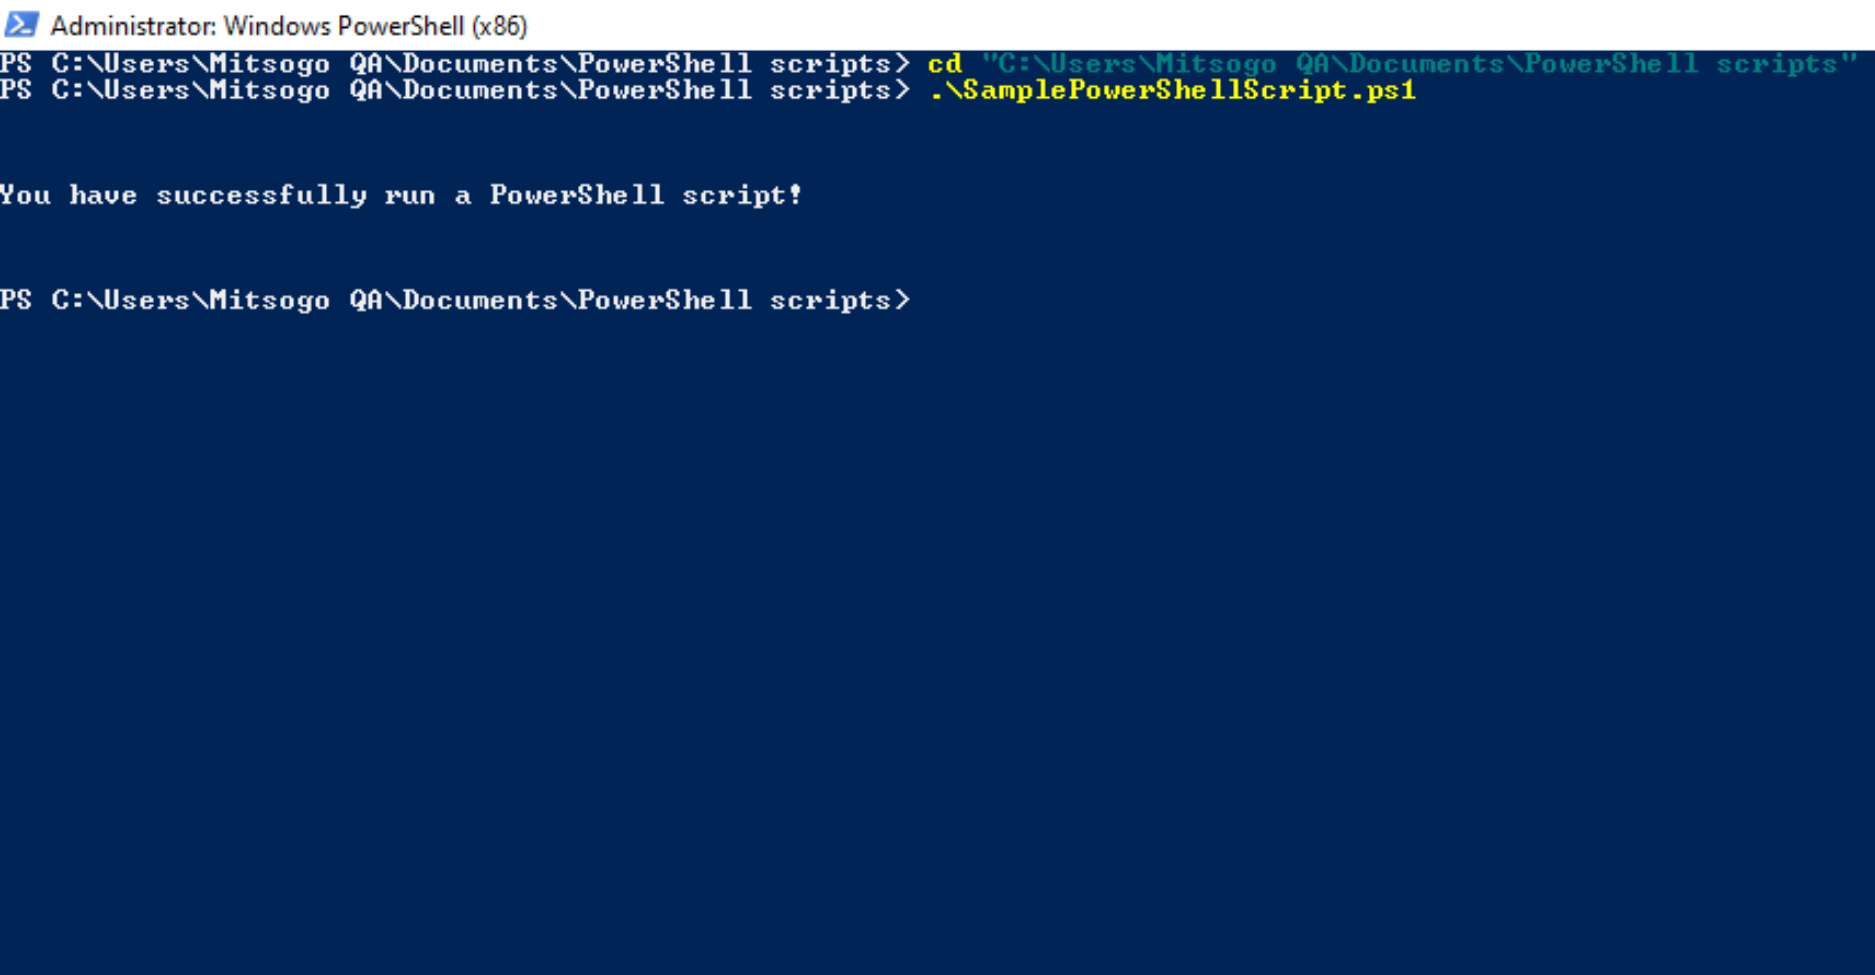
Call the script from PowerShell
You can also call a PowerShell script from the command line in Windows PowerShell itself. First, you must navigate to the folder where the script is located. Use the following command.
|
1 |
cd “c:\(PathToScript)” |
Click enter, and then run the following command.
|
1 |
.\(NameOfPowerShellFile.ps1) |
Use Windows PowerShell Integrated Scripting Environment (ISE)
You can use the PowerShell Integrated Scripting Environment (ISE) editor to open and run a PowerShell script. To open a PowerShell file in the editor, right-click on the file and select ‘Edit’. The file is opened in PowerShell ISE. This method is the best way to run a PowerShell script, as opening the script in PowerShell ISE enables you to review the script before you run it.
Now, to run the script, click on the green play button in the toolbar. The results of the scripts are displayed in the console.
Custom execution via UEM
Sometimes, IT admins may find themselves in situations where they may need to deploy a number of PowerShell scripts in bulk to many of their managed Windows devices. In such cases, employing a Unified Endpoint Management (UEM) solution to help push and run scripts would be the best solution. Hexnode’s UEM solution enables IT to seamlessly deploy scripts, automate tasks, and ensure simple and streamlined management of Windows devices.
Some useful PowerShell commands

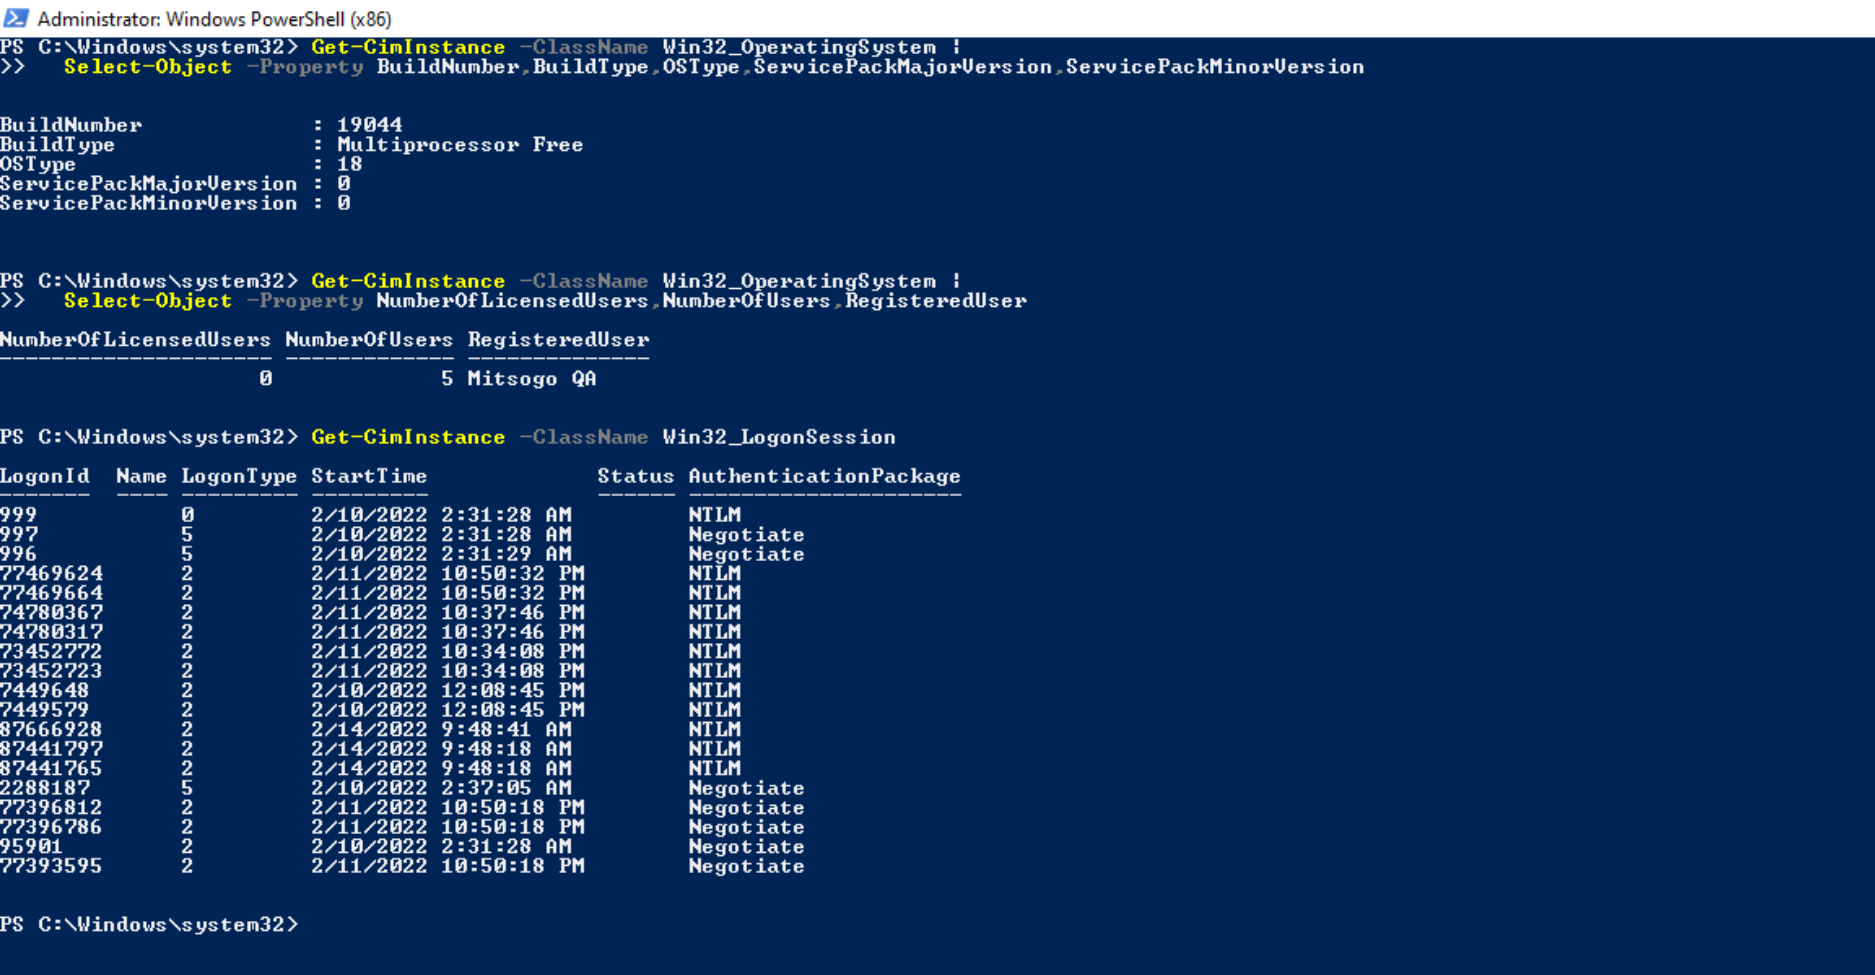
Collecting information about computers
- List OS version information
Use this command to display the OS version and service pack information.
|
1 2 |
Get-CimInstance -ClassName Win32_OperatingSystem | Select-Object -Property BuildNumber,BuildType,OSType,ServicePackMajorVersion,ServicePackMinorVersion |
- List number of local users and owner information
Use this command to list the number of licensed users, current number of users, and owner name
|
1 2 |
Get-CimInstance -ClassName Win32_OperatingSystem | Select-Object -Property NumberOfLicensedUsers,NumberOfUsers,RegisteredUser |
- View logon session information
View the general information about logon sessions associated with users.
|
1 |
Get-CimInstance -ClassName Win32_LogonSession |
- Display service status
View the status of all services on a specific computer.
|
1 2 |
Get-CimInstance -ClassName Win32_Service | Select-Object -Property Status,Name,DisplayNameChanging computer state |
- Shut down or restart the device
To shut down the device, use the following command
|
1 |
Stop-Computer |
To restart the device, use the following command
|
1 |
Restart-Computer |
Working with files and folders
- List all files and folders within a folder
Use this command to get a list of all items directly within a folder
|
1 |
Get-ChildItem -Path C:\ -Force |
- Copy files and folders
Use this command to back up files and folders to a specified path
|
1 |
Copy-Item -Path (path) -Destination (destination) - Force |
- Create files and folders
Use this command to create a new folder
|
1 |
New-Item -Path '(path)' -ItemType Directory |
Use this command to create an empty file
|
1 |
New-Item -Path '(path)\(FileName.format)' -ItemType File |
You can also view our collection of sample scripts by visiting Hexnode’s sample script repository.
Best practices for PowerShell scripting

Ensure proper formatting
Although the PowerShell interpreter does not care about pretty formatting, the people who review your code do care. Along with keeping your script simple, it should be consistently organized and formatted with the help of indentations. Indentations give your text more structure and visibility.
Document your code. Use comments
You may not be the only person who might have to read and go through your code. And let’s be honest, after maybe half a year, you may not be able to understand your own code yourself. Adding comments and properly documenting your code enables you to counteract such situations, thereby enabling you and your colleagues to save considerable amounts of time. Comment your code in a simple and understandable language. Explain your logic when applicable. Add comments to define parameters and variables.
Follow naming conventions
It is essential to follow naming conventions when defining variables. Variable names should be meaningful and properly reveal their motives and uses. Naming variables as $a and $b are not exactly a great practice. You may know the purpose of $a and $b at the time you are writing the script, but someone who is reviewing your script may not be able to pick up on their purposes. It is better to clearly name your variables in relation to the data they represent. If the variable name contains multiple words, you must capitalize the first letter of each word to make it easier to read.
Test your code against any reasonable scenario
To ensure the minimum chance of errors creeping in, it is important to test any reasonable scenario your script might run under. This includes testing your script under 64- and 32-bit PowerShell hosts, testing under ISE and Console PowerShell hosts, testing against elevated and non-elevated PowerShell modes and more, depending on your specifications and requirements.
Final note
The capabilities offered by PowerShell scripting equips IT admins with a vast suite of features and functionalities that enable them to perform almost any type of administrative task without the need for third-party tools within a Windows environment. Moreover, employing a UEM solution like Hexnode to streamline the deployment and execution of PowerShell scripts in a Windows environment, enables IT teams to optimize time and costs by a significant amount.
Need help managing Windows devices?
Look no further. Hexnode's Unified Endpoint Management solution helps you meet all your device management needs.
TRY OUT FOR FREE