Category filter
Android Zero Touch Enrollment
What is Zero Touch Enrollment?
When you have a whole lot of corporate-owned devices to be enrolled in bulk, Zero-Touch Enrollment (ZTE) is the best way to go. Android ZTE is a one-time process for the secure deployment of corporate-owned devices without manually configuring each of them.
It is an out-of-box enrollment method where the devices will be enrolled in the MDM once it is powered on and connected to the network. It prevents unauthorized devices from joining your MDM environment, thus enhancing your security.
What are the key features of Zero Touch Enrollment?
- One-time setup: It is a one-time setup where the end-user needs to just power on the device and connect to the network to get enrolled with MDM.
- Bulk enrollment of devices: It allows large scale roll-out of corporate-owned devices without physically accessing any of them.
- Enrolled as Device Owner: Devices enrolled through ZTE will be provisioned as Device owner (Android Enterprise enabled devices).
- Allows resellers to add devices to the portal.
What are the requirements for Zero Touch Enrollment?
Before starting with the enrollment process, the following pre-requisites are to be met.
- Devices should be purchased directly either from a Zero touch reseller partner / Google partner and not from a consumer store. ZTE extended the support for all devices including Samsung devices running on Android 9.0 and above. For Samsung devices running on lower OS versions, you need to use the Samsung Knox Mobile Enrollment (KME) to enroll such devices in the Hexnode UEM portal.
- Phones/tablets running Android 9.0 and above.
- Ensure that your device is compatible with ZTE from the list of Android Zero Touch Devices.
- A Google account associated with corporate email. Ensure that you don’t use your personal Gmail account.
Configure Zero Touch Enrollment
There are four steps by which you can complete Zero Touch Enrollment:
- Associate a Google Account.
- Setup Zero Touch enrollment portal.
- Add MDM Configuration.
- Apply MDM Configuration to devices.
Associate a Google Account
You need a Google account associated with your corporate email to set up the Zero touch portal.
- Navigate to Create your Google Account.
- Provide your name.
- Provide your corporate email in the field Your email address. Ensure that you don’t click on Create a Gmail account instead.
- Provide other requisite details and follow the on-screen instructions to complete the account creation process.

Setup Zero Touch Enrollment Portal
- Sign in to Zero Touch Portal using the Google account linked to the corporate email.
| Navigation Panel | Description |
|---|---|
| Configurations | You can create, modify and delete MDM configurations here. If required, you can set default MDM configurations to be applied to the devices added to the portal. |
| Devices | The devices added to the account will be listed here. You can assign the configurations to the selected devices. If not required, you can even remove the devices from here. |
| Manage People | You can add, modify or delete the users that can access and manage the portal here. |
| Resellers | If required, additional resellers can be added here so that your account can be shared with multiple resellers. |
Add MDM Configuration
- Sign in to Zero Touch Portal.
- Navigate to Configurations.
- Click on the Add button to add a new configuration.
- You will have the following options to be configured.
| Settings | Description |
|---|---|
| Name | Provide a suitable name to identify your configuration. |
| EMM DPC | Select Hexnode For Work app from the list of EMM apps. |
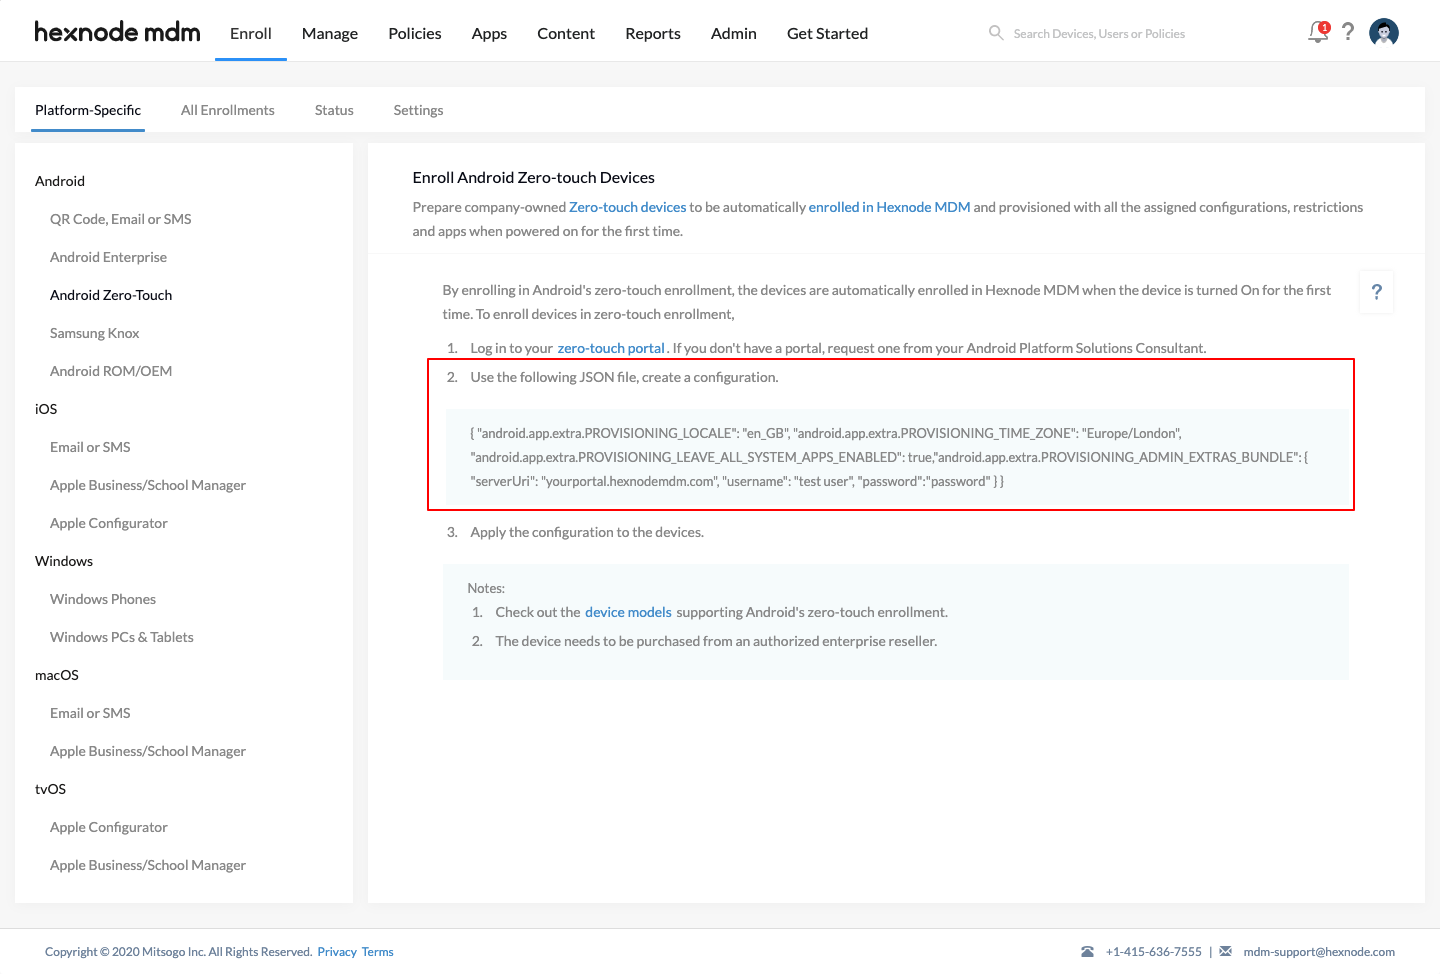
| DPC extras | Provide the JSON data here. JSON data is available under Enroll > Platform – Specific > Android > Android Zero-Touch.
 |
| Company Name | Provide the name of your organization. This name will be shown on the user’s device during enrollment. |
| Email address | Provide your organization’s IT admin email address here. This will be displayed on the user’s device during enrollment, and it can be used to contact the IT admin in case of any issues with the enrollment. |
| Phone Number | Provide your organization’s IT support phone number here. This will be displayed on the user’s device during enrollment, and it can be used to contact the IT admin in case of any issues with the enrollment. |
| Custom Message | Provide an optional message to be displayed on the device screen during enrollment. |
Apply MDM Configurations to devices
Once the configurations are created, you need to associate them with the devices. You can apply the configuration to single device or multiple devices.
Apply configuration to a single device
- Sign in to Zero Touch Portal.
- Navigate to Devices.
- Select the devices to which configurations are to be applied.
- Under Configurations against the selected devices, select the configuration which you have created previously.
- If you need to temporarily remove the device from the ZTE, select No config under Configurations.
Apply configuration to multiple devices
Configurations can be applied to multiple devices by using a CSV file.
CSV file should be of the following format.
| Field | Description |
|---|---|
| modemtype | The parameter in this field should be always set as IMEI in uppercase character. |
| modemid | Provide the IMEI number of the device. |
| serial | Provide the serial number of the device. |
| model | Provide the model name of the device. |
| manufacturer | Provide the name of the device manufacturer. |
| profiletype | The parameter in this field should always be set as ZERO_TOUCH in uppercase characters. |
| profileid | Provide the ID corresponding to the configuration to be applied to the devices.
|
Once the CSV file is prepared, you can upload the file to the Zero touch portal.
- Sign in to Zero Touch Portal.
- Navigate to Devices and click on the ellipsis (3 dot) icon in the table header.
- Select Upload Batch Configuration.
- Upload the CSV file.
- All the devices in the CSV file will now be assigned to the specific configuration.
Remove the devices from Zero Touch Portal
You can remove the devices from the Zero Touch Portal through the de-registering process.
Follow the steps to deregister the device,
- Sign in to Zero Touch Portal.
- Navigate to Devices.
- Select the device you want to remove and click on the Deregister option against the devices.
- Click on Deregister in the confirmation panel.


