Category filter
Wi-Fi configuration on Windows devices
Configuring Wi-Fi settings on devices allows users to access corporate Wi-Fi seamlessly. You can configure the Wi-Fi settings remotely and deploy them to Windows devices. It allows the users to access the organization network automatically without worrying about configuring it manually.
Configure Wi-Fi settings for Windows
To create Wi-Fi configuration settings for Windows devices,
- Login to your Hexnode UEM portal.
- Navigate to Policies. Click on New Policy to create a new one or click on any policy to edit an existing one. Enter the Policy Name and Description in the provided fields.
- Select Windows. Go to Network > Wi-Fi. Click on Configure
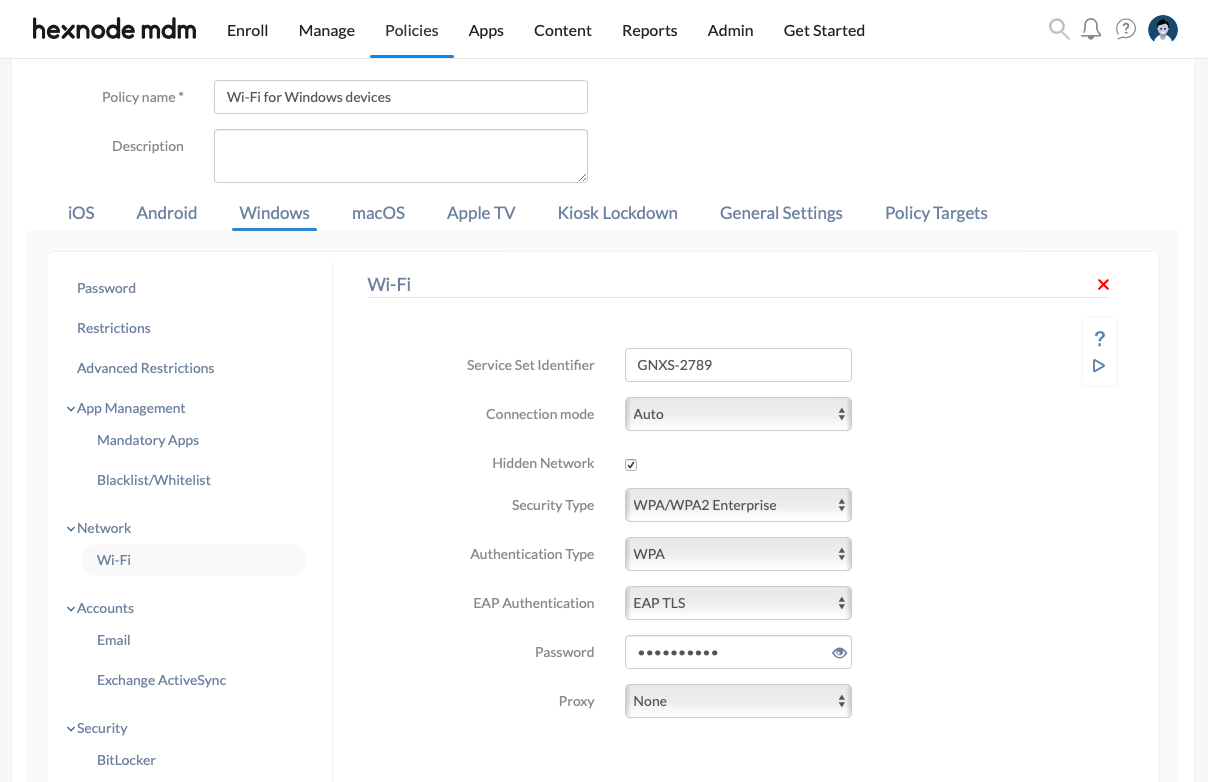
- The following Wi-Fi network settings can be configured.
| Wi-Fi settings | Description |
|---|---|
| Service Set Identifier | Enter the name of the Wi-Fi network. It specifies the name of the wireless network the devices get connected. |
| Connection mode | Select the option Manual to enable users to choose the Wi-Fi network manually.
By default, the Connection mode is set to Auto, which lets devices to connect to the Wi-Fi network automatically when they are within the range. |
| Hidden Network | Select Hidden Network to enable devices to connect to the Wi-Fi network even if it is not broadcasting its SSID.
Disabled by default. |
| Security Type | Select any security protocol used to authenticate the devices: Open, WEP, WPA-PSK/WPA2-PSK, or WPA/WPA2 Enterprise.
By default, the Security Type is set to Open which specifies no authentication. |
| Authentication type
(If you select WPA-PSK/WPA2-PSK or WPA/WPA2 Enterprise as the Security Type) |
Choose the authentication type from WPA (default) and WPA2.
The difference between WPA (Wi-Fi Protected Access) and WPA2 is the method of encryption used. WPA uses TKIP (Temporal Key Integrity Protocol) which is a method for checking message integrity whereas WPA2 uses AES-based CCMP (based on stronger AES encryption algorithm) which is a stronger encryption protocol. |
| Password
(If you select WEP, WPA-PSK/WPA2-PSK, or WPA/WPA2 Enterprise as the Security Type) |
Enter the Password required for the device to get connected to the Wi-Fi network. |
| EAP authentication
(If you select WPA/WPA2 Enterprise as the Security Type) |
Select an Extensible Authentication Protocol (EAP) type to authenticate the network connection from EAP TLS (default) and PEAP-MSCHAPv2. |
| Proxy | Select Manual to set up the Proxy settings manually.
Proxy protects the device from attacks by acting as an intermediary between the device and the internet. By default, the proxy configuration is set to None, which lets you skip setting up a proxy server. |
| Server
(If you choose to set up the Proxy settings manually) |
Enter the name or IP address of the proxy server. |
| Port
(If you choose to set up the Proxy settings manually) |
Enter the port number of the proxy server. By default, the port number is set to 0. |
Apply the Wi-Fi network policy to devices/groups
There are two ways by which you can associate restrictions to the devices in bulk.
If you haven’t saved the policy yet,
- Navigate to Policy Targets.
- Click on + Add Devices, search and select the required device(s) to which you need to apply the policy and click OK
- Click on Save to apply the policies to the devices.
If you’ve already saved the policy and taken to the page which displays the policy list,
- Select the required policy
- Click on Manage > Associate Targets.
- Select Device/ User/ Device Group/ User Group/ Domain.
- Search and select the required policy target and click Associate.
What happens at the device end?
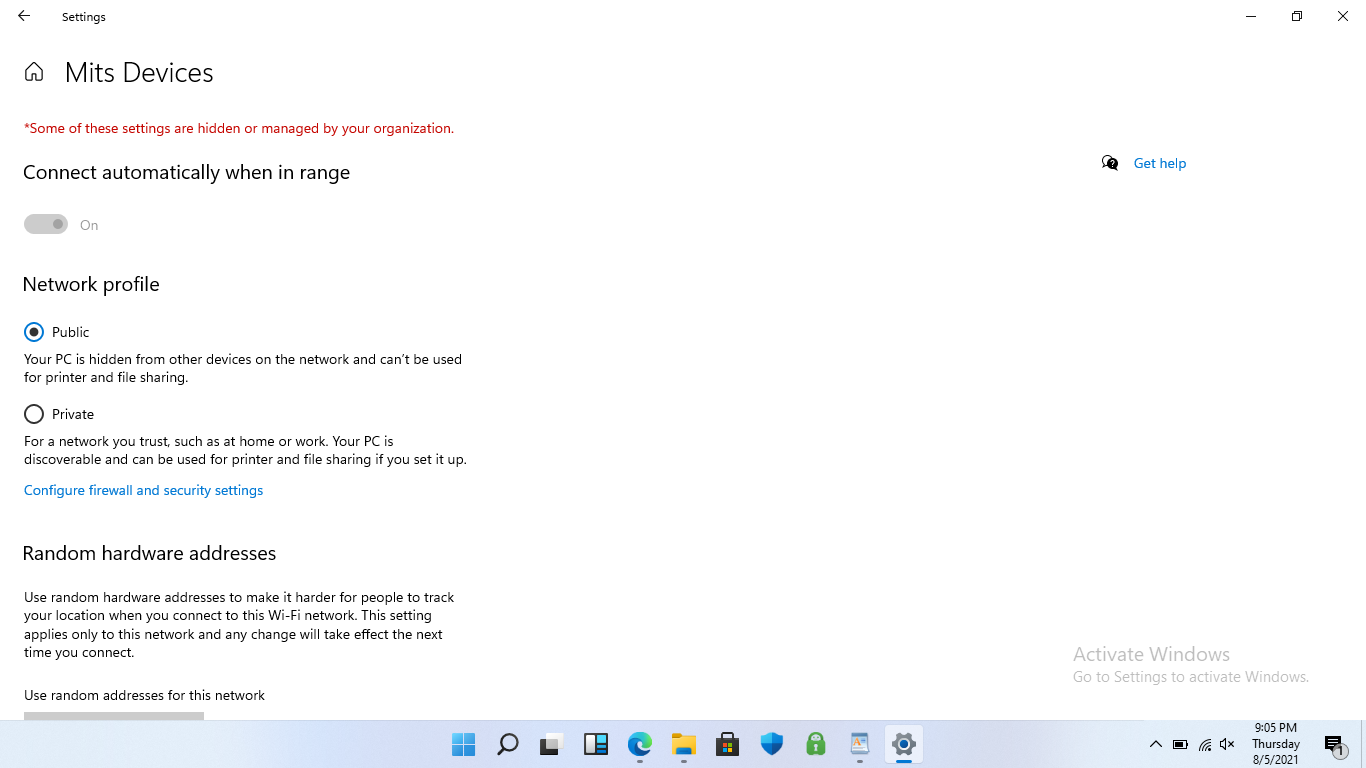
When the device comes in the range of the configured Wi-Fi network, the device connects to the configured network automatically. It gets listed among the other available networks with a tag indicating that the organization manages it. Thus, the users cannot forget the network manually, and the network configurations remain associated with the device.

Update an existing Wi-Fi configuration
Follow the below steps to update an existing Wi-Fi configuration that has been applied to the device via a policy:
- Create a new policy with the updated Wi-Fi configuration.
- Apply the policy to the target devices/groups.
- Now, modify the Wi-Fi configuration on your network router (reflecting the new SSID and other Wi-Fi settings as per the newly created Wi-Fi policy).
- (Optional) Archive the old Wi-Fi policy configured for the network.


