Category filter
Microsoft Active Directory Integration with Hexnode
Active directory domain services hold all directory information and takes care of all the interactions between the user and domain. Any unauthorized user access to a device or a server can be verified using Microsoft Active Directory Integration. With Hexnode, you can manage multiple Active Directory domains from a single console.
Once you integrate Microsoft Active Directory with Hexnode, you will be able to see the users, user groups and subdomains of the linked domain. In order to integrate your Active Directory with Hexnode, you must first configure AD Agent Settings.
Hexnode MDM AD Agent Settings
- To configure an AD Agent service, click on Admin > Active Directory. This opens up the Agent Settings page when you first configure an Active Directory. First, click on the Download link to download and install the AD Agent on your server. Next, click on the second Download link to download configuration file.
- Launch the Hexnode MDM_AD Setup Wizard. Click on Next to continue or Cancel to exit setup.
- Select the destination folder. By default, the setup wizard will install the Hexnode MDM_AD in the folder C:\HexnodeMDM_AD
- Select the configuration file downloaded in step 2. Click on Next.
- Once you have uploaded the configuration file successfully, setup will begin installing Hexnode MDM_AD on your computer. Click on Install.
- Click on Finish to exit setup.
- On Hexnode MDM Console, click on Check agent status to know whether the agent is connected or not. Now, click on ‘Configure AD‘ to configure Active Directory Settings.


Active Directory Settings
Server Configuration
- Domain Name – Enter the Active Directory Domain Name which can be the same as the organization’s public domain name, sub-domain or any alternate names which may end in .local.
- Domain Controller – Enter the Domain Controller Name.
- Domain\Username – Enter the Domain Name and Username in the format NetBiosName\SAMAccountName.
- Password – Enter the password.
- Select Agent – Select the AD Agent name from the drop-down list. Click on Add New Agent to add a new agent.
- Selected OU’s – By default, all the OUs in the domain will be selected. You can click on Change to select the specific OU’s you want.
- Allow Self Enroll – If you enable ‘Allow Self Enroll’ option, users in this particular domain will be able to enroll directly from the portal without any enrollment requests.
Schedule Sync for Microsoft Active Directory
You have an option to choose how often you want the AD to be synced with Hexnode UEM. You can schedule daily or weekly sync, select the days of the week and choose the time of the day the sync has to occur.
On clicking Save, your Active Directory will be synced with Hexnode MDM databases.

Navigate to Admin > Active Directory.
In the server configuration page, you can add a new agent by clicking on Add new agent.
Similarly, to create a new Active Directory, click on the empty slot with the + sign and configure the settings.

Data fetched from AD
Once the integration is successful, the admin can see the users and user groups under the Manage tab.
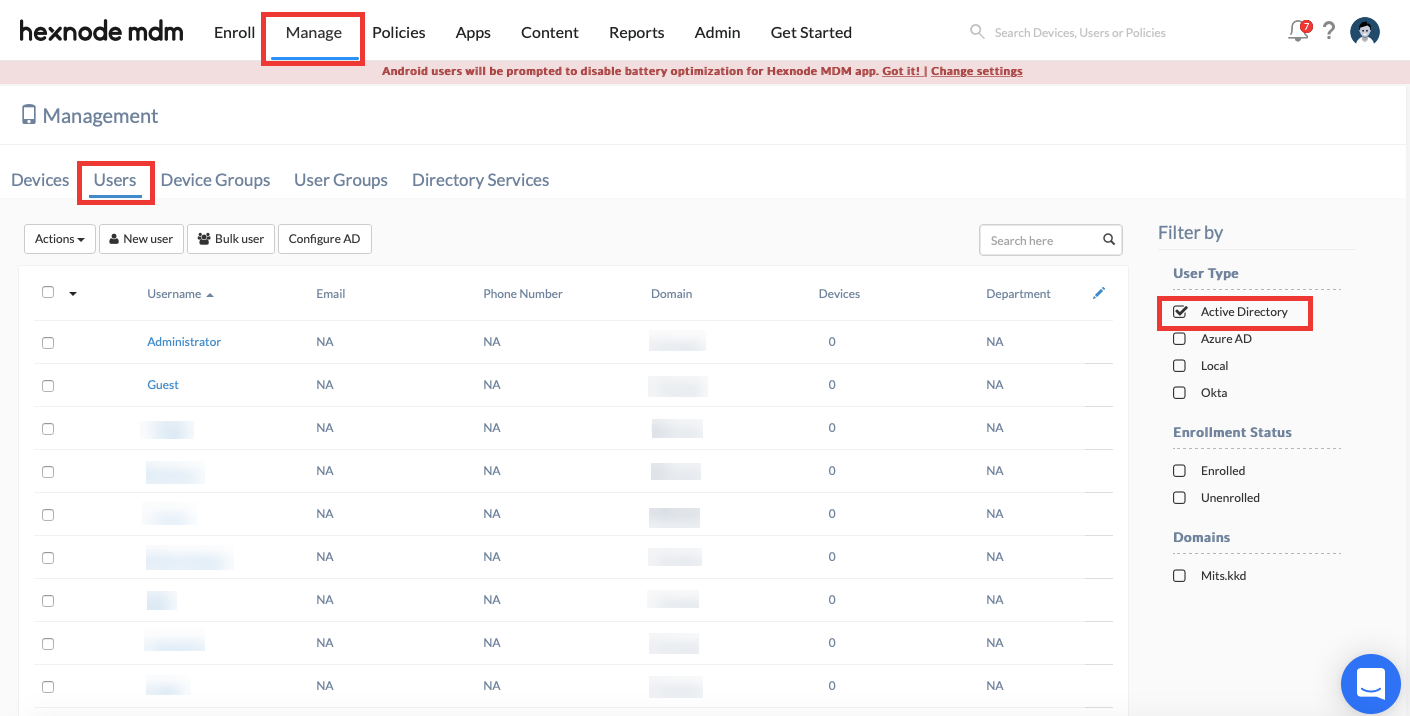
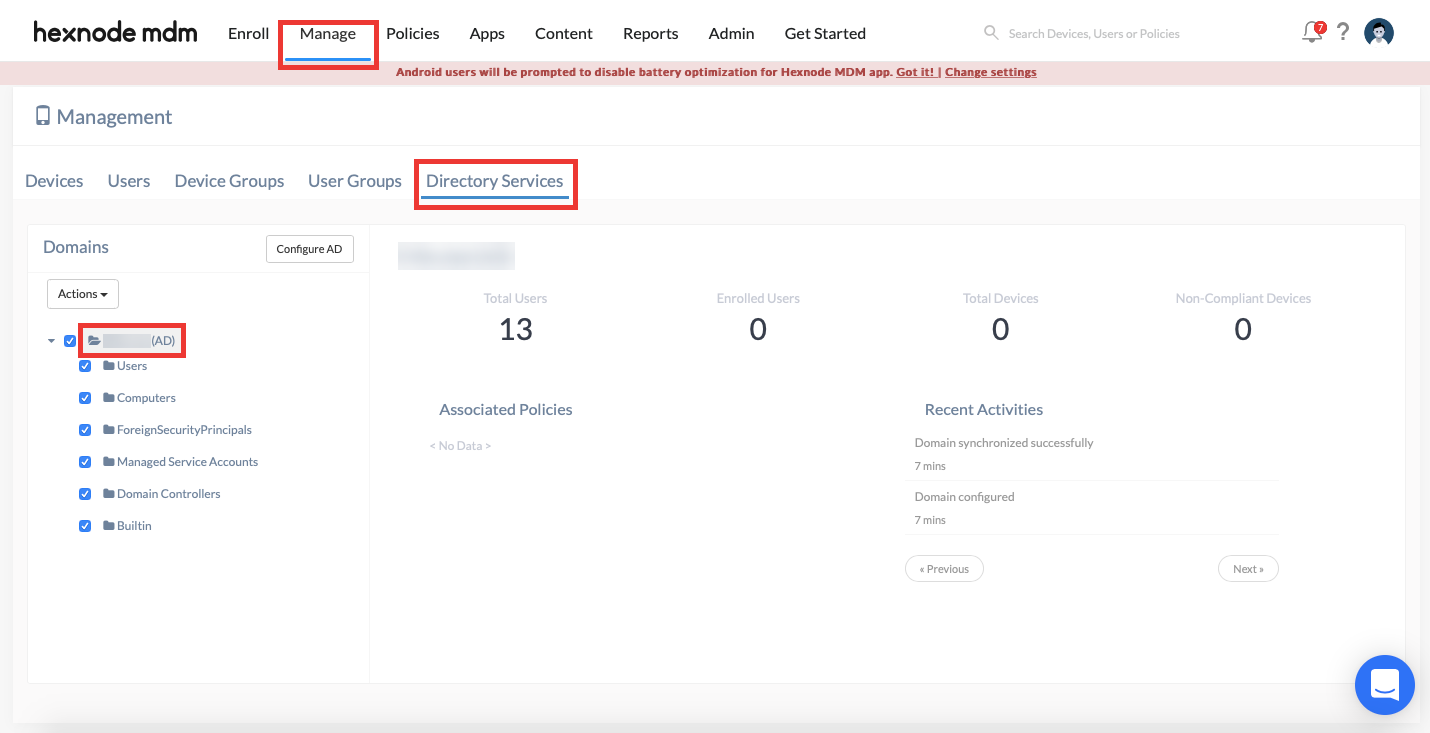
In addition, the Directory Services sub-tab under the Manage tab will have the linked domains listed. This sub-tab displays the recent actions performed on the domain. The admin can also perform actions on the domain here.
Delete AD domain
Hexnode UEM lets users remove their Active Directory domain from the portal with ease.
- Access the Delete Domain option by clicking on the settings icon under Enroll > All Enrollments > Enterprise > Active Directory.
- During the deletion process, the administrator is provided with two options.
- Disenroll device(s)
- Assign to a new user
- Disenroll device(s) option removes the Active Directory domain from the portal and disenrolls all devices enrolled under the domain.
- Pre-approved devices will also be deleted from the portal.
- The admin is then required to specify the number of users that will be deleted under the domain and click on the Remove button to complete the process.
- Assign to a new user option lets the admin assign all devices under the domain to a new user. All existing restrictions/configurations and apps associated with the old user will be removed from the respective device(s).

- After specifying the number of users that will be deleted, click on the Remove button which will open a dialogue box to assign device(s) to a new user.
- Select the domain and choose the user to assign the devices.
- Toggle the Delete Old User’s Location History checkbox to delete location history of old users. Click on the Assign button to complete the process.

 under an Active Directory account")


